
LA CROSSE 308-146v2 Wireless Atomic Color Foredadr Station Instruction Manual![]()
WIRELESS ATOMIC COLOR FORECAST STATION
Initial Setup
- Insert 2 new AA batteries (not included) into the TX142THv3 sensor. Observe the correct polarity. The red LED will flash when transmitting.
- Insert 3 new AA Alkaline batteries (not included) into the station. Observe correct polarity.
- After 5 minutes, place the sensor outside in a shaded location. Maximum range is 330 feet (100 meters) open air.
Atomic Time Search
The LCD backlight and USB charging port will momentarily turn off while the station searches for the atomic signal. After the initial search, this station will only search for the atomic signal after midnight.
- Press the +/RCC button to start or stop a manual signal search. WWVB Icon will flash
For information about WWVB visit:www.nist.gov/pml/div688/grp40/wwvb.cfm
LCD Features
Set Time, Date, etc.
- Hold the SET button to enter time set mode.
- Press the +/RCC or -/ºC/ºF buttons to adjust values.
- Press the SET button to confirm and move to the next item.
Settings order:
- WWVB Reception
- Time Zone
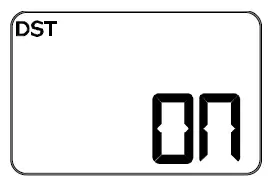
- DST Indicator,
- 12/24 Hour Time Format
- Hour
- Minutes,
- Year
- Month
- Date
Note: Day of the week sets automatically.
- WWVB Time On/Off
- Time Zone
- DST Indicator

- 12Hr/24Hr Time
- Hours
- Minutes
- Year
- Month
- Date
Press the -/ºC/ºF button to exit or wait 20 seconds to exit.
Fahrenheit/Celsius Temperature Display
From the normal time display, press the -/ºC/ºF button to select Fahrenheit or Celsius temperature display.
Time Alarm
- Hold the ALARM button 3 seconds to enter alarm time set mode.
- The hour will flash.
- Use the +/RCC or -/ºC/ºF buttons to set the hour.
- Press the ALARM button to confirm adjustments and move to the minutes.
- The minutes will flash.
- Use the +/RCC or -/ºC/ºF buttons to set the minutes.
- Press the ALARM button to confirm and exit.
- Press the ALARM button once to view alarm time.
- Press the ALARM button again to activate the alarm. Bell icon appears.
- Press the ALARM button again to deactivate the alarm. The bell icon disappears.
Snooze
- When alarm sounds, press the LIGHT/SNOOZE button to silence the alarm for 10 minutes.
- The alarm icon will flash.
- In snooze mode, press any button to stop alarm for one day.
Note: The alarm is crescendo sound. The alarm will sound for 2 minutes and then shut off completely.
Weather Forecast Icons
The unit predicts weather condition of the next 12-hours based on the change of atmospheric pressure. The weather forecast is about 70-75% correct.
The Icons shown forecast the weather in terms of getting better or worse and not necessarily sunny or rainy as each icon indicates.
INTELLIGENT WEATHER FORECAST
This station learns. Please allow 7-10 days for barometric calibration. This will ensure an accurate personal forecast for your location.
Backlight
When using A/C power:
- Press the LIGHT HI/LO button to adjust the backlight brightness.
- Hold the HOLD ON/OFF button and the backlight will turn off completely. Hold again to turn on the backlight.
When using Battery power only:
- Press the LIGHT HI/LO button for 8 second backlight.
Heat Index | Dew Point
- Press the HEAT/DEW button once to view Heat Index.
- Press the HEAT/DEW button twice to view Dew Point.
MIN/MAX Values
The station automatically resets minimum and maximum values daily at midnight (12:00 AM).
- Press the MIN/MAX button to view maximum values.
- Hold the MIN/MAX button to reset maximum values.
- Press the MIN/MAX button to view minimum values.
- Hold the MIN/MAX button to reset minimum values.
Multiple Sensors
The forecast station will accommodate up to three remote outdoor sensors (TX142TH-v3), sold separately. Press the CH (channel) button to see the temperature on other channels.
To connect multiple remote sensors to the forecast station:
- Remove the battery cover from all the sensors.
- Set the first outdoor sensor to Channel 1 and insert 2-AA batteries.
- Set the second outdoor sensor to Channel 2 and insertAA batteries.
- Set the third outdoor sensor to Channel 3 and insert 2-AA batteries.
- Press and hold CH button to search for all outdoor sensors.
- Press the TX button on each outdoor sensor to transmit.
- When connection is established, the respective temperature & humidity for each of the selected channels numbers will appear on the main unit.
- Allow the sensors and the forecast station to stay 5-10 feet apart for 15 minutes to establish a solid connection.
- Install the battery covers on each sensor.
- After 15 minutes place the remote sensors in appropriate locations (see “position the outdoor sensor”).
Press and release the CH button to view channel 1, 2 or 3 on the forecast station.
Channel Scroll
The word AUTO will appear when the forecast station is set to scroll through the channels automatically.
- Press the CH button repeatedly until AUTO is displayed. The forecast station will rotate through all available channels.
- Press the CH button once to display only one channel continually.
USB Charge Port
Charge a smart phone, camera or other devices when the forecast station is plugged into a power outlet with the included 5.0V AC adapter.Note: This is a power-output charging port. It does not supply power to the forecast station.
- Connect your external device’s USB charging cable (not included) to the USB charging port.
- Charging times will vary.
- 1 Amp maximum current. Charge 1 Amp devices or devices that are self-regulating.
Restart
Restart: If the outdoor temperature shows dashes, remove batteries from the digital station & sensor and press any button 20 times. After 15 minutes, return to Step 1 under initial setup.
| Specifications | |
| Indoor: | |
| Temperature Range: | +32°F to +122°F (0°C to 50°C) |
| Humidity Range: | 10%-99% (RH) |
| Interval: | About every 30 seconds |
| Outdoor: | |
| Temperature Range: | -40°F to 140°F (-40°C to 60°C) |
| Alkaline Batteries: | -20°F to 140°F (-28.8°C to 60°C) |
| Lithium Batteries: | -40°F to 140°F (-40°C to 60°C) |
|
NOTE: |
Temperatures below – 20°F (-28.8°C) require Lithium batteries in the outdoor sensor. |
| Humidity Range: | 10%-99% (RH) |
| Distance: | Over 330 ft. (100 meters) RF 433MHz (open air) |
| Interval: | About every 50 seconds |
| Power: | |
| Forecast Station | |
| Primary Power:
AC6: AC6: HX09-0501500-AU |
5-volt AC power adapter (included) |
| Optional/Battery Backup | Optional 3-AA, IEC, LR6 batteries (not included) |
| TX142TH-v3 Sensor: | 2-AA, IEC, LR6 batteries (not included) |
| USB | |
| USB Charge Port: | Output 1A |
| Battery Life: | |
| Forecast Station Battery Backup: | Battery life is over 24 months when using the AC adapter for primary power |
|
TX142TH-v3 Sensor: |
Battery life is over 12 months when using reputable battery brands for both Alkaline and Lithium batteries |
| Dimensions: | |
| Forecast Station: | 5.9” L x 2.36” W x 5.9” H (150 x 60 x 150mm) |
| TX142TH-v3 Sensor: | 1.57″ x 0.79″ x 5.12″ (40 x 20 x 130mm) |
Position Station
The station is designed to sit on a desk or table.
- For best WWVB reception orientate the station with the front of the back facing Ft. Collins, Colorado.
- Choose a location 6 feet or more from electronics such as cordless phones, gaming systems, televisions, microwaves, routers etc.
- Place within range of the outdoor sensor.
- The maximum transmitting range in open air is 330 feet (100 meters). Obstacles such as walls, windows, stucco, concrete, and large metal objects can reduce the range.
Position Outdoor Sensor
- Mount the outdoor sensor on a north-facing wall or in any well shaded area. Under an eave or deck rail is preferred.
- The maximum transmitting range to the station is over 330 feet (100 meters) in open air, not including walls.
Care and Maintenance
- Do not mix old and new batteries
- Do not mix Alkaline, Standard, Lithium, or Rechargeable Batteries
- Always purchase the correct size and grade of battery suitable for the intended use.
- Replace all batteries of a set at the same time.
- Clean the battery contacts and also those of the device prior to battery installation.
- Ensure the batteries are installed correctly with regard to polarity (+ and -).
- Remove batteries from equipment when it is not to be used for an extended period.
- Promptly remove expired batteries.
Warranty and Support
La Crosse Technology, Ltd. provides a 1-year limited time warranty (from date of purchase) on this product relating to manufacturing defects in materials & workmanship.Before returning a product, please contact our friendly customer support with questions or visit our online help (manuals and FAQS):
FCC Statement
This equipment has been tested and found to comply with the limits for a Class B digital device, pursuant to part 15 of the FCC Rules. These limits are designed to provide reasonable protection against harmful interference in a residential installation. This equipment generates, uses, and can radiate radio frequency energy and, if not installed and used in accordance with the instructions, may cause harmful interference to radio communications. However, there is no guarantee that interference will not occur in a particular installation. If this equipment does cause harmful interference to radio or television reception, which can be determined by turning the equipment off and on, the user is encouraged to try to correct the interference by one or more of the following measures:
- Reorient or relocate the receiving antenna.
- Increase the separation between the equipment and receiver.
- Connect the equipment into an outlet on a circuit different from that to which the receiver is connected.
- Consult the dealer or an experienced radio/TV technician for help.This device must not be co-located or operating in conjunction with any other antenna or transmitter.
Operation is subject to the following two conditions:
- This device may not cause harmful interference, and
- This device must accept any interference received, including interference that may cause undesired operation.
Caution!
The manufacturer is not responsible for any radio or TV interference caused by unauthorized modifications to this equipment. Such modifications could void the user authority to operate the equipment.
report this adAll rights reserved. This manual may not be reproduced in any form, even in part, or duplicated or processed using electronic, mechanical or chemical process without the written permission of the publisher. This booklet may contain errors or misprints. The information it contains is regularly checked and corrections are included in subsequent editions. We disclaim any responsibility for any technical error or printing error, or their consequences. All trademarks and patents are recognized.
Read More About This Manual & Download PDF:
References
[xyz-ips snippet=”download-snippet”]