LAKELAND Compressor Ice Cream Maker Instruction Manual
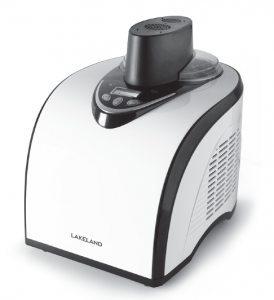
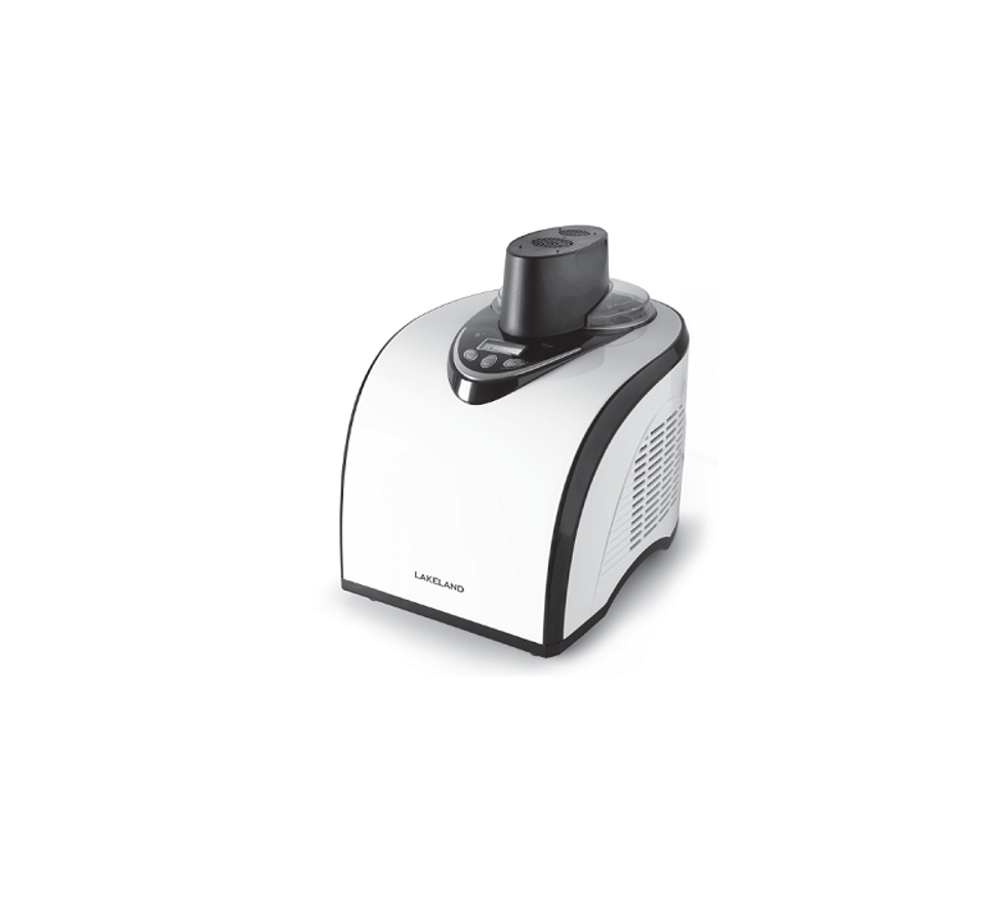
LAKELAND DIGITAL ICE CREAM MAKER
Thank you for choosing the Lakeland Digital Ice Cream Maker Please take a little time to read this booklet before you use your ice cream maker and keep it in a safe place for future reference.The Compressor Ice Cream Maker is so easy to use, no need to pre-freeze the bowl as this ice cream maker has a built-in freezer. Set the timer according to your recipe and pour your mixture through the opening. The ice cream maker will churn and stir to a creamy, smooth consistency within an hour. The Compressor Ice Cream Maker also makes gelato, sorbet and frozen yoghurt.Here at Lakeland, our award-winning family-owned business still offers the same excellent quality, value for money and exceptional customer service as when we foundedthe company back in the 1960s. Our products are hand-picked and thoroughly tested so you can be sure that everything you purchase will be a pleasure to use for many years to come.
PRODUCT FEATURES

SAFETY CAUTIONS
Carefully read all the instructions before using the appliance and keep in a safe place for future reference. Always follow these safety cautions when using the appliance to avoid personal injury or damage to the appliance. This appliance should be used only as described in this instruction book.
- This appliance can be used by children aged from 8 years and above and persons with reduced physical, sensory or mental capabilities or lack of experience and knowledge if they havebeen given supervision or instruction concerning use of the appliance in a safe way and understand the hazards involved. Children shall not play with the appliance. Cleaning and usermaintenance shall not be done by children unless they are older than 8 and supervised.
- Make sure your electricity supply matches the voltage shown on the appliance.
- Ensure all packaging materials and any promotional labels or stickers are removed from the appliance before the first use.
- Always inspect the appliance before use for noticeable signs of damage. Do not use if damaged or has been dropped. In the event of damage, or if the appliance develops a fault contact the Lakeland customer care team on 015394 88100.
- Do not use this appliance if the lead is damaged. If the lead is damaged it must be replaced, contact the Lakeland customer care team on 015394 88100.
- Always use the appliance on a dry, level, heat resistant surface.
- Unplug from the mains when not in use and before cleaning. Allow to warm up to room temperature before cleaning the appliance. To disconnect, turn the socket to “off” and remove the plug from the mains socket.
- To protect against fire, electric shock or personal injury, do not immerse cord, plug or unit in water or other liquids.
- Do not leave the lead hanging over the edge of a kitchen table or worktop. Avoid contact between the lead and hot surfaces.
- Do not use any accessories or attachments with this appliance other than those recommended by Lakeland.
- For indoor use only.
- For domestic use only. It is not suitable for commercial use, or for use outdoors.
- This appliance should be used for preparation of food as described within the instructions for use that accompany it.
- Always ensure that your hands are dry before removing the plug from the mains socket. Never pull the plug out of the mains socket by its lead. This appliance can be used by children aged from 8 years and above and persons with reduced physical, sensory or mental capabilities or lack of experience and knowledge if they have been given supervision or instruction concerning use of the appliance in a safe way and understand the hazards involved. Children shall not play with the appliance. Cleaning and user maintenance shall not be done by children unless they are older than 8 and supervised.
- To avoid injury or possible fire, do not cover the appliance when in use.
- Do not connect this appliance to an external timer or remote control system.
- An earthed extension cable may be used with care. The electrical rating of the cable should be at least as great as the appliance. Do not allow the cable to hang over the edge of the worktop or touch any hot surfaces.
- This appliance complies with the basic requirements of Directives 2014/30/EC (Electromagnetic Compatibility) and 2014/35/EU (Low Voltage Directive).
- WARNING: A cut off plug inserted into a socket is a serious safety (shock) hazard. Ensure the cut off plug is disposed of safely.
- CAUTION: The plastic bags used to wrap this appliance or the packaging may be dangerous. To avoid risk of suffocation, keep these bags out of reach of babies and children. These bags are not toys.
- The Compressor Ice Cream Maker should only be used at least 10cm away from walls and other surfaces, to allow sufficient airflow.
- Keep the appliance, plug and lead away from hot ovens, electric and gas burners, flames and hot surfaces.
- Never use the appliance in areas where certain vapours may be present (paint thinner, flammable material, oil based paint and varnish, flammable liquids and gases) for a risk of possible explosion.
- To prevent freezer burn, protect your hands when handling the removable bowl from the appliance. Never touch with wet hands.
- When the Compressor Ice Cream Maker is churning, please do not attempt to move it, and never put your hands or any other utensils inside.
- If any part becomes damaged, discontinue use.
- Ice cream or sorbet containing raw ingredients should be consumed within one week. Ice cream tastes best when fresh.
- Ice cream or sorbet which contains raw eggs should not be given to children, pregnant women or the elderly.
- Never freeze ice cream that has been fully or partially defrosted.
SETTING UP THE COMPRESSOR ICE CREAM MAKER AND USING FOR THE FIRST TIME
- Unpack the Compressor Ice Cream maker, remove all the packaging materials.
- Clean all the parts, following the instructions in ‘Care and Cleaning’.
- Make sure that all parts are clean and dry before assembling the product.WARNING: Do not insert the plug into the electrical outlet or turn on the appliance before you have assembled the ice cream maker.
- Place the main unit on a flat, dry level surface, for example, a kitchen table.
- Place the removable bowl inside the fixed bowl in the main unit.
- Insert the mixing blade into the removable bowl.
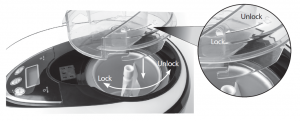
- Place the transparent lid on top turning it clockwise to lock into place.
- Line up the mixing blade with the spindle on the motor and lower the motor into place connecting with the power connector.
- The ice cream maker is now ready for use.
PROGRAMMING YOUR COMPRESSOR ICE CREAM MAKER
Insert the plug into the socket and switch it on. The ice cream will beep, the LCD display will illuminate blue and ‘00’ will flash on the display. If no buttons are pressed within15 seconds the LCD display goes out.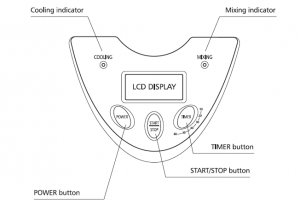
When you press the POWER button the LCD displays ‘60:00’ which is the default operating time of 60 minutes.
The time (length of programme) can be set at 10 minute intervals between 10 and 60 minutes for the operating time of the programme. It can be preset by pressingTIMER Button. You can alter the length of the programme time according to your taste of recipes.
When you have set the time, press the START/STOP button to start. The ice cream maker begins mixing immediately and the ‘MIXING’ light comes on and is GREEN. After 2 minutes the ice cream maker will start the cooling process and the ‘COOLING’ light comes on and is RED. The LCD display will alternate between the time remaining and the temperature of the ingredients.
When the programme finishes, the ice cream maker automatically stops and beeps 10 times. The LCD display show ‘00:00’. When the ice cream maker has finished, if the appliance is not turned off, or touched after 10 minutes, it will automatically go into the ‘Extended Cooling Function’ to keep the ice cream from defrosting.
EXTENDED COOLING FUNCTION
The appliance will run the COOLING function, with NO mixing for 10 minutes and then every other 10 minutes, for up to 1 hour. The appliance will then return to its initial default status, of power on only with no operation.WARNING: Always remember to turn off and unplug from socket when you have finished making the ice cream to avoid an electric shock in removing the removable bowl.
ADJUSTING OPERATIONS
Stopping the Ice Cream Maker in operation The appliance can be stopped by pressing the START/STOP button for 3 seconds, or pressing the POWER button once when the appliance is running. The LCD display will default back to 60:00 on the display. Adjusting Operating Time – Whilst in operation Whenever the appliance is running, you can add to the operating time by pressing theTIMER Button. This will increase the time in 5 minute intervals for each time it is pressed up to the maximum time of 60 minutes on the displayed.Note: The time can only be increased, NOT decreased.
Adding Operation Time – When Finished
When the preset time (60 minutes) finishes, the appliance stops and returns to its initial default. If you would like the ice cream consistency to be harder, you can select anoperating time (10/20/30/40/50/60 minutes) by pressing TIMER button, then again press the START/STOP button. The appliance will continue to run down the time you selected and stops, entering into the ‘Extended Cooling Function’ to keep the ice cream frosted.
Controlling the Volume of the Ingredients
To avoid overflow and waste, please make sure that the ingredients do not exceed 60% of the capacity of the removable bowl, as ice cream expands when being formed.
INSTRUCTIONS FOR USE
BEFORE USE:The beauty of home-made ices is that you can tailor the ingredients to your tastes and dietary requirements, and use seasonal fruits to flavour.For some simple ideas to get you started, see ‘Recipes’.
- Choose a recipe, prepare your mixture and let it cool.Note: Chill the ingredients in the fridge before use. Warm ingredients or ingredients at room temperature will prolong the preparation time.
- Place the removable bowl inside the fixed bowl in the main unit and insert the mixing blade. Place the transparent lid on top turning it clockwise to lock into place.
- Line up the mixing blade with the spindle on the motor and lower the motor into place locating on the power conector.
- Insert the plug into the socket and switch it on. The screen will illuminate blue and show ‘00’ on the display to show it is connected.
- Select the appropriate time and press the START/STOP button. The appliance will start to count down the time. The LCD display will alternate between the time remainingand the temperature of the ingredients.
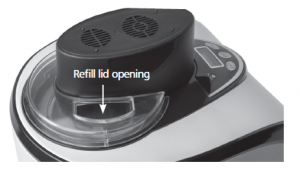
- Pour your mixture into the ice cream maker through the refill lid openingDO NOT pour too much mixture into the bowl. Leave approximately 3cm from the top of the bowl, so that the mixture can expand in volume during preparation.
- Let the ice cream maker run until the ice cream has reached the correct consistency.vThe ice cream maker will stop turning when the timer has finished. The preparation time depends on the recipe and the temperature of the ingredients and the room.
 DO NOT pour too much mixture into the bowl. Leave approximately 3cm from the top of the bowl, so that the mixture can expand in volume during preparation.
- Do not turn off the appliance before the ice cream is ready. If it is switched off too early, the ingredients may freeze against the inside wall of the removable bowl.
- The time needed to reach the consistency you require may be shorter or longer than the time in the recipe due to the temperature of the ingredients or the room temperature. If you need less time; switch off the appliance and take out the mixing blade. You can set the Compressor Ice Cream Maker for a longer time if you need a thicker consistency.
- Use the ice cream scoop provided, a plastic or wooden spoon or spatulato scrape the ice cream from the removable bowl. Metal spoons or spatulas can cause damage to the freezer bowl.
When you’ve finished, turn off the ice cream maker by pressing the power switch and unplug the appliance from the socket. Serve the ice cream or transfer to a separatecontainer and store in your freezer.
HINTS AND TIPS
- Chill the ingredients in the fridge before use.
- The times indicated in these recipes are guidelines. The actual preparation time depends on the ingredients used, the temperature of the ingredients and the roomtemperature. Monitor the mixture through the transparent lid and adjust the timer if necessary.
- Make sure all the ingredients are thoroughly mixed, the sugar has completely dissolved and the mixture has cooled before pouring your mixture into the maker.
- For the fullest flavour, choose ripe fruits. Wash carefully, remove all seeds, skin and core, and chop into small pieces.
RECIPES
Please note that all spoon measurements are standard metric, so 1 tsp is 5ml and 1 tbsp is 15ml. We recommend using a set of measuring spoons for accurate results. There is a measuring cup included, to use to measure out the recipes below, 1 cup is 250ml.
VANILLA ICE CREAM – Makes approx. 1 Litre
| Ingredients | Quantity |
| Whole milk | 1 cup |
| Granulated sugar | ¾ cup |
| Double cream | 2 cups |
| Vanilla extract | To taste |
WHAT YOU DO
Whisk the milk and granulated sugar in a medium bowl, using a hand mixer or a whisk, until the sugar has dissolved. Usually about 1 – 2 minutes on low speed. Stir in the double cream and vanilla to taste. Turn the appliance on, pour mixture into the removable bowl through refill lid and let mix until thickened, about 50 – 60 minutes.
VARIATIONS:
Mint Chip: Replace the vanilla with 1 to 1½ teaspoons pure peppermint extract (to taste). Chop about 110g of dark chocolate bar into tiny uneven pieces. Add the choppedchocolate during the last 5 minutes of freezing
Butter Pecan:
Melt a slice of unsalted butter in a skillet. Add 1 cup roughly chopped pecans and 1 teaspoon kosher salt. Cook over medium-low heat, stirring frequently until the pecans are lightly browned. Remove from the heat, strain (the butter will have a pecan flavour and may be reserved for another use). Allow the pecans to cool completely. Add the toasted buttered pecans during the last 5 minutes of freezing.
Cookies & Cream: Add ¾ cup coarsely chopped cookies during the last 5 minutes of freezing.
BASIC CHOCOLATE ICE CREAM – Makes approx. 1 Litre
| Ingredients | Quantity |
| Whole milk | 1 cup |
| Granulated sugar | ½ cup |
| Dark chocolate (your favourite) | 240g, broken into 2cm pieces |
| Double cream | 2 cups |
| Vanilla extract | 1tsp |
WHAT YOU DO
Place the whole milk in a pan and bring to the boil, just bubbling around the edges. Place the sugar and chocolate into a food processor fitted with the metal blade andpulse until the chocolate is very finely chopped. Add this to the hot milk, stir until it has blended together and is smooth. Transfer to a medium bowl and allow to cool completely. Stir in the double cream and vanilla to taste. Turn the appliance on, pour mixture into the removable bowl through refill lid and let mix until thickened, about 50 – 60 minutes.
VARIATIONS:
Chocolate Almond: Add ½ teaspoon pure almond extract along with the vanilla. Add ½ – ¾ cup chopped toasted almonds or chopped chocolate-coated almonds duringthe last 5 – 10 minutes of freezing.
Chocolate Cookie: Add ½ – 1 cup chopped cookies during the last 5 minutes of freezing.Chocolate Fudge Brownie: Add ½ – 1 cup chopped day old brownies during the last 5 minutes of freezing.Chocolate Marshmallow Swirl: When removing the ice cream to a container for freezing, layer it with scoops of your favourite chocolate sauce and marshmallow.
FRESH LEMON SORBET – Makes approx. 1 Litre
| Ingredients | Quantity |
| Sugar | 2 cups |
| Water | 2 cups |
| Lemon zest | 1 tbsp, fine |
| Lemon juice | 1 cup, freshly squeezed |
WHAT YOU DO
Place the sugar and water in a saucepan and bring to a boil over medium-high heat. Reduce heat to low and simmer without stirring until the sugar dissolves, about 3 – 5minutes. Allow to cool completely. This is called a simple syrup, and may be made ahead in larger quantities to have on hand for making fresh lemon sorbet. Keep refrigerated untilready to use. When cool, add the lemon zest and juice, stirring to combine. Turn the appliance on, pour mixture into the removable bowl through refill lid and let mixuntil thickened, about 50 – 60 minutes.
CHOCOLATE FROZEN YOGURT – Makes approx. 1 Litre
| Ingredients | Quantity |
| Dark chocolate | 1 cup |
| Dark chocolate | 180g, chopped |
| Low fat vanilla yoghurt | 2 cups |
| Sugar | ¼ cup |
WHAT YOU DO
Combine the milk and chocolate in food processor fitted with the metal blade and pulse until well blended and smooth, 20 – 30 seconds. Add the yoghurt and sugar, pulse untilsmooth, about 15 seconds. Turn the appliance on, pour mixture into the removable bowl through refill lid and let mix until thickened, about 50 – 60 minutes.
ADAPTING YOUR OWN RECIPES
Once you’ve tried some of the recipes in this booklet, you may wish to adapt them, using our suggestions as a guide. Chilling times will vary depending on the foods you choose. Stop the ice cream maker and lift the motor and transparent lid to check. Chill for a couple more minutes if needed. Chill the ingredients in the fridge before use. The times indicated in these recipes are guidelines. The actual preparation time depends on the ingredients used, the temperature of the ingredients and the room temperature. Monitor the mixture through the transparent lid and adjust the timer if necessary. Make sure all the ingredients are thoroughly mixed, the sugar has completely dissolved and the mixture has cooled before pouring your mixture into the ice cream maker. For the fullest flavour, choose ripe fruits. Wash carefully, remove all seeds, skin and core, and chop into small pieces.
STORAGE OF ICE CREAM
Remove finished ice cream into another container using a plastic scoop or a wooden spoon. Do not use a metal scoop to avoiding scratch on the inside removable bowl.
FREQUENTLY ASKED QUESTIONS
Question: When the appliance is assembled and you press the power button it does not start?Answer: Check that the appliance is plugged in and turned on at the socket. The motor may not be correctly seated on the connection, lift and make sure it is properly seated.Question: Why is the consistency of my mix too soft?Answer: Check the ingredients, run the Compressor Ice Cream Maker for a further10 minutes to see if the consistency improves to your liking.
CARE AND CLEANING
- Always switch off and unplug the Compressor Ice Cream Maker from the wall socket before cleaning.
- Let the removable bowl come back up to room temperature before cleaning.
- Wash the refill lid, transparent lid, mixing blade, removable bowl, measuring cup and ice cream scoop in warm soapy water, rinse and dry thoroughly.
- Do not place any parts in the dishwasher.
- Wipe the main unit and motor with a damp cloth, then dry.
- CAUTION: Never immerse the main unit, motor or power cord in water or any other liquids.
- Clean thoroughly before using for the first time and after every use.
- Check the parts for wear or damage after every few uses.
- Do not use abrasive cleaners, bleaching agents or metal scourers on any parts. This will damage the Compressor Ice Cream Maker.
- Always use plastic, wooden or silicone spatulas, as metal utensils will damage non-stick coatings.
- Make sure that the appliance and attachments are completely clean and dry before you store them.
- Store the Compressor Ice Cream Maker with the power cable loosely coiled. Never wrap it tightly around the product.
ELECTRICAL CONNECTIONS
THIS APPLIANCE MUST BE EARTHEDThe appliance is fitted with a fused three-pin plug to B51363 which is suitable for use in all homes fitted with sockets to current specifications.
CHANGING THE AMP FUSEUse a amp B51362 fuse. Only B5I or ASTA approved fuses should be used. If you are unsure which plug or fuse to use, always refer to a qualified electrician.
Note: After replacing or changing a fuse on a moulded plug which has a fuse cover, the cover must be refitted to the plug; the appliance must not be used without a fuse cover. If lost, replacement fuse covers can be obtained from an electrical shop. This appliance complies with the following EU Directives: 2014/35/EU (Low Voltage Directive) and2014/30/EU (EMC Directive). RECYCLING
RECYCLING YOUR ELECTRICALS
 Along with many other high street retailers, Lakeland has joined a scheme whereby customers can take their unwanted electrical productsto recycling points set up around the country. Visit www.recycle-more.co.uk to find your nearest recycling point.
Read More About This Manual & Download PDF:
References
[xyz-ips snippet=”download-snippet”]