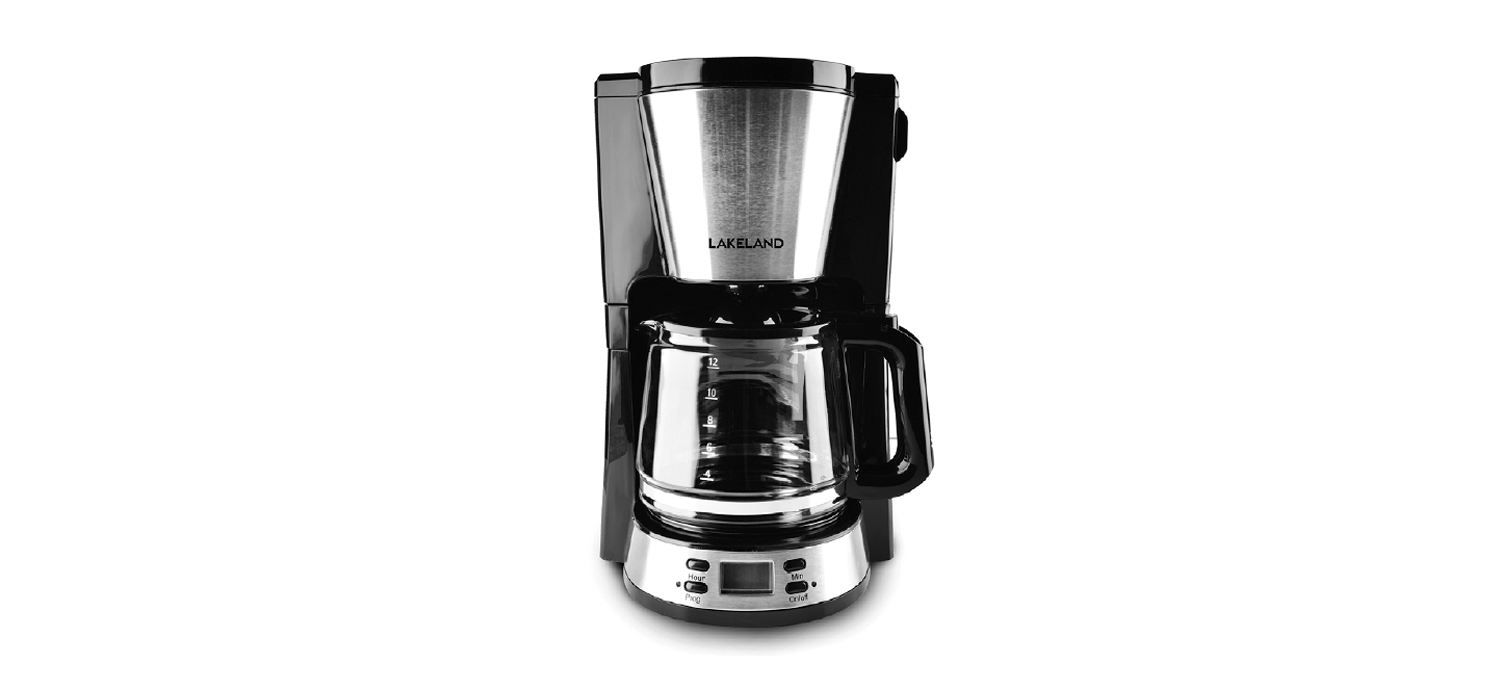
LAKELAND
Filter Coffee MachineInstruction Manual
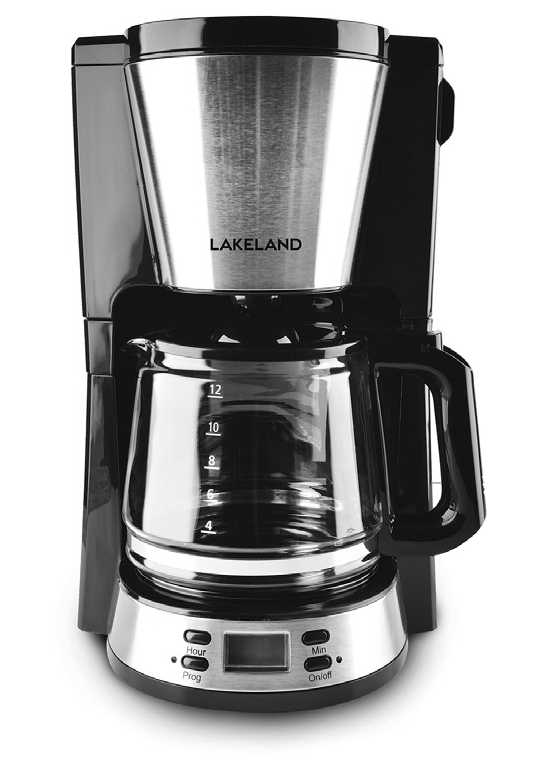
Model: 62807
LAKELAND FILTER COFFEE MACHINE
Thank you for choosing the Lakeland Filter Coffee Machine.
Please take a little time to read this booklet before you use your appliance and keep it in a safe place for future reference.
Quick and easy, the Filter Coffee Maker heats water to the best temperature to brew perfectly tasting, fully flavoured filter coffee. The non-stick warming plate keeps your coffee warm for around 40 minutes after brewing starts, then automatically shuts off. A permanent filter is included for easy cleaning and less waste.
Here at Lakeland, our award-winning family-owned business still offers the same excellent quality, value for money and exceptional customer service as when we founded thecompany back in the 1960s.
Our products are hand-picked and thoroughly tested so you can be sure that everything you purchase will be a pleasure to use for many years to come.
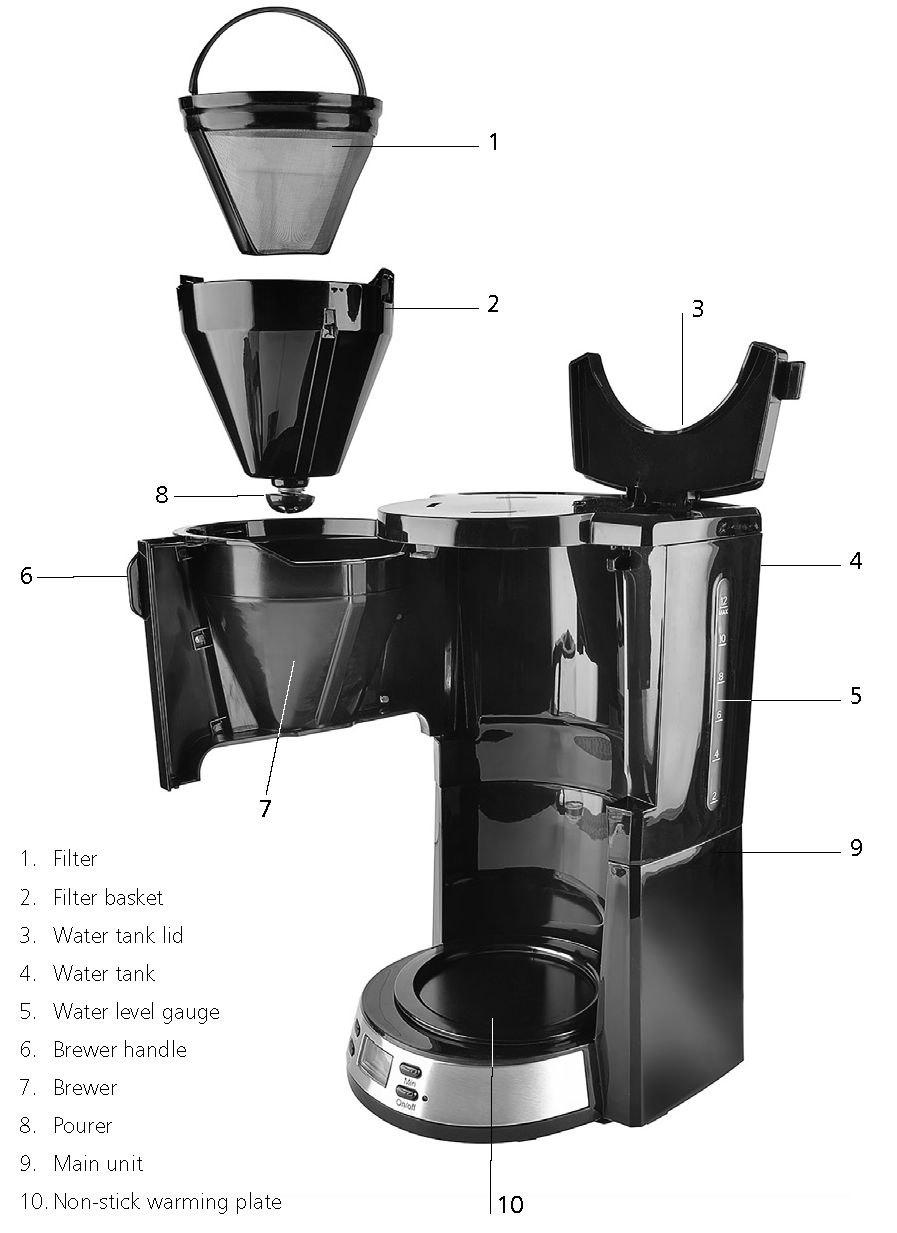
PRODUCT FEATURES
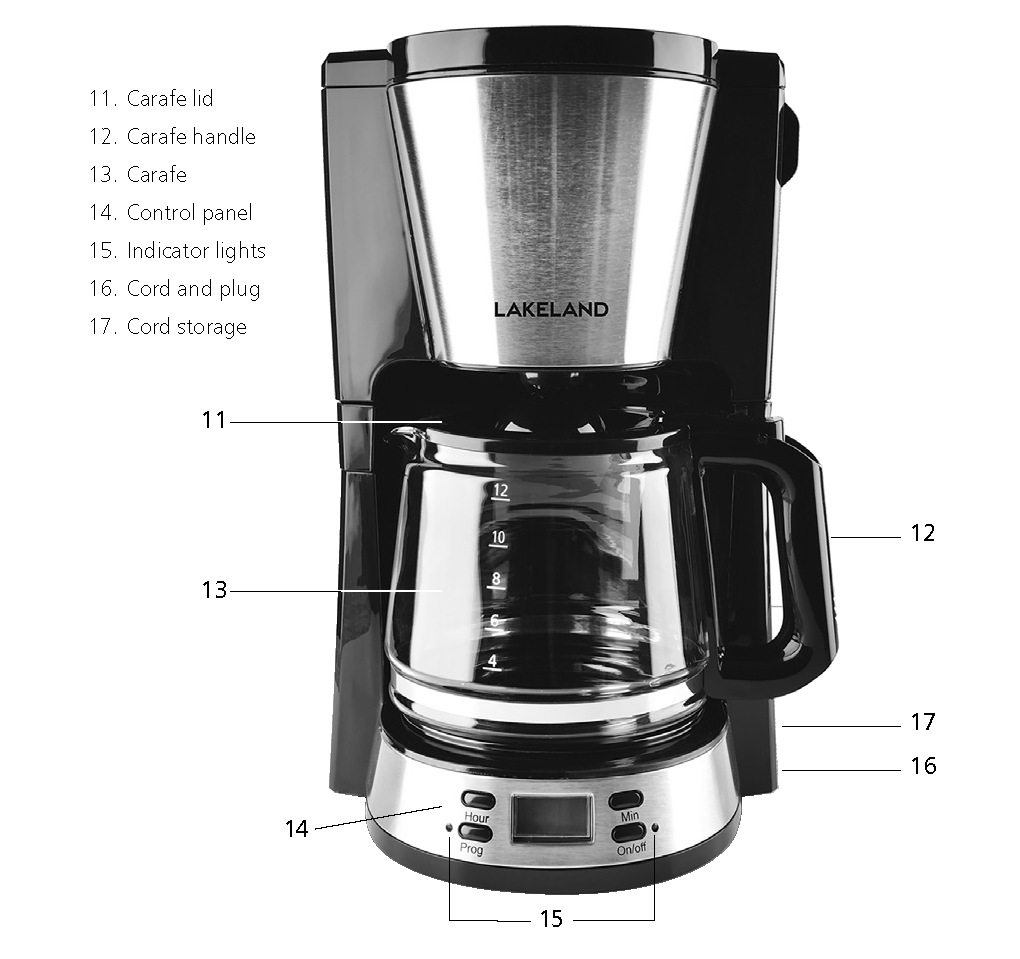
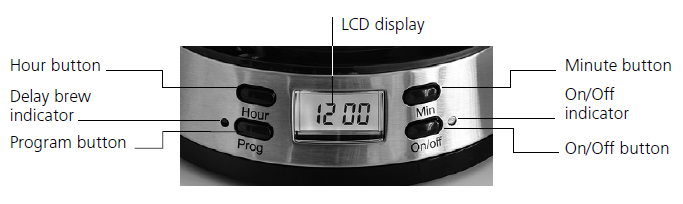
CONTROL PANEL
SAFETY CAUTIONS
Carefully read all the instructions before using the appliance and keep in a safe place for future reference. Always follow these safety cautions when using the appliance to avoid personal injury or damage to the appliance. This appliance should be used only as described in this instruction book.
- This appliance can be used by children aged from 8 years and above and persons with reduced physical, sensory or mental capabilities or lack of experience and knowledge if they have been given supervision or instruction concerning use of the appliance in a safe way and understand the hazards involved. Children shall not play with the appliance. Cleaning and user maintenance shall not be done by children unless they are older than 8 and supervised.
- Make sure your electricity supply matches the voltage shown on the appliance.
- Ensure all packaging materials and any promotional labels or stickers are removed from the appliance before the first use.
- Always inspect the appliance before use for noticeable signs of damage. Do not use if damaged or has been dropped. In the event of damage, or if the appliance develops a fault contact the Lakeland customer care team on 015394 88100.
- Do not use this appliance if the lead is damaged. If the lead is damaged it must be replaced with a special lead. Contact the Lakeland customer care team on 015394 88100.
- Always use the appliance on a dry, level, heat resistant surface.
- Unplug from the mains when not in use and before cleaning. To disconnect, turn the socket to “off“ and remove the plug from the mains socket.
- Do not use any accessories or attachments with this appliance other than those recommended by Lakeland.
- To protect against fire, electric shock or personal injury, do not immerse cord, plug or lid in water or other liquids.
- Do not leave the lead hanging over the edge of a kitchen table or worktop. Avoid contact between the lead and hot surfaces.
- For indoor use only.
- For domestic use only.
- This appliance should be used for preparation of drinks as described within the instructions for use that accompany it.
- Always ensure that your hands are dry before removing the plug from the mains socket.Never pull the plug out of the mains socket by its lead.
- To avoid injury or possible fire, do not cover the appliance when in use.
- Do not connect this appliance to an external timer or remote control system.
- An extension cable may be used with care. The electrical rating of the cable should be at least as great as the appliance. Do not allow the cable to hang over the edge of the worktop or touch any hot surfaces.
- This appliance complies with the basic requirements of Directives 2014/30/EU (Electromagnetic Compatibility) and 2014/35/EU (Low Voltage Directive).
- WARNING: A cut off plug inserted into a 13amp socket is a serious safety (shock) hazard. Ensure the cut off plug is disposed of safely.
- CAUTION: The plastic bags used to wrap this appliance or the packaging may be dangerous. To avoid risk of suffocation, keep these bags out of reach of babies and children. These bags are not toys.
- Do not place the appliance on or near a gas or electric oven, or any hot surfaces.
- Do not move the appliance while it is switched on.
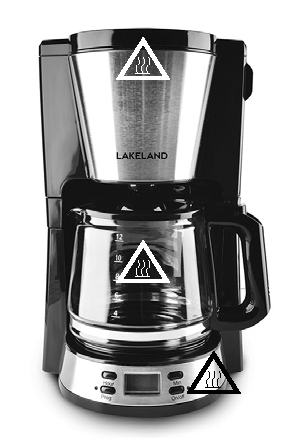
- Only use the carafe with this appliance, it must never be used on a hob or in a microwave. Do not put the hot carafe down onto a wet or cold surface. Do not use the carafe if it is damaged. Ensure the carafe is securely on the base before switching on the appliance.
- Ensure the carafe lid is securely in place when using the Filter Coffee Maker and when pouring coffee. Do not use force when putting the lid on the carafe.
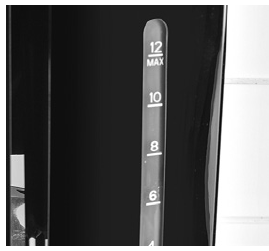
- The water tank must be filled with water to at least the ‘2 cup MIN’ mark, before it is switched on. Do not fill beyond the ‘12 cup MAX’ mark, or the appliance may spit boiling water.
- WARNING: Do not open the lid or reach into the water tank when the appliance is switched on. Hot steam will escape and is a scalding hazard. Ensure the tank lid is fully closed.
Never lift the lid so that your arm is over the appliance, hot steam will escape and may cause injury. Lift from the side, and always use the lid handle.
Surfaces marked with this symbol ![]() will be hot when the appliance is on and for some time after it is switched off.Allow the appliance to fully cool down before moving, cleaning or storing.
will be hot when the appliance is on and for some time after it is switched off.Allow the appliance to fully cool down before moving, cleaning or storing.
USING THE FILTER COFFEE MACHINE FOR THE FIRST TIME
- Unpack the Filter Coffee Machine, remove all the packaging materials.
- Before first use, wipe the main unit with a clean damp cloth. Wash the carafe, filter basket and permanent filter in hot soapy water, rinse and dry thoroughly.
- Make sure all parts are clean and dry before assembling the product.
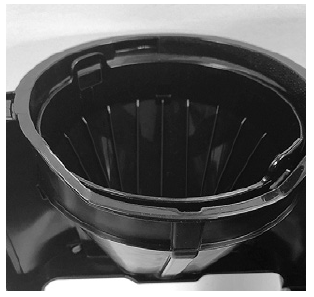
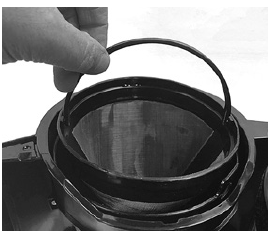
1. Using the brewer handle, open the brewer and place the filter basket inside. It should sit neatly flat inside.
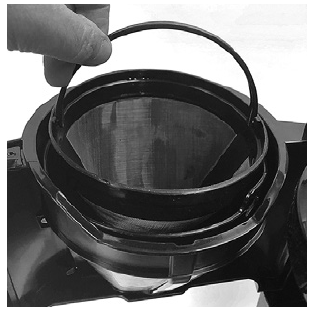 2. Put the filter into the filter basket. It will sit flat neatly inside. Close the brewer chamber. Before first use, fill the carafe with water to the ‘12 cup MAX’ mark and run this through the Filter Coffee the machine, following the directions on the next page to thoroughly clean.Do this three times.
INSTRUCTIONS FOR USE
The coffee machine must be filled with coffee and water and your carafe must be in place before you plug in and switch on the machine.
- Fill the carafe with clean cold water, to the amount you require using the cup measurements on the side. 1 cup = 125ml.
- Lift the lid using the lip at the side and fill the water tank with the water and close the water tank lid.
WARNING: To avoid the risk of burning or scalding from hot coffee or steam do not fill beyond the ‘12 cup MAX’ on the tank, or the appliance may spit boiling water. Always fill beyond the ‘2 cup MIN’ mark.
3. Slide the brewer handle to the left to open the brewer and remove the permanent filter.
4. Add your coffee to the permanent filter, or alternatively use a paper filter. For each cup of coffee (125ml), add 7.5 grams of ground coffee into the filter, or one level tbsp. Gently shake the filter to distribute the coffee evenly.
5. Put the filter into the filter basket, it will sit flat neatly inside.
6. Close the brewer by moving the brewing chamber to the right until it closes properly.
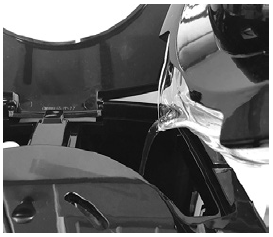
7. Slot the empty carafe onto the hot plate.
8. The pourer is on a spring, which will move upwards when the carafe is put onto the hot plate. The hole in the carafe lid will line up with the pourer when the carafe is in position on the hot plate, so the coffee can filter straight into the carafe. Ensure the carafe is securely on the base.
9. Plug in and switch on at the socket. When first turned on the LCD will illuminate blue, then go off and 12:00 will appear on the screen.
10. Switch on the brewing cycle by pressing the ON/ OFF button. The red ‘ON’ light will illuminate and the LCD will illuminate blue and 12:00 to indicate the brewing cycle has started.
WARNING: If no water or coffee is coming out of the filter basket, unplug the appliance IMMEDIATELY and wait for 10 minutes before opening and checking the filter is in place correctly.
11. When the brewing process ends and the water tank is empty, there will still be hot liquid in the filter. Wait for a few minutes for the rest of the liquid to drop through into the carafe.
12. Do not remove the carafe from the hot plate during brewing.Note: During brewing process, the buttons of PROG, HOUR and MINUTE are invalid.
13. The brewing process can be interrupted by pressing the ON/OFF button at any time, the ON/OFF indicator will go out. The appliance will continue brewing once ON/OFF button is pressed again.
14. When the brewing cycle is complete the red light will remain lit as it has started the keep warm function and the screen will just show a 12:00.
15. The hot plate will keep your coffee warm for around 40 minutes after brewing has started, then automatically switch off and the red light will go out. For an optimum coffee taste, serve it just after brewing.
16. To brew another carafe, repeat the process after allowing the coffee machine to completely cool, approximately 5 minutes.
WARNING: During brewing, condensation will form underneath the water tank lid. Take care, steam/water could be hot when you open the lid.
17. As coffee grounds absorb water during the brewing cycle, the amount of brewed coffee is slightly less than the amount of water added to the water tank.
18. When the coffee grounds have cooled, open the lid and carefully remove the filter by lifting by the handle out of the filter basket. Discard the used coffee grounds, these are compostable, and rinse the filter.
19. Press the ON/OFF button to turn the Filter Coffee Machine off.20. Switch off and unplug at the socket when not in use for a long period of time.
NOTE: The thermostat inside the appliance will need to cool completely before you can press the ‘ON/OFF’ button again to make another carafe. This will take around 5 minutes.
When the ‘ON/OFF’ button is on and illuminated, the appliance must run a full brewing cycle until the light switches off. If you switch off the coffee machine before the brewing cycle has finished, when the appliance is switched back on it will continue the cycle until it has finished. This will not be a full cycle.
PROGRAMMING YOUR FILTER COFFEE MACHINE SETTING THE CLOCK
- You can set the clock on your coffee machine at anytime whilst the appliance is switched on.
- Press the HOUR button, which is a 24 hour clock (0Hrs – 23Hrs) and then the MIN button to set the correct time.
- Press and hold the buttons to scroll through the numbers quickly. When the number displayed is getting close, release and press the appropriate button to increase one digit at a time.
SETTING A PRE-SET DELAY MODE
- To set a delayed time for a brewing, first press the PROG button and the Delay Brew light will flash green. Next set the time you want your coffee to start brewing by using the HOUR and MIN buttons, following the steps above of ‘Setting The Clock’.
- Press the PROG button again, the PROG indicator illuminates in green solidly. After a while, the LCD display indicates the current time.Note: If you want to change the delay start time, follow the above steps 1-2 again.
- Remember to put in your coffee and water in advance.
- To confirm the delay time to start brewing, simply press the PROG button and the time you have set will appear on the control panel. Press the PROG button again to confirm the delay time.
- Your coffee machine will automatically begin brewing at the set time. When the brewing cycle begins the red light will illuminate and the LDC will illuminate blue, to highlight that the coffee machine is in operation.
- To cancel the Delay Mode, press the PROG button for about 5 seconds to cancel, andthe green light will go out.
- When the brewing cycle has finished the red light will remain on as it is in keep warm function.
- To reset for the next time i.e. the next morning, press the PROG button and the Delay Brew indicator light will illuminate green on the control panel.
WARNING: If after 10 minutes the coffee maker has not cooled down completely, the water tank may have overheated. Open the lid with care as steam will escape and could causes scalds of burns.
PLEASE NOTE: If you try to restart the coffee machine before it has completely cooled, it may result in an incomplete cycle. The appliance has a thermal reset switch to prevent it from overheating and may shut down.
HINTS AND TIPS
- Ground coffee does not stay fresh for as long as coffee beans. If you are using ground coffee, watch expiry dates and buy in small amounts.
- If you are grinding coffee beans, set your grinder to a fine/medium grind, and try to use the ground coffee within a week of grinding. Very finely ground coffee may cause the filter basket to overflow.
- Store unused coffee grounds in a cool, dry place. If you open a packet of coffee tightly reseal it and store in the fridge to maintain freshness.
- To avoid the coffee machine overflowing, use less ground coffee when brewing decaf or flavored coffee.
- For hotter coffee, rinse your carafe with warm water before brewing
USING COFFEE BAGS OR TEA BAGS
Place the coffee bag or tea bag into the filter and follow the ‘Instructions For Use’.Use 1 bag per cup.
FREQUENTLY ASKED QUESTIONS
Question: Why does the coffee taste too weak?Answer: There is not enough ground coffee being used. Add more coffee to the filter. You must always use a minimum of 7.5g or 1tbsp of coffee per cup.
Question: Why is the filter basket overflowing or the coffee brewing too slowly?Answer: There is too much water in the water tank. Use the carafe to measure the amount of water you are putting into the water tank. Do not fill beyond the 12 cups MAX mark on the water tank. There is too much coffee in the filter. The coffee may be ground too finely. The filter may not be in the correct position.
Question: Why is the coffee not brewing or the coffee machine not turning on?Answer: The water tank maybe empty or the coffee machine is not plugged in. Check the water tank is filled and the coffee machine is plugged in.
Question: Why is the coffee machine taking a long time to brew?Answer: The coffee machine may need cleaning. See ‘Care and Cleaning’, the coffee machine may need descaling.
Question: Why won’t the red ‘ON’ LED illuminate to switch on when pressed?Answer: The thermostat inside the appliance will need to cool completely before you can press the ‘ON/OFF’ button again to make another carafe. This will take around 5 minutes.
Question: When I switch on the coffee machine the red ‘ON’ LED is already illuminated?Answer: The appliance has been switched off before it has run a full brewing cycle. If you switch off the appliance before the brewing cycle has finished, when switched back on it will continue the cycle. This will not be a full cycle.
Question: There seems to be a small amount of oil on the top of my brewed coffee?Answer: This is due to the release of oil from roasted coffee beans. Stronger roasted coffee beans release more oil. If you perform a regular cleaning program it will prevent an oily build up.
CARE AND CLEANING
- Unplug the Filter Coffee Machine and let it cool completely before cleaning.
- Clean thoroughly before using for the first time and after every use.
- Check the parts for wear or damage after every few uses. Do not use abrasive cleaners or steel wool.
- Never immerse the main unit in water or any other liquid. To clean the outer surfaces, wipe with a clean damp cloth and dry thoroughly before storing.
- Wash all removable parts in hot soapy water, rinse and dry thoroughly before using or storing.
- Store the Filter Coffee Machine with the power cable loosely coiled. Never wrap it tightly around the product.
CLEANING THE FILTER COFFEE MACHINE
- We recommend cleaning the water tank once a month, or more frequently in hard water areas.
- Mix 300ml of cold water and 100ml of white wine vinegar, and pour into the water tank.
- Place the carafe onto the warming plate.
- Press the ON/OFF button to switch on. After 30 seconds press the ON/OFF button againand leave the Filter Coffee Machine off for 30 minutes.
- After 30 minutes press the ON/OFF button again to switch on the coffee machine and finish the brew cycle. Then switch it off when the water and vinegar has filtered through.
- Then fill the water tank to the 12 cup MAX mark of clean cold tap water, and run another brew cycle. Do this three times to thoroughly clean.
- Wash all removable parts in hot soapy water and dry thoroughly.
TECHNICAL INFORMATION
Power: 1000W.Voltage: 220-240V.Frequency: 50-60Hz.ELECTRICAL CONNECTIONSTHIS APPLIANCE MUST BE EARTHEDThe appliance is fitted with a fused three-pin plug to BS1363 which is suitable for use in all homes fitted with sockets to current specifications.
CHANGING THE 10 AMP FUSE
Use a 10 amp BS1362 fuse. Only BSI or ASTA approved fuses should be used. If you are unsure which plug or fuse to use, always refer to a qualified electrician.Note: After replacing or changing a fuse on a moulded plug which has a fuse cover, the cover must be refitted to the plug; the appliance must not be used without a fuse cover.If lost, replacement fuse covers can be obtained from an electrical shop. This appliance complies with the following EU Directives: 2014/35/EU (Low Voltage Directive) and 2014/30/EU (EMC Directive).
RECYCLING YOUR ELECTRICALS
Along with many other high street retailers, Lakeland has joined a scheme whereby customers can take their unwanted electrical products to recycling points set up around the country.Visit www.recycle-more.co.uk to find your nearest recycling point.
Lakeland
Alexandra Buildings, Windermere, Cumbria, UK LA23 1BQTel: +44(0)15394 88100 lakeland.co.uk
References
[xyz-ips snippet=”download-snippet”]