
![]()
Quick Start GuideWorks with Google Home & Alexa
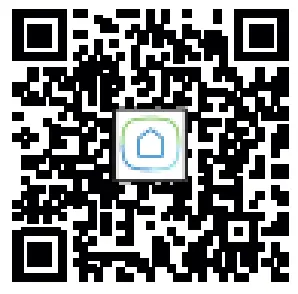
Download and install the Laser SmartHome or Connect SmartHome App for either iOS or Android devices.
 |
|
![]()
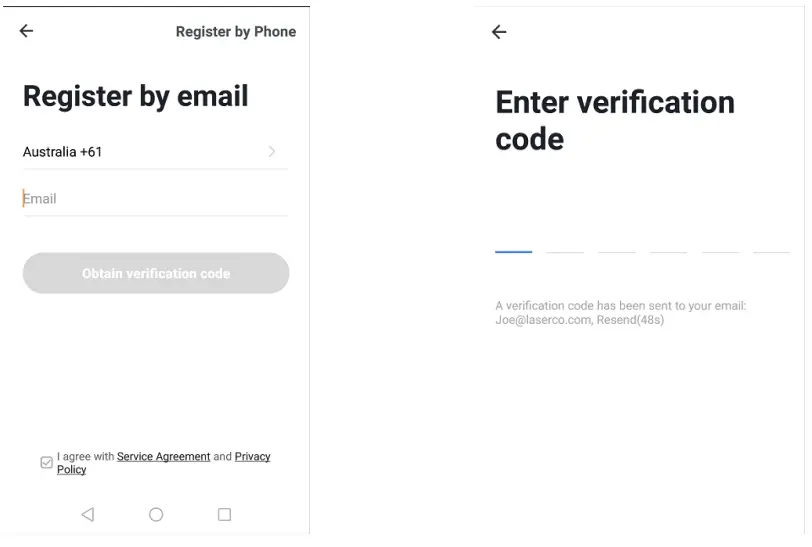
Once downloaded, the app will ask you to register your device. Enter your phone number or email which makes you feel comfortable and select the country you live in.You will receive a text with a registration code. Enter verification code then create a password for your account.
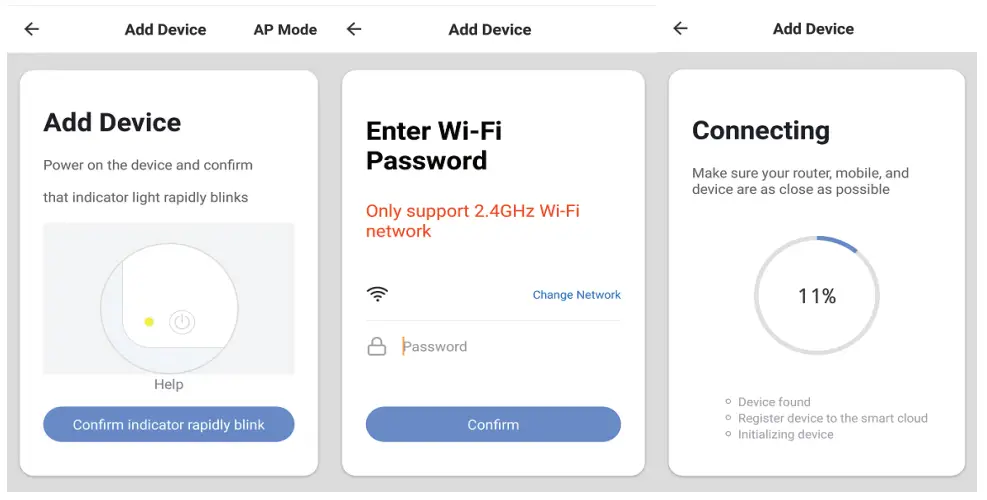
Adding a New Device
- Install/plug in the device.
- Turn on the power of the device and make sure the light or indicator light is flashing quickly. (If the device is not flashing, please turn the power on & off 4 times.)
- Open App and Click “Add Device” or “+” to add an appropriate device.
- Select WiFi network and input password of WiFi then.
- Once connected the App will prompt the connection, then you can rename the device assign the device to a different room, or just click “done”.

- Once a new device has been added, you will be able to control the device with the App via click the device icon.
- Click on the top right corner, you can go into the “Details of devices” page for the device. You can remain or reassign your device here.
- You also can share your device with your family member so that they can control the device as well. You also can create groups for multiple devices, so that you can control all devices at once. For example, set all downlights in a group.
- Instruction on how to connect to Amazon Alexa or Google Assistanalso can be found on the “Details of devices” page.Q & A

Why failed to add the device?
- Please check whether the device is powered on;
- Whether the phone is connected via Wi-Fi;
- Whether the device is ready for configuration. To get the device ready before configuration, normally you can manually press on the device to get it ready. Please refer to “Product Instructions” or Device ResetInstruction for details.Notice Each time to add a device, reset Wi-Fi to get the device ready for configuration and make sure the router is working properly.
- Check routers or related: If the router is a dual-band router, select 2.4G network and add a device. You also need to enable the router’s broadcasting function.Set up wireless router: Set encryption method as WPA2PSK and authorization type as AES, or set both as auto. The wireless mode cannot be 11n only.Don’t use Chinese to name router Wi-Fi. To stay strong Wi-Fi signal, please keep the device and router within a certain distance.Whether connected devices have reached the maximum number of router’s connections. If so, please try by turning off the Wi-Fi connection of some device.The router’s wireless MAC filtering function is enabled. Remove the device from the filter list and make sure that the router is not prohibiting the device from connecting.
- Make sure the password entered in App is correct when adding new device
How to reset devices?
- Reset plugPress and HOLD the RESET button for 6 seconds.A flashing light will appear to show the device is in pairing mode.A fast blinking light (4 times per second) indicates normal WIFI pairing mode.A slow blinking light (2 times per 3 seconds) indicates AP pairing mode.
How to add a device under EZ mode?
- Make sure that indicator light or light quickly flash;
- The phone has connected to Wi-Fi router and been able to connect to the Internet;
- Tap “ Add device” in-app and enter the correct Wi-Fi password. Touch to search device around;
- In the device list, select and add the device.
How to add a device under AP mode?
- Make sure that indicator light quickly flashes or light slowly flashes;
- Tap “Add device” in App and then “AP mode” in the top right corner. Connect to the device hotspot first and then Wi-Fi.
- Tap “Next” to add a device.
Can I control the device with a 2G/3G/4G network?When adding a device for the first time, it requires that the device and phone need to be under the same Wi-Fi environment. After successfully adding the device, you can remote control the device with a 2G/3G/4G networkHow can I share my device with my family?Open App, go to “Profile” > “Device Sharing” > “Sharings Sent”, tap “Add Sharing”, then you can share the device with the added family members.How can I manage the devices shared by others?Open App, go to “Profile” > “Device Sharing” > “Sharings Received”, then you can find the devices shared by other users. It also allows to add remarks to users or delete certain sharings by long pressing or swiping left.
Warranty Against DefectsLaser Corporation Pty Ltd (“Laser”) warrants your new product to be free from defects in materials and workmanship for 12 months, from the date of purchase, provided that the product is used in accordance with 2 accompanying recommendations or instructions where provided. The benefit of this warranty is in addition to your rights under theAustralian Consumer Law and to other rights and remedies of the consumer under a law in relation to the goods or services to which the warranty relates.Through a network of retailers and resellers, Laser will provide you with your choice of a repair, exchange (where possible) or refund (within Dead on Arrival period) for this product if it becomes defective within the warranty period.This warranty will no longer apply where the defect is a result of alteration, accident, misuse, abuse, normal wear and tear, neglect or improper storage. Please retain yourreceipt as proof of purchaseHow to make a product warranty claim:Step 1: Find your receipt which proves the date of purchase.Where the date of purchase cannot be verified, your place of purchase or Laser will make an assessment based on the date of manufacture, the condition of the Laser Product and the type of defect.Step 2a): Contact your place of purchase. They will assess the nature of the fault and repair, replace or fund the product as per their store refund or warranty policy.Step 2b): If your place of purchase cannot be contacted, then you can contact Laser. Customer Service with details of your defective Laser Product:Phone: (02) 9870 3340; or Email: [email protected] or online www.laserco.com.au/warranty (click on “Consumers (End Users)”).Our business address is at 1/6-8 Byfield Street, North Ryde, NSW 2113Step 3: The laser will issue you with a Return Authorisation (RA) number within 48 hours.When requested, send us the defective Product and a copy of your receipt. The laser will cover the cost of the return delivery.Step 4: Wait for us to contact you. Once we have received your defective Laser Product for inspection, we will inform you of our assessment of your claim within 7 days. When we contact you, we will firstly let you know whether you have a valid claim under this Warranty, and if so, we will inform you whether your defective Laser Product will be replaced or repaired, together with the number of days you can expect to wait to receive your replaced or repaired Laser Product.Step 5: For further details on warranty coverage and returns, please check the Terms and Conditions for Warranty Returns section on www.laserco.com.au/warranty Our goods come with guarantees that cannot be excluded under the Australian Consumer Law. You are entitled to a replacement or refund for a major failure and compensation for any other reasonably foreseeable loss or damage. You are also entitled to have the goods repaired or replaced if the goods fail to be of acceptable quality and the failure doesnot amount to a major failure.
 report this ad
![]()
References
[xyz-ips snippet=”download-snippet”]