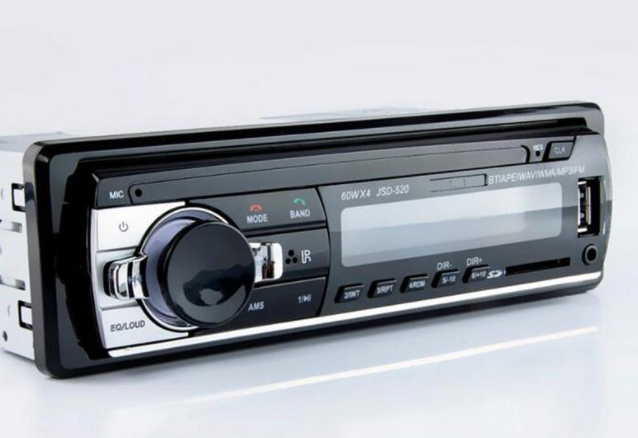
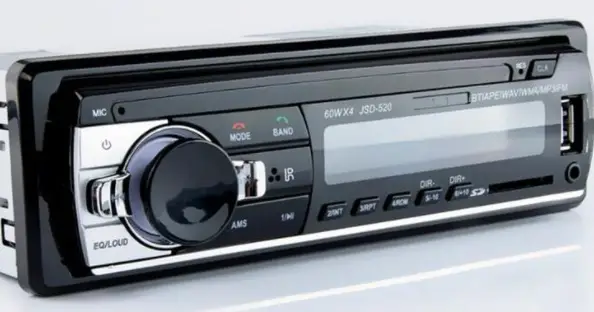
LEADFAN 27794635 Single Din Car Stereo with Dual Bluetooth
THANK YOU FOR PURCHASING OUR PRODUCTS.After you receive the product, please read the installation instructions in order to better use the product and avoid damage caused by wrong operation, thank you!
PRECAUTIONS BEFORE INSTALLATIONThank you very much for purchasing and using our products. When you receive the product, please do not take it directly to the car for installation, because the product may affect the product after a long journey, please try the machine first and then install.
TEST METHOD:Take the machine to the car’s battery. Combine the red and yellow wires of the standard power cord of the machine together and connect it to the positive pole of the battery. The black wire of the power cord is connected to the negative pole of the battery. Wait 10 seconds, press each button of the machine to see if the machine can be turned on normally. If the test machine cannot be turned on, please confirm whether it is strictly in accordance with the steps of our test machine method to operate. If the problem is still not resolved, please contact us, thank you for your cooperation.
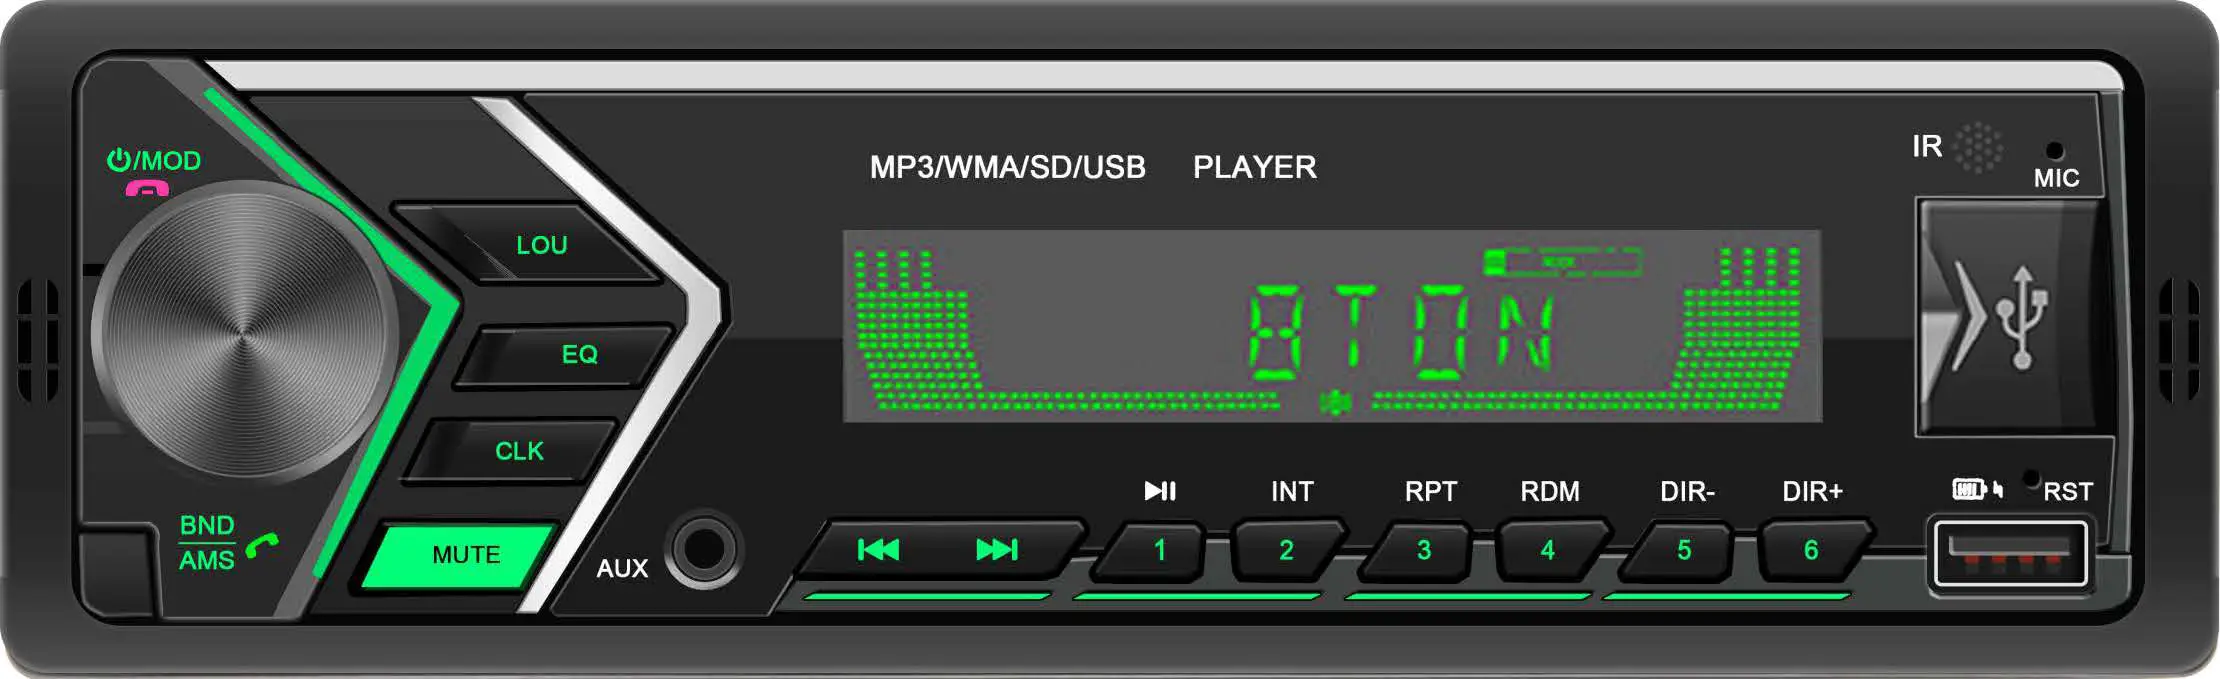
OPERATING INSTRUCTIONS
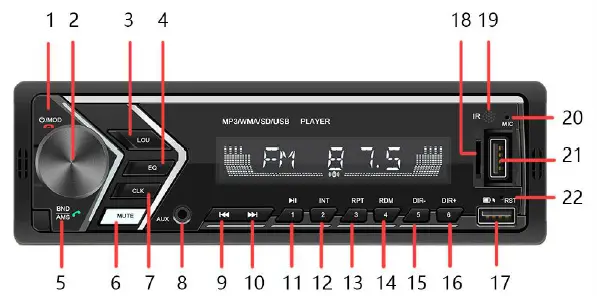
- POWER/MOD/Shot press to tum on. Long press for three seconds to turn off. Press the button repeatedly, the led will display the following sequence: RADIO/BT/AUX IN/USB/SD In Bluetooth mode, short press to end call.
- VOLUME / SELECT CONTROLRotate the volume knob to control the volume: Press the select button shortly until the desired function is shown on the display.*BASS/TREBLE/BALANCE/FADER/LOUD/EQ/STEREO(mono)-DX/LOC/AUTO
- AUDIO SOURCE RECORDING: When inserting a USB device or SD card, long press VOL to enter the audio recording mode. It can record the sound of the radio, Bluetooth music and AUX audio into the storage device.
- LOU: Loudness ON/OFF
- EQ: POP/ROCK/JAZZ/CLASSIC/FLAT/ OFF
- BND/AMS/In radio mode, press the button to browser station (FM1-FM2-FM3). Long press to automatically search for and store radio stations. In Bluetooth mode, short press to answer call
- MUTE: Mute ON/OFF
- CLK: Time displayShort press to display time, and then long press to set minutes, tum the volume knob to adjust the time. And then short press to set hours. Finally long press to confirm it.
- AUXIN JACKInsert your portable player into the jack, in any playing mode, audio will come through the car speaker.
- BUTTONIn playback mode, it is tie function of the previous track:Long press to rewind the track. In radio mode, this function can search backward for radio stations.
- BUTTONIn playback mode, it is tie function of the next track:Long press to forward the track. In radio mode, this function can search forward for radio stations.
- BUTTONIn Radio mode press to play preset station #1. In USB/SD mode press to start music playback. During playback press again to pause playback, press again to resume play.
- INT BUTTONIn Radio mode press to play preset station #2. Pressing this key will playback a snippet of each track. Press again to stop snippet and listen to the full track. While this mode is activated ‘INT” will be displayed.
- RPT BUTTONIn Radio mode press to play preset station #3. Pressing this key will activate repeat mode. They current track will be continually repeated until repeat is deactivated. When this mode is activated RPT will appear.
- RDM BUTTONIn Radio mode press to play preset station #4. Pressing this key will activate Random playback mode.
- DIR- BUTTONIn Radio mode press to play preset station #5. In playback mode, short press to choose forward 10 songs, long press for previous folder.
- DIR+ buttonIn Radio mode press to play preset station #6. In playback mode, short press to choose next 10 songs, long press for next folder.
- USB CHARGING HOLEPlug in the data cable to charge for mobile devices with 5V/2.1A.
- Micro SD CARD SLOTInsert the Micro SD card in the slot. Select SD with the mode selector. Audio will begin playback automatically.
- IR receiverRemote control infrared signal receiving window.
- MIC HOLELet your voice be heard when calling.
- USB PORTConnect your external device via USB (not included) to playback audio. Support audio format: MP3/WMA/APE/FLACAVAV.
- RESETUse a pin to insert the hole to restore the unit to factory defaults.
COLOR CHANGE INSTRUCTIONS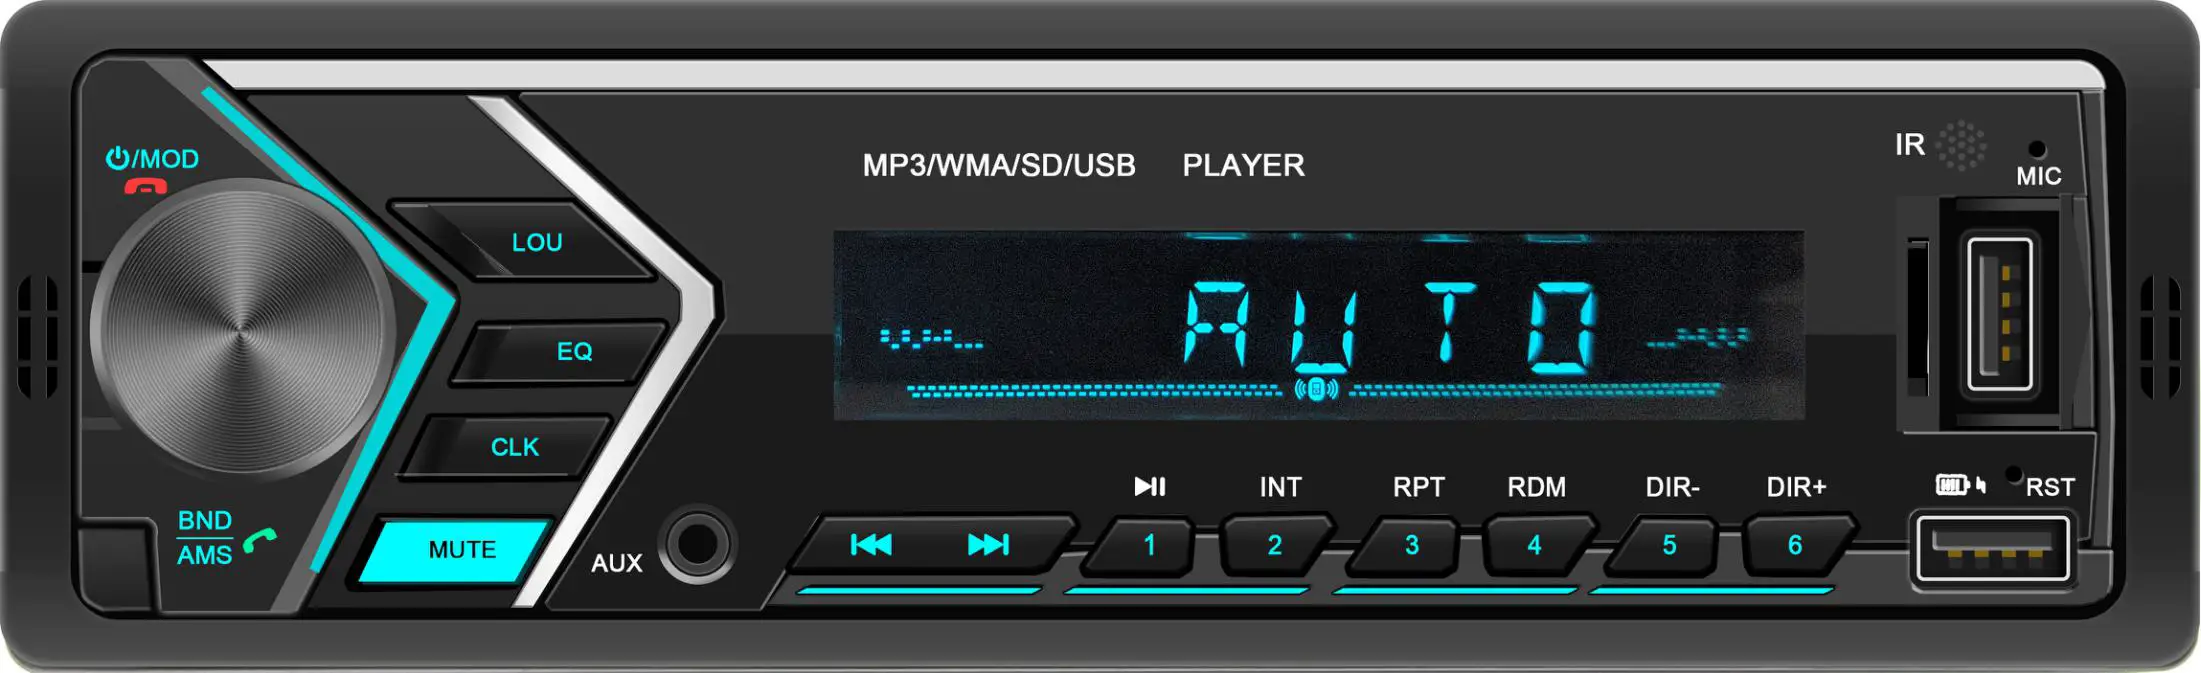
Press the round button until you see AUTO, then rotate it to select your favorite color. Auto/red/green/yellow/blue/purple/cyan/white.
BLUETOOTH INSTRUCTIONS
- Device Name : ‘CAR BT’
- PIN Number: ‘0000’ (If need)
- Bluetooth connection method: When the machine is powered on, turn your phone to the Bluetooth mode, click on the search device. When ‘CAR BT’ is displayed in the list, click ‘CAR BT’ to connect.
- Bluetooth play mobile music: After the Bluetooth connection is successful, open the music player software on the mobile phone to play music. Two Bluetooth mobile phones can be connected at the same time. The player gives priority to the mobile phone that receives the audio signal first.
Bluetooth name not searched or searched for connection unsuccessful? Solution: Cancel all other Bluetooth devices connected to the phone, and then click again to search for the device. If the problem is still not solved, you can search/connect several times. If it still doesn’t work, unplug the host and wait for 1 minute, then power on again, and then search for connections.
REMOTE CONTROL DESCRIPTION
NOTE:
- The battery is not included, you need to put it on first.
- If the remote control does not work, please take the battery off and wipe it, then put it back. If it still not working, may be the remote control battery is low, please replace it.
SPECIFICATION
Note: Specifications and the design are subject to possible modification without notice due to improvement.
| Frequency Range | 87.5-107.9MHz |
| Sensitivity | 12dBµV |
| I.F.Frequency | 10.7MHz |
| Frequency Response | 40Hz-15KHz(±3dB) |
| Stereo Separation | >28dB |
| S/N Ratio | >50dB |
| Power Supply Voltage | 12VDC,Negative Ground |
| Max Current Consumption | 15A |
| Max Out put Power | 4 x 45W |
PRECAUTIONS
- Choose the mounting location carefully so that the unit will not interfere with the normal driving functions of the driver.
- Avoid installing the unit where it would be subject to high temperatures, such as from direct sunlight or hot air from the heater, or where it would be subject to dust, dirt or excessive vibration.
- Use only the supplied mounting hard ware for a safe and secure installation.
- Adjust the mounting angle as desired.
Note: Keep the release Key in the safe place as you may need it in future to remove the unit from the car.
Installation
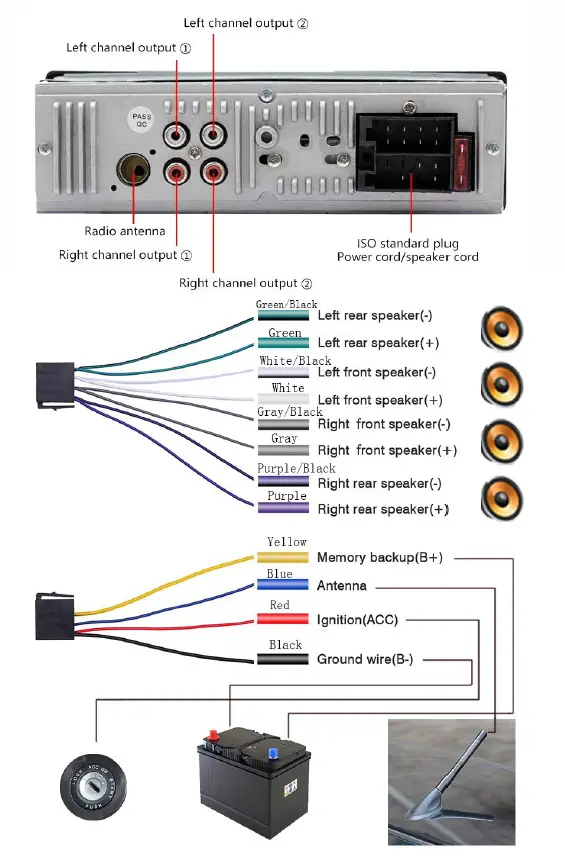
Remove the stereo carefully from the box, retaining the packaging for future use (Servicing) When the yellow line B+ and line red line ACC have a 12V positive power at the same time, the unit can be turned on normally. The yellow line B+ keeps the power on and the machine has a memory function. 8 speaker cables, each cable can not be grounded, can not be shared, can not touch the line, otherwise there will be no sound output, output sound distortion, overheating of machine and so on.
TROUBLESHOOTING
 report this ad
Q: My original car plug is inconsistent with the new unit plug. How to wire it?A: There is a lossless line. The new unit tail line and the lossless line are the same color. It is not connected to the color. After plugging it, insert one end into the original car plug, the other into the unit, and unit will work properly. If there is no lossless line, you must distinguish the function of each line on the original car plug. Refer the wiring diagram on the top of the machine cover, and wire the corresponding function of each line on the new machine.Q: I have connected the line, but the unit is not powered.A: Check if the fuse on the unit is blown. Put the red line of the new unit together with the yellow line and take it to the anode of the car battery, the black wire to the cathode. Then press the start button. This requires checking the circuit on the original car plug. Generally the red line or the yellow line of the new unit does not come over.Q: There is no sound or the sound is small.A: The unit has four color lines of white, gray, green and purple. The two wires of each color are connected to one speaker. Several speakers are connected to each other. Maybe the speaker cable of the original plug is not distinguished when the wiring is connected. The two wires of one speaker are not connected to the same color line, or the speaker cable has a ground/wire. You can take off the speaker cables and find a speaker from the outside. Each color is tested separately and whether there are any problems.Q: Every time you start the car, you have to turn it on manually, and the time and playback status are not remembered.A: In this case, the red line of the new unit tail line is reversed with the yellow line, and the two tines can be reversed and connected. If the radio can memory the time, but can not remember when playing the USB flash drive, it is that the power-on reset time of this USB flash drive is too long, the unit does not detect the U disk when booting the U disk, so the memory is not live, replace the USB flash drive of other brands can be solved.Q: It does not read the memory card or USB flash drive.A: Please format the memory card or USB flash drive on the computer. The system format is: FAT32. and re- download the MP3 song for playback.Q: I have a subwoofer. After the connection, the subwoofer does not ring.A: The unit provides an audio for the subwoofer. The interface is the red/white lotus jack on the back of the unit. If the subwoofer has no sound after the connection, please pull out the subwoofer cable plug and touch the connector wire core position of the cable. If the subwoofer is normal, it will ring. If it does not ring please check power and settings on the cable or subwoofer. Some subwoofer with FM and Bluetooth function. When using the audio function of the unit, please set the mode of the subwoofer to AUX mode.![]()
[xyz-ips snippet=”download-snippet”]