
Lenovo Single Fixed Panel Bath Screen Installation Guide
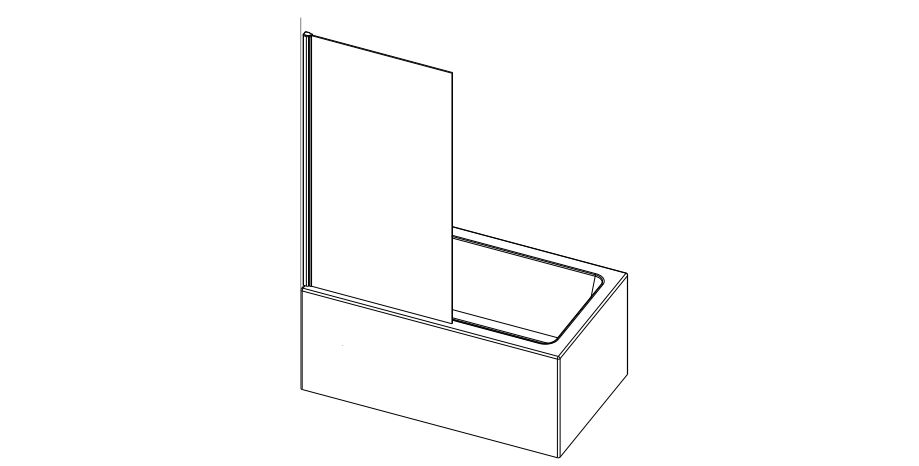
SINGLE FIXED PANEL BATH SCREEN
Installation Guide
Please read these instructions carefully and keep for future reference.Incorrect fitting will invalidate the guarantee
![]() SAFETY
SAFETY
- Handle glass with great care. Although glass is very tough, sharp impacts can damage both the glass and metal frame.
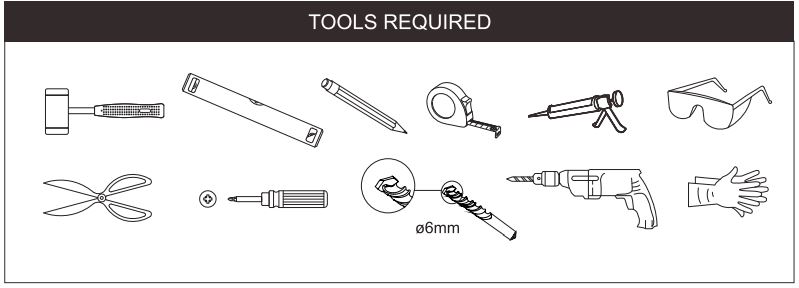
- Make sure there are no hidden pipes or cables hidden in the wall where you intend to drill
- Wear safety goggles, shoes and appropriate clothing
![]() BEFORE INSTALLATION
BEFORE INSTALLATION
- Ensure your bath is level before fitting. This screen is not designed to fit on baths with stepped fronts, roll top rims or integral soap dishes.
- The screen should be fitted on tiled walls which are sealed with waterproof grout.
- The tiling or other wall finishing should be effectively sealed at the bath edges.
- Always check very carefully that all components are present and profiles are vertical.
- To Avoid damage, use the opened out packaging to build the screen onNote: The screws and wall plugs supplied are for masonry walls. For lightweight walls i.e. stud partitions, plasterboard etc. use alternative fixings
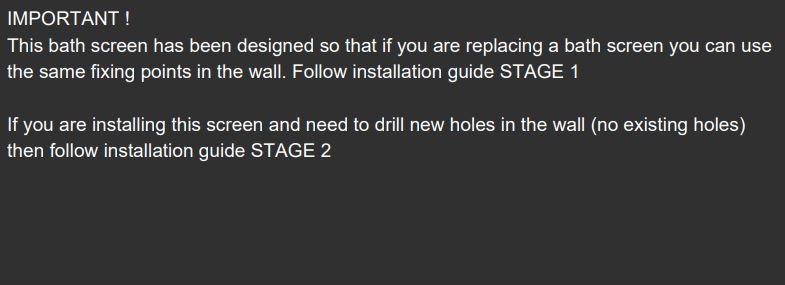
STAGE 1- For Installation using existing holes in the wall
Check the condition of the existing wall plugs and replace if required with supplied wall plugs which are for masonry walls. For lightweight walls i.e. stud partitions, plasterboard etc. use alternative fixings.NOTE: Only silicone the wall profile after fixing to the wall (see sealing section). Do not silicone on the back of the wall profile before fixing to the wall.
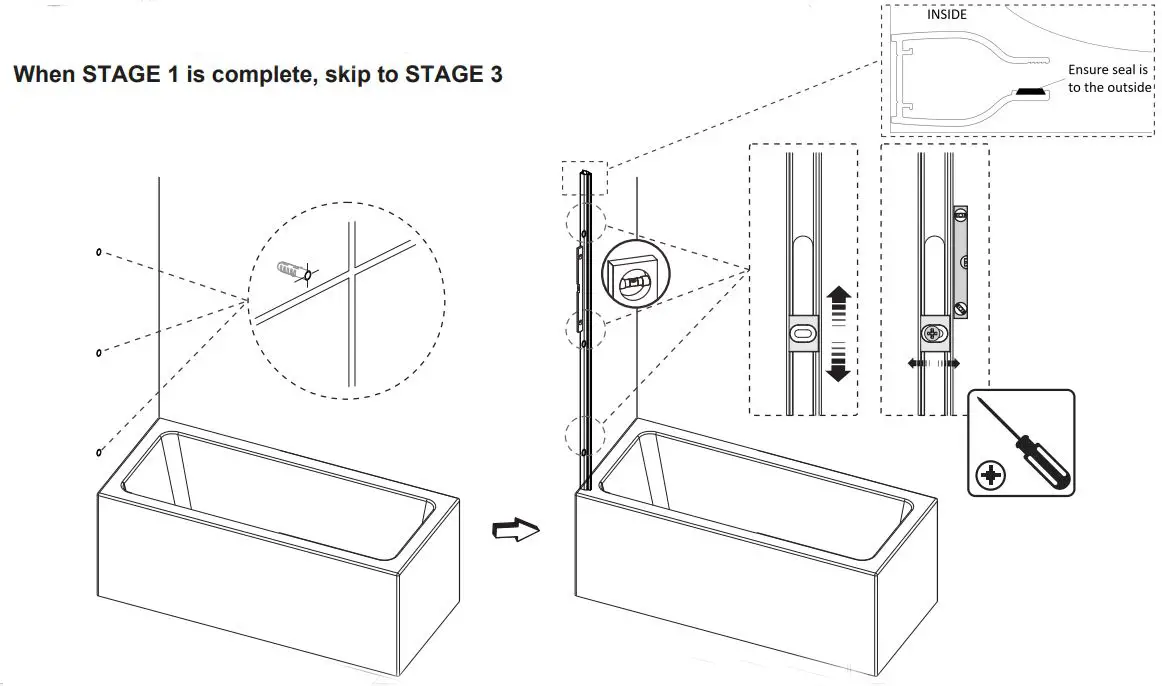
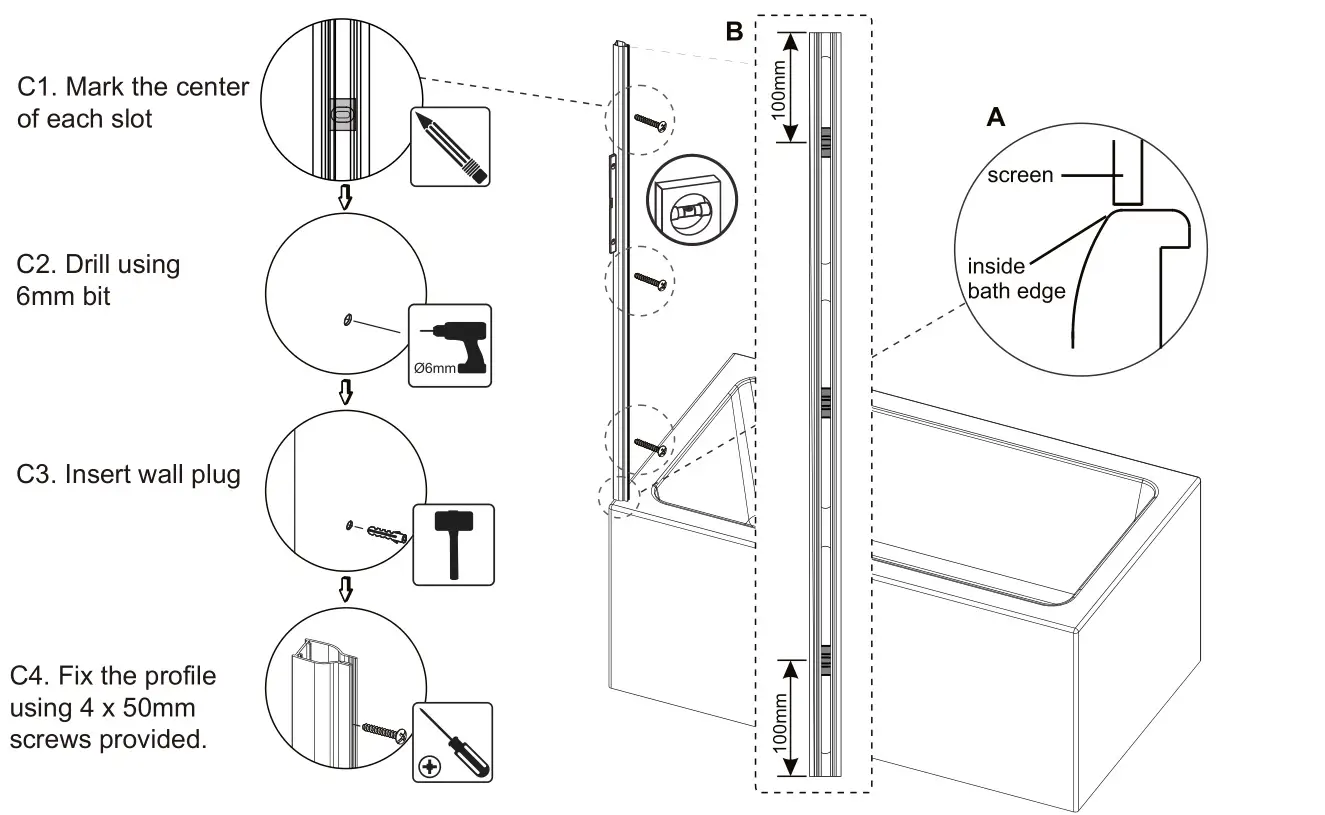
STAGE 2- For Installation where holes in wall need to be drilled
A) Ensure profile is plumb to the wall and positioned to ensure the bath screen will be on the inside edge of the bath.B) Move the adjusting block so it is located in the correct position for optimum fixing stability, 100mm down from the top of the profile, 100mm up from the bottom of the profile and centered on profile.
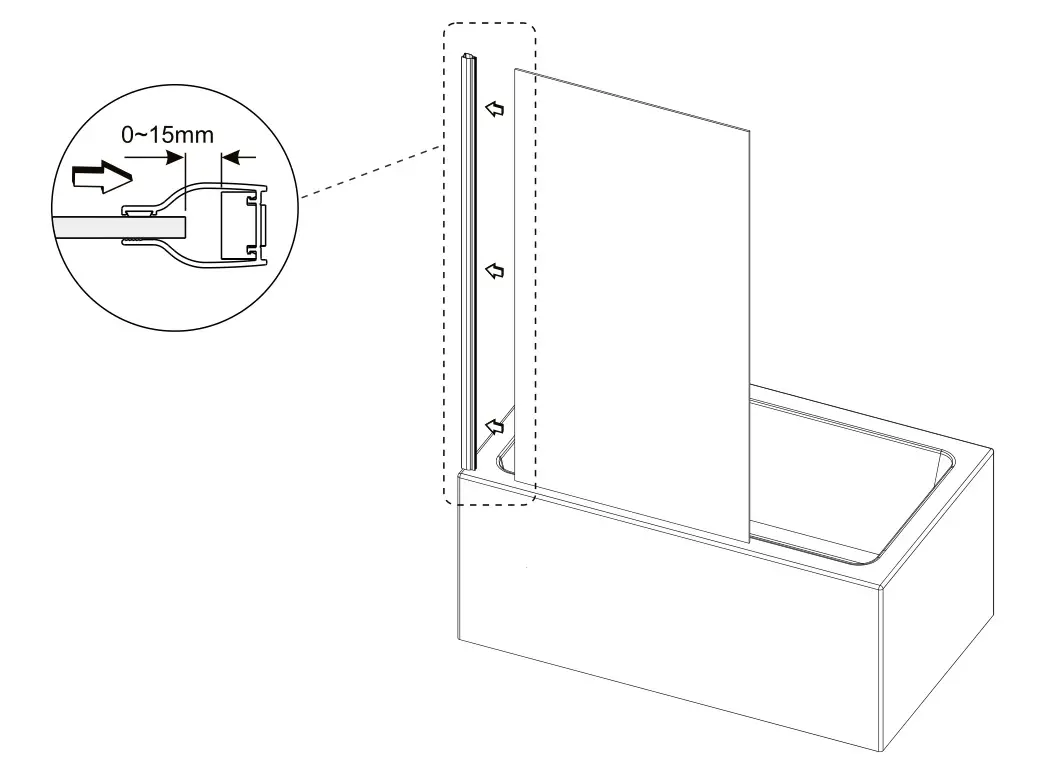
STAGE 3
Insert glass panel into the wall profile.Note: Maximum adjustment of the glass panel in the wall profile is 15mm.
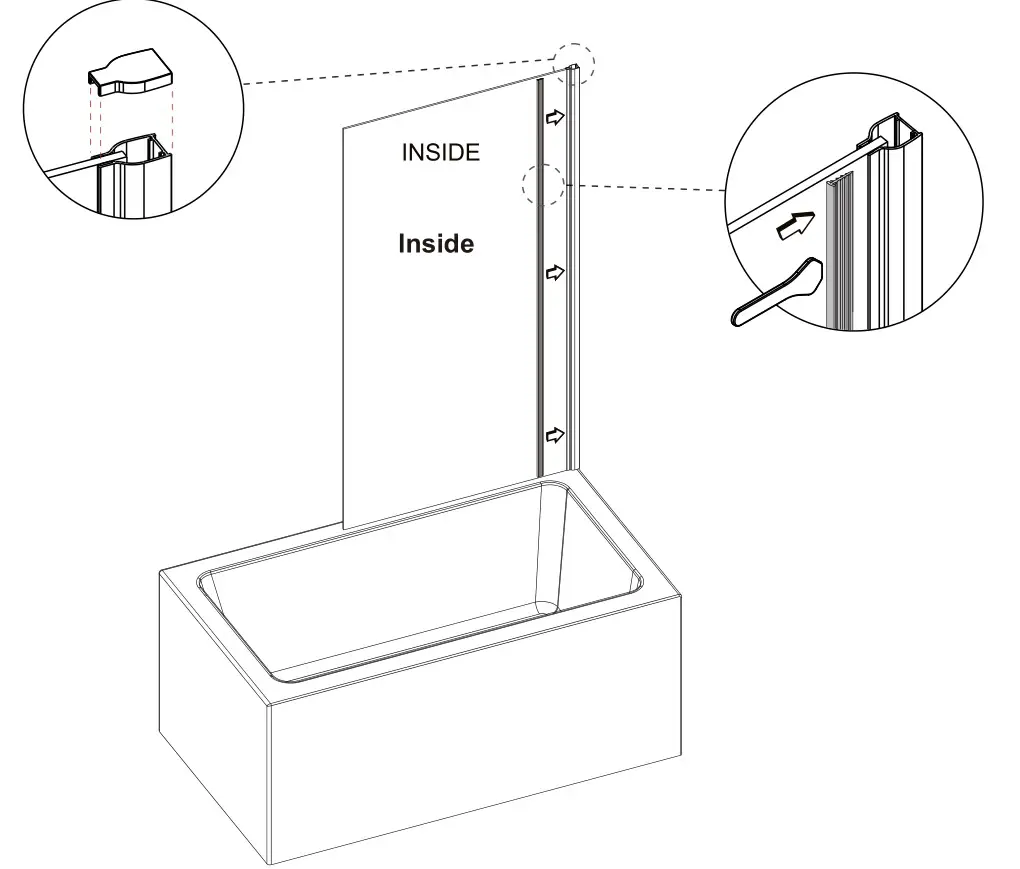
STAGE 4
Insert wedge gasket to the inside of the wall profile using the tool provided. Start at the bottom, pushing the seal in fully all the way up.Fit the wall profile cover cap on to the profile
STAGE 5
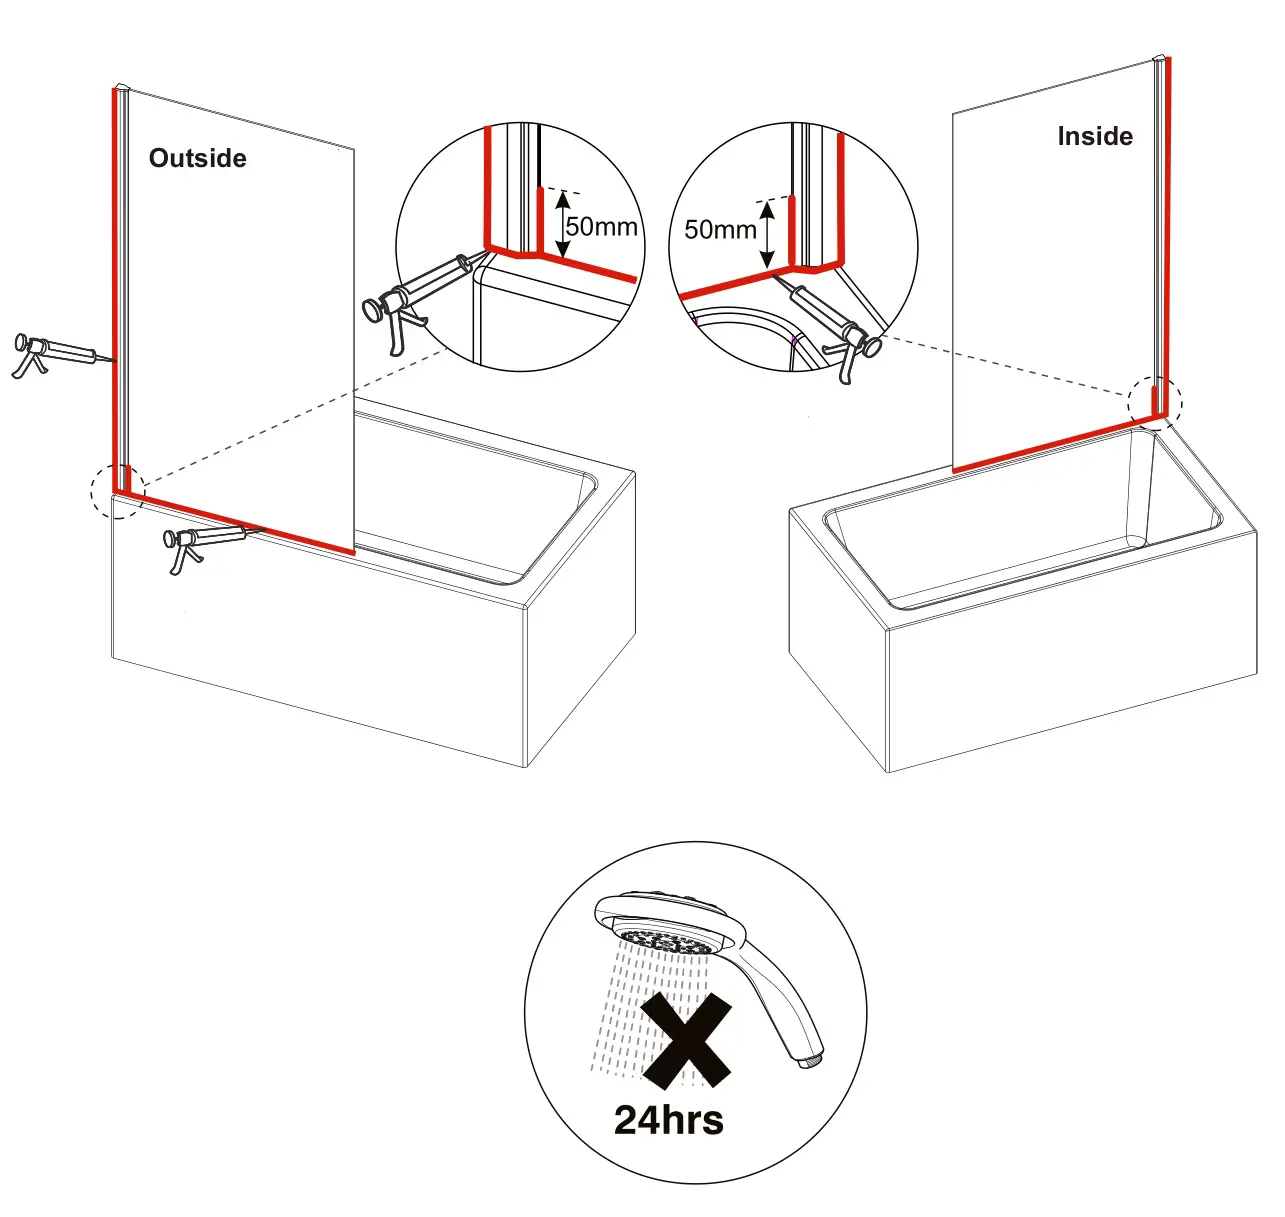
Before sealing make sure all surfaces are clean, dry and free from any residue such as grout. Use neutral cure anti bacterial silicone and applicator gun to seal between the wall and the wall profile.Inside:Seal top to bottom between the wall profile and the wall. Seal 50mm up from the bottom where the wall profile meets the glass.Outside:Seal top to bottom between the wall profile and the wall. Seal along the full length of the joint between the glass and top of bath. Seal 50mm up from the bottom where the wall profile meets the glass.DO NOT USE THE BATH SCREEN FOR 24 HOURS AFTER SEALING
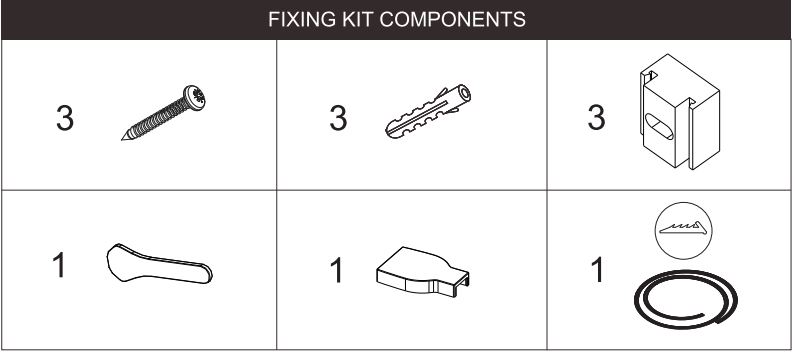
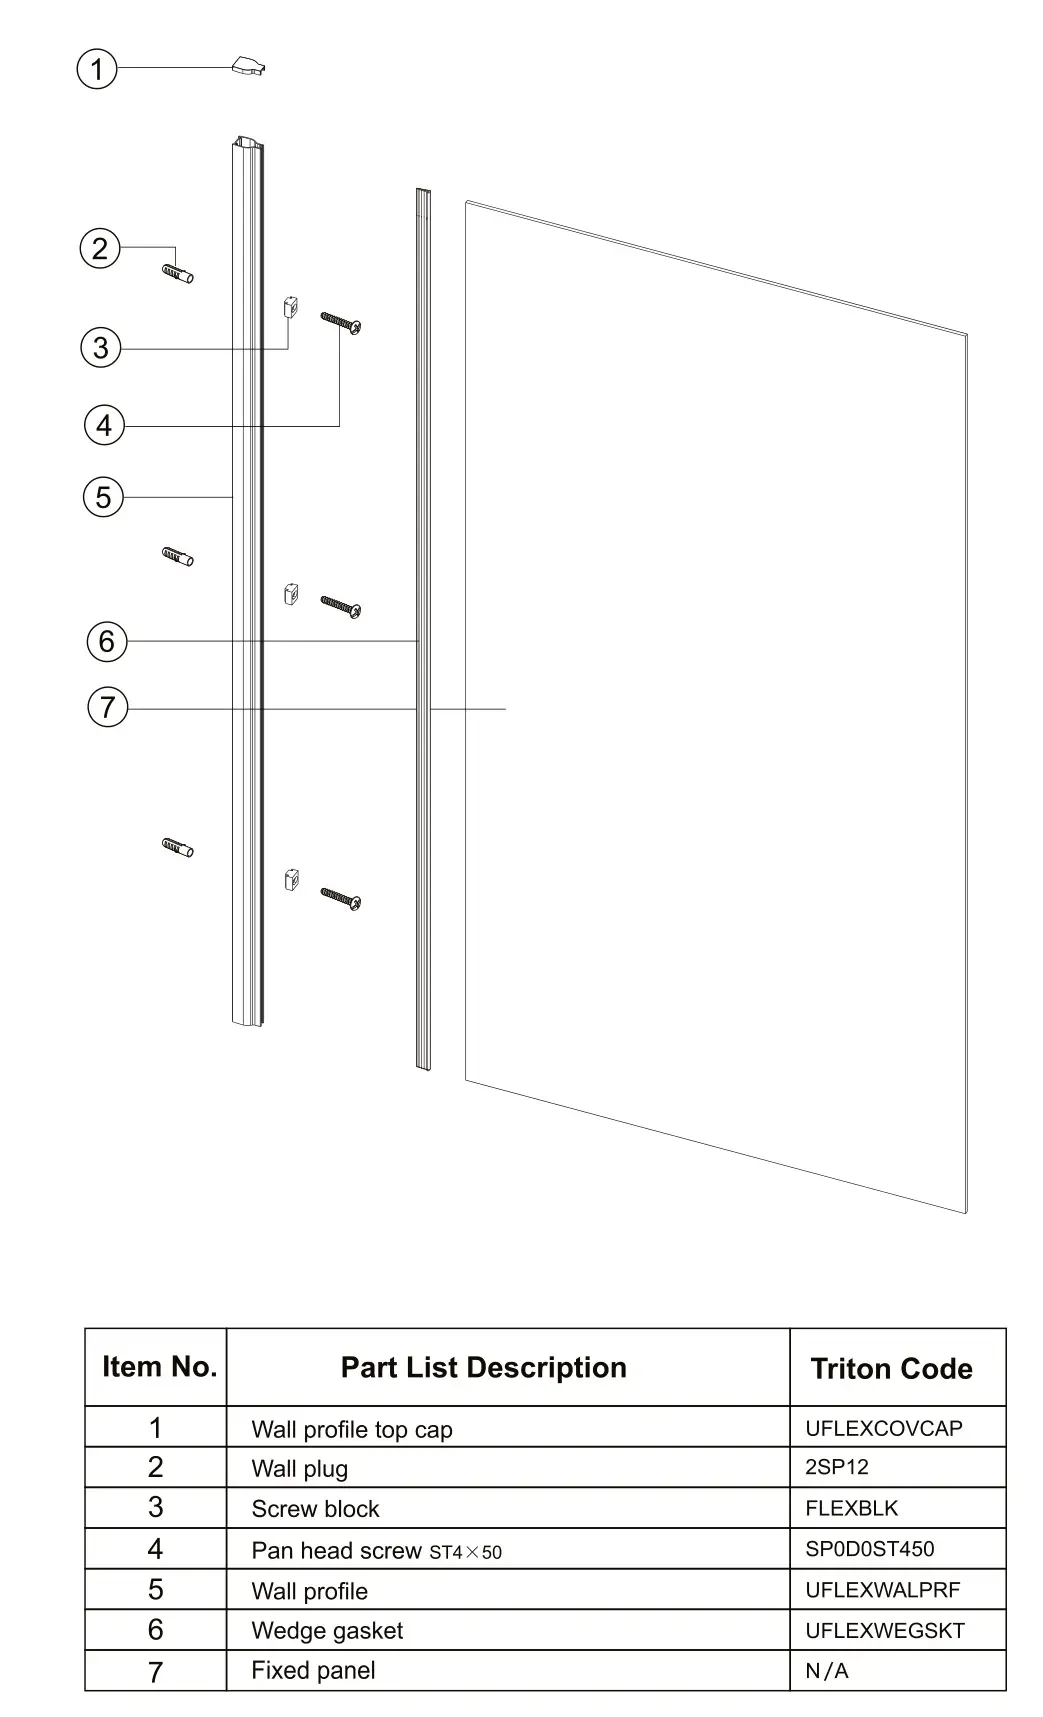
PARTS LIST
[xyz-ips snippet=”download-snippet”]