![]()
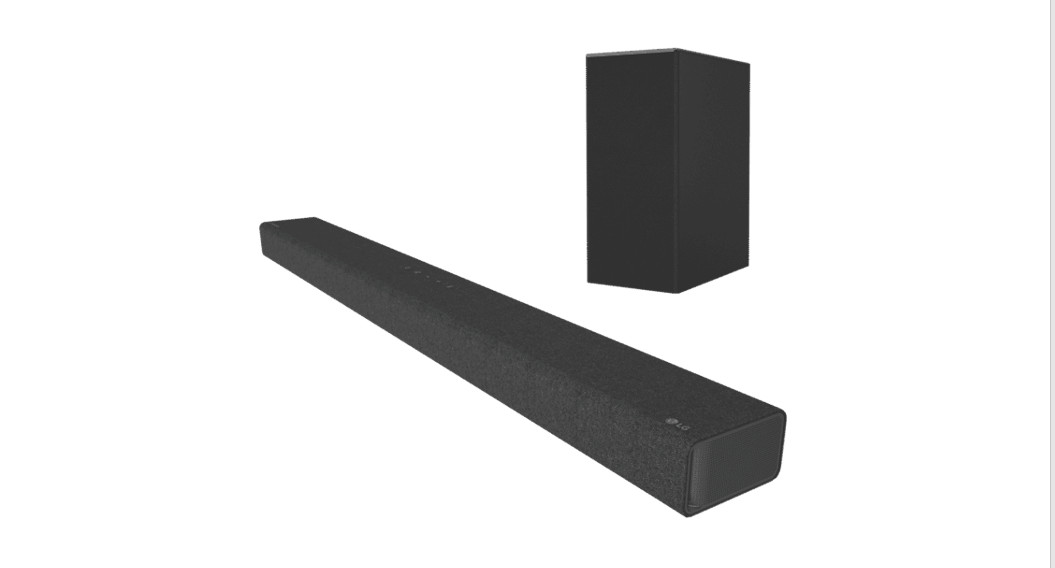
SIMPLE MANUALWIRELESS SOUNDBARSP60Y

Installing and Using the ProductPlease read this manual carefully before operating your set and retain it for future reference. To view the instructions of advanced features, visit http://www.lg.com or scan QR code and then download Owner’s Manual. Some of the content in this manual may differ from your product.
 https://www.lg.com/global/ajax/common_manual
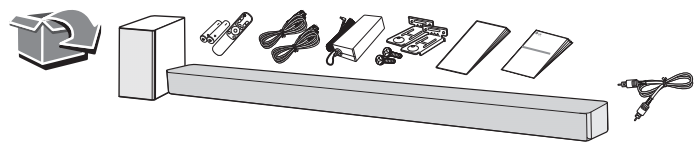
A SoundbarB Remote Control Receiver / Status DisplayC Rear Speakers / Wireless Receiver (Sold separately, SPK8-S)D Wireless Subwoofer – Install it close to the soundbar.E External Device – (Blu-ray player, game console, etc.)
- Connect the soundbar to your TV via an optical cable or an HDMI cable.
- If you are using an external device (ex. Blu-ray player, game console, etc.), connect it to the soundbar via an HDMI cable.
- If you purchased the rear speakers and wireless receiver separately, connect the rear speakers to the wireless receiver via a speakercable. When connecting the rear speakers to the wireless receiver, connect the black striped cable to the negative terminal of each speaker and the remaining cable to the positive terminal of each speaker.
- Connect to power in the following order: wireless subwoofer
 wireless receiver soundbar. Then, turn on the soundbar. When the connection is automatically established with the soundbar, the LEDs on the wireless subwoofer and the wireless receiver will light up in green.
 - Using the product with your TV1 Press the Function button repeatedly until “OPT/HDMI ARC” appears on the status display.2 On your TV’s settings set the output speaker to [HDMI ARC], [Optical], or [External Speaker].3 When the TV is properly connected to the product, “OPT” or “ARC” appears on the status display with a sound.
- Connecting the product to your smartphone via Bluetooth1 Tap the Settings button on your smartphone and select Bluetooth. Turn on the Bluetooth function. ( Off > On)2 Press the Bluetooth pair button. After a moment, you will see “BT READY” on the status display.3 Find and tap the product on your smartphone. The product appears as “LG SP60Y (XX)”.4 When the product is connected to your smartphone via Bluetooth, you can see the status display change from “PAIRED” [“Connected Bluetooth device name” “BT”.
- Connecting to the LG Sound Bar app
- Find and install the LG Sound Bar app on Google Play or App Store from your smartphone.
- You can get more information regarding its use by selecting [Help] in [Setting].
If you see a red LED on the back of the wireless subwoofer or on the front of the wireless receiver, it means that the soundbar is not connected to the speakers. If this is the case, connect them in the following order.
- Press the Power button on the soundbar to turn it off.
- Press the PAIRING (Pairing) button on the back of the disconnected wireless subwoofer or wireless receiver. Check if each LED blinks green.– If you still see a red LED on the back of the wireless subwoofer, press and hold the button on the back of the subwoofer again.
- Press the Power button on the soundbar to turn it on.
- When the connection is established, you will see a green LED light on the back of the wireless subwoofer or on the front of the wireless receiver light up in green.
* Keep the soundbar, the subwoofer, and wireless receiver away from the device (ex. wireless router, microwave oven, etc.) over 1 m to prevent wireless interference.
- Some speakers may not make sound depend on the input source. Select CINEMA sound mode to listen through all speakers.
- Design and specifications are subject to change without notice.
- Google Play is a trademark of Google LLC.
|
CAUTION |
CAUTION: TO REDUCE THE RISK OF ELECTRIC SHOCK DO NOT REMOVE COVER (OR BACK) NO USER-SERVICEABLE PARTS INSIDE REFER SERVICING TO QUALIFIED SERVICE PERSONNEL. This lightning flash with an arrowhead symbol within an equilateral triangle is intended to alert the user to the presence of uninsulated dangerous voltage within the product’s enclosure that may be of sufficient magnitude to constitute a risk of electric shock to persons.
![]() The exclamation point within an equilateral triangle is intended to alert the user to the presence of important operating and maintenance (servicing) instructions in the literature accompanying the product.WARNING:
The exclamation point within an equilateral triangle is intended to alert the user to the presence of important operating and maintenance (servicing) instructions in the literature accompanying the product.WARNING:
- TO PREVENT FIRE OR ELECTRIC SHOCK HAZARD, DO NOTEXPOSE THIS PRODUCT TO RAIN OR MOISTURE.
- Do not install this equipment in a confined space such as a bookcase or similar unit.
CAUTION:
- Do not use high voltage products around this product. (ex. Electrical swatter) This product may malfunction due to electrical shock.
- No naked flame sources, such as lighted candles, should be placed on the apparatus.
- Do not block any ventilation openings. Install in accordance with the manufacturer’s instructions. Slots and openings in the cabinet are provided for ventilation and to ensure reliable operation of the product and to protect it from overheating. The openings should never be blocked by placing the product on a bed, sofa, rug or another similar surface. This product shall not be placed in a built-in installation such as a bookcase or rack unless proper ventilation is provided or the manufacturer’s instruction has been adhered to.
- The Power Plug is the disconnecting device. In case of an emergency, the Power Plug must remain readily accessible.
- The apparatus should not be exposed to water (dripping or splashing) and no objects filled with liquids, such as vases, should be placed on the apparatus.
- For safety marking information including product identification and supply ratings, please refer to the main label on the bottom or the other surface of the product.
For models using an adapterOnly use the AC adapter supplied with this device. Do not use a power supply from another device or another manufacturer. Using any other power cable or power supply may cause damage to the device and void your warranty.
For models using a Laser device
| CLASS 1 LASER PRODUCT KLASSE |
| CLASS I LAZER MAHSULOTI |
This product employs a Laser System. To ensure proper use of this product, please read this owner’s manual carefully and retain it for future reference. Shall the unit require maintenance, contact an authorized service center. Use of controls, adjustments, or the performance of procedures other than those specified herein may result in hazardous radiation exposure. To prevent direct exposure to the laser beam, do not try to open the enclosure.For models using a batteryThis device is equipped with a portable battery or accumulator.CAUTION: Risk of fire or explosion if the battery is replaced by an incorrect type.For models using a built-in batteryDo not store or transport at pressures lower than 11.6 kPa and at above 15,000 m altitude.
- replacement of a battery with an incorrect type that can defeat a safeguard (for example, in the case of some lithium battery types);
- disposal of a battery into fire or a hot oven, or mechanically crushing or cutting of a battery, that can result in an explosion;
- leaving a battery in an extremely high temperature a surrounding environment that can result in an explosion or the leakage of flammable liquid or gas; and
- a battery subjected to the extremely low air pressure that may result in an explosion or the leakage of flammable liquid or gas.
- The appliance is not intended for use by young children or infirm persons without supervision.
- Young Children should be supervised to ensure that they do not play with appliances.
- If the appliance is supplied from a cord extension set or an electrical portable outlet device, the cord extension set on the electrical portable outlet device must be positioned so that it is not subject to splashing (of water or any form of liquid) or ingress of moisture.
 RF Radiation Exposure StatementThis equipment shall be installed and used at a minimum distance of 20 cm from the human body.
Specification
Power consumption
- Refer to the main label.
AC adapter
- Model: DA-50F25
- Manufacturer: Asian Power Devices Inc.
- Input: 100 – 240 V ~ 50 – 60 Hz
- Output: 25 V 2 A
- Model: MS-Z2000R250-050D0-P
- Manufacturer: MOSO POWER SUPPLY TECHNOLOGY CO., LTD.
- Input: 100 – 240 V ~ 50/60 Hz
- Output: 25 V 2 A
Dimensions (W x H x D): Approx. 1000.0 mm x 63.0 mm x 105.0 mmBus Power Supply (USB): 5 V ![]() 500 mAAmplifier (Total RMS Output power): 440 W RMS
500 mAAmplifier (Total RMS Output power): 440 W RMS
OPEN SOURCE SOFTWARE NOTICE INFORMATIONTo obtain the source code under GPL, LGPL, MPL, and other open-source licenses, that are contained in this product, please visit https://opensource.lge.com.In addition to the source code, all referred license terms, warranty disclaimers, and copyright notices are available for download. LG Electronics will also provide open source code to you on CD-ROM for a charge covering the cost of performing suchdistribution (such as the cost of media, shipping, and handling) upon email request to [email protected].This offer is valid for a period of three years after our last shipment of this product. This offer is valid to anyone in receipt of this information.]
Symbols
|
~ |
Refers to alternating current(AC). |
| Refers to direct current(DC). | |
| Refers to class II equipment. | |
| Refers to stand by. | |
|
! |
Refers to “ON” (power). |
| Refers to dangerous voltage. |


www.lg.comCopyright © 2021 LG Electronics Inc. All Rights Reserved.
References
[xyz-ips snippet=”download-snippet”]