
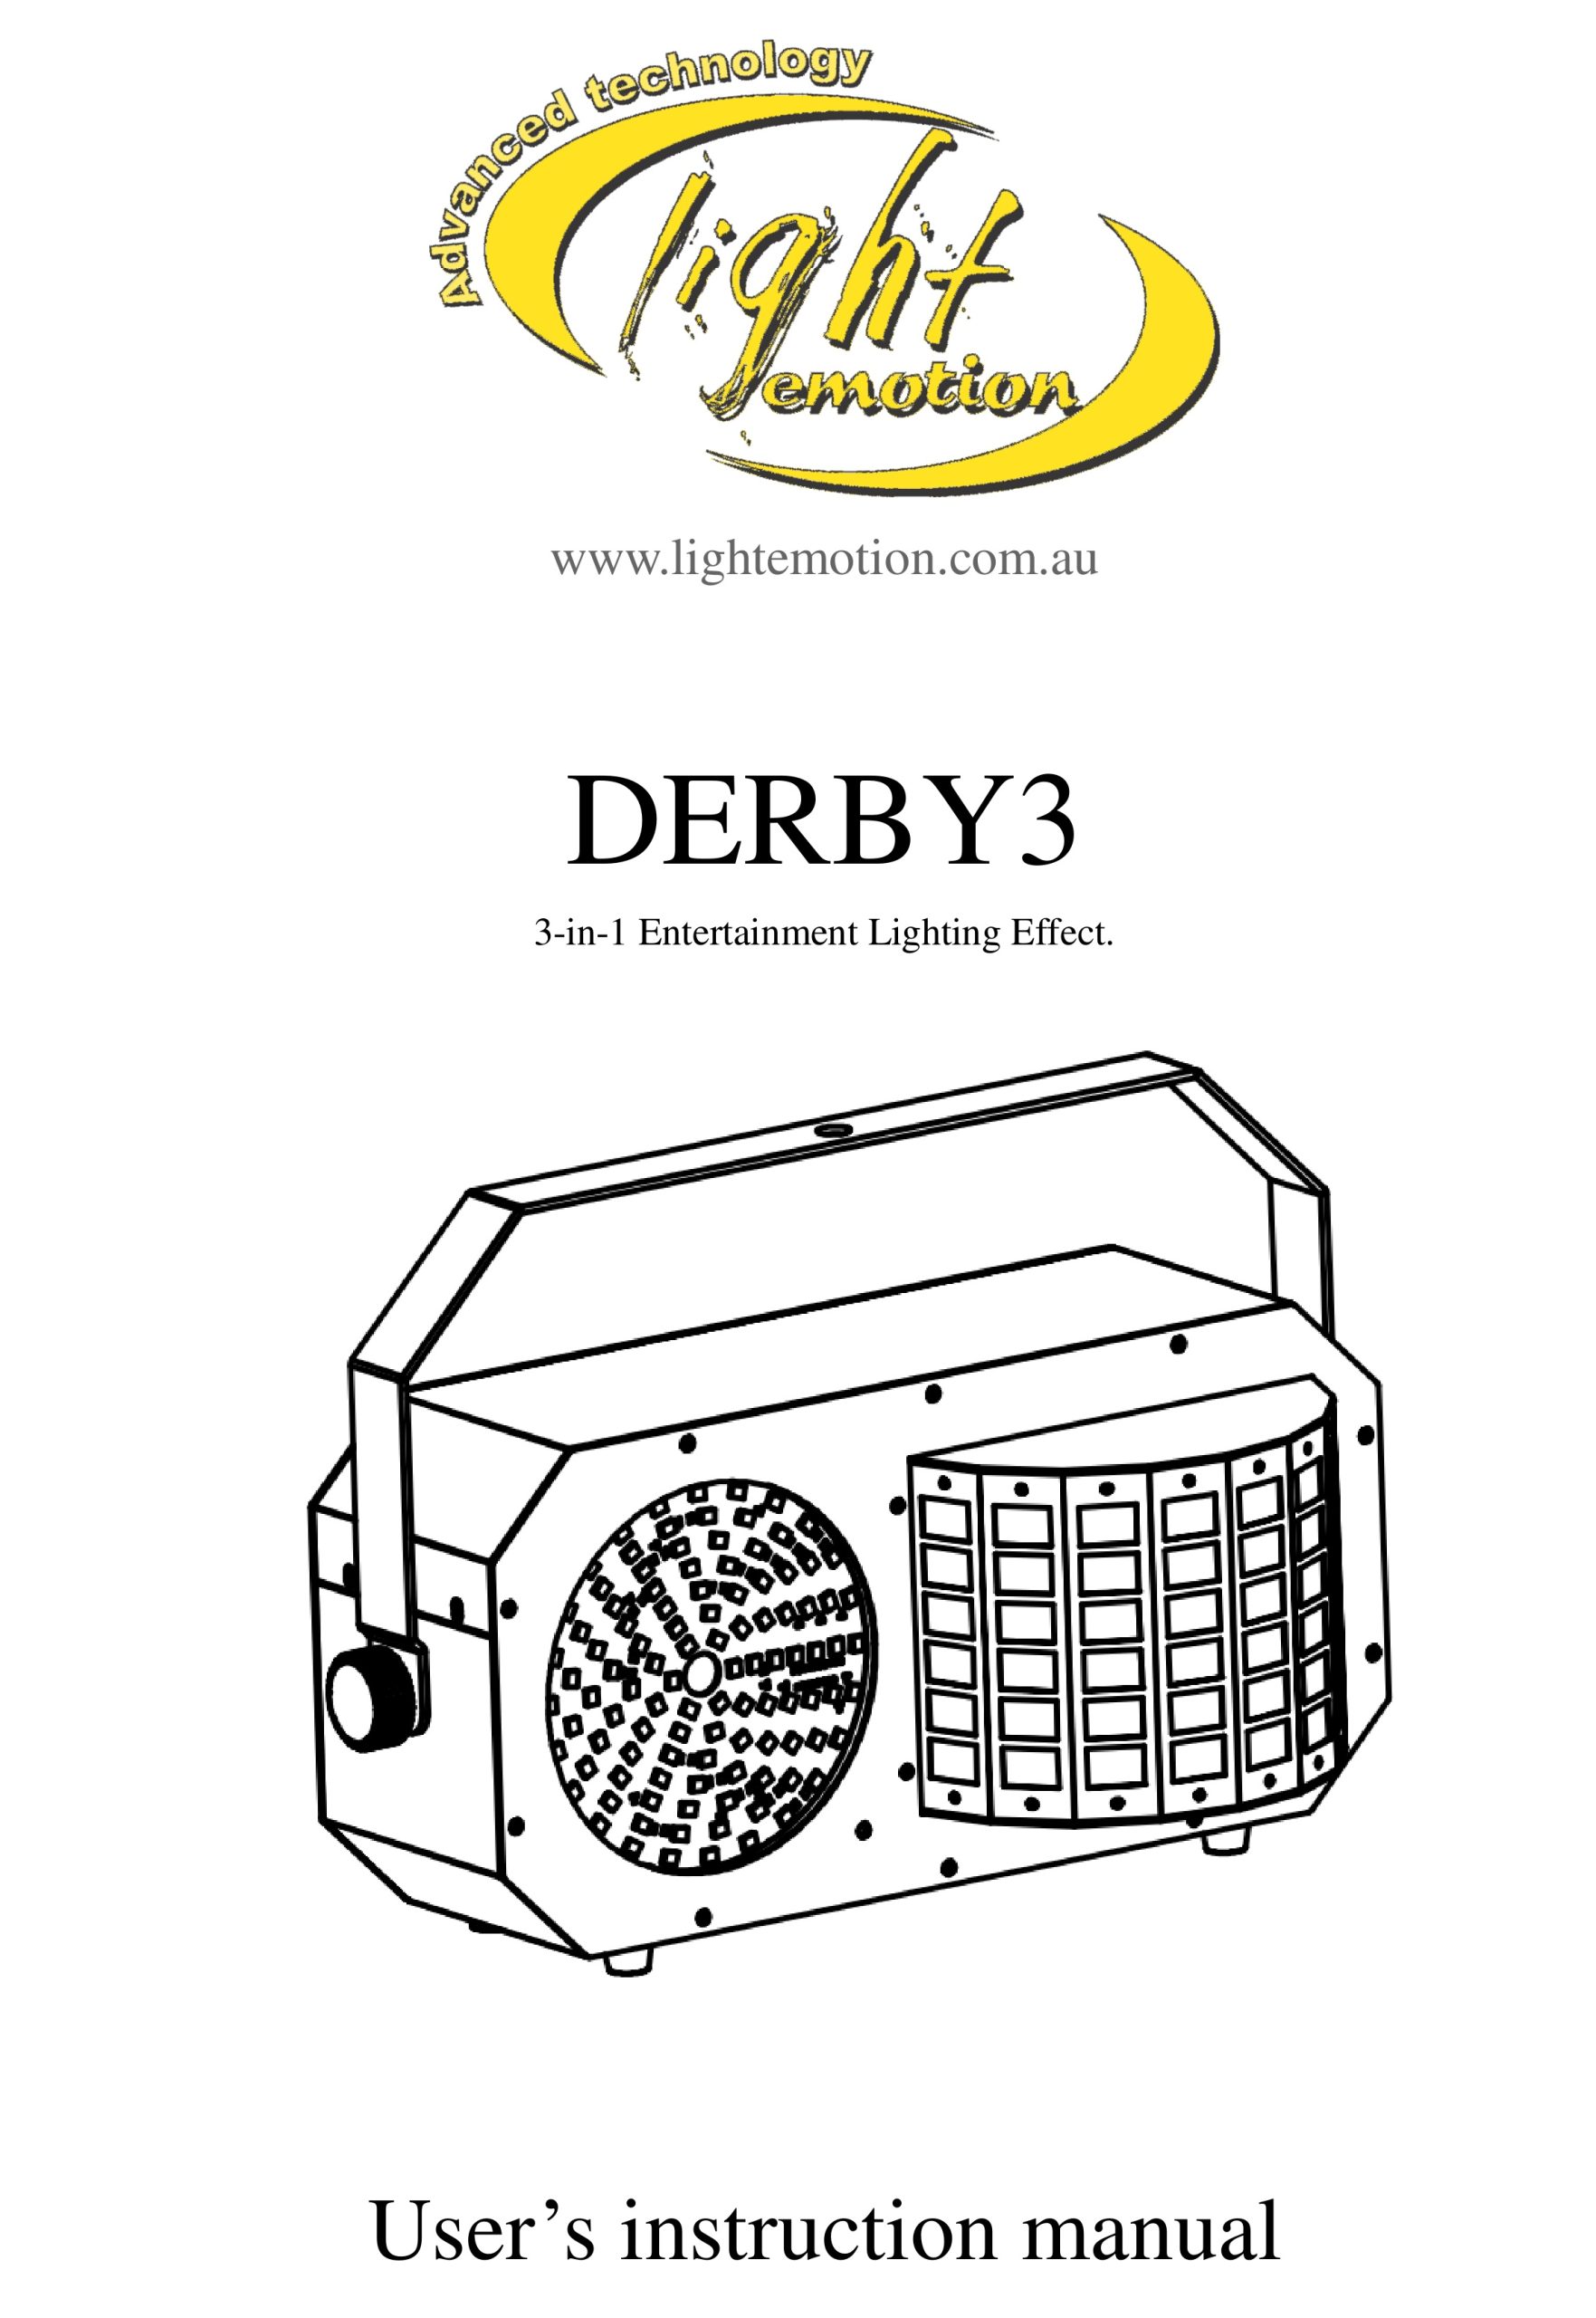
Light Emotion DERBY3 3-in-1 Entertainment Lighting Effect User Manual
Introduction
Thank you for the purchase of your DERBY3 3-in-1 Lighting Effect by Light Emotion. We are confident you will be satisfied with your purchase and enjoy many years of use from this Professional Light Emotion product. Please read these instructions carefully to ensure the product is well look after and used correctly to avoid any potential problems.Please note that as part of our ongoing commitment to continuous improvement and product development, the specifications in this manual are subject to change without notice. Whilst every care has been taken in the preparation of this manual we reserve the right to change specifications in the course of product improvement.
What is in the box:
– 1 x DERBY3 fixture– Power cable– Laser safety switch key– IR remote control– This user manual
Safety Instructions:
Please read these instructions carefully. It includes important information about the installation usage and maintenance of this product.
– Please keep this User Manual for future consultation. If you sell the unit to another user, be sure that they also receive this instruction booklet.– Always make sure that you are connecting to the proper voltage and that the line voltage you are connecting to is not higher than that stated on the sticker of the fixture.– This product is intended for indoor use only. To prevent risk of fire or shock, do not expose fixture to rain or moisture.– Make sure there are no flammable materials close to the unit while operating.– The unit must be installed in a location with adequate ventilation, at least 50cm from adjacent surface. Be sure that no ventilation slots are blocked.– Always disconnect from power source before servicing.– Secure fixture to stands, trussing and the like using a safety chain.– Maximum ambient temperature is 40˚C. Do not operate fixture at temperatures higher than this.– In the event of serious operating problem, stop using the unit immediately. Never try to repair the unit by yourself. Repairs carried out by unskilled people can lead to damage or malfunction. Please contact the nearest authorized technical assistance centre.– Make sure power cord is never crimped or damaged.– Never disconnect power cord by pulling or tugging on the cord.– Never carry the fixture directly from the cord. Carry by holding the unit directly or via the hanging bracket.– Avoid direct eye exposure to the light source while it is on
Installation:
Caution: For safe mounting of this product, please read the following carefully.– Use a suitable clamp to attach to lighting stand, trussing or bar, together with safety chain.– When mounting the product, do not stand directly underneath the product– Always use a safety chain when mounting the product on stands, trussing or bars. Make sure the breaking strain rating of the chain is at least 10 times the weight of the product.– Make sure there is adequate ventilation around the product.– Never look directly into the LED light or laser sources of the product.– For indoor use only – do not use outdoors.– To avoid electrical shock, keep away from rain and moisture.
Features
This product is designed as entertainment effect lighting fixture and is only intended to be used as an effect forentertainment and production applications. Due to our ongoing commitment to constantly reviewing and improving products, features and specifications are subject to change without prior notice.
It features a Derby effect, RGB mini laser which produces patterns and a unique 105 SMD LED panel round flood area that can be used for patterns, strobing and flood light applications. All three built-in effects can be controlled independently or used together to create interesting lighting effect shows. Like most lighting effects, the beams of the Derby in particular are enhanced in an environment where a smoke / fog or haze machine is used, but the use of an effects machine is not necessary for this light to provide a great and effective light show.
– Derby LED: 2 x 10w RGBW 4-in-1 10W LED– SMD LED Panel: 105 x 0.2W RGB 30-in-1 SMD LED– Laser: Red 100mW/650nm + Green 30mW/532nm + Blue 80mW 450nm– Control: Sound activated, auto, DMX, master/slave, IR remote control– DMX channels: 2 / 14 ch selectable profile– Power input: 100-240VAC, 50/60Hz.– Power consumption: 50W– DMX connections: 3 pin male and female XLR– Dimensions: 510 x 290 x 295mm– Weight: 6.5kg
Operation
Because this light features a laser, there is the mandatory key operated laser safety switch on the rear of the unit. This is independent of the power on/off switch. The laser will not operate until the safety switch is placed into the on position using the included key. All other functions of the product will work regardless, when the power switch is on.
The four button LED menu control on the rear of the product allows you to access all features of the product including how it is to be controlled.
LED Four Digit Display:

Using the four button LED menu control, press the menu button repeatedly until you reach your desired mode. You can also scroll though the modes using the up and down buttons. Press enter to access being able to vary the settings for that mode or feature. Using the up and down buttons, adjust to the desired setting, then press enter again to save your setting.
The following table shows each of the modes and the settings able to be varied in each mode:

Explanation of Menu items
Addr – DMX addressChMd – DMX profile 2 or 14 channel modeShNd – Built in show selectionSPEE – Speed setting for shows 1-7 if not sound activatedSLMD – Chose between master or slave modeSoUn – Sound activation on or offSoSe – Sets sound sensitivityNodM – Sets what the light does if there is loss of DMX signalLED – LED display on or off – When you chose off, the LED display will turn itself off after 10 seconds of not being used. Pressing mode turns on the LED display.Ver – shows the software version of the lightTEST – Test mode.
Notes:
– DMX takes priority over all other mode settings. If there is a DMX lead connected and a DMX signal received, the light will immediately be controlled by DMX.– After using the LED menu, hold down the menu button for 2 seconds for the light to resume normal operation. Otherwise normal operation will resume after 10 seconds (as in light effects output).
Infra Red remote control.

DMX Control
Using DMX you can control each of the three effects built into this light individually. You can also use DMX to call upon built in programs and shows. This fixture has 2 DMX profiles – 2 and 14 channels modes. The 14 channel mode allows individual control of all the effects while the 2 channel mode is a simpler way to control the light by DMX simply calling upon built in programs and features.
14 Channel DMX chart:


Note: In 14 channel mode, channel 1 needs to be set between 0 and 9 to be able to control the feature of the light individually. When channel 1 is set between 10 and 255, the light will perform one of the 7 inbuilt shows in accordance to what the DMX setting is on channel 1. Also note that channel 2, when channel 1 is set between 10 and 255 playing shows, controls sound activation and the speed of the shows
2 channel DMX Chart:

DMX-512 Control Connection
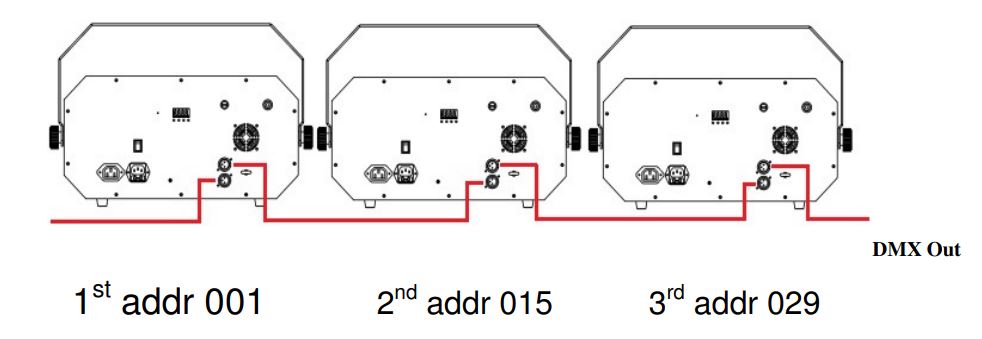
Using a 3 pin XLR cable, you can connect the product to a DMX controller and then to other fixtures with 3 pin XLR inputs and outputs. When not using DMX, multiple fixtures can be connected together and operate under master/slave control. The signal cable should have two core with shielded cable, the signal connectors are XLR input and output connectors. Please refer to the below diagram:

DMX Address Setting
When being used in conjunction with a DMX controller, each fixture must be set a specific starting address. When receiving signal, fixture will receive channel control signals of this address from the DMX controller.For simplicity, the user can use the same address for multiple fixtures but this will result in each fixture providing exactly the same output and fixtures with the same DMX address cannot be individually controlled.To control each fixture individually via DMX, each fixture must have its own unique DMX address. If this fixture is in 14 channel DMX mode then each address must be 14 channels apart. For example, if the first unit is on DMX channel 1, the 2nd must be on DMX channel 15, the 3rd on channel 29 and so on.Similarly, for 2 channel DMX mode, the DMX channels would be 1,3,5,7 and so on.Some DMX controllers may group fixtures in lots of 16 channels – so in that case, fixture 1 on channel 1, fixture 2 on channel 17, 3 on 33, and so on. Refer to your DMX controllers’ instruction manual on how best to manage your DMX channel allocation.
DMX-512 connection with DMX terminator
A DMX terminator helps to reduce ‘noise’ on the DMX chain, and makes the light respond to control more accurately. It should be plugged in to the last fixture in any chain. For Terminator connections please see below:

Cleaning and Maintenance
From time to time it is recommended the product is cleaned to ensure maximum light output and performance. Use a wet cloth to clean the housing as well as the lenses. Please note that alcohol based cleaners and solvents cannot be used as they will cause damage to the product.
When used in a fixed long term installation such as a venue or club, the unit should be periodically taken down from the installation and professionally cleaned. Dust build-up within the unit can cause damage and ultimately failure of components.
Technical Data
– Derby LED: 2 x 10w RGBW 4-in-1 10W LED– SMD LED Panel: 105 x 0.2W RGB 30-in-1 SMD LED– Laser: Red 100mW/650nm + Green 30mW/532nm + Blue 80mW 450nm– Control: Sound activated, auto, DMX, master/slave, IR remote control– DMX channels: 2 / 14 ch selectable profile– Power input: 100-240VAC, 50/60Hz.– Power consumption: 50W– DMX connections: 3 pin male and female XLR– Working temperature 10-40 degrees C– Fuse 5x20mm 250VAC T2A– Dimensions: 510 x 290 x 295mm– Weight: 6.5kg
Warranty
This product is warranted for 2 years from your purchase date. We are confident that this product will give many years of trouble-free operation but should an unlikely problem arise, warranty claims must be via the original place of purchase, together with the original purchase receipt. Please keep both your original purchase receipt and this instruction manual together and in a safe place for future reference. Should the product be sold within the warranty period, be sure to pass on both to the new purchaser so they are able to claim warranty should they need to. We recommend you register your warranty online at
 report this ad
Purchased from:_________________________________________Contact Details:_________________________________________Date Purchased:_________________________________________Invoice/Receipt Number:__________________________________
Copyright Light Emotion 2017. E&OEExclusively imported by LSW Imports and DistributionPO Box 887, Kingsgrove, NSW, 2208[email protected]www.lightemotion.com.au1800 643 111 (within Australia)+612 9718 4900 (outside of Australia)
References
[xyz-ips snippet=”download-snippet”]