![]()
21.5″ Live StreamQuad Split Multiview MonitorFHD Display with HDMI, 3G-SDI, USB Type-C InterfacesUser Manual
 |
 |
MULTIVIEW LIVE STREAMING MONITOR
Introduction
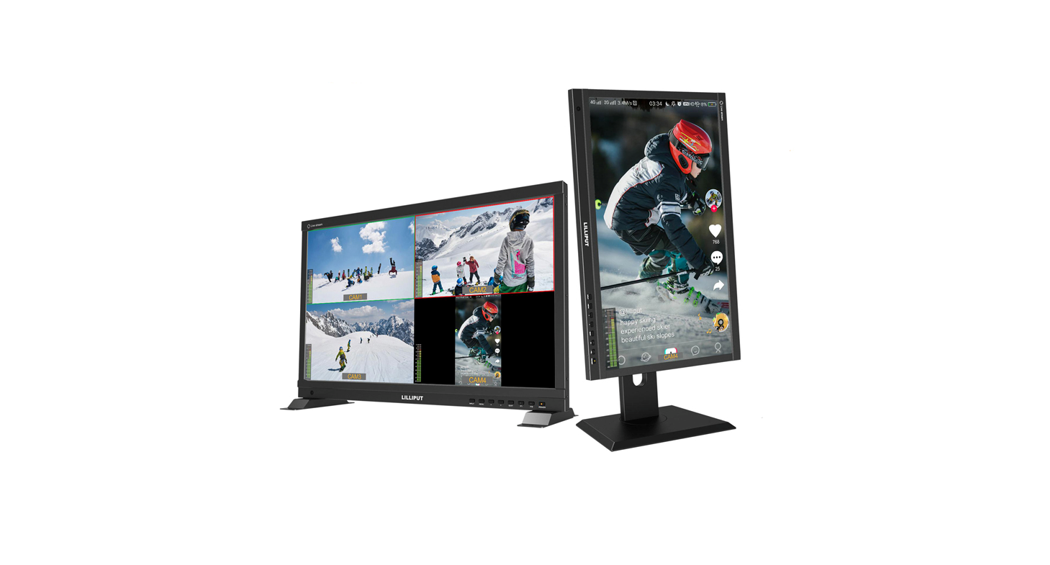
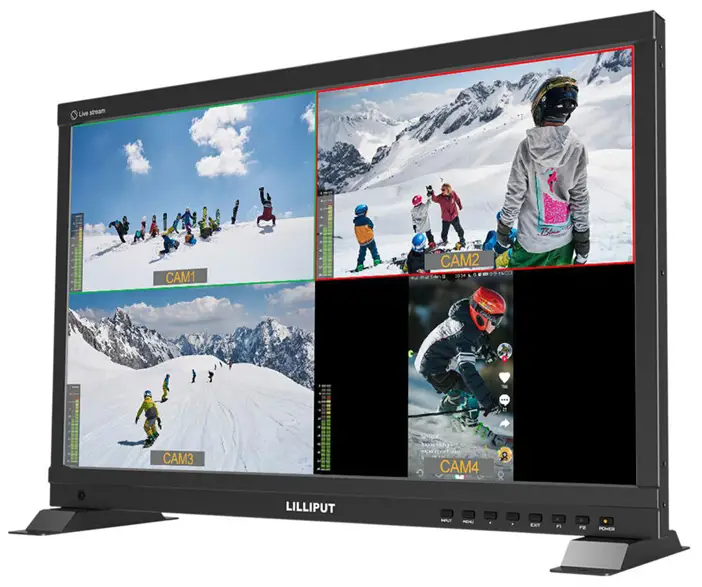
The 21.5 inches Full HD live streaming multiview monitor can be switched live up to 4 1080P high-quality video signal inputs, which make it easy to create professional multi-camera events for live streaming. At a time when live streaming in mobile phones is popular, monitor innovatively built-in phone mode so as to directly display a vertical video in multi-camera. All-in-one capability greatly reduces the cost of productions.
Features
- 21.5 inch 1920×1080 physical resolution
- 500cd/m² brightness, 1500:1 contrast
- Supports multiple video signal input:3G-SDI*2、HDMI*2、USB TYPE-C
- Supports PGM (SDI/HDMI) output
- Supports HDMI and SDI signal cross-conversion (Output 1080p60/50/30/25/24 through PGM) Automatic backlight adjustment
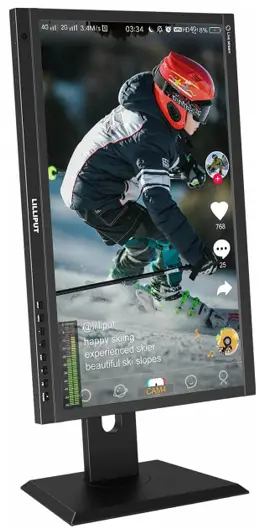
- Supports vertical display: Camera Mode and Phone Mode
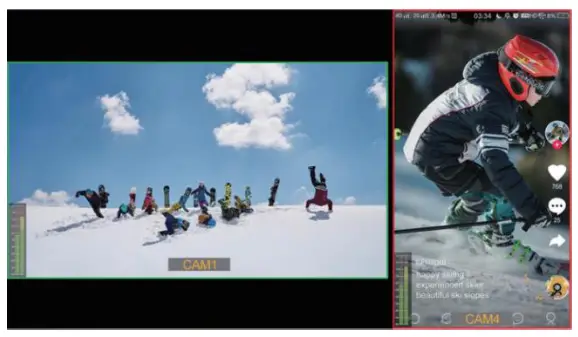
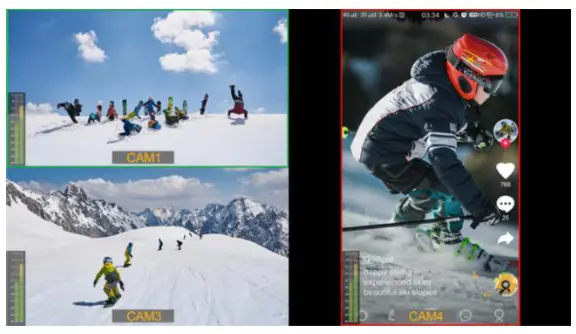
- Supports multiview display: Full screen/Vertical/Dual-1/Dual-2/Triple/Quad
- Supports level meter for multiview
- Supports UMD editing
- PVW and PGM video signals can be switched at a shortcut
- Color temperature (6500K, 7500K, 9300K, User)
- Camera assist functions, for example, peaking, false color, exposure, histogram, etc.
- Supports VESA 100mm and 75mm optional bracket with swivel and load-bearing action
- Applications: Mobile phone live, multi-camera live, broadcast, TV, film, and video switching
Product Description
1.1 Front Panel and Buttons
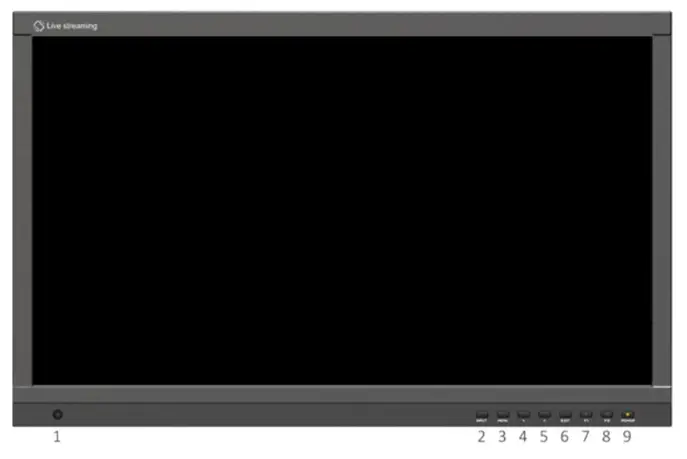 1) A window for brightness sensing2) INPUT: Signal switching sequence: SDI 1, SDI 2, HDMI 1, HDMI 2, USB Type-C.Note! INPUT is available only in Full Screen or Vertical mode3) MENU: Bring up the menu or confirm the options4) ◁ : Select an option in the menu. Decrease the option value5) ▷ : Select an option in the menu. Increase the option value6) EXIT: To return or exit the menu function7, 8) User-definable function button, default as• F1: Multiview Mode• F2: PGM Cut9) Power: Power on/off (green light for on, red light for off.
1.2 Rear Enclosure and Interfaces
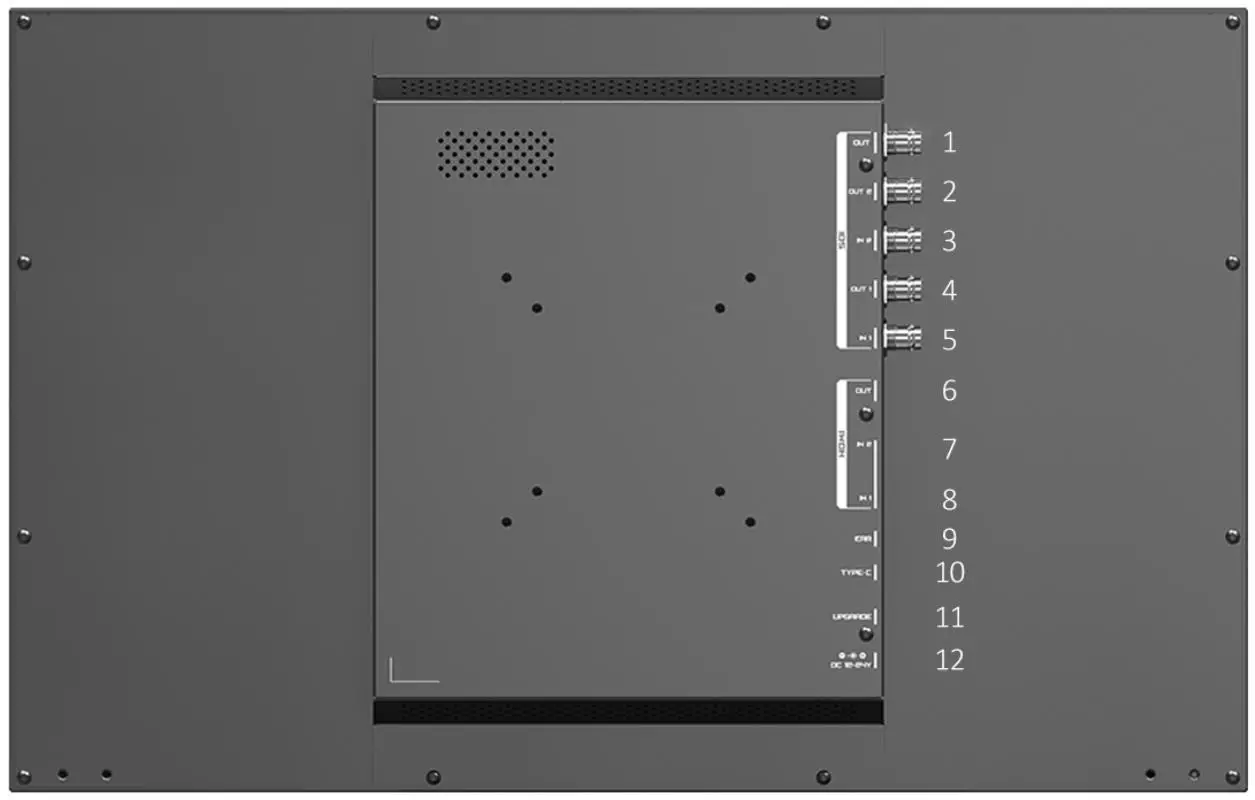
1) 3G-SDI output interface (PGM output)2) 3G-SDI 2 loop output interface3) 3G-SDI 2 input interface4) 3G-SDI 1 loop output interface5) 3G-SDI 1 input interface6) HDMI output interface (PGM output)7) HDMI 2 input interface8) HDMI 1 input interface9) 3.5mm Ear Jack10) USB TYPE-C input interface11) Upgrade port12) Power input: DC 12-24V
1.3 Supported Installations
• VESA mount bracketMounting through standard VESA 75mm/100mm holes on the back of the monitor:
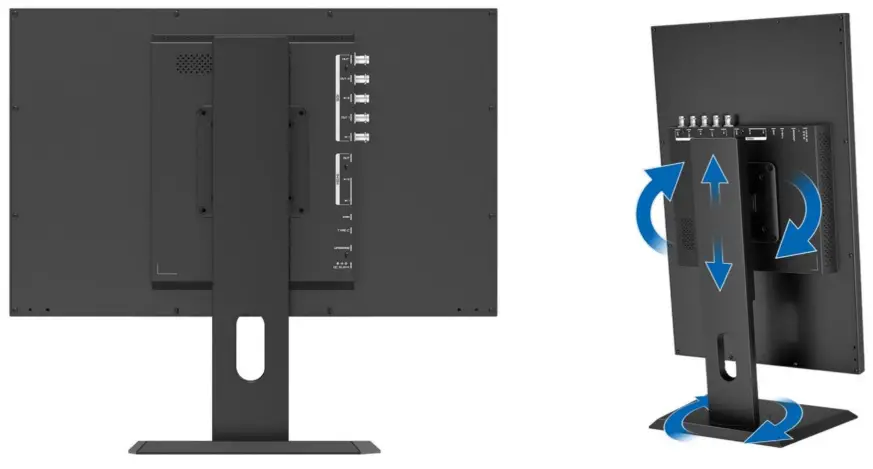
(The bracket is an optional part and supports multi-angle rotation and height adjustment)• Base stand bracketMounting through the screw holes left in the bottom of the monitor:
2. Menu Settings2.1 User-definable Function ButtonsPress either F1, F2 for 3-5 seconds to bring up the function setting. Press [▷] or [◁] to select the desired option; Press [MENU] to confirm the option and set it as a shortcut function. Press [EXIT] to close the function setting.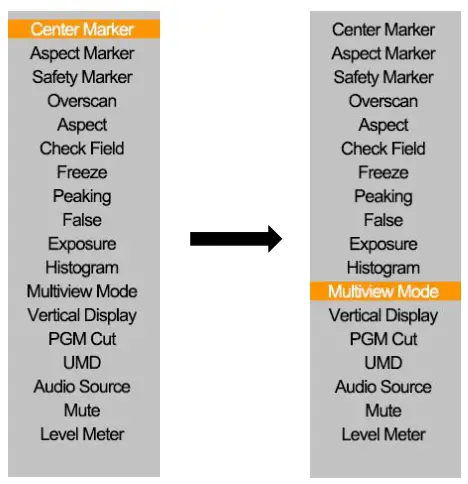
User settable function buttons to suit individual needs: Center Marker, Aspect Marker, Safety Marker, overscan, Aspect Ratio, Check Field, Freeze, Peaking, False Color, Exposure, Histogram, Multiview Mode, Vertical Display, PGM Cut, UMD, Audio Source, Mute, Level Meter.Note! F1 default: [Multiview Mode], F2 default: [PGM Cut], [PGM Cut] is only available in shortcut function 2.2 MENU and ▷ / ◁ Buttons• Turn on the power, press [MENU] to display the OSD; Press [▷] or [◁] to select between Information, Multiview, UMD, Picture, Marker, Further sub-menu.• The [▷] or [◁] buttons allow to switch or adjust the options and values in the menu, press [MENU] toconfirm or [EXIT] to exit.• When the OSD is not displayed, press the [▷] or [◁] button to adjust the volume. Press [MENU] again to switch between Volume, Brightness, Contrast, Saturation, Tint, Sharpness, and Exit in that order. Select the desired option and adjust the value of the option switched to by using [▷] or [◁]. nction, Audio, and System; Press [MENU] again after selection to enter
2.3 Menu Operation2.3.1 Information
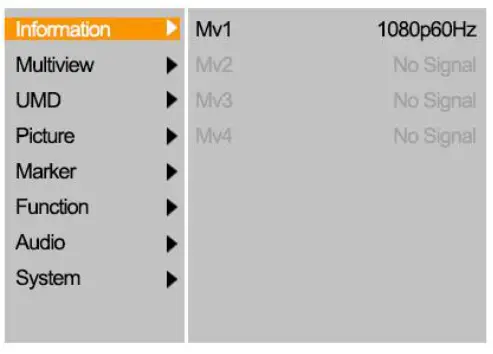 (Showing the resolution and fresh rate of each video signal)
• 3G-SDI supported signal formats: 1080p60/59.94/50/30/29.97/25/24/23.98; 1080i60/59.94/50; 720p 60/59.94/50; Backwards compatible with other formats.• HDMI supported signal formats: 1080p60/59.94/50/30/29.97/25/24/23.98; 1080i60/59.94/50; 720p 60/59.94/50; Backwards compatible with other formats.• USB Type-C supported signal formats: 1080p60/59.94/50/30/29.97/25/24/23.98; 1080i60/59.94/50; 720p 60/59.94/50; Backwards compatible with other formats.
2.3.2 MultiviewTo set the multiview mode, preset values for the input signal, and switch between different signals.
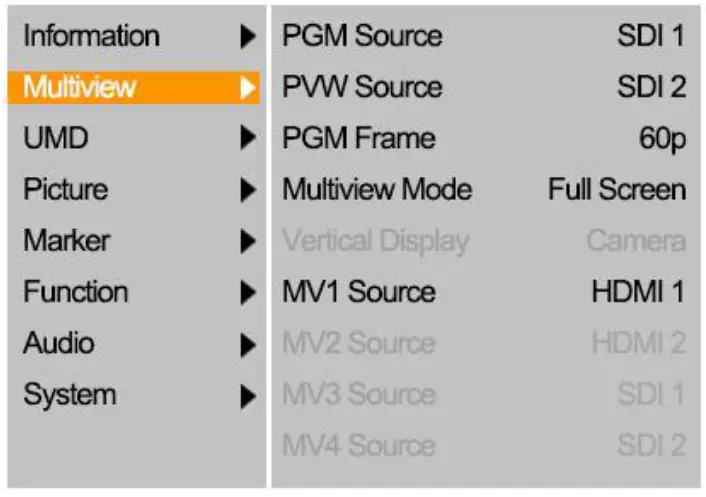 • PGM source: default value is SDI1/SDI2/HDMI1/HDMI2/TYPE-C, select the source for PGM output.• PVW source: default value is SDI1/SDI2/HDMI1/HDMI2/TYPE-C, select PVW preview signal source, through the [PGM Cut] function can realize the PGM source and PVW source signal switch each other.
Note! The PGM source is marked with a red frame and PVW source is marked with a green frame
• PGM Frame: default is 60p/50p/30p/25p/24p, select the source frame rate for PGM output• Multiview Mode:
 |
 |
| Full Screen (Horizontal screen) | Vertical (Vertical screen) |
|
|
|
|
|
|
 Dual-1
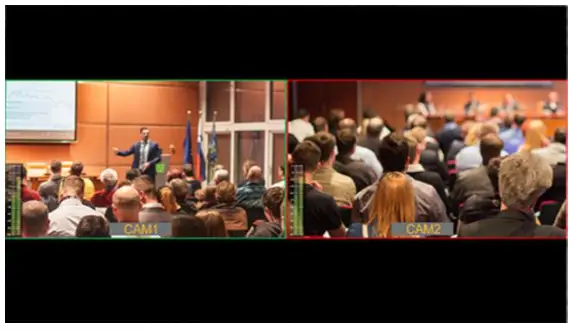
 Triple
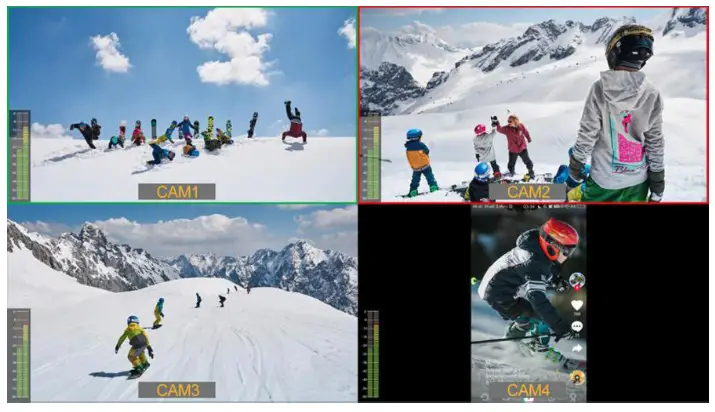 Quad
Quad- Vertical Display: default is Camera/Phone. In phone mode, the vertical phone signal from USB Type-Coutput can be displayed in full screen.
- MV1 source selectable from SDI1/SDI2/HDMI1/HDMI2/TYPE-C, default is SDI1.
- MV2 source selectable from SDI1/SDI2/HDMI1/HDMI2/TYPE-C, default is SDI2.
- MV3 source selectable from SDI1/SDI2/HDMI1/HDMI2/TYPE-C, default is HDMI1.
- MV4 source selectable from SDI1/SDI2/HDMI1/HDMI2/TYPE-C, default is HDMI2.
 (Multiview signal source sequencing)
2.3.3 UMD

• Select to turn UMD on or off. When turn on, each source will display the selected UMD information, the UMD font color can be changed from white/red/green/blue/yellow/cyan/magenta, default is green.
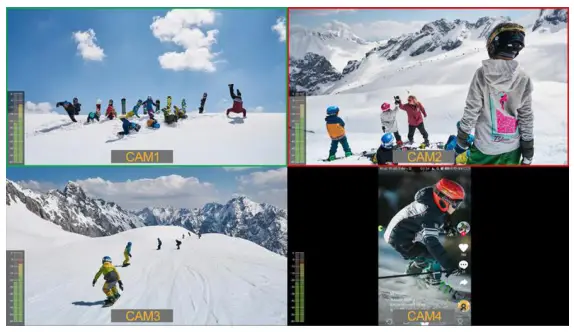 (Current demo UMD color is yellow, characters are typed as CAM1~4)
Character Editing Method.:Select [SDI1], press [MENU] to switch the character object; Press [▷] or [◁] to change the current character; Long press [MENU] to add a new character after the current character object, maximum support 16 characters; Long press [EXIT] to delete the current character.
2.3.4 Picture
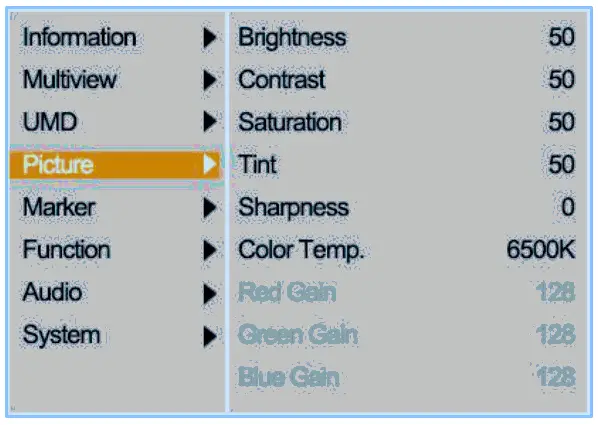
- Brightness selectable from 0 to 100
- Contrast selectable from 0 to 100
- Saturation selectable from 0 to 100
- Tint selectable from 0 to 100
- Sharpness selectable from 0 to 100
- Color TemperatureAdjustable color temperature level: 6500K, 7500K, 9300K, User.
Note! User can only adjust the gain or offset values for red, green, and blue in “User” mode– Red, Green, and Blue Gain Adjustment range 0-255, the default value is 128.– Red, Green, and Blue Offset Adjustment range 0-511, the default value is 255.
2.3.5 Marker
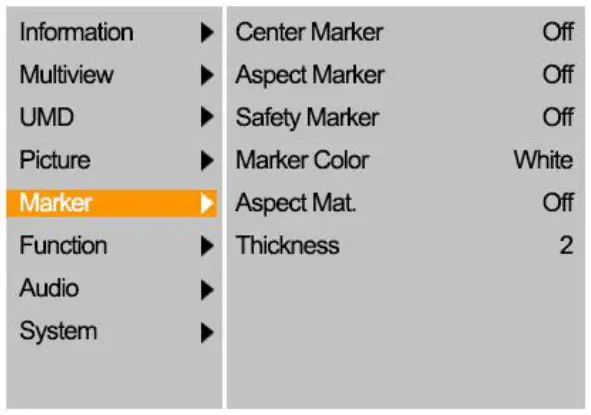
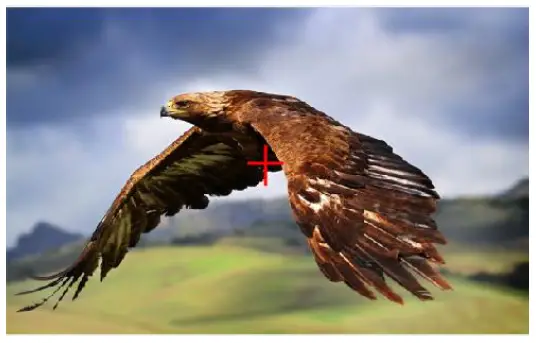
• Center MarkerSelect On, it will appear “+” marker on the center of the screen.
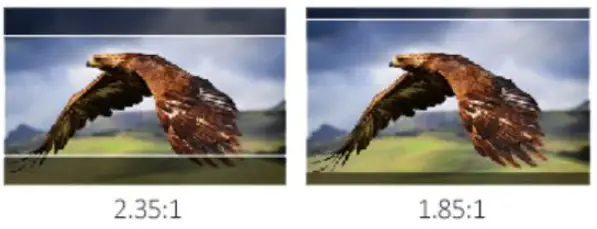
• Aspect MarkerThe Aspect Marker provides various aspect ratios.Selectable from: 16:9/1.85:1/2.35:1/4:3/3:2/1.3X/2.0X/2.0X MAG
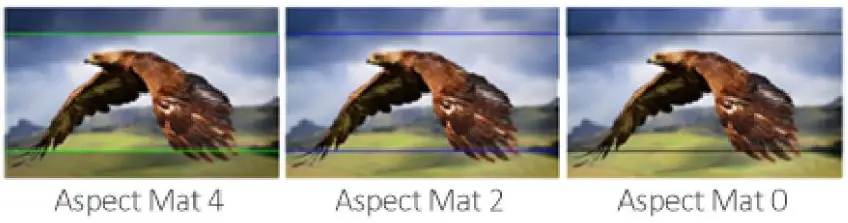
 • Safety MakrerUsed to select and control the size and availability of the safety area.Available type are: 95%/93%/90%/88%/85%/80%. Default is Off.• Marker ColorThe colors for Center Marker, Aspect Marker, and Safety Marker are available in red, green, blue, white, andblack. Default is white.• Aspect Mat.Aspect Mat darkens the area of the outside of Marker. The degrees of darkness is between [0] to [7].
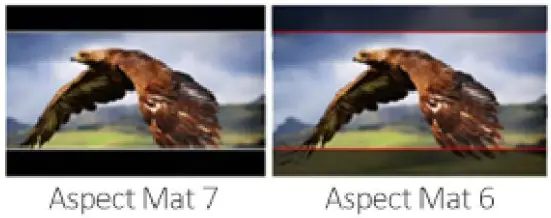
• ThicknessThickness of the marker line is selectable from 1 to 7, the default value is 2.Note! The Marker function is not available in Multiview Mode2.3.6 Function
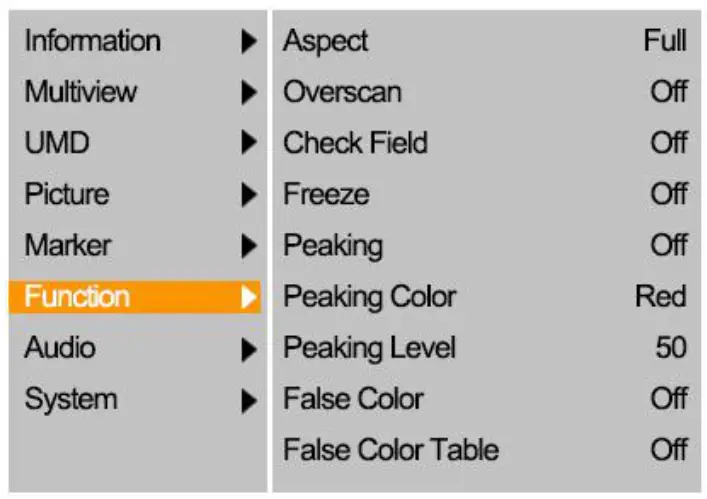
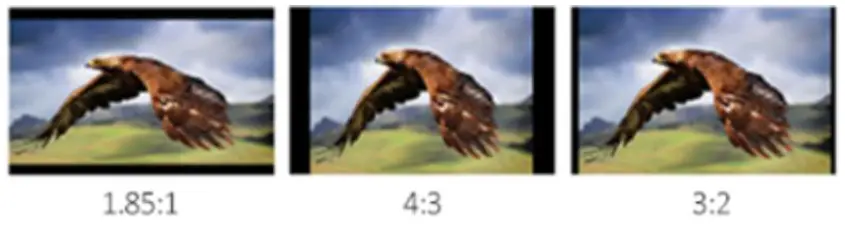
• AspectSelect display ratio: Full/1.85:1/2.35:1/4:3/3:2/1.3X/2.0X/2.0X MAG. Default is Full.Note! The Aspect is not available in Multiview Mode

• OverscanSome edges of the image may be clipped after turning on the overscan. Default is Off.Note! The Overscan is not available in Multiview Mode
• Check FieldUsed to calibrate or analyze the accuracy of the screen color when Check Field is switched on. Selectable:Off/Red/Green/Blue/Mono. Default is Off.• FreezeTurn on to capture and display a frame of the current signal at any time. Default is Off.• PeakingUsed to assist in tracking the focus of the subject. Default is Off.• Peaking ColorAvailable colors: red/green/blue/white/black. Default is red.• Peaking LevelUse this setting to adjust the level of focus sensitivity from [0]-[100]. If there are plenty of details of the image with high contrast, it will display lots of focus assist lines that may cause visual interference. So, decrease the value of peaking level to reduce the focus lines to see clearly. Conversely, if the image has fewer details with low contrast, it should increase the value of the peaking level to see the focus lines clearly.
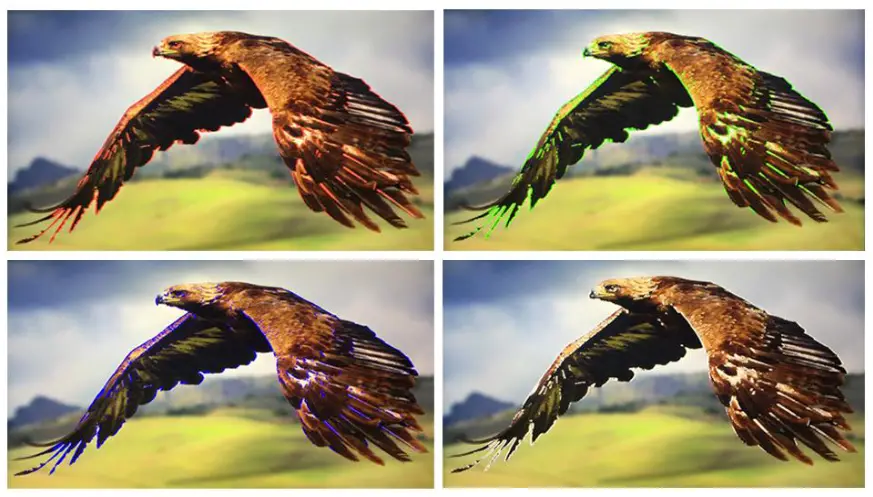
• False ColorThis monitor has a false-color filter to aid in the setting of camera exposure. As the camera Iris is adjusted, elements of the image will change color based on the luminance or brightness values. This enables proper exposure to be achieved without the use of costly, complicated external equipment. Selectable from: Off/Spectrum/ARRI/RED/Default. Default is Off.

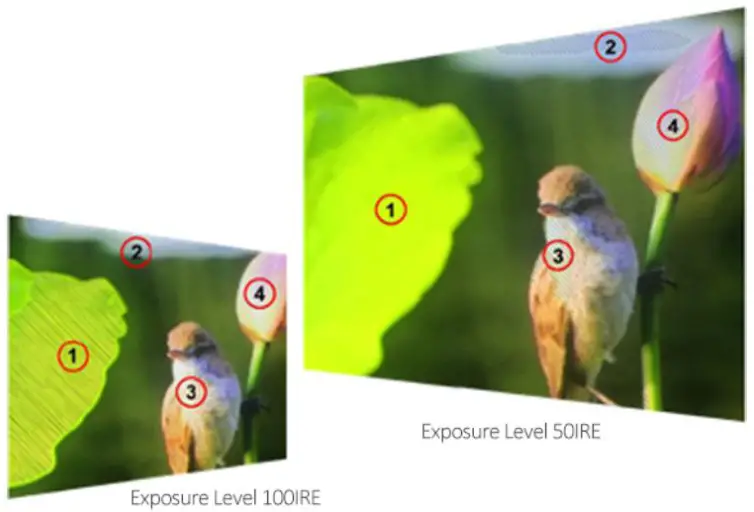
• False Color TableTurn on or off False Color reference tables.• ExposureThe exposure feature helps the user achieve optimum exposure by displaying diagonal lines over areas ofthe image that exceeds the set exposure level.• Exposure LevelThe Exposure Level can be set from 50 to 100IRE. Default is 100IRE.
• HistogramThe horizontal axis of the histogram represents the luminance, from left to right indicating low to high luminance. The vertical axis of the histogram indicates the number of pixels, from bottom to top indicating the number of pixels from less to more. The higher the histogram bumps in a certain luminance range, the more pixels there are in that luminance range. For example, if the histogram’s bumps are mainly on the left side, this means that the overall brightness of the image is low; if it is on the right side, the overall brightness is high; if it is in the middle, the brightness is comfortable.
 (Actual distribution is white, black for demonstration reference)
2.3.7 Audio
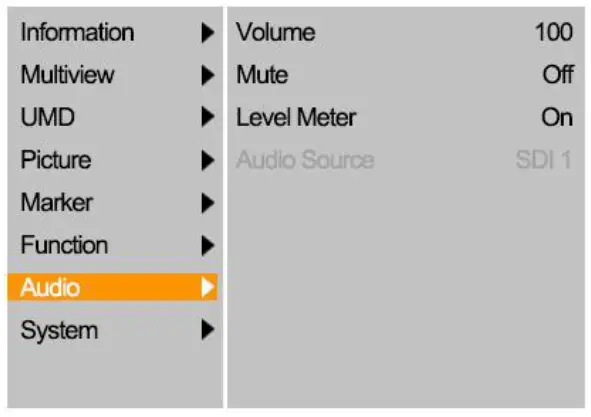 • Volume
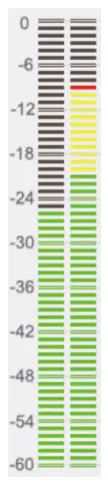 Adjusts the volume of built-in speaker and headphone, selectable range: 0-100. Default is 50.• MuteDisable any sound output when turning it off.• Level MeterTo achieve optimum audio quality, ensure the audio levels do not reach 0. This is the maximum level, meaning that any audio that exceeds this level will be clipped, resulting in distortion. Ideally, peak audio levels should fall in the upper end of the green zone. If the peaks enter into the yellow or red zones, the audio is in danger of clipping.• Audio SourceSelectable range: SDI1/SDI2/HDMI1/HDMI2/TYPE-C, Full Screen or Vertical mode default to the current audio source, Multiview mode defaults to SDI1
2.3.8 System
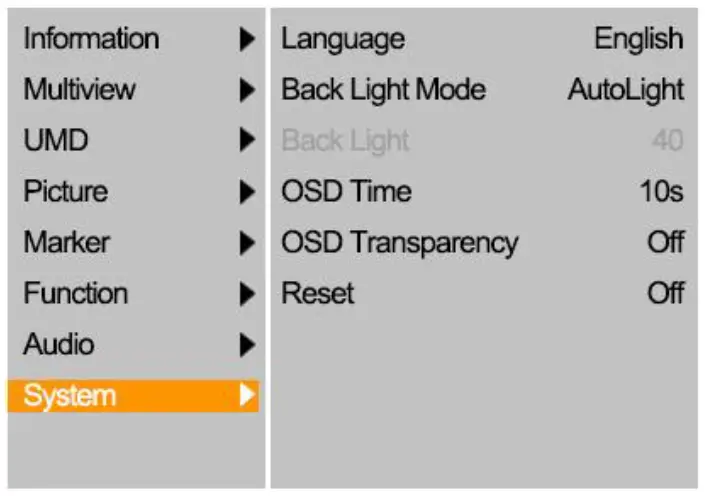
• LanguageAvailable in both Chinese and English.• Back Light ModeOptional: Custom/AutoLightAutoLight mode allows the backlight value to be adjusted automatically according to the ambient brightness.Manual adjustment of the backlight value in Custom mode• Back LightAdjusts the level of the backlight from 0-100. Default is 100.• OSD TimerSelect the displaying time of the OSD. It has 10s, 20s, 30s preset to choose.• OSD TransparencySelect the transparency of the OSD from Off, 25% to 50%.• ResetIf there is any problem unknown, press to confirm after selecting. The monitor will return to default settings.
Specifications
| DISPLAY | |
| Panel | 21.5″ |
| Physical resolution | 1920×1080 |
| Aspect | 16:9 |
| Brightness | 500 nit |
| Contrast | 1500:1 |
| Viewing Angle | 170°/170° (H/V) |
| VIDEO INPUT | |
| SDI | 1080p 60/59.94/50/30/29.97/25/24/23.98; 1080i 60/59.94/50; 720p
60/59.94/50…Backward compatible with other signals |
| HDMI | 1080p 60/59.94/50/30/29.97/25/24/23.98; 1080i 60/59.94/50; 720p
60/59.94/50…Backward compatible with other signals |
| USB Type-C | 1080p 60/59.94/50/30/29.97/25/24/23.98; 1080i 60/59.94/50; 720p
60/59.94/50…Backward compatible with other signals |
| VIDEO OUTPUT | |
| PGM SDI | 1080p 60/50/30/25/24 |
| PGM HDMI | 1080p 60/50/30/25/24 |
| AUDIO IN/OUT | |
| SDI | 2ch 48kHz 24-bit |
| HDMI | 2ch 24-bit |
| Ear Jack | 3.5mm |
| Speaker | 1 |
| POWER | |
| Input Voltage | DC 12-24V |
| Power Consumption | ≤33W (15V) |
| ENVIRONMENT | |
| Operating Temp. | -20°C~60°C |
| Storage Temp. | -30°C~70°C |
| OTHERS | |
| Dimension (LWD) | 508mm×321mm×47mm |
| Weight | 5.39kg |
Accessories
Standard Accessories
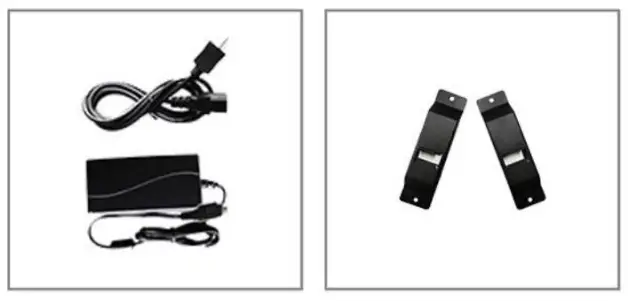
1) DC 15V Power Adapter2) Base Stand3) USB Type-C Cable4) Electronic User Manual
 1 pair1 pair1 pc1 pc
Optional Accessories
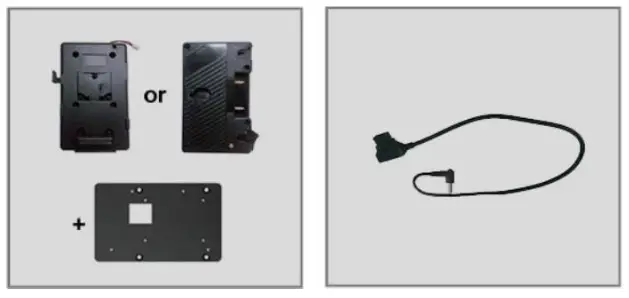
1) V-mount or Anton Bauer Battery Plate2) D-tap Cable3) Swivel Bracket4) Suitcase (Sunshade, frame brackets are included)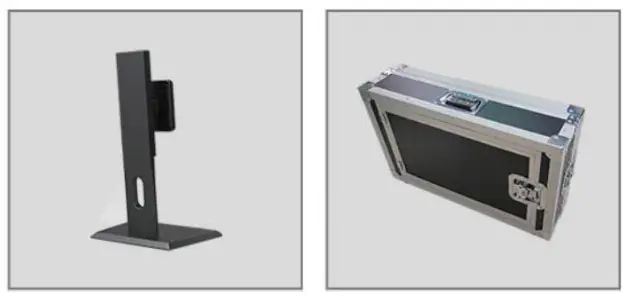 1 pc1 pc1 pc1 pc
Trouble Shooting
- Only black-and-white display:Check whether the color saturation and check field are properly set up or not.
- Power on but no pictures:Check whether the cables of HDMI and 3G-SDI are correctly connected or not. Please use the standard power adapter coming with the product package. Improper power input may cause damage.
- Wrong or abnormal colors:Check whether the cables are correctly and properly connected or not. Broken or loose pins of the cablesmay cause a bad connection.
- When on the picture shows size error:Press [MENU] → [Function] → [Overscan] to zoom in picture automatically.
- Other problems:Please try to press Menu button and choose [MENU] → [System] → [Reset] → [ON].
- Image Ghosting:If the same image or text continues to be displayed on the screen for an extended period of time, part of that image or text may burn into the screen and leave a ghost image, which is not a quality issue but a characteristic of some screens. It is simply a matter of turning the monitor off for a half hour to recover. Therefore no warranty/return/replacement will be made in this case.
- Some options can not be selected in the Menu:Some options are only available in certain modes, for example, the Center Marker function can only be used in full screen.
- Not working properly:If there is a problem that cannot be solved, please contact the relevant sales for after-sales service and leave the serial number to make it easier to locate the components so that the problem can be dealt with more quickly. The serial number is located on the back of the monitor under the barcode.
 report this ad
Note: Due to constant effort to improve products and product features, specifications may change without priority notice.
[xyz-ips snippet=”download-snippet”]