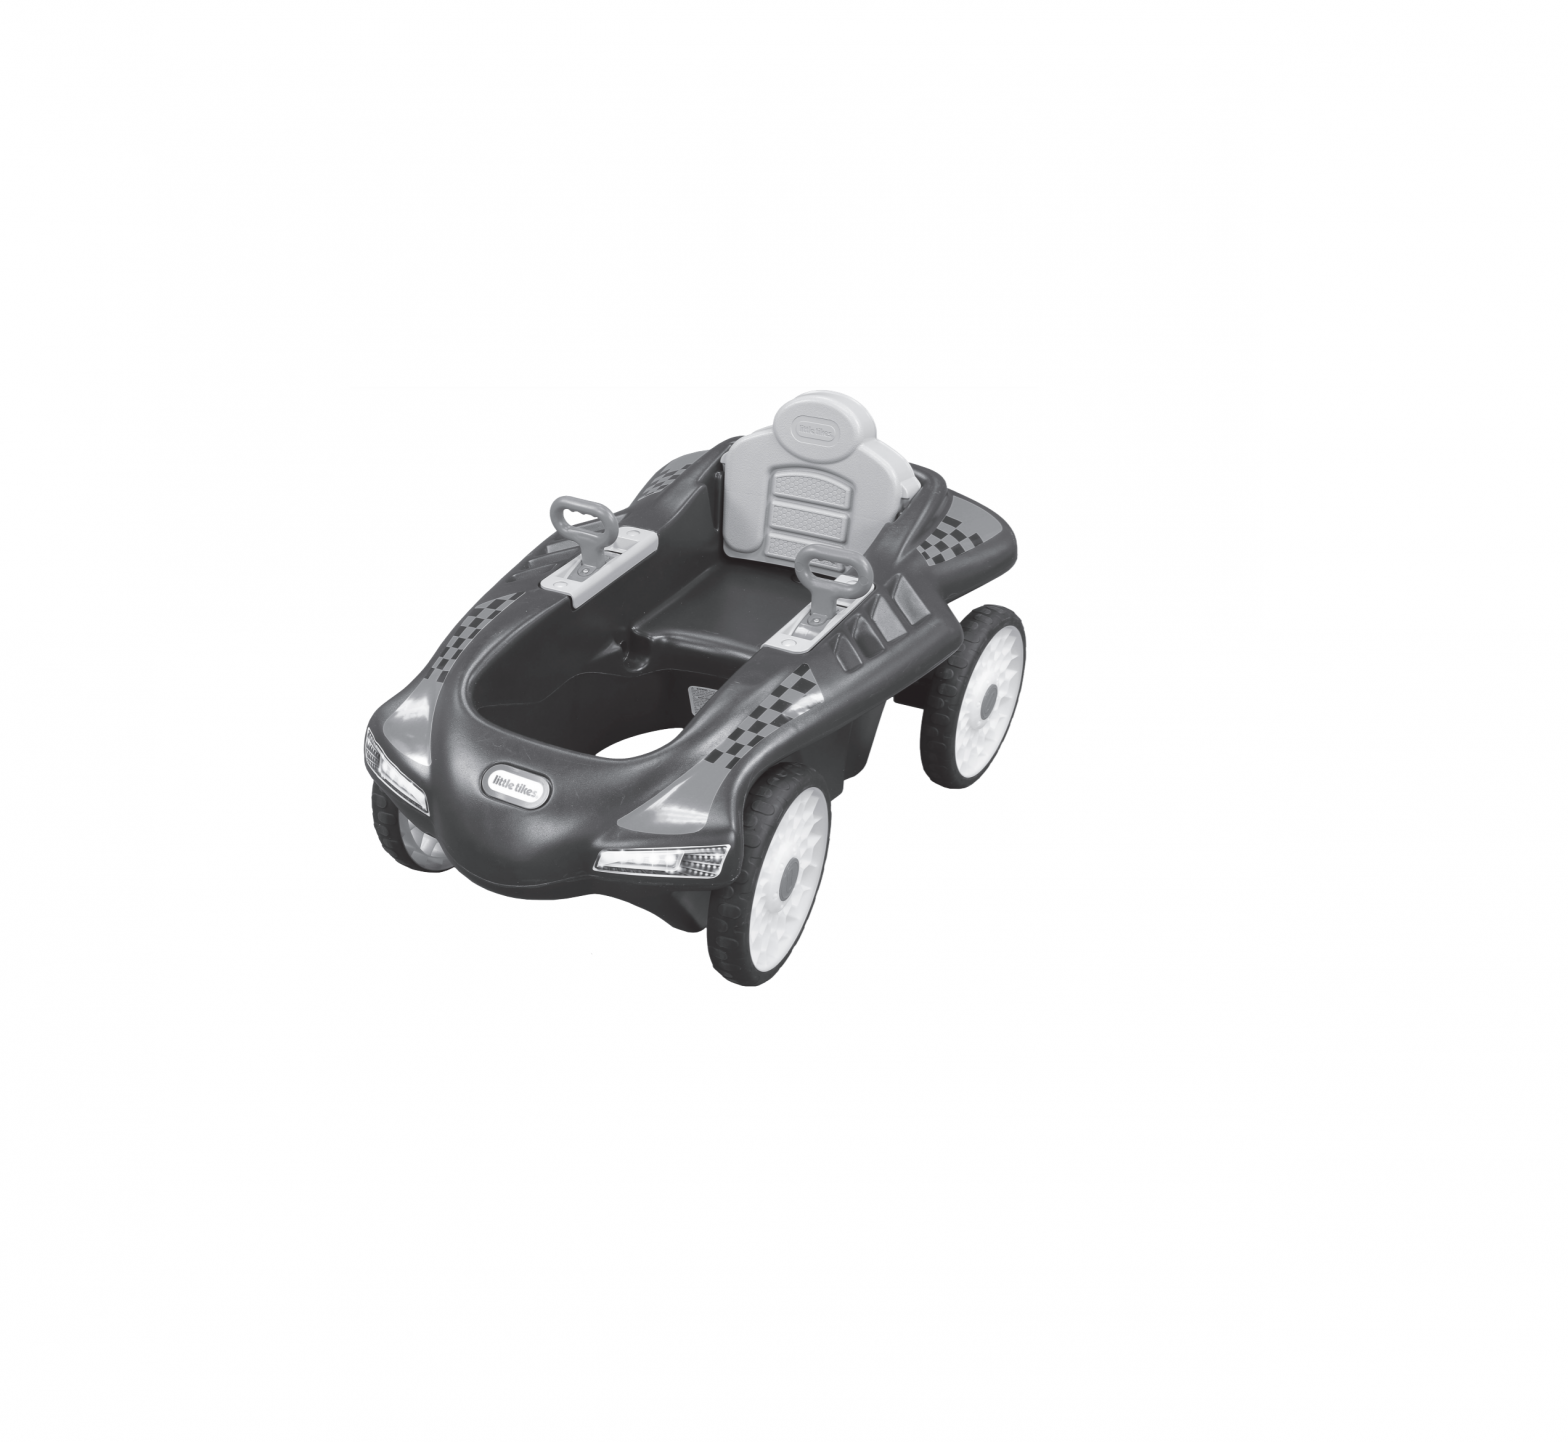
little tikes Jett Car Racer
| Thank you for choosing the Little Tikes© Jett Car Racer™.We strive to provide a durable, easy-to-assemble toy thats made to last, giving your child years of imaginative, engaging fun! |
Really important information you should know!
- Read through all the instructions first.
- Clear a flat surface to lay out all the materials so everything is close at hand.
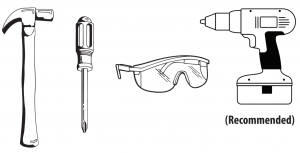
- You will need a Phillips head screwdriver (power driver, recommended, not included) hammer and safety glasses (not included) to assemble the Jett Car Racer™.– When installing screws, be sure screws are tightened snugly, but do NOT OVERTIGHTEN.
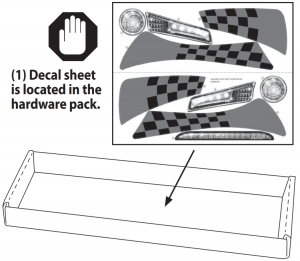
- Be sure to locate your decals and set aside. Decals are easier to apply when the part is laying flat, so you may want to apply the decals before assembly.
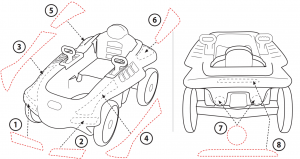
- The parts are listed below – each part is identified with a letter in RED for easy reference.
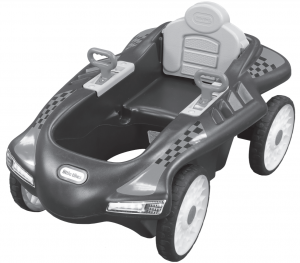
- Illustrations are for reference only. Styles may vary from actual contents.
- If you have any questions, we’re here to help. Give our customer service team a call at 1-800- 321-0183.
![]() WARNINGS!
WARNINGS!
- Keep these instructions for future reference.
- Prior to assembly, this package contains small parts: hardware which is a choking hazard and may contain sharp edges and sharp points. Keep away from children until assembled.
- Ride-on toys should not be used near swimming pools, on or near steps, hills, roadways, or inclines.
- Shoes must be worn at all times.
- Only one rider at a time.
- Maximum weight limit: 105 lbs. (47.6 Kg)
- This product is intended for use by children ages over 3 – 10 years.
- Adult supervision required. Do not leave children unattended.
- This product is intended for outdoor domestic family use only.
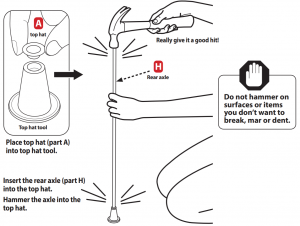
- Protect your eyes. Always wear safety glasses when using a hammer.
- When temperatures fall below 0°F/-18°C, outdoor use of this product is not recommended.In extreme cold, plastic materials lose resilience and may become brittle and crack upon impact. Store product in a warmer, protected place.
DISPOSALDisassemble and dispose of equipment in such a manner that no hazardous conditions such as, but not limited to, small parts and sharp edges exist at the time equipment is discarded.
A Few Things Before You Start!
BEFORE you begin assembly, make sure you have all the parts listed below.
![]() Some packages of hardware may have extras pieces.
Some packages of hardware may have extras pieces.![]() Questions? We’re here to help.Little Tikes customer service team at 1-800- 321-0183.
Questions? We’re here to help.Little Tikes customer service team at 1-800- 321-0183.
Tools required (not included)
 |
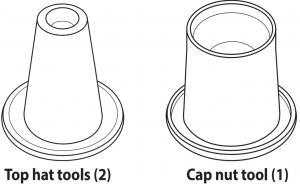
Included in hardware pack.Discard after use.
|
Tool color may vary.
|
Hardware Guide
 |
 |
|
 |
||
 |
||
 |
 |
|
 |
 |
 |
 |
 |
|
 |
 |
|
 |
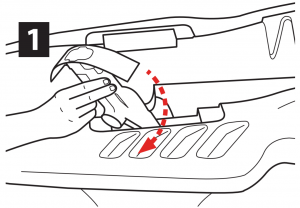
Let’s start in the front!
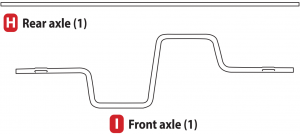
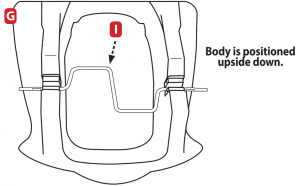
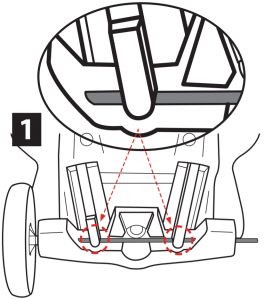
Place front axle (part I) into the body (part G).
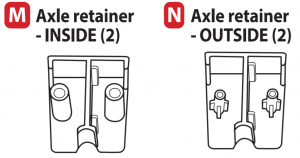
Place axle retainer halves (parts M & N) over axle and on each side of body. Push until they fit tightly together.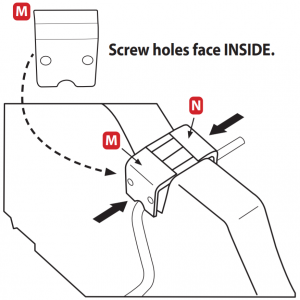
Hold the 2 retainer parts together, and install (2) 3/4” (1.9 cm) screws (these are the 3/4” screws with the pointed end).
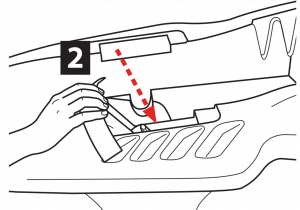
Pedaling along next!
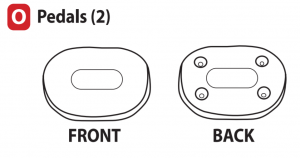
While the body is still positioned upside down, fit pedal halves (part O) around the axle. Check to be sure you have the front of the pedal facing up and the screw holes facing down.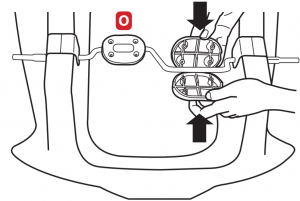

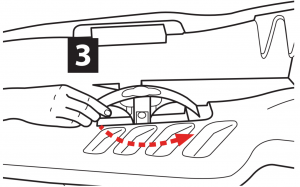
Steering – insert, twist & turnback!
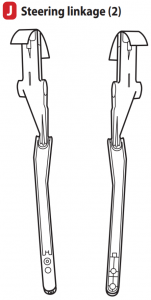
Insert a steering linkage (part J) into the side of the body; into the opening and through the hole located in the rear of the bottom of the body.
|
|
 IMPORTANT: Follow steps exactly! Certain parts of product DO NOT come apart once installed.

- Turn the steering linkage clockwise to fit the center column through the opening.

- Once the center column is through, push the steering linkage into the opening.
- Turn steering linkage BACK counterclockwise.
- Fit the steering arm beneath the opening
Steering – finish up!
Inside, align the steering linkage center with the pin opening. From inside the body, insert a steering linkage pin (part F) and push through to the outer side. REPEAT ON THE OTHER SIDE.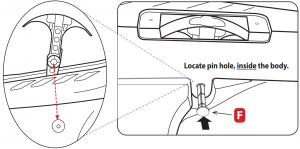
Insert the steering linkage TOOL (part L) into the body.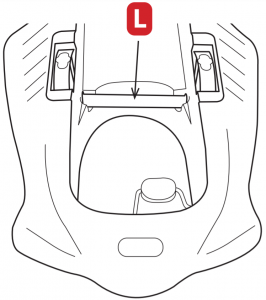
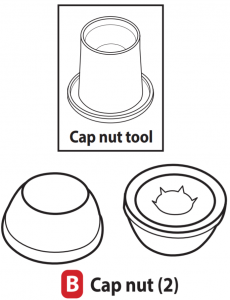
Place on the end of the steering linkage pin. Hammer cap nut onto steering pin. Repeat on other side.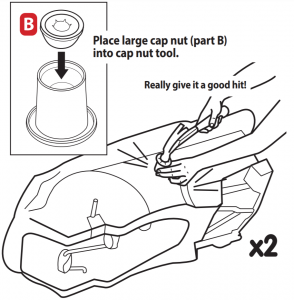
Cover it…
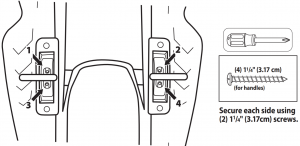
Fit steering linkage covers (part K) over each steering arm. Secure each side using 2 fasteners.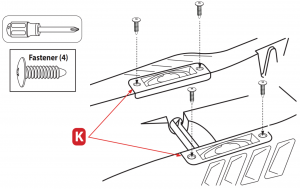
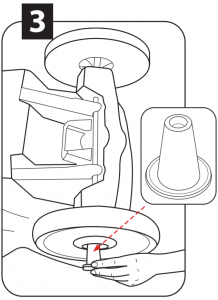
Ready for REAR wheels..
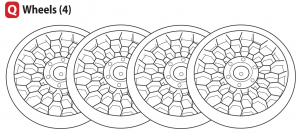
Insert wheel bushing (part D) into wheel (part Q) center – INSIDE (x4).
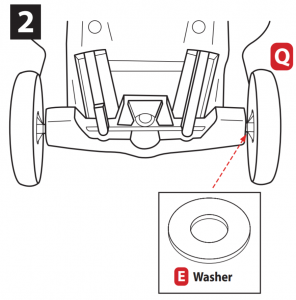
Slide onto rear axle, 1 wheel (Q), 1 washer (E).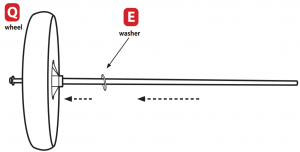
- Slide assembled axle through steering support then through steering linkages and out the other end of steering support.
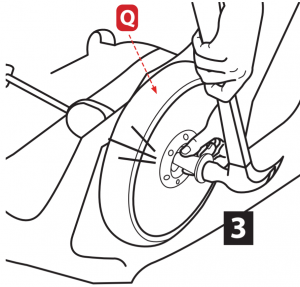
- Add a washer (part E), then slide on a wheel (part Q).
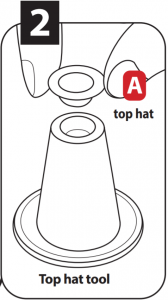
- Turn the car on its side. Place a top hat tool under the wheel to support axle assembly.
- Place a top hat into tool and then place onto exposed axle. Hammer top hat onto axle. Really give it a good hit!Place top hat (part A) into top hat tool.
 Place top hat (part A) into top hat tool.
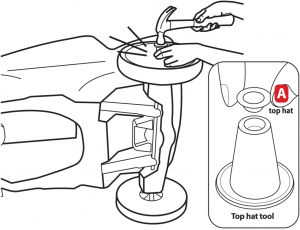
Now the front wheels

Add a washer (part E) and a spacer (part C).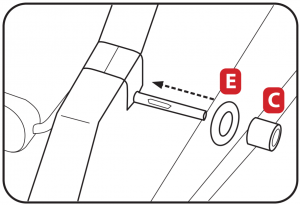
- Slide on wheel (Q).
- Place top hat (part A) into top hat tool.
- Place top hat tool on exposed axle. Hammer onto axle. Really give it a good hit!
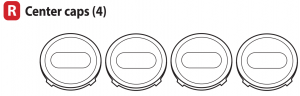
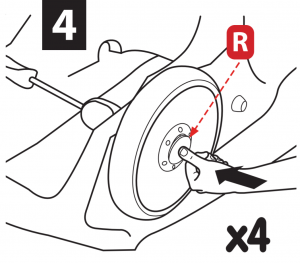
- Align slots and snap on the center caps (part R).
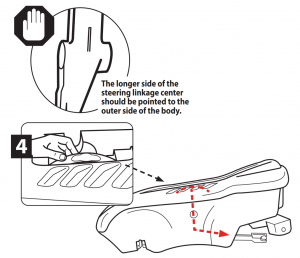
Handle it!
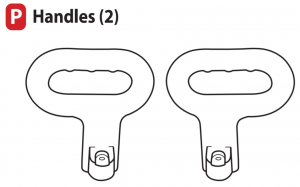
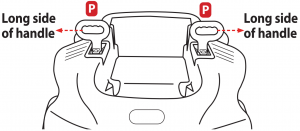
Insert handles (part P) into steering. NOTE: long side of handle should be pointed toward the outside of the racer.
Let’s finish with the decals!
Decals must be applied to a clean, dry surface. Wipe clean with a dry rag before application.Remove air from under decals by applying pressure to the decals starting from the center, and work towards edges. NOTE: If decals bubble, prick with a pin to remove the air.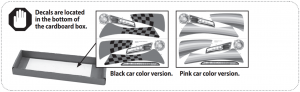
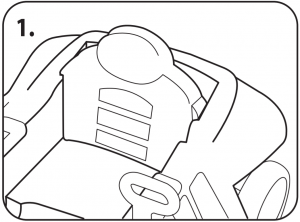
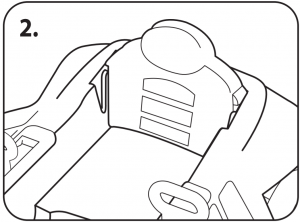
Seat Positions
- Seatback position closest to the pedals.
- Seatback position furthest to the pedals.
- NO SEATBACK

LIMITED WARRANTY
The Little Tikes Company makes fun, high quality toys. We warrant to the original purchaser that this product is free of defects in materials or workmanship for one year * from the date of purchase (dated sales receipt is required for proof of purchase). At the sole election of The Little Tikes Company, the only remedies available under this warranty will be the replacement of the defective part or replacement of the product. This warranty is valid only if the product has been assembled and maintained per the instructions. This warranty does not cover abuse, accident, cosmetic issues such as fading or scratches from normal wear, or any other cause not arising from defects in material and workmanship. *The warranty period is three (3) months for daycare or commercial purchasers.U.S.A and Canada: For warranty service or replacement part information, please visit our website at www.littletikes.com, call 1-800-321-0183 or write to: Consumer Service, The Little Tikes Company, 2180 Barlow Road, Hudson OH 44236, U.S.A. Some replacement parts may be available for purchase after warranty expires—contact us for details.Outside U.S.A and Canada: Contact place of purchase for warranty service. This warranty gives you specific legal rights, and you may also have other rights, which vary from country/state to country/state. Some countries/ states do not allow the exclusion or limitation of incidental or consequential damages, so the above limitation or exclusion may not apply to you.
CONSUMER SERVICE
United States: www.littletikes.com1-800-321-0183 Monday – FridayThe Little Tikes Company 2180 Barlow Road Hudson, OH 44236E-mail:
United Kingdom:www.littletikes.co.ukLittle Tikes, MGA Entertainment (UK) Ltd50 Presley Way Crownhill Milton Keynes MK8 0ES Bucks, UKTel: +0 800 521 558E-mail:
Australiawww.littletikes.com.auImported by MGA Entertainment Australia Pty LtdSuite 2.02, 32 Delhi Road Macquarie Park NSW 21131 300 059 676
© The Little Tikes Company, an MGA Entertainment company. LITTLE TIKES® is a trademark of Little Tikes in the U.S. and other countries. All logos, names, characters, likenesses, images, slogans, and packaging appearance are the property of Little Tikes. Please keep this address and packaging for reference since it contains important information. Contents, including specifications and colors, may vary from photos depicted on package.Instructions included. Please remove all packaging including tags, ties & tacking stitches before giving this product to a child.

References
[xyz-ips snippet=”download-snippet”]