![]()
C920e HD WEBCAMComplete Setup Guide
![]()
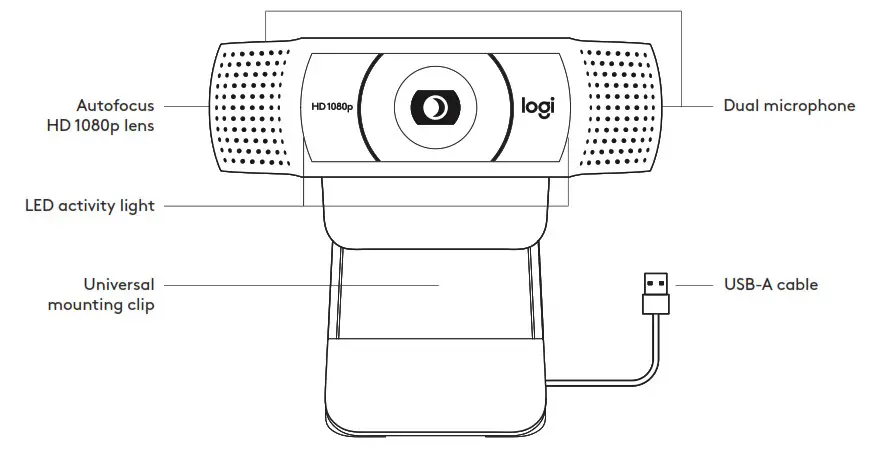
KNOW YOUR PRODUCT
* Tripod not included
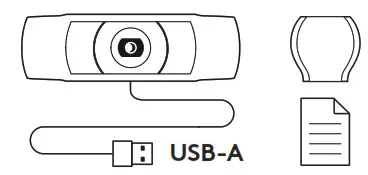
WHAT’S IN THE BOX
- Webcam with 5 ft (1 5 m) attached USB-A cable
- Privacy shutter
- User documentation

ATTACH THE PRIVACY SHUTTER
| 1. Attach external privacy shutter by locating the lens on the webcam | 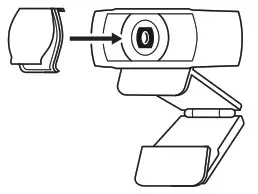 |
| 2. Snap it onto the front of the webcam, directly over the center | |
| 3. Manually adjust the privacy shutter to open or close as desired | |
SETTING UP THE WEBCAM
For placement on a monitor
| 1. Place your webcam on a computer, laptop or monitor at a position or angle you desire | 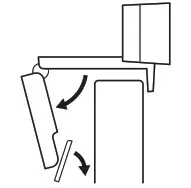 |
| 2. Adjust the webcam to make sure the foot on the universal mounting clip is flush with the back of your device | 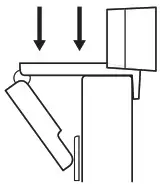 |
| 3. Manually adjust the webcam up/down to the best position to frame yourself | 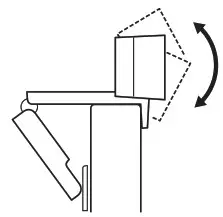 |
For placement on a tripod*
| 1. Locate the ¼ inch tripod thread on the bottom of the universal mounting clip | |
| 2. Secure the webcam on your tripod by twisting it into the ¼ inch thread | |
| 3. Place your webcam with the tripod in the best position to frame yourself | 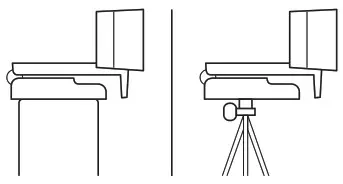 |
* Tripod not included
| CONNECTING THE WEBCAM VIA USB-APlug the USB-A connector into the USB-A port on your computer | 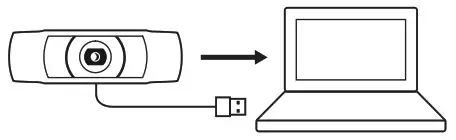 |
| SUCCESSFUL CONNECTIONLED activity light will light up when the webcam is in use by an application | 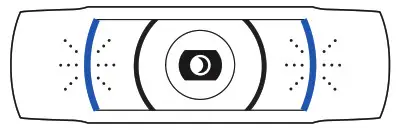 |
DIMENSIONS
INCLUDING FIXED MOUNTING CLIP:Height x Width x Depth: 1 70 in (43 3 mm) x 3 70 in (94 mm) x 2 80 in (71 mm)Cable Length: 5 ft (1 5 m)Weight: 5 71 oz (162 g)
www.logitech.com/support/C920e
© 2020 Logitech, Logi and the Logitech Logo are trademarks or registered trademarks of Logitech Europe S A and/or its affiliates in the U S and other countries Logitech assumes no responsibility for any errors that may appear in this manual Information contained herein is subject to change without notice
WEB-621-001784 002
[xyz-ips snippet=”download-snippet”]