![]()
Quick Start GuideWireless Security Camera System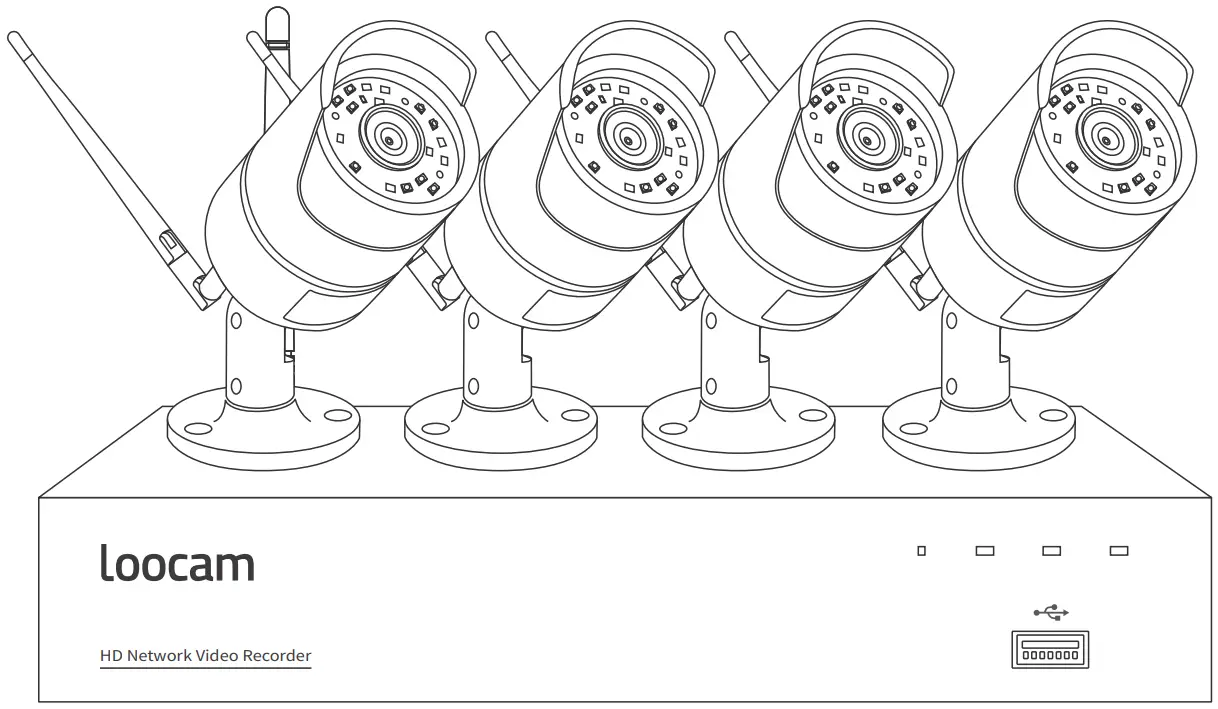 Copyright 2021 © Loocam Technology LLC, California. All rights reserved. Apple and App Store are trademarks of Apple Inc., registered in the U.S. and other countries. Google and Google Play are trademarks of Google Inc.ATTENTION: Please read carefully and keep this guide in a safe place.www.loocam.com
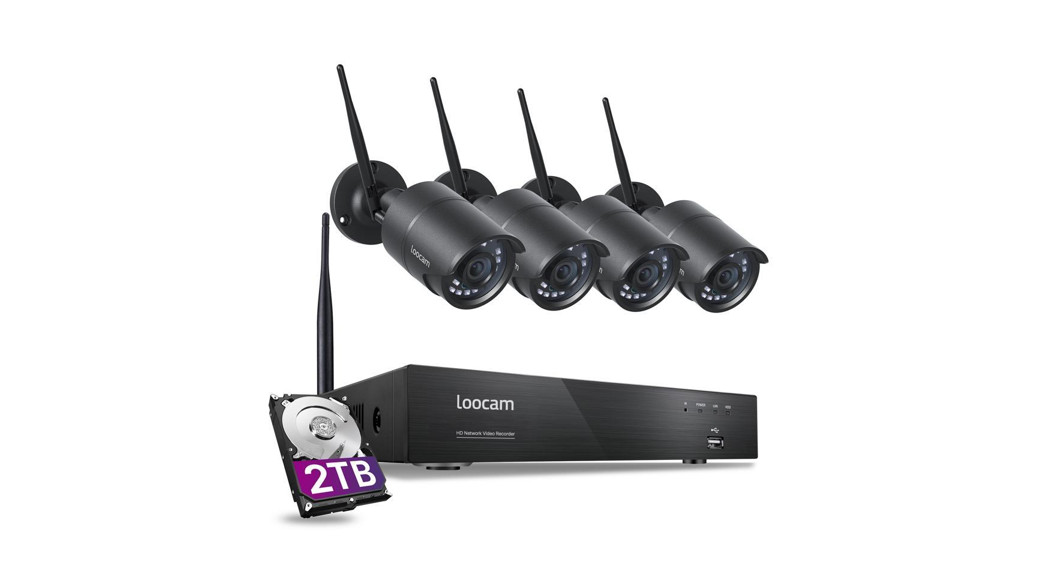
What’s in the box


Product Overview
NVR Back Panel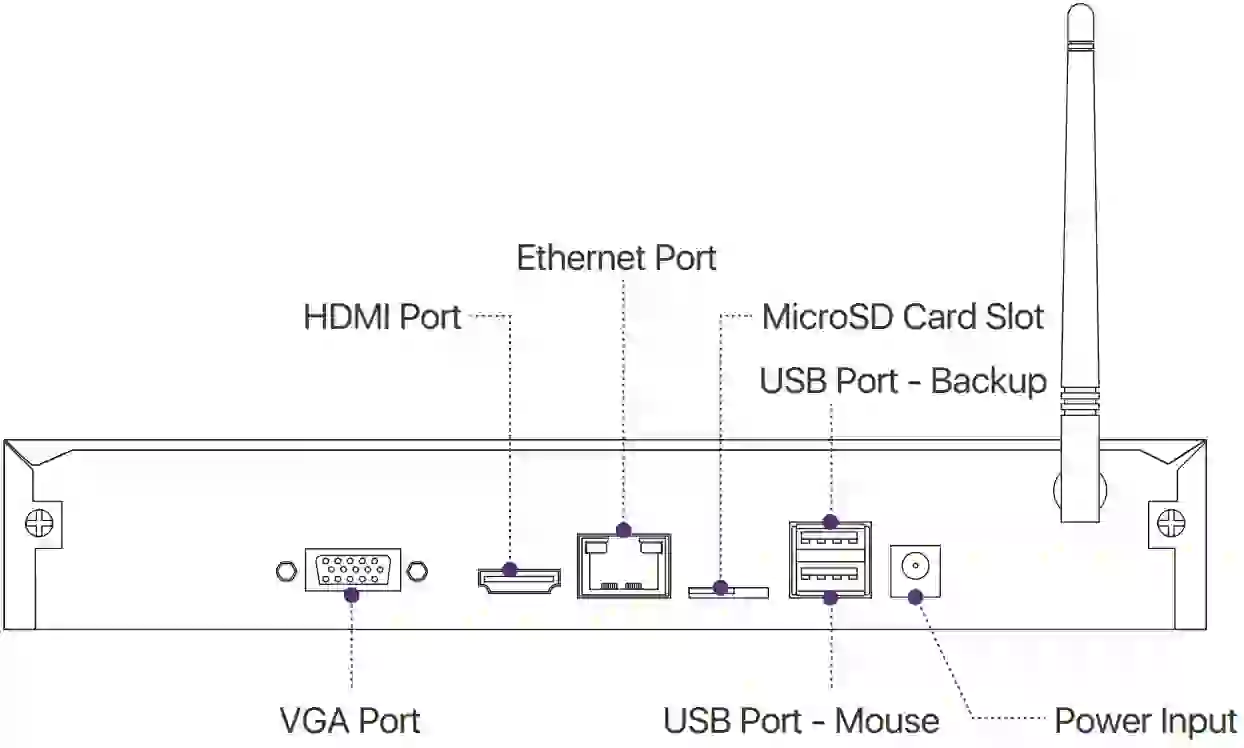
Installation and Setup
Hard Drive InstallationThe NVR may not include HDD (Hard Disk Drive) depending on the kit you selected. This NVR works with most 3.5″ SATA HDD (supports up to 8TB).Note: Please skip this step if HDD is pre-installed in your NVR.
- Unplug your NVR from power, unscrew and remove the top cover.
- Connect the SATA power and data cables from the NVR to the corresponding ports on your HDD (as shown).
- Place the Hard Disk into the DVR. Arrange the wires neatly.
- Hold the HDD and the NVR steadily, gently turn it over and line up the holes on the HDD with the holes on the bottom of the NVR. Using a suitable screwdriver, screw the provided screws into the holes. Assemble back the cover.
- After installing a Hard Disk, you need to first format the Hard Disk before recording. Right-click the mouse > go to Main Menu > Disk Management > Select the Hard Disk > Click Format > Apply.Note: For a MicroSD card, simply insert the card into the allocated slot at the back of the NVR. The surveillance-certificated hard drive is recommended. Compared to HDD (which supports full-day recording), a MicroSD card is an economical alternative for light recording.
 NVR can only support one type of storage at one time.
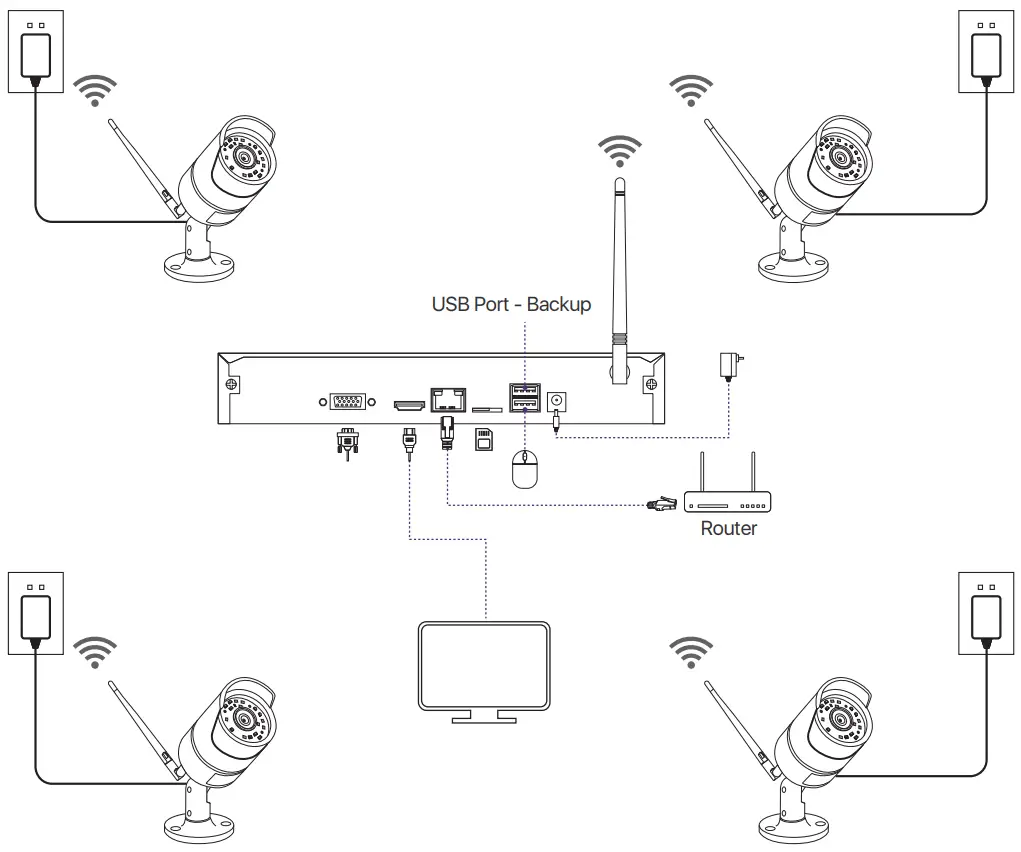
Security System Connection
To ensure that the product works properly and is not damaged while in transit, we recommend you test the whole system before installation.
- Install the antenna on the back panel of the NVR as shown in the diagram <NVR Back Panel> on page 1.
- Next, install the other antennas on the back of each camera. Make sure the antennas are tightened.Note: Antennas for NVR and Cameras are the same.
- Connect the monitor to the NVR using HDMI or VGA.
- Use a network cable to connect the NVR to the router.
- Insert the USB mouse into the USB port on the rear panel of the NVR
- Connect the cameras to the power adapter (DC 12V/1A).
- Connect the power adapter (DC 12V/2A) to the NVR power input.
- Plug power adapters into the wall socket.
Paring Add-on Camera
The cameras have been paired before shipping. Simply plug and play. It is recommended to test the system with the cameras before installation. If it does not work, please contact Loocam customer service.In the event of adding new add-on cameras or pairing the cameras after resetting, pleasefollow the steps below:
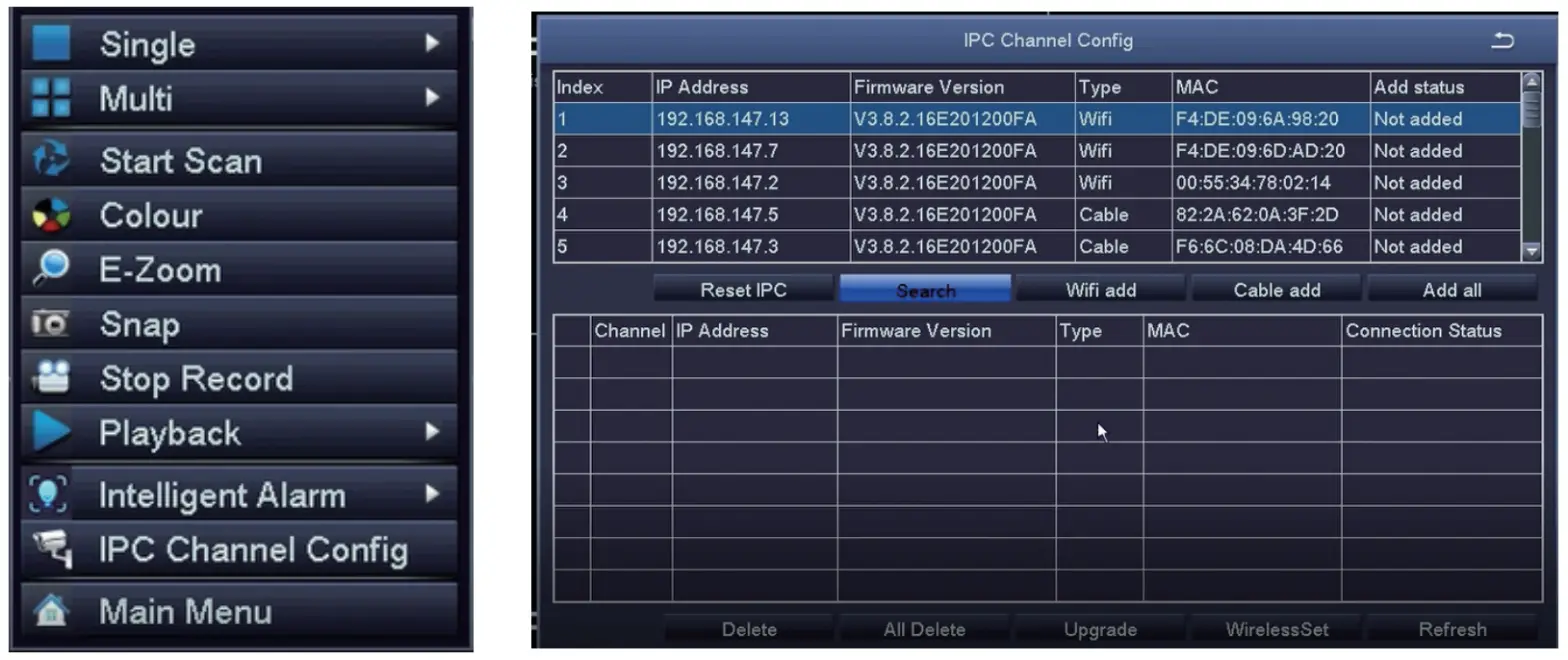
- Right-click on the mouse which is connected to the NVR for the operation menu.
- Click on the <IPC channel config>to enter the IPC channel configuration interface.
- Click on the search button on the IPC channel configuration page to search for the corresponding IPC;
- Next, select the IPC you wanted to add from the search result and click wireless add. Upon successful connection, the connected IPC will appear at the bottom of the page.Now you can see a live feed from the newly added channel of the camera.
Operating NVR System
NVR System SetupAfter connecting the system, power on the NVR, and a Wizard page setting appear. On the Wizard page setting, you can edit the device name, select Language, Date Format,Time Format, Time Zone, System Date, and System Time.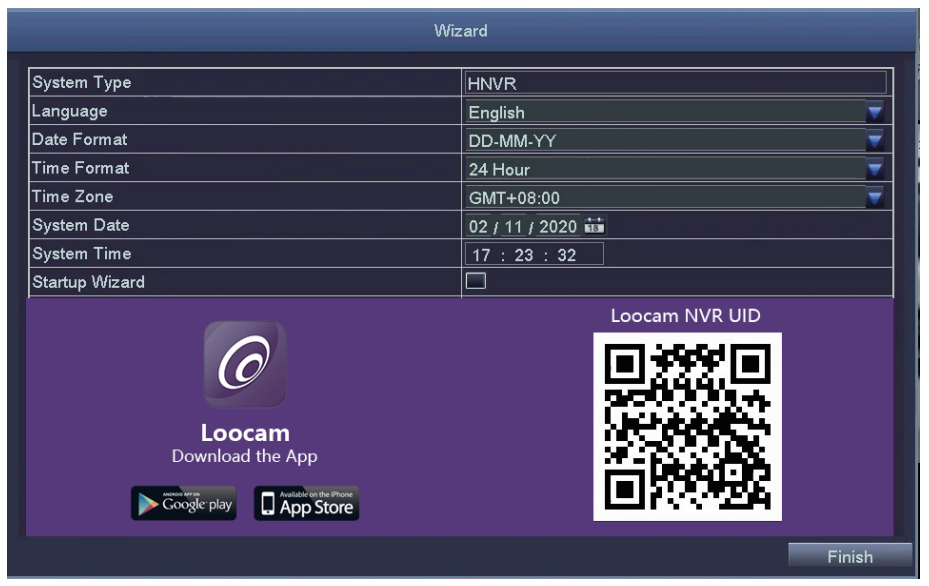 Password Setting:From the NVR live viewing screen, right-click and tap Main Menu > Setup > Users. Select the account you want to set password and click <Change Password>. Defaultpassword (Empty). When setting the password, please enter at least 6 characters or more.Note: You can write down the password in case you forget.Password :Video RecordingFrom the NVR live viewing screen, right-click and tap Main Menu > Search, the system will display as shown:
 Search the video you want via Time or Event, then click on the play button.
![]() Select the channel
Select the channel![]() Start playing
Start playing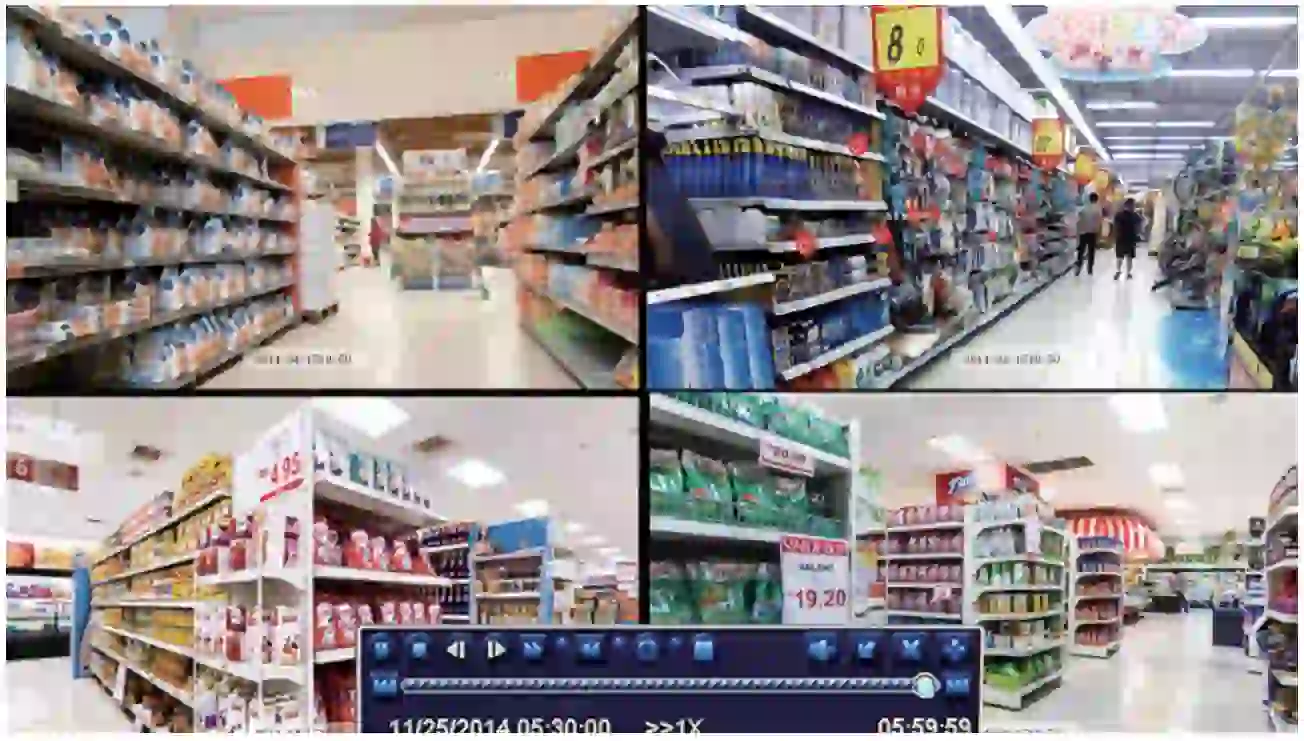
 Previous Record:Move to last recorded eventNext Record:Move to the next recorded eventFast Forward:Video can be played at different speeds, from 1/4x to 16x speed.Rewind:Video play can be rewind at 1x, 8x, 16x and 32x speed.Screen Display Mode:Both single-screen and multi-screen are available. You can choose how many channelsyou want to playback one time. Channel without records displays a blank screen.Motion DetectionAfter setting motion detection, the NVR will only record when it detects movement or activity.Right-click > Main Menu> Setup > Alarm > Motion.Select the camera you want to set up motion detection by ticking the box under ‘Enable’
 Note: An icon will be shown when motion is detected by the camera and the system will start recording.Human Figure DetectionThis NVR supports human figure detection. When the human figure is detected, it will trigger an alarm/recording. Combining motion detection and human figure detection, the false alarm rate will decrease.
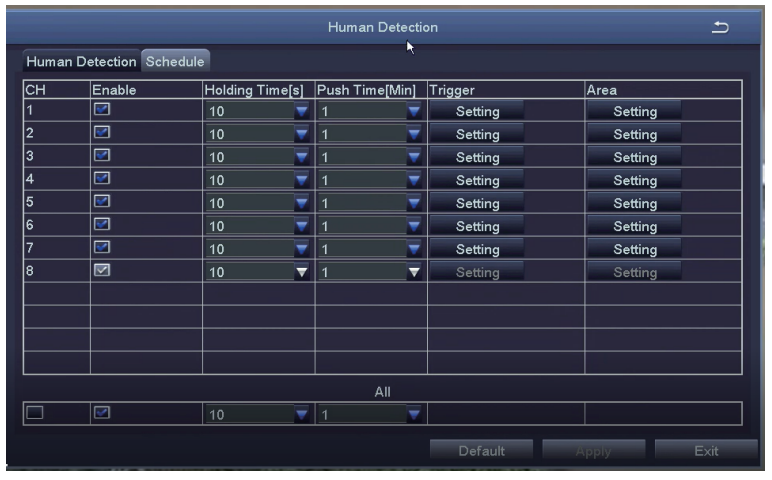 Backup via USB flash driveInsert the USB flash drive. Right click > Main Menu> Backup > select channel and time > Search >select the video clips > Backup > select storage media > Start.
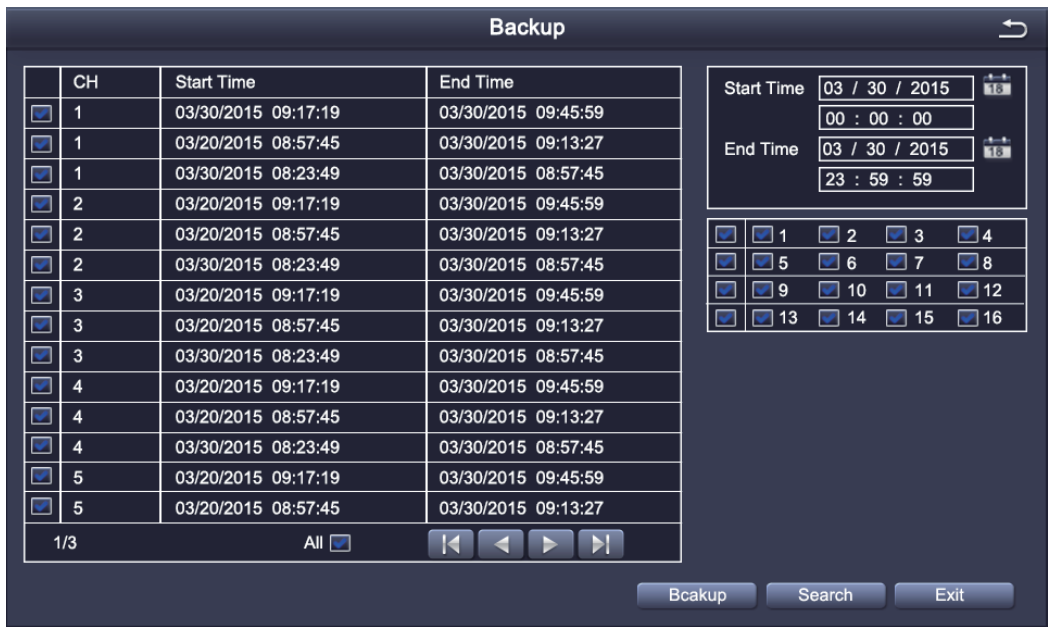 System Upgrade via USB flash driveYou can contact our official customer service or download the latest program directly from the official website. Copy the firmware file to the root of the USB flash drive. Then proceed as follows:First, plug in the USB flash drive, and then unplug the NVR power supply. Plugin the power plug, you will see an “upgrading” upgrade interface on the monitor. Please wait for a while. After the upgrade is completed, unplug the USB flash drive and the upgrade has completed.Note: After the upgrade is completed, please do not restart the power supply when the U disk is still plugin, otherwise the system will perform the upgrade again.5. Setup for Remote Viewing (Smartphone)APP DownloadScan the QR Code or search Loocam in AppStore or Google Play to download the free app.
 |
https://play.google.com/store/apps/details?id=com.ansjer.loocamccloud_a |
 iOS
iOS android
 This camera system can work without internet connectivity. For the best user experience, remote control via the internet is recommended.After downloading, register and create an account.
 Note: You can write down your account information below, in case you forgot. (Registered email or phone number, user account name, password or a security question)Add Device
- Go to Loocam App on your phone, tap the icon [+] in the top right corner to add a device.
- Select your device type of NVR.
- Scan the UID QR code on the NVR cover. This UID QR code also can be found on theNVR startup screen or in the NVR main menu (Information-System-Device ID).
- Follow the instructions to add your device and watch the live streaming video.Note Two-way voice via Loocam App for cameras with built-in mic and speaker.
6. Setup for Remote Viewing (PC)Client InstallationDownload Mac or Windows client (AVSS) from Loocam’s official website www.loocam.com.Note: If you have registered an account through Loocam APP, simply log in using the same account for AVSS.Add/Manage DeviceClick ![]() under Device List to add a device, edit a device, or configure the device.
under Device List to add a device, edit a device, or configure the device.
Live View and Control
Once you have successfully added the device, click on the device name of the device you want to view under Device List, select the channels to start viewing.
Camera Installation
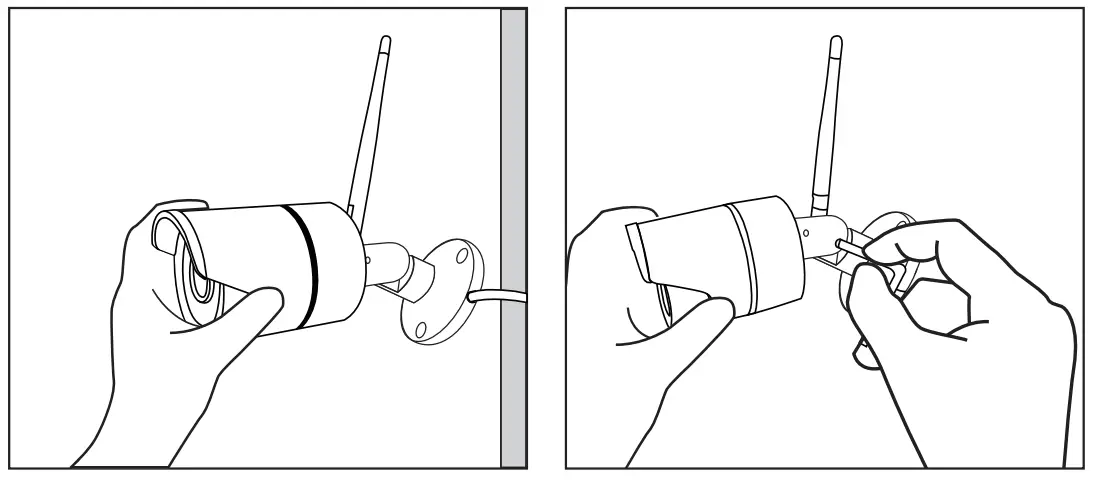
Step 1: Loosen the bracket screws, fold the camera bracket and screw the antenna in thecorresponding place (as shown in the diagram).Note: Install the cameras at least 7ft. above the ground with antenna vertical for optimal signal.Step 2: Drill holes on the wall according to the position of the mounting hole sticker, and insert the plastic anchors into the holes.Step 3: Align the mounting hole of the camera with the wall with the plastic anchors, then screw the screws in.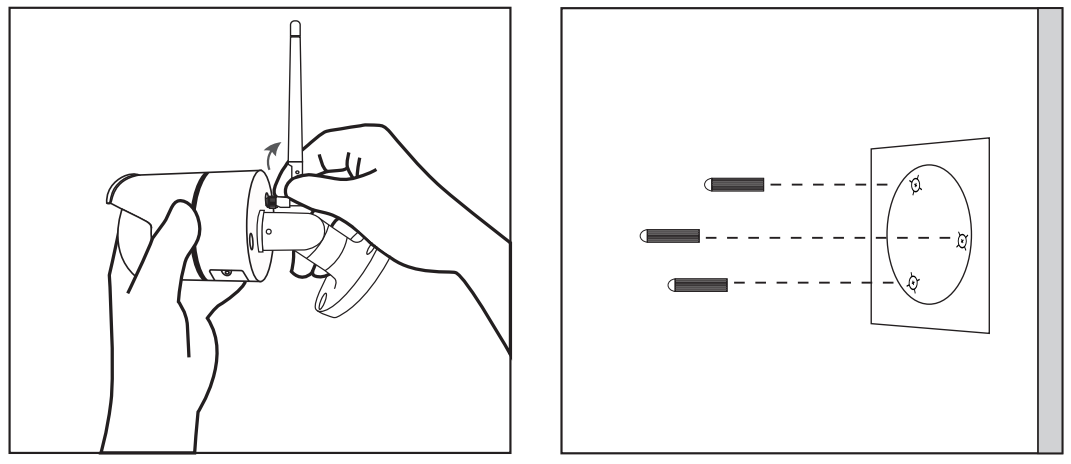
Installation Tips
- Refer to the image right for the ideal position. It is recommended to place the camera at least 7 ft. above the ground and tilting it towards the area of surveillance for best visual coverage.
- Ensure that the camera has a clear line of sight.
- Place the camera at no more than 20 ft away from the area you want to monitor.
- Install the camera within the wireless signal range of the NVR.
- Install outdoor without worry. Cameras have strong weather resistance casing (IP66 full protection grade).
- Install the cameras within the maximum line-of-sight (LOS) distance of 2000ft. from theNVR. The maximum Los distance will be reduced by each wall, ceiling, or major obstruction between the cameras and the NVR.

Warranty and Support
Loocam Technology LLC provides a one-year limited warranty from the date of purchase. Please keep your dated purchase receipt which is required for limited warranty requests. For more details on the warranty, please visit www.loocam.com.If you have any questions in regards to your new Loocam security product, please email us [email protected].![]()
 report this ad
@Loocam![]() @LoocamTech
@LoocamTech![]() @LoocamTechCopyright 2021 © Loocam Technology LLC, California. All rights reserved. Apple and App Store are trademarks of Apple Inc., registered in the U.S. and other countries.Google and Google Play are trademarks of Google Inc.
@LoocamTechCopyright 2021 © Loocam Technology LLC, California. All rights reserved. Apple and App Store are trademarks of Apple Inc., registered in the U.S. and other countries.Google and Google Play are trademarks of Google Inc.
References
[xyz-ips snippet=”download-snippet”]