VC-B11UHD Camera(USB Camera)User Manual 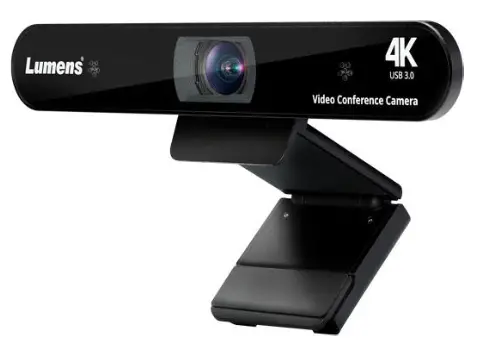
[Important]
To download the latest version of Quick Start Guide, multilingual user manual, software, or driver, etc., please visit Lumens https://www.MyLumens.com/support
Copyright Information
Copyrights © Lumens Digital Optics Inc. All rights reserved.
Lumens is a trademark that is currently being registered by Lumens Digital Optics Inc.
Copying, reproducing, or transmitting this file is not allowed if a license is not provided byLumens Digital Optics Inc. unless copying this file is for the purpose of backup after purchasing this product.In order to keep improving the product, Lumens Digital Optics Inc. hereby reserves the right to make changes to product specifications without prior notice. The information in this file is subject to change without prior notice.
To fully explain or describe how this product should be used, this manual may refer to namesof other products or companies without any intention of infringement.
Disclaimer of warranties: Lumens Digital Optics Inc. is neither responsible for any possible technological, editorial errors or omissions, nor responsible for any incidental or related damages arising from providing this file, using, or operating this product.
Chapter 1 Safety Instructions
Always follow these safety instructions when setting up and using the VC-B11U USB Camera:
- Operation1.1 Please use the product in the recommended operating environment, away from water or a source of heat.1.2 Do not place the product on a tilted or unstable trolley, stand, or table.1.3 Please clean the dust on the power plug prior to usage. Do not insert the product’s power plug into a multiplug to prevent sparks or a fire.1.4 Do not block the slots and openings in the case of the product. They provide ventilation and prevent the product from overheating.1.5 Do not open or remove covers, otherwise, it may expose you to dangerous voltages and other hazards. Refer all servicing to licensedservice personnel.1.6 Unplug the product from the wall outlet and refer servicing to licensed service personnel when the following situations happen:• If the power cords are damaged or frayed.• If the liquid is spilled into the product or the product has been exposed to rain or water.
- Installation2.1 For security considerations, please make sure the standard hanging rack you bought is in line with UL or CE safety approbations andinstalled by technician personnel approved by agents.
- Storage3.1 Do not place the product where the cord can be stepped on as this may result in fraying or damage to the lead or the plug.3.2 Unplug this product during thunderstorms or if it is not going to be used for an extended period.3.3 Do not place this product or accessories on top of vibrating equipment or heated objects.
- Cleaning4.1 Disconnect all the cables prior to cleaning and wipe the surface with a dry cloth. Do not use alcohol or volatile solvents for cleaning.
- Batteries (for products or accessories with batteries)5.1 When replacing batteries, please only use similar or the same type of batteries.5.2 When disposing of batteries or products, please adhere to the relevant instructions in your country or region for disposing of batteries or products.
Precautions
| This symbol indicates that this equipment may contain dangerous voltage which could cause electric shock. Do not remove the cover (or back). No user-serviceable parts inside. Refer servicing to licensed service personnel. | |
| This symbol indicates that there are important operating and maintenance instructions in this User Manual with this unit. |
FCC Warning
This equipment has been tested and found to comply with the limits for a Class B digital device, pursuant to part 15 of the FCC Rules. These limits are designed to provide reasonable protection against harmful interference in a residential installation. This equipment generates, uses, and can radiate radio frequency energy and, if not installed and used in accordance with the instructions, may cause harmful interference to radio communications. However, there is no guarantee that interference will not occur in a particular installation. If this equipment does cause harmful interference to radio or television reception, which can be determined by turning the equipment off and on, the user is encouraged to try to correct the interference by one or more of the following measures:– Reorient or relocate the receiving antenna.– Increase the separation between the equipment and receiver.– Connect the equipment into an outlet on a circuit different from that to which the receiver is connected.– Consult the dealer or an experienced radio/TV technician for help.
Notice :The changes or modifications not expressly approved by the party responsible for compliance could void the user’s authority to operate the equipment.
IC WarningThis digital apparatus does not exceed the Class B limits for radio noise emissions from digital apparatus as set out in the interference-causing equipment standard entitled “Digital Apparatus,” ICES-003 of Industry Canada
Cet appareil numerique respecte les limites de bruits radioelectriques applicables aux appareils numeriques de Classe B prescrites dans lanorme sur le material brouilleur: “Appareils Numeriques,” NMB-003 edictee par l’Industrie.
KC WarningThis equipment is Industrial (Class B) electromagnetic wave suitability equipment and the seller or user should take notice of it, and this equipment is to be used in the places except for home.
Chapter 2 Package Contents
|
VC-B11U
|
Instruction forinstallation
|
Remote Control
|
USB cable (USB 3.0Type A to Type C)
|

Chapter 3 Function Introduction
3.1 Overview
 Front View
Side ViewBottom
|
NO. |
Item |
Function Descriptions |
| 1. | Lens Modules | 8.5 megapixels, 4K wide-angle lens |
| 2. | LED Indicator | The indicator is displayed in blue when outputting an image through the USB and off when the USB is not in use |
| 3, | Microphone | Capture sound while filming |
| 4. | USB 3.0 Type C Port | Connect to a computer for power supply and use for image transmission |
| 5, | Tripod deck lock hole | 1/4″ lock hole for mounting the camera |
3.2 System Requirements
- Windows System: Windows 7 or later
- Chrome System
- MAC System: Mac OS X 10.12 and above
Chapter 4 Instruction for installatio
4.1 Instruction for installation
4.1.1 I would like to install the camera on top of the screenPlace the VC-B11U camera on top of the screen,and securely install it to the screen by adjusting the mount.
4.1.2 Machine SizeLength x Width x Height:Base Mount not included: 30 mm x 210 mm x 35 mm (1.2” x 8.3” x 1.4”)Base Mount included: 47.4 mm x 210 mm x 73.6 mm (1.9” x 8.3” x 2.9”)Weight: 0.5 kg (1.1 Ibs)
Front View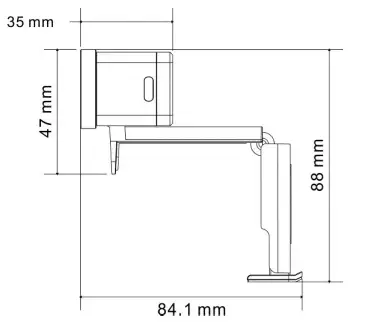
Side View
Bottom
4.2 Connecting devices
4.2.1 Video Conference — Connecting to PC
Connect one end of the USB to the camera and the other end to the computer.VC-B11U driver will be installed in the computer automatically
4.2.2 Connect to the touchscreen TV/touchscreen display
Download video conference software suited for the touchscreen TV from App Store foroperation.
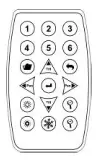
Chapter 5 Remote Control Buttons Descriptions

|
Item |
Description |
| Numeric Keys 1-6 | Load the position where the Preset is saved |
| Preset | Appoint an ID (1 – 6) to save the current position data |
| Reset | Appoint an ID (1 – 6) to delete the current position data |
| Zoom + / – | Increase or decrease the image size |
| Home | Short press: The screen returns to the widest anglePress and hold for 3 seconds: Restore to the Factory Reset |
| Move the lens | |
| Pan Right | Adjust the screen directly to the right |
| Pan Left | Adjust the screen directly to the left |
| Tilt-Up | Adjust the screen direction up |
| Tilt Down | Adjust the screen direction down |
| BRT + / – | Adjust the brightness of the image |
| Auto Frame | Smart viewfinder |
Chapter 6 Descriptions of Major Functions
6.1 I would like to control the camera
- Use the remote control to control VC-B11U.
- It can be controlled using USB PTZ Camera Controller software.<Remark>Please download software from the Lumens website and USB PTZ Camera ControllManual.
6.2 I would like to use Skype for video conferencePlease refer to Chapter 4 Instruction for installation to complete connecting VC-B11U with the computer. Start Skype; select the contact; press to begin the video conference.
If it doesn’t work, please refer to the following steps to setup the camera:
- Start Skype -> [Setting] -> [Audio & Video].
- Select [Lumens VC-B11U Video Camera].
- Select [Lumens VC-B11U Audio].
- After the setting is completed, the video conference is ready to begin.
6.3 I would like to save the current screen position dataUse the remote control; press [Preset]key and press [ID] within 3 seconds to store data of thecurrent position.<Remark> ID shall be a digit [1 ~ 6].
6.4 I would like to clear the saved position dataUse the remote control; press [Reset] key and press [ID] within 3 seconds to clear data of thedesignated position.<Remark> ID shall be a digit [1 ~ 6].
6.5 I would like to adjust the brightness of the image
- Use the remote control; press [BRT +] to increase the brightness.
- Use the remote control; press [BRT -] to reduce the brightness.
6.6 I would like to adjust the direction of the screen shot
- Press [Tilt •] or [Tilt •] on the remote control to adjust the angle upward or downward.
- Press [Pan •] or [Pan •] on the remote control to adjust the angle to the right or left.
6.7 I would like to zoom in/out images
- Press [Zoom +] on the remote control to zoom in on images.
- Press [Zoom -] on the remote control to zoom out images.
6.8 I would like to use the smart viewfinderPress [Auto Frame] on the remote control. The camera will automatically detect the locations ofpeople, and automatically adjust the zoom to the most appropriate size to accommodate all theparticipants according to change of the conference venues and the number of people.
Chapter 7 Troubleshooting
This chapter describes problems you may encounter while using VC-B11U. If you have questions, please refer to related chapters and follow all the suggested solutions. If the problem still occurred, please contact your distributor or the service center.
|
No. |
Problems |
Solutions |
| 1. | There is no image output from VC-B11U | 1.Replace the USB cables and make sure they are not faulty.2. Verify whether the computer or equipment has detected the VC-B11U camera and is connected correctly. |
| 2. | VC-B11U cannot be operated by remote control | 1. Please confirm that VC-B11U has been connected to the computer, and launch video software.2. Please verify the VC-B11U LED indicator. When the signal from the remote control received by the device is normal, the LED indicator will flash. |
| 3. | VC-B11U output resolution is low | The default output resolution of VC-B11U is 1920 x 1080. Please go to the connected video conference software setting and adjust the video conference output resolution. <Remark> Some video conference software do not have the option of adjusting the resolution, such as Skype |
Supplier’s Declaration of Conformity 47 CFR § 2.1077 Compliance Information
Manufacturer: Lumens Digital Optics Inc.Product Name: VC-B11UModel Number: USB Camera
Responsible Party – U.S. Contact InformationSupplier:Lumens Integration, Inc.4116 Clipper Court, Fremont, CA 94538, United Statese-mail : [email protected]
report this adFCC Compliance StatementThis device complies with Part 15 of the FCC Rules. Operation is subject to the following two conditions : (1) This device may not cause harmful interference, and (2) this device must accept any interference received, including interference that may cause undesired operation.
References
[xyz-ips snippet=”download-snippet”]