


3663602522508 / 3663602548140 LL2T
 =
=  +
+ 

A IMPORTANT– Please read carefully before use.

EN14975 A These products comply with the European Standard EN14975:2006+A1:2010.

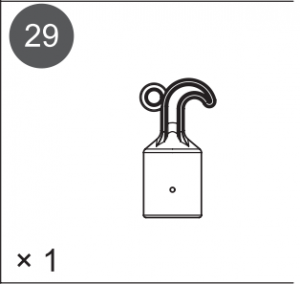
A Weight of the ladder.

1


2
01 A Assembly
01
02
3
01 A Assembly
03
04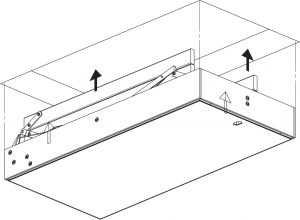
4
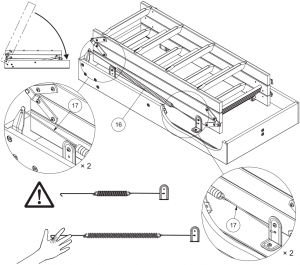
01 A Assembly
05


06

07
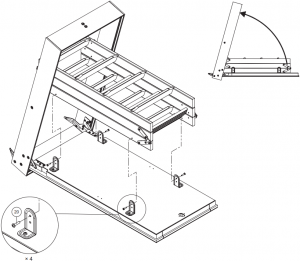
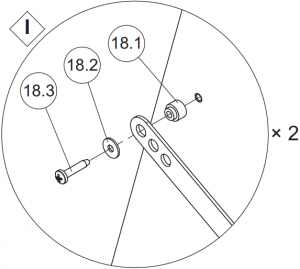
5
01 A Assembly
08
09
10
11

A For Safety & Installation, go to page 7.
6
 A Safety & Installation
IMPORTANT! Please read all these installation instructions before starting to install your loft ladder.The ladder should be high enough to allow you to climb up into the loft without exceeding the maximum permitted safe working height. The ladder must bear a load corresponding to the weight of the fitter plus the weight of the loft ladder.Do not use the ladder as an access passage during building or renovation work. Do not use the ladder if the ceiling height exceeds the maximum ceiling height stated in the installation instructions or on the product label.For safety’s sake, always face the ladder when climbing up and down and grip at least one string of the ladder. The ladder must be used only by one person at a time.Do not use the ladder if it is faulty or damaged. The springs are very taut. Take care when adjusting springs. Only adjust the spring mechanism when the ladder is folded (i.e. the springs are under least tension). Great care should be taken when removing springs. If the ladder is delivered unassembled, read the assembly instructions carefully before assembling and installing the ladder.The ladder is tested to 150 kg (maximum load). A load in excess of 150 kg may cause damage to the ladder and constitutes a risk of personal injury.NB! Lubricate all moving metal parts with oil immediately after assembly. Parts must subsequently be lubricated at least once a year.
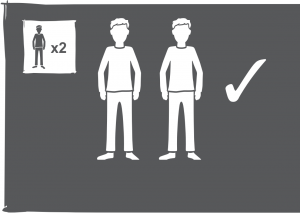
01 Fitters, tools and materials:We recommend that 2 fitters install the loft ladder together. One fitter must be strong enough to lift the loft ladder to the ceiling (as the loft ladder weighs up to 28 kg (EAN: 3663602522508 ) / 28.7 kg (EAN: 3663602548140), depending on model).
02 Installation instructions:
To ensure that the product is assembled and fitted correctly, these instructions should be followed carefully. If you have any difficulties, contact an expert for installation advice.
WARNING: DO NOT DISMANTLE the loft ladder once it has been assembled.
NB! For models in which the ladder is fixed to the trapdoor. If, during installation, you wish to detach the ladder to reduce the weight of the loft ladder, loosen the screws between the metal bracket and the ladder itself. Do not loosen the screws on the trapdoor as these can easily be over tightened when reassembled. An over tightened screw may lose its grip on the timber and, in serious cases, fall out.
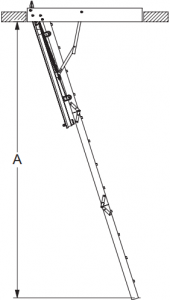
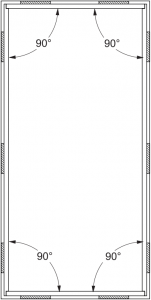
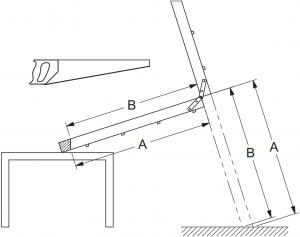
Positioning the loft ladder:Wear gloves when removing insulation material. Check that the area selected for positioning the ladder is unencumbered by electrical wiring, water pipes, heating/cooling pipes, etc. If necessary, get a qualified craftsman to remove such encumbrances. Make sure that there is sufficient clearance (distance A) for the ladder to rest on the floor. Make sure that there is sufficient space for the ladder to fold out to its full length (B) (see figure 1). For two-section models, make sure that there is sufficient swing space. For specific measurements and adjustment options, see the assembly instructions supplied with the product.
Figure 1
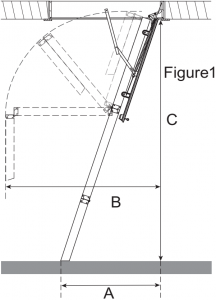
|
A(cm) |
B(cm) |
C(cm) |
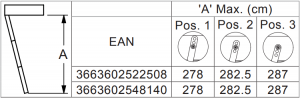
| 125 | 158 | 278 |
03 To make opening in ceiling:We recommend that you wear goggles and mask for protection from falling dust and other particles from the loft. Remove all items of furniture from the work area. Cover the floor. Frame and cut the opening through plaster/other ceiling material (see table 1). This allows space for spacer blocks and ensures that
7
A Safety & Installation
the loft ladder is fitted perpendicularly. If the loft ladder cannot be fitted in the normal way, i.e. parallel with the ceiling joists, contact a qualified craftsman for advice. Figures 2, 3 and 4 show how to frame the ceiling opening. If you fit the loft ladder parallel to the existing ceiling joints, only single ceiling joists and single transverse joists are required. If you fit the loft ladder at right angles to the joists, you will need to make double transverse joists of the same size as the existing ceiling joists.
| EAN | Length(cm) | Width(cm) |
| 3663602522508 | 115 | 57.4 |
| 3663602548140 | 120 | 60 |
Table 1
Figure 2 Figure 3
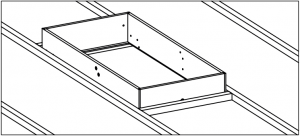
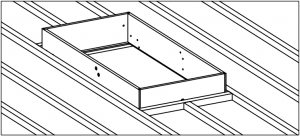
 Figure 4
WARNING: If the ceiling joists are made in a material other than timber, e.g. steel, contact a qualified craftsman. Never saw through a load-bearing joist without advice from a qualified craftsman. Take great care when sawing ceiling joists. For safety’s sake, if there is no loft flooring, lay planks across the ceiling joists to allow safe passage in the loft during installation.
04 Fitting temporary supports:
To keep the loft ladder in place in the ceiling opening during installation, you are advised to fit temporary supports. If the trapdoor will be clad, the loft ladder must be fitted as many mm higher in the opening as the thickness of the cladding. Cladding material must not weigh more than 6 kg per m². Cladding material must not be more than 12 mm thick. We recommend that the cladding is affixed using construction adhesive.
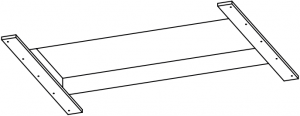
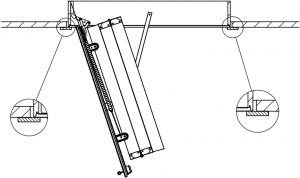
Figure 5
WARNING: It is important that cladding is fitted firmly and correctly. When affixing cladding, the ladder must NOT be loaded.
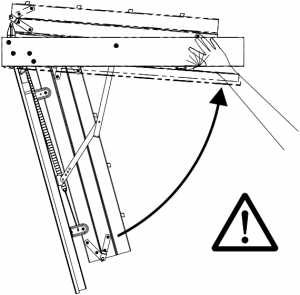
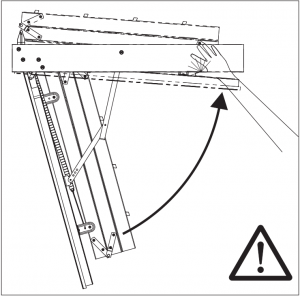
05 Attaching the loft ladder:
One fitter goes up into the loft room, taking all the tools he needs. The other fitter remains below.
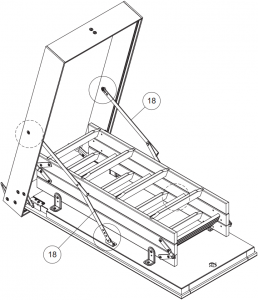
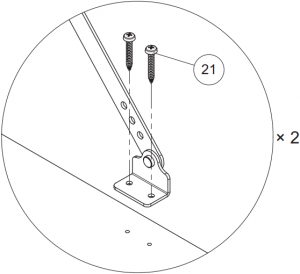
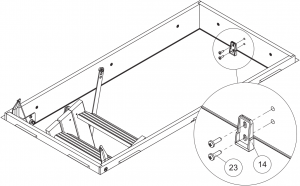
Lift the ladder up into the loft. Before lowering the loft ladder into the opening from above, attach 2 supporting planks under the ceiling opening. The loft ladder rests on these supports (see figure 5). Fold the ladder so that the frame can be attached to the ceiling opening. Make sure that the loft ladder is level and perpendicular. Attach loft ladder with adequate screws, allow at least half the total screw length to penetrate the support joists, specified within Assembly Step `05′ on page 5 (3 on long side and 2 at each end). Don’t forget to attach blocks on the back of the fixing points (see figure 6). When the loft ladder is firmly attached, remove supports.
WARNING: DO NOT use the loft ladder before it is firmly attached to the opening and adjusted to the correct ceiling height.
Vapour barrier: When the loft ladder is firmly attached to the deck, the vapour barrier must be attached in the correct way. The space between the loft ladder and the joist construction must be well insulated to avoid thermal bridges.


Figure 6
8
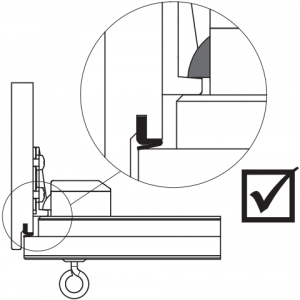
06 Adjusting to correct ceiling height:
Refer to step 9, 10 and 11 from assembly instructions for detail on adjusting the length of the ladder.
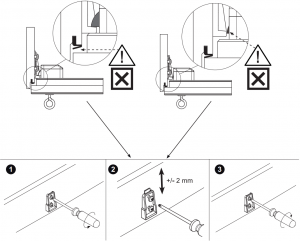
WARNING: DO NOT SHORTEN THE LADDER TOO MUCH. If the ladder is too short, it may unexpectedly fold up during use, thus risking serious personal injury. To check that the ladder is the correct length, unfold it to its full length. All sections of the ladder must be aligned perfectly with no gaps, and both strings must rest flat on the floor (see figure 8).
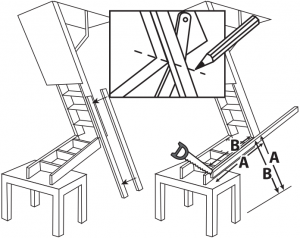
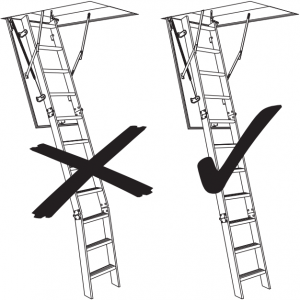
Figure 7 Figure 8
DO NOT use the ladder if all sections of the ladder are not aligned. If the ladder is too long, shorten the strings once more. If the ladder is too short, order a new lower section from your dealer. Do NOT allow the ladder to rest on a box, blocks, platform or similar. Such constructions are unsafe and unstable, and do not provide appropriate permanent support for the ladder.
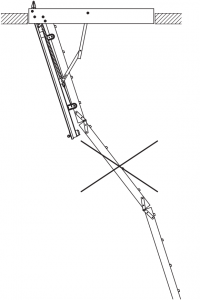
07 How to use the ladder:
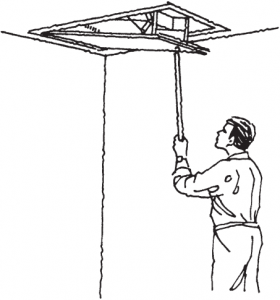
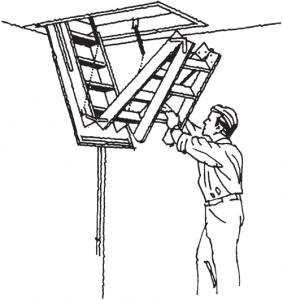

Figure 9A Figure 9B Figure 9C
The following drawings show how to use the loft ladder safely (see figure 9).
NOTE: If your building construction differs from installation guide above, consult an expert.WARNING: Never modify the product. The manufacturer accepts no liability whatsoever for personal injury or damage caused to the building or parts thereof by a product, whose construction has been modified.
9
Safety & Operation
Pre-Use and periodic checks:
- Check stiles and treads are not split, warped, bowed, loose, rotten or otherwise damaged.
- Check all screws, bolts and nuts are secure and tight (do not over tighten).
- Check trapdoor locks into position correctly.
- Check metal parts are not corroded or otherwise damaged.
- Check all hinges operate smoothly (lubricate periodically see label on trapdoor).
- Check ladder sections operate smoothly when opened.
- Check ladder sections are straight when fully opened.
- Check ladder feet rest firmly on the floor.
- Check ladder sections are flat and correctly positioned once folded.
Use
- Never use this loft ladder for purposes for which it has not been designed, such as trade or building work.
- Never use this product unless it has been fully, and correctly, installed.
- Fully open trapdoor before unfolding the ladder.
- Ensure the springs and connecting wires have not become trapped or snagged.
- Ensure the springs and connecting wires are correctly positioned and are secure.
- Fully unfold ladder before use.
- Ensure any catches or locks are fully engaged before ascending the ladder.
- Ensure both ladder feet rest firmly on the floor before climbing the ladder.
- Inspect the ladder before climbing (see above) do not use if damaged.
- Only wear suitable footwear whenever ascending or descending the ladder.
- Maintain 3 points of contact by gripping the handrail or ladder stiles when ascending or descending.
- Do not overload the ladder by carrying heavy objects.
- Take care when carrying awkward shaped objects up and down the ladder.
- Keep a firm grip on anything being carried to prevent the object falling.
- Only ascend and descend the ladder by facing the treads.
- Never exit the ladder by stepping away from the treads.
- Ensure the trapdoor is securely locked after use.
Care & Maintenance

01 Repair & Maintenance
- Repairs and maintenance shall be carried out by a competent person and be in accordance with these instructions. NOTE: A competent person is someone who has the skills to carry out repairs or maintenance, eg. trained by the manufacturer.
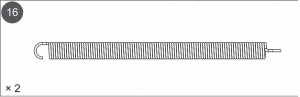
- For repair and replacement of parts, e.g. feet, springs and hooks, contact your supplier or distributor.
- Ladders shall always be operated in accordance with the producer’s instructions.
- Timber loft ladder stiles and treads should not be painted or varnished.
- Periodically lubricate all moving parts with light oil.
- Periodically clean all timber parts to prevent the build-up of dirt, grease and other contaminants.
02 Traceability
For traceability purpose it can be identified by the barcode (EAN) number and also manufacturing date or serial number, these can be found on the trapdoor.
10
| LL2T | A Product contains |
  |
Manufacturer · FabricantUK Manufacturer:Kingfisher International Products Limited,3 Sheldon Square, London, W2 6PX,United Kingdom
EU Manufacturer:Kingfisher International Products B.V.Rapenburgerstraat 175E1011 VM AmsterdamThe Netherlandswww.kingfisher.com/products
EN Distributor:B&Q Limited, Chandlers Ford, Hants, SO53 3LE,United Kingdomwww.diy.com
Screwfix Direct Limited, Trade House,Mead Avenue, Yeovil, BA22 8RT,United Kingdomwww.screwfix.com
To view instruction manuals online,visit www.kingfisher.com/products
Customer Helpline (Freephone)UK 0800 324 7818 [email protected]Eire 1800 932 230 [email protected]
R1-96105 P/N115998-01 Rev. B 12/19
References
[xyz-ips snippet=”download-snippet”]