MADGE TECH TCTempX4LCD 4 and 8-Channel Thermocouple Temperature Data Logger User Guide
Product Overview
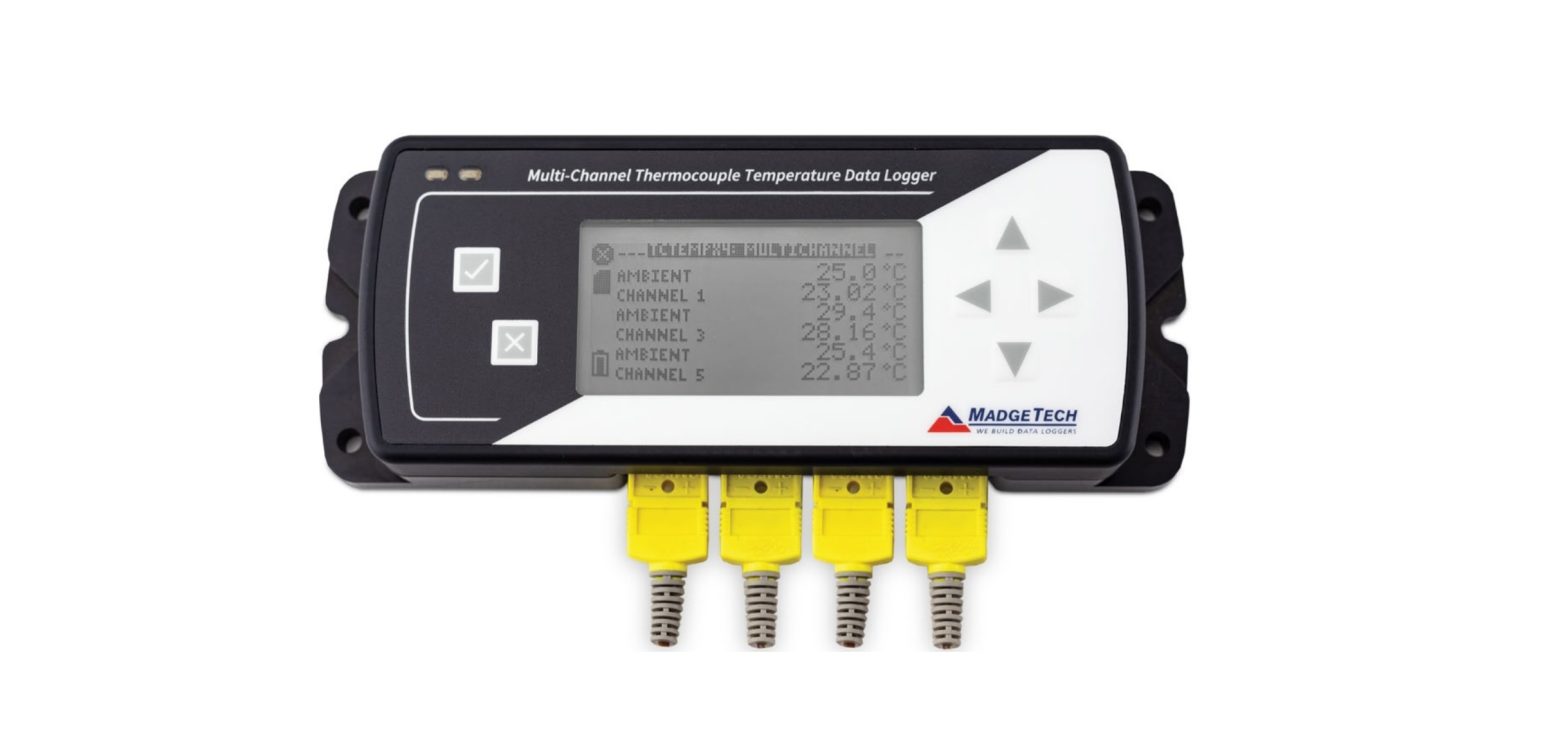
The TCTempX4LCD and TCTempX8LCD are four and eight channel thermocouple data loggers with an LCD screen. The device features on-screen minimum, maximum and average statistics, as well as a user configurable screen that allows for any combination of channels to be displayed. The device accepts J, K, T, E, R, S, B and N type thermocouples.
Display Overview
LCD Screen Overview

Status Indicators
- Battery Power (Full, Half-full, Empty)

- Memory Remaining (Empty, Half-full, Full)
- Device is running
- Device is stopped
- Delay Start
- Push-button (Manual) Start
- Device reset has occurred
- External power present
Thermocouple Connections
The TCTempX4LCD and TCTempX8LCD Series has 4 or 8 SMP connections. These connections allow the user to insert subminiature thermocouple plugs into the connectors on the device. The diagram below shows how to connect the individual thermocouples for each of the devices.

Warning: Note the polarity instructions. Do not attach wires to the wrong terminals.
Thermocouple Channel Numbers
|
TC5 |
TC6 | TC7 | TC8 |
| TC1 | TC2 | TC3 |
TC4 |
Installation Guide
Installing the Software
The Software can be downloaded from the MadgeTech website at madgetech.com. Follow the instructions provided in the Installation Wizard.
Device Operation
Connecting and Starting the Data Logger
- Once the software is installed and running, plug the supplied USB-A to Micro USB cable into the data logger.
- Connect the USB-A end of the cable into an open USB port on the computer.
- The device will appear in the Connected Devices list. Highlight the desired data logger.
- For most applications, select Custom Start from the menu bar and choose the desired start method, reading rate and other parameters appropriate for the data logging application and click Start.
- Quick Start applies the most recent custom start options
- Batch Start is used for managing multiple loggers at once
- Real Time Start stores the dataset as it records while connected to the logger
- The status of the device will change to Running, Waiting to Start or Waiting to Manual Start, depending upon your start method.
- Disconnect the data logger from the USB cable and place it in the environment to measure.Note: The device will stop recording data when the end of memory is reached or the device is stopped. At this point the device cannot be restarted until it has been re-armed by the computer
Thermocouple Type
To change the thermocouple type:
- In the Connected Devices panel, click the device desired.
- On the Device Tab, in the Information Group, click Properties. Or, right-click the device and select Properties in the context menu.
- On the General Tab, change the Thermocouple type in the drop down menu.
- Apply these changes, there will be a prompt to reset the device, select Yes.
Please note that the same thermocouple type must be used on all of the channels.
Downloading Data from a Data Logger
- Connect the logger to the interface cable.
- Highlight the data logger in the Connected Devices list. Click Stop on the menu bar.
- Once the data logger is stopped, with the logger highlighted, click Download. You then can create a report from the saved Dataset.
- Downloading will offload and save all the recorded data to the PC.
Device Functions
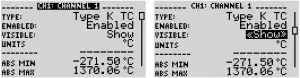
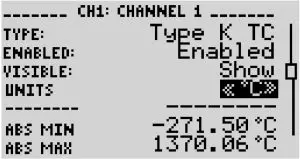
Channel Options
Each of the TCTempX4LCD and TCTempX8LCD’s channels have several options that are configurable by the user through the device’s display screen menus and the software.
Show or Hide Channels on the Home Screen
The user may choose to either show or hide channels on the home screen
To change channel visibility from the Home Screen:
- Press to view first channel screen
- Use to view additional channels
- On desired channel screen use to highlight Visible
- Use to choose Show or Hide
- Press to return to the Home Screen—OR—
- Use to highlight desired channel
- Press to view channel screen
- Use to highlight Visible
- Use to choose Show or Hide
- Press to return to the Home Screen
Change Channel Display Size
Channels may be viewed in a number of different sizes.The smallest size allows for an overview of several channels at once, while the largest gives at-a-glance access to one or two channels.

To change channel display size from the Home Screen:
- Press to enter the Main Menu
- Use to highlight Setup Menu
- Press to enter the Setup Menu
- Use to highlight Channel Size
- Use to choose the desired channel size
- Press once to return to the Main Menu
- Press again to return to the Home Screen
Change Channel Units
Channels can be customized to display readings in a variety of convenient units. Units available for selection will vary according to channel type.
Note: Changing display units will not affect logged data.
To change channel display from the Home Screen:
- Press to view first channel screen
- Use to view additional channels
- On desired channel screen use to highlight Units
- Use to choose the desired unit option
- Press to return to the Home Screen—OR—
- Use to highlight desired channel
- Press to view channel screen
- Use to highlight Units
- Use to choose the desired unit option
- Press to return to the Home ScreenNote: Press to update all channels.
LED Functionality
|
|
Primary LED (Green):
|
|
|
Secondary LED (Red):
|
|
|
Channel LED (Blue):
|

Product Support & Troubleshooting
- Visit our Resources online at madgetech.com/resources.
- Contact our friendly Customer Support Team at (603) 456-2011 or [email protected]
MadgeTech 4 Software Support
- Refer to the built-in help section of the MadgeTech 4 Software.
- Download the MadgeTech 4 Software Manual at madgetech.com.
- Contact our friendly Customer Support Team at (603) 456-2011 or [email protected].
6 Warner Road, Warner, NH 03278(603) 456-2011[email protected]madgetech.com
DOC1375036-00 | REV 1 2020.08.17


References
[xyz-ips snippet=”download-snippet”]