MAGNASONIC FS71 All-In-One 22MP Film Scanner with HDMI User Manual
What’s Included
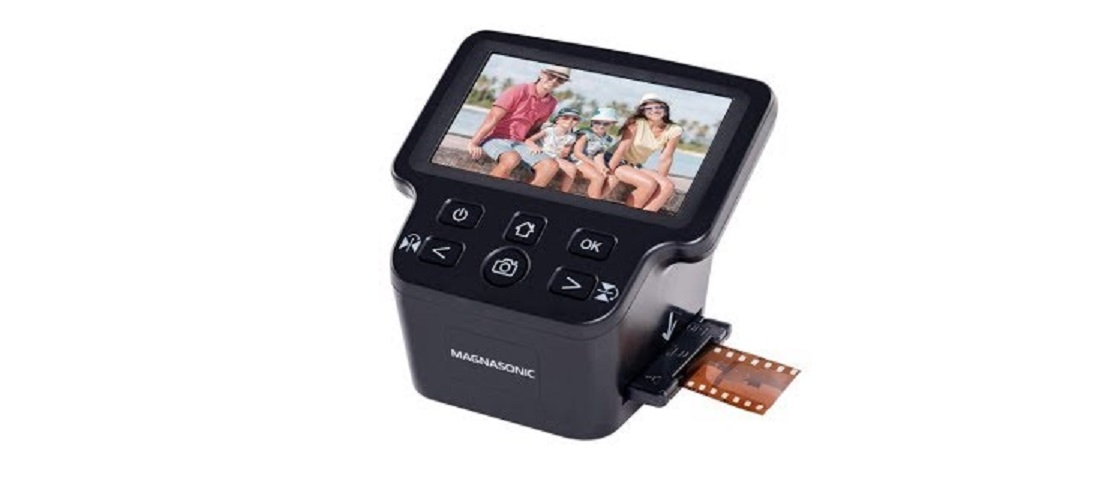
- 22MP All-In-One HDMI Film Scanner
- Slide Adapter
- Negative Film Adapter
- 110 Slide Insert
- 110 Film Insert
- Super 8/8mm Insert
- Mini USB-to-USB Cable
- USB Wall Power Adapter
- Cleaning Brush
Product Information
Negative Adapter
110 Slide Insert
Slide Adapter
110 Film Insert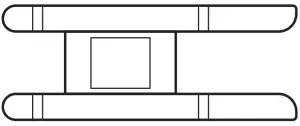
Super 8/8mm Insert
Product Information
Front
Back
Capture Images
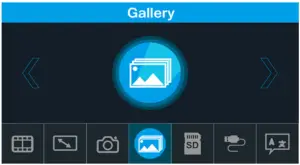
Gallery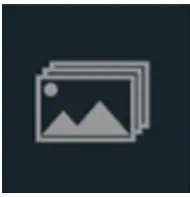
Format SD Card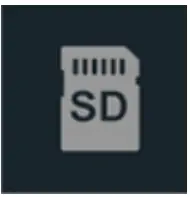
Connect to PC
Language Setting
Film Type Setting
Resolution Setting
Operating Instructions
Cleaning and Care
Use the included cleaning brush to ensure there is no dust or debris on the lens. Insert the soft end of the brush, face down, into the film/slide holder slot. Carefully push the brush around inside to get rid of any dust or debris that may be on the lens.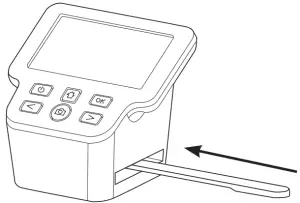
Powering On Your Film Scanner
- Using the included mini USB to USB cable, connect the mini USB plug to the mini USB port on the film scanner.
- Connect the other end of the USB cable into the included USB wall adapter. Plug the wall adapter into a power outlet.
- Press the power button on the scanner to turn it on.

Changing The Language
- On the main menu, go to Language.
- You may now select the language of your choice by using the < and > buttons to scroll between the available selections.
- Press the OK button to select the language.
Prepping Your Film/Slides
- Insert your slide or film into the appropriate slide or film adapter. If you are unsure what adapter to use, on the film scanner menu go to Film Type then choose the film or slide type you are going to scan. There will be images of the corresponding film or slide adapter you can reference.
- Ensure the slide/film is facing the correct way and is not bent.
- Close the slide or film adapter and press the edges so that it locks into place.Note: This scanner has 128MB of built-in memory available to store approximately 50 scanned images. This film scanner will also accept SD, SDHC, and SDXC cards with a maximum of 128GB for extra memory.Note: If you are using a 128GB SD card, it may need to be formatted before using for the first time. Please see page 12 for formatting instructions.
Using an SD Card
Insert the SD card, face down, into the SD card slot located at the back of the film scanner. The SD card will click in automatically if inserted properly.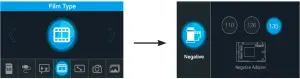
Remove the SD card by pressing on it until it clicks and pops out, then remove it from the slot.
Scanning Your Images
- Press and hold the power button for 3 seconds on the scanner to turn it on.
- Insert the prepared film or slide adapter into the slot on the right side of the film scanner.
- Select your film/slide type that you are scanning by going into Film Type on the scanner’s menu, go to your corresponding film/slide and press the OK button.
- Once you have selected your film or slide type, hit the button to go back to the main menu.
- Go to Capture to begin scanning your images. Press the OK button.
- You should now see your film or slide image on the screen.
- To adjust brightness or color, press the OK button. Use the left and right.arrow buttons to move between brightness, red, green, or blue. Press the OK button to adjust them up or down.
- When ready, press the button to return to your image.
- You can also mirror or flip your image prior to scanning and saving your image by pressing the left (mirror) or right (flip) buttons.
- To capture and save your image, press the button again.
- You can press the button to return back to the main menu when your scanning is done.

Viewing Your Scanned Images
- To view your scanned images, go to Gallery and press the OK button.
- Your images will play automatically.
- To manually review your saved images and stop the auto-play, press the OK button again.
- Use the left and right buttons to scroll through each saved image.
- To delete the scanned image press the OK button to open the menu, then press the right arrow and press OK to select Delete. The image will be permanently deleted from the scanner.
Watching Saved Images From a TV Screen
- Turn on the film scanner.
- Using an HDMI to HDMI cable (not included), connect the HDMI plug into the HDMI port at the back of the film scanner.
- Connect the other end of the HDMI cable into the HDMI port on your TV.Note: When you connect the film scanner to your TV via HDMI, the scanner’s LCD screen will turn off automatically.
- Ensure that your TV is set to the proper HDMI input/video source.
- You should now see your saved images on your TV.
Downloading Images To Your Computer
- Ensure your computer is powered on.
- Connect the film scanner to your computer via the included mini USB cable.
- Turn on the film scanner.
- In the film scanner menu, select USB Upload.
- A new folder will appear on your computer. Your saved images can be found here. You can now move these images from your scanner directly onto your computer.
Formatting Your SD Card
WARNING: Formatting your SD card will delete all files stored on the SD card. Download your files from your SD card to your computer before formatting.
- In the main menu, go to Format press the OK button.
- When prompted if you would like to format the media, use the < button to choose “Yes”. Press the OK button to begin formatting the SD card.
FAQ / Troubleshooting
|
Issue |
Solution |
| How can I get the best quality scan possible? | Ensure the film/slides are clean and that you clean the inside of the scanner with the included cleaning brush immediately before scanning. See pg. 7 for instructions on how to use the cleaning brush. |
| How should I prepare the film/slides to ensure the best possible scan? | The film/slide should be free of any dust/fingerprints. This can be done with an appropriate cleaning cloth. |
| I’ve noticed a consistent spot on every slide I have scanned. Is something wrong with my scanner? | There is likely a small amount of dust inside your unit. Use the included cleaning brush to ensure there is no foreign debris. See pg. 7 for instructions on how to use the cleaning brush. |
| Do I need a computer to begin scanning? | Everything is plug-and-play right out of the box. You can save images to an SD card (up to 128GB) or the scanner’s internal memory (128MB). You can then export to a computer at a time that is more convenient. |
| What file format are the images saved as? | The files are automatically saved in JPG format. |
| Can I use this to scan raw film or do I need to develop the negatives first? | The scanner will work for developed film only. |
Specifications
| Image Sensor | 14.0 Mega Pixels (4416*3312) 1/2.3” CMOS sensor |
| Display | 5” TFT LCD |
| White Balance | Automatic |
| Exposure Control | Automatic/Manual (-2.0 EV ~ +2.0 EV) |
| Supported Film Type | Film: 35mm, 110, 126, and Super 8 Slides: 135, 110, and 126 |
| Languages | English, Spanish, French, S-Chinese, T-Chinese, German, Italian, Japanese |
| Scanning Method | Single |
| Resolution | 14.0 Megapixels/22 Megapixels (interpolation) |
| Picture Aspect Ratio | 135/3:2, 126/1:1, 110/4:3, Super8/4:3 |
| PC System Compatibility | Windows XP, Vista, Windows 7, Windows 8, Windows 10 |
| Mac System Compatibility | Mac 10.7.3 and higher |
| Image File Format | JPEG |
| Light Source | LED Backlight |
| Scanning Speed | 2-3 Seconds |
| Internal Memory | 128 MB (51 images) |
| External Memory Card | SD card up to 128GB |
| Power Supply | DC 5V/1A (USB) Adapter |
| Dimensions | 5.4 (L) x 4.4 (W) x 4.9 (H) inches |
| Weight | 0.83 lbs |
| Product Certifications | FCC, ICES, cETL/ETL, HDMI |
Magnasonic® Warranty
Thank you for choosing Magnasonic. We guarantee your investment in our products is a solid one! Extensive thought, research, planning, and design goes into every product we make. High quality components combined with precision manufacturing allows us to maintain the highest possible production standards. All items are guaranteed against defects in materials and craftsmanship. Magnasonic products come with a complete one year parts and labour warranty. Proof of purchase from an authorized Magnasonic dealer is required when seeking warranty assistance.
Magnasonic has outstanding quality control, if something should go wrong with any of our products, we will repair it free of charge! If the product cannot be repaired, we will replace the product. If the product has been discontinued, we will replace the product with either the newest version of said product or current equivalent. Replacement parts furnished in connection with this warranty shall be warranted to a period equal to the unexpired portion of the original product warranty.
This warranty shall not apply to:A. Any defects caused or repairs required as a result of abusive operation,negligence, accident, improper installation or inappropriate use as outlined in the owner’s manual.B. Any Magnasonic product tampered with, modified, adjusted or repaired by any party other than Magnasonic.C. Any cosmetic damage to the surface or exterior that has been defaced or caused by normal wear and tear.D. Any damage caused by external or environmental conditions, including but not limited to transmission line/power line voltage or liquid spillage.E. Any product received without appropriate model, serial number, and CSA/cUL/cULus/cETL/cETLus markings.F. Any products used for rental or commercial purposes.G. Any installation, setup and/or programming charges.H. Defect or damage as a result of connecting a product to an outlet with the incorrect voltage. Voltage converters must be used where applicable.
If in any situation your purchase displays a manufacturer’s defect during the warranty period and does not function correctly, Magnasonic will repair your product and cover all parts, labour, and return costs upon delivery of the Magnasonic product together with proof of purchase.
Products returned to Magnasonic for warranty service must be shipped prepaid (paid by customer). Products must be shipped in the original shipping container or its equivalent; in any case the risk of loss or damage in transit is to be borne by you.
We believe everyday experiences should be extraordinary. We pledge to work with you in resolving any issue that occurs with your product. If you are in need of assistance do not hesitate to visit our support page at: www.magnasonic.com/support/
Important Safety Instructions
Safety Alerts
If any of the following conditions are present, stop using immediately, unplug the power cord, and refer to a qualified service professional for servicing:
A. If there is any smoke or unusual smell while using.B. If the product has been exposed to rain, water, or other liquids.C. If the product does not operate normally by following the operating instructions.D. If the product exhibits a distinct change in performance.E. If the product has been dropped or damaged in any way.
Best Practices for Safe Use
- Only use films of standard size.
- Only use attachments/accessories specified by the manufacturer.
- Unwind and straighten the USB cord before use.
- Check that the power voltage stated on the rating label corresponds to your local electricity supply.
- Unplug the power adapter from the wall when the product is unused for a long period of time and during thunderstorms.
- Do not use this product near water.
- Do not immerse this product, the power cord, or any accessories in water or any other liquid.
- Do not block any ventilation openings.
- Do not place this product near any heat sources such as radiators, heat registers, stoves, or other apparatus (including amplifiers) that produce heat.
- Do not attempt to service or disassemble this product yourself as opening or removing covers may expose you to dangerous voltages or other hazards.
Cleaning and Care
- Please make sure the scanner is clean before using.
- Do not use liquid cleaners.
- Do not use organic solvents such as alcohol, gasoline, or thinner, to clean the equipment.
- Clean outside of the product only with a dry cloth.
- Do not clean the inside of this product with anything except for the included cleaning brush.
FCC Information
This equipment has been tested and found to comply with the limits for a Class B digital device, pursuant to part 15 of the FCC Rules. These limits are designed to provide reasonable protection against harmful interference in a residential installation. This equipment generates, uses and can radiate radio frequency energy and, if not installed and used in accordance with the instructions, may cause harmful interference to radio communications. However, there is no guarantee that interference will not occur in a particular installation. If this equipment does cause harmful interference to radio or television reception, which can be determined by turning the equipment off and on, the user is encouraged to try to correct the interference by one or more of the following measures:
- Reorient or relocate the receiving antenna.
- Increase the separation between the equipment and receiver.
- Connect the equipment into an outlet on a circuit different fromthat to which the receiver is connected.
- Consult the dealer or an experienced radio/TV technician for help.
NOTE: This unit may contain a microcomputer for signal processing and control function. In very rare situations, severe interference, noise from an external source, or static electricity may cause it to lockup. In the unlikely event that this should happen, turn off the unit, wait at least five seconds, and then turn it back on again.
The terms HDMI and HDMI High-Definition Multimedia Interface, and the HDMI Logo are trademarks or registered trademarks of HDMI Licensing Administrator, Inc. LLC in the United States and other countries.
Thank you for your purchase of this Magnasonic product. Please read this user manual carefully before using product to ensure proper use. Keep this manual in a safe place for future reference.magnasonic.com/support
We reserve the right to change models, configurations, or specification without notice or liability. Product may not be exactly as shown. © MAGNASONIC®, MAGNASONIC®, the MAGNASONIC® marks may be registered. All other trademarks are property of their respective owners.
Thank you for your purchase of this Magnasonic® product. We hope you enjoy your experience.
Questions?Give us a chance to help, we’re just a click away.

Don’t forget to register your product with us!Magnasonic.com/registration
 report this ad
![]()
References
[xyz-ips snippet=”download-snippet”]