
![]()
![]()
 K5 PLUSQUICK START GUIDE
Thank you for purchasing the K5 Series 3D Printer by MakerPl!You will find that your K5 is packed with features and is versatile, reliable, and user-friendly.This guide provides you with quick instructions to help you quickly set up and operate your K5. If you require detailed instructions, please refer to the User’s Manual in the included U– Disk.
 |
Do not touch the nozzle while your K5 is in operation. High temperatures may cause injury. |
|
Moving parts may cause injury while your K5 is in operation. |
|
This version of the Cura slicing software included has been specially optimized to work with your K5 and is updated continuously. Please contact technical support for updates. |
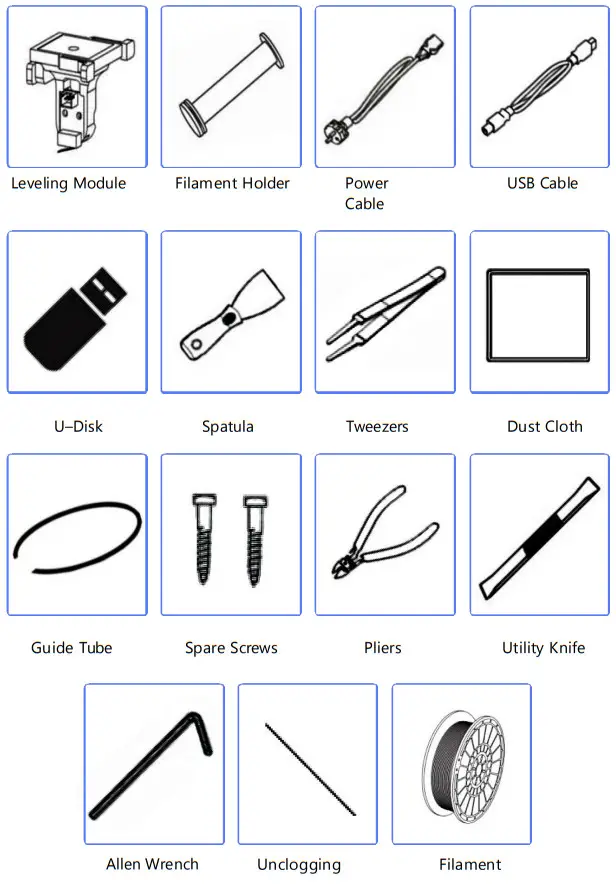
STARTER KIT CONTENTS
GETTING TO KNOW YOUR K5

Your K5 has a user–friendly touch user interface, with clear onscreen instructions and prompts which guide you in setting up, calibrating and printing.
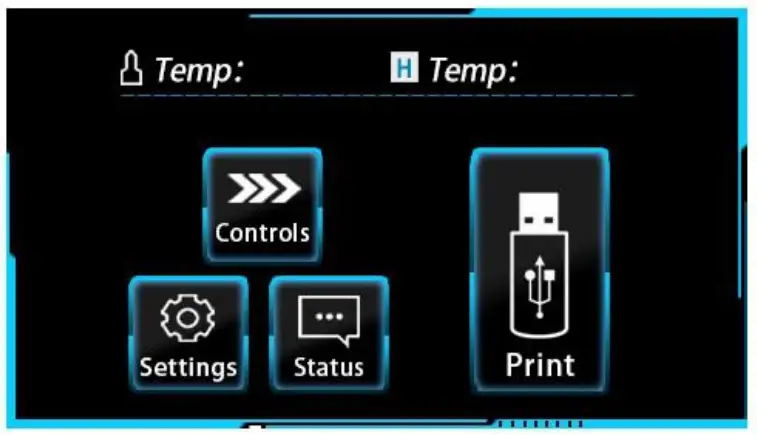
HOME SCREEN
PRINT SCREEN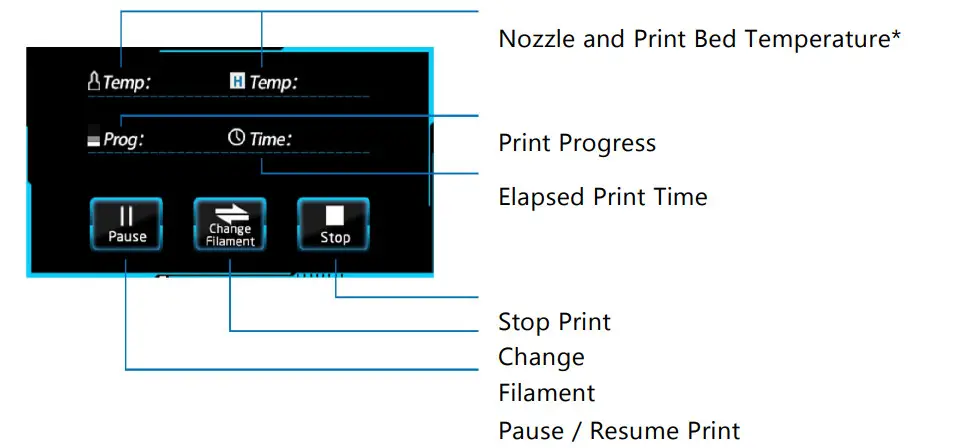
* Nozzle and print bed temperatures are adjustable while printing.Single tap to make temperature increments of 1. Long press to make increments of 10. Print chamber LED can be toggled on or off while setting print bed temperature.
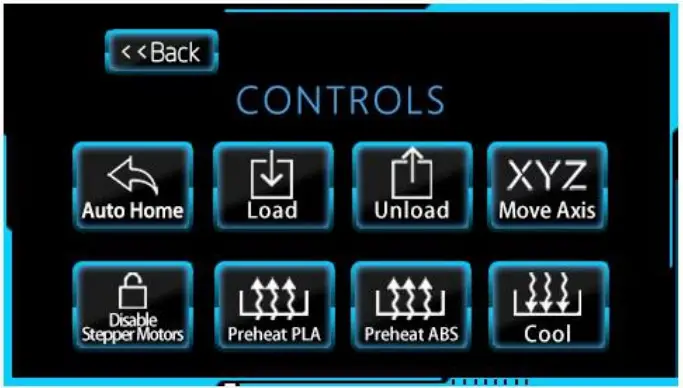
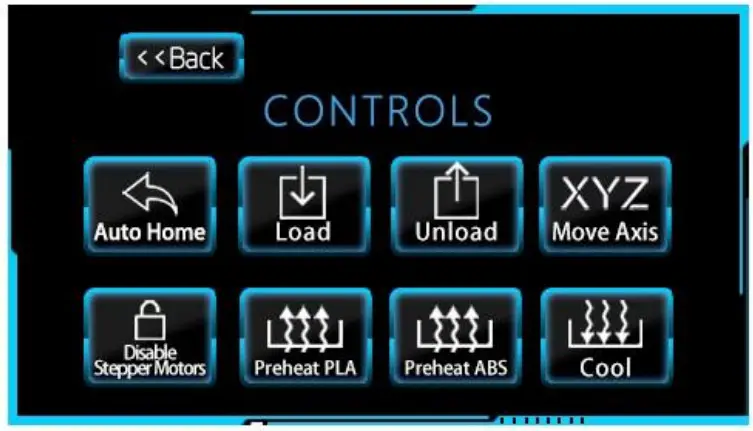
CONTROLS SCREEN
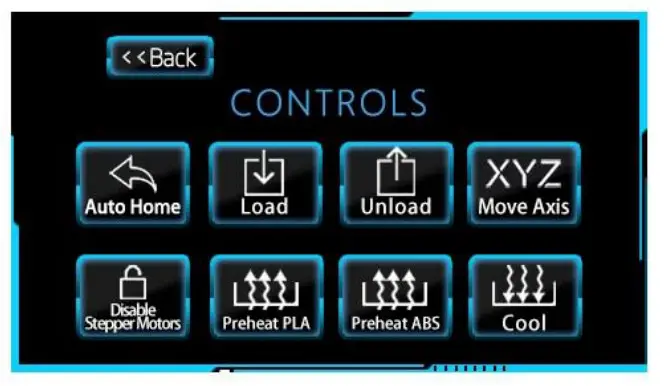
Auto Home: Resets all axes to zero. Load: Heats and loads filament into the extruder.Unload: Heats and unloads filament from extruder.Move Axis: Manually move X, Y, or Z-axis.Disable Stepper Motors: Disables the stepper motors for users to physically move the X and Y axes.Preheat PLA: Preheats the print bed to 70°C and the extruder to 200°C. Preheat ABS: Preheats the print bed to 100°C and the extruder to 230°C. Cool: Reduces the temperature of the nozzle and print bed to ambient temperatures.
SETTINGS SCREEN
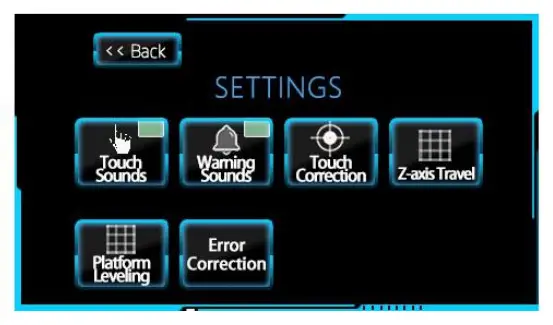
Touch Sounds: Enable or disable sounds for screen touches. Warning Sounds: Enable or disable warning sounds, including alarms. Touch Correction: Starts the calibration procedure of touchscreen.Z-axis Travel: Measures the current travel distance of the Z-axis. Platform Leveling: Starts the leveling procedure of the build platform. Error Correction: Starts the calibration procedure for filament breakage (available on some models).
LEVELING YOUR PLATFORM
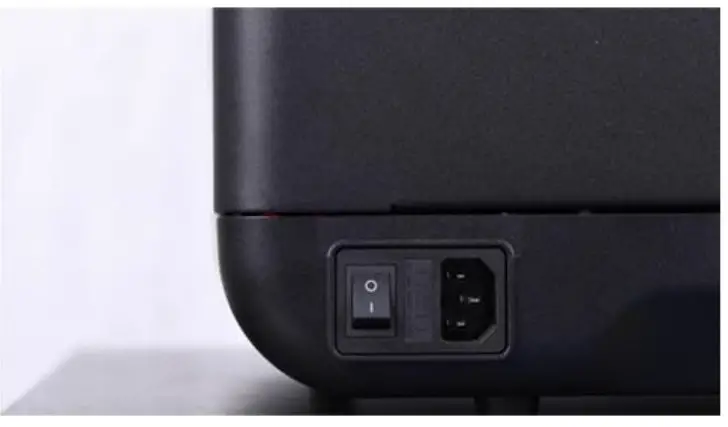
Connect the power cable to the power input and power on.
Tap the Settings button.
In the Settings screen, select Platform Leveling.
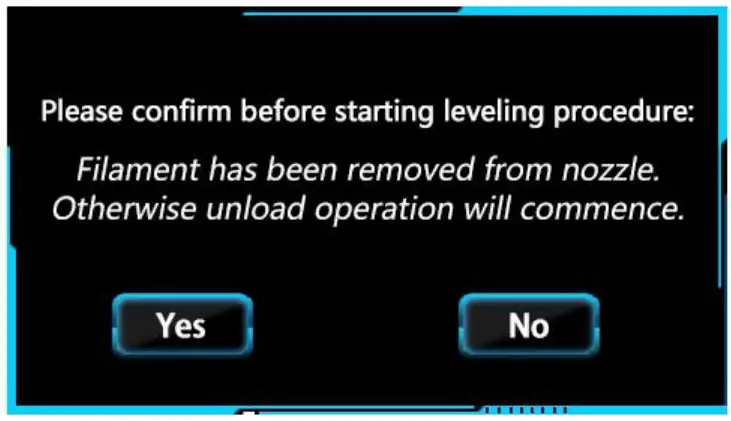
Select Yes. If subsequent leveling procedures are required, select No if filament has been loaded in the extruder to begin the unloading procedure.
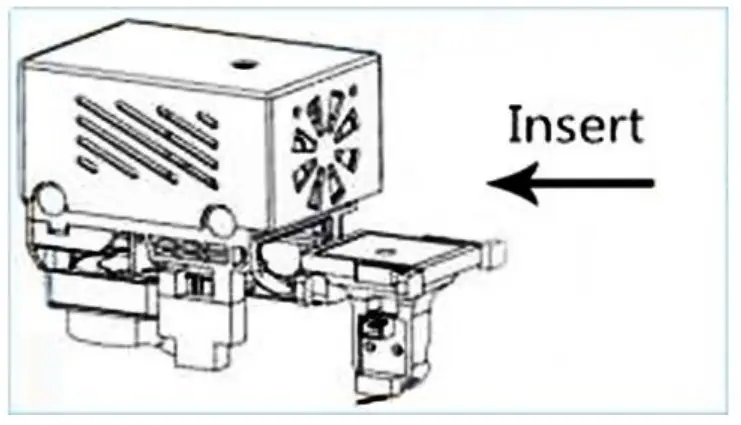
Replace the hot-swap nozzle with the leveling module, ensuring it clicks in place in the extruder.
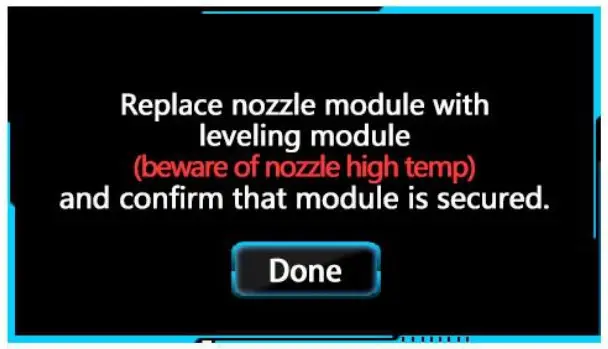
Once the leveling module is secured, select Done.
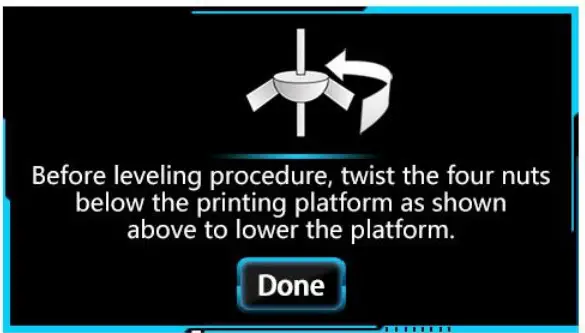
Follow the on-screen instructions to tighten the four nuts counterclockwise. Select Done when complete.
The platform will measure the designated points twice.
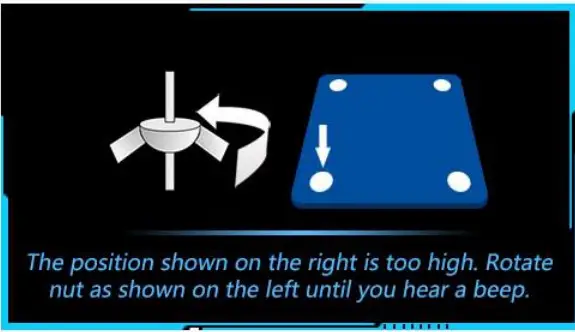
Tighten each nut slowly as shown onscreen until you hear a beep.
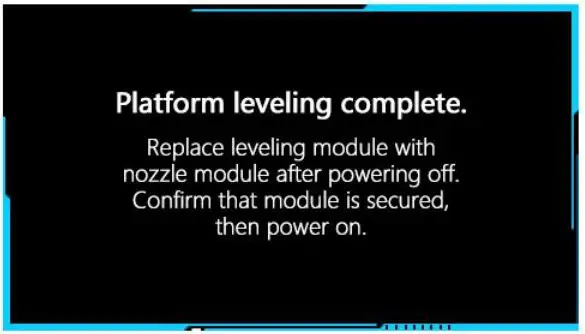
After the calibration procedure is complete, follow the onscreen instructions to power off the K5 before replacing the nozzle and powering on.
YOUR FIRST PRINT
Now that you have learned about your K5 and leveled its platform, it’s time to print!
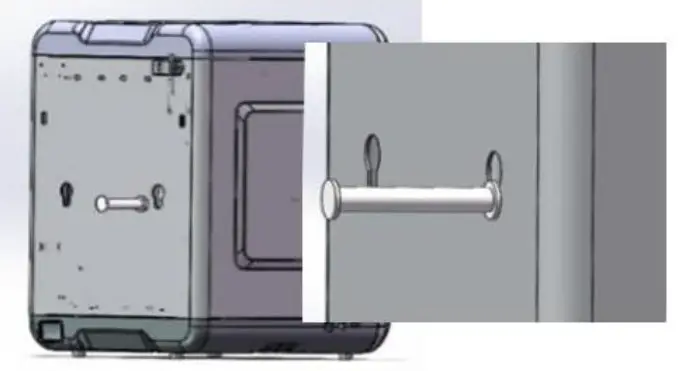
Clamp the gap end of the rack downward securely into the back slot of the K5.
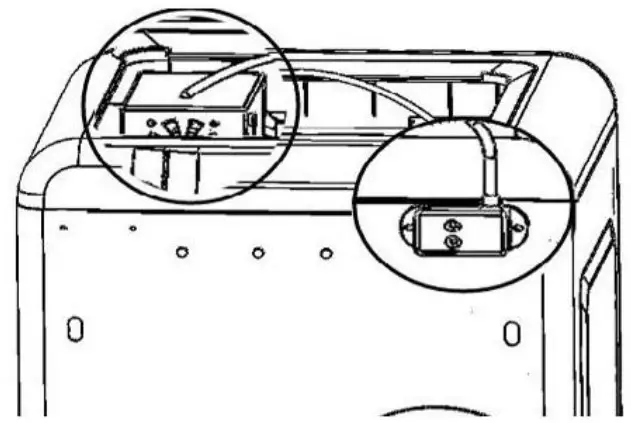
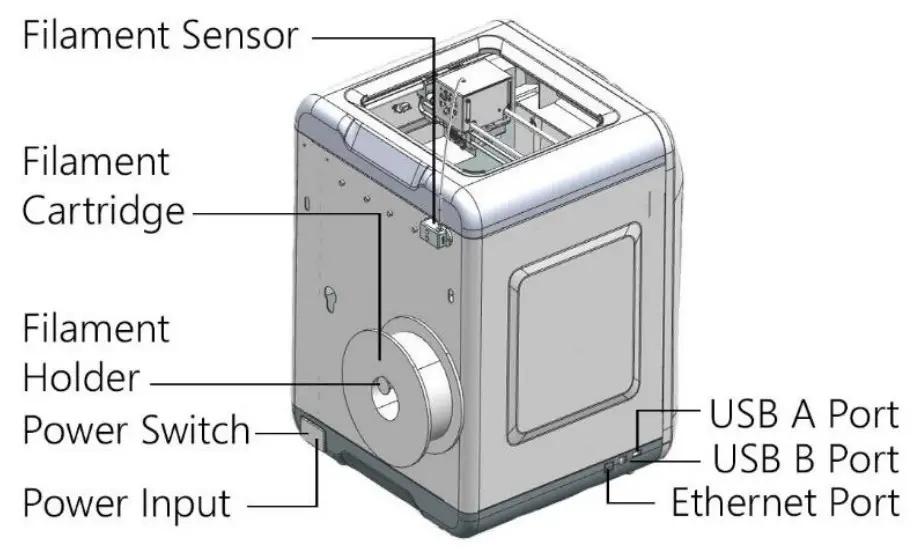
Insert the PTFE tube into the upper port of the filament sensor on the right side of the K5.
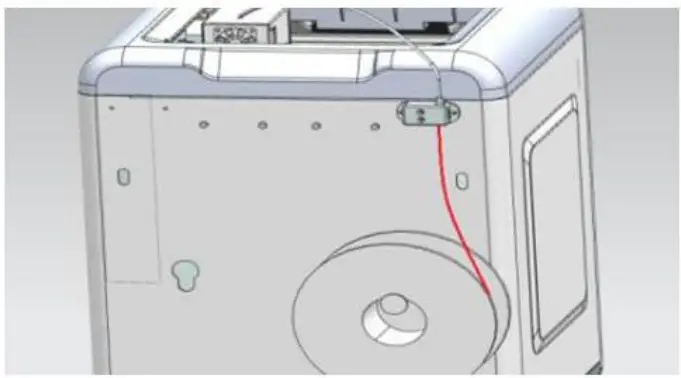
Place the filament cartridge on the rack, insert the filament end into the filament sensor and through the PTFE tube.
Ensure that the filament passes through the PTFE tube and insert the end into the filament intake until there is resistance.
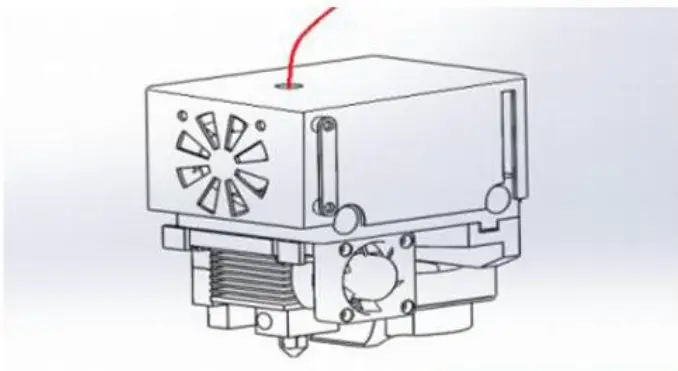
On the home screen, select Controls and then Load to heat and load the filament into the extruder. The nozzle will extrude a string of filament for a few minutes. Follow the onscreen prompts once complete.
On the home screen, select Print.
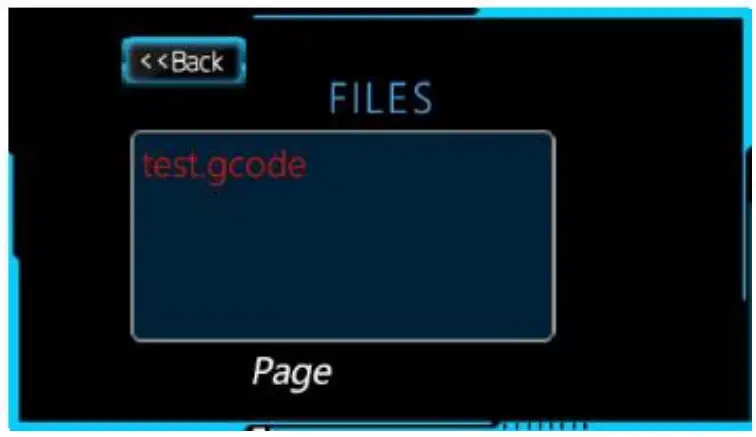
Select the desired model to print.
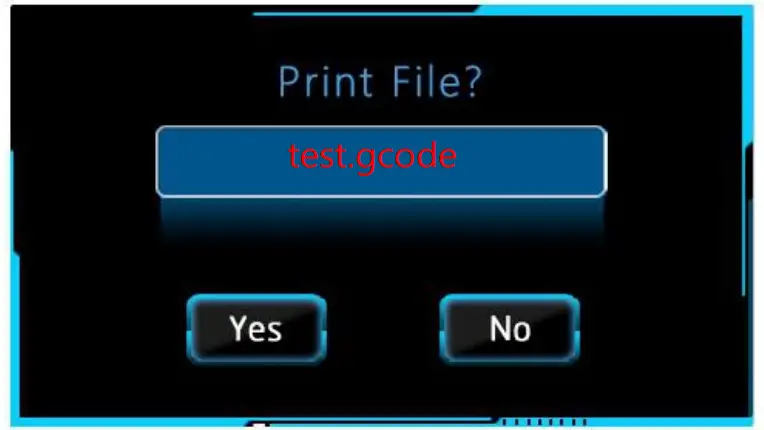
Tap Yes to commence printing or No to go back to the file list.
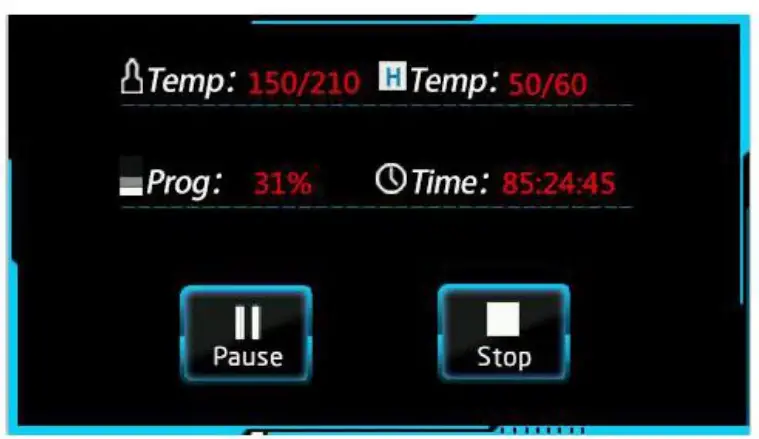
As the temperature of the nozzle and print bed rises to a predetermined level, your K5 will commence printing.
You will eventually unload the filament for different reasons. Select Unload in the Controls screen to heat and unload the filament from the extruder. The nozzle will extrude a string of filament for a few minutes. Once the extrusion is complete, gently pull the filament out from the extruder through the PTFE tube.
WIFI AND VIDEO MONITORING
The K5 PLUS has Wi-Fi connectivity. You can monitor your print progress through its HD camera, and pause, resume or stop the print from your Windows PC, Mac or even your mobile phone!
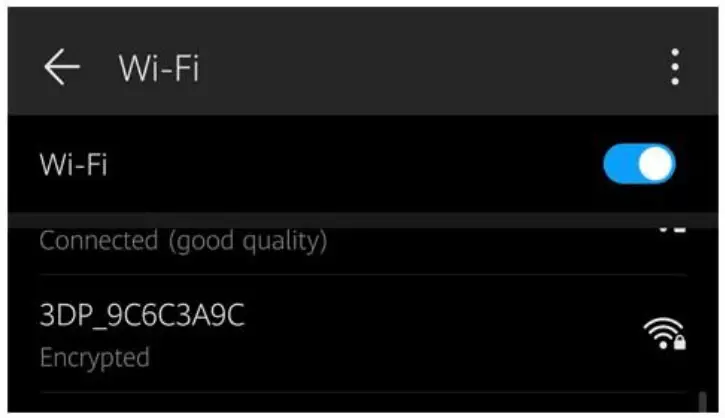
Search through the Wi-Fi networks on your PC, Mac or mobile phone for your K5’s SSID and connect to it.
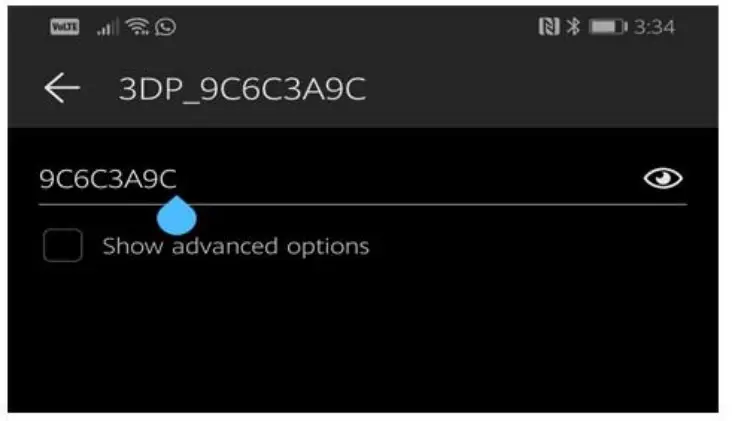
Enter the last 8 digits of your K5’s SSID as the password.
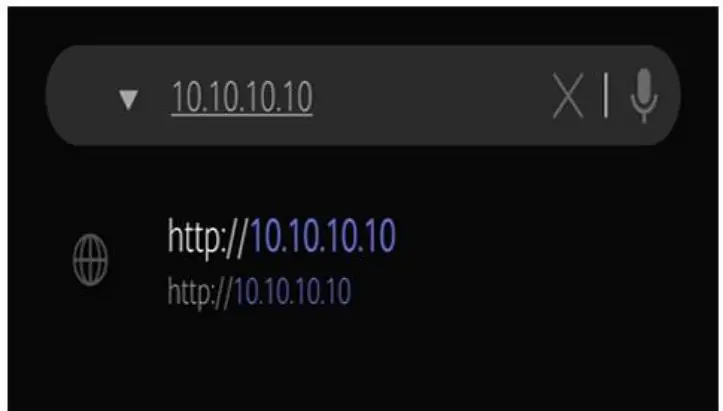
Open your internet browser and enter 10.10.10.10 in the URL field.
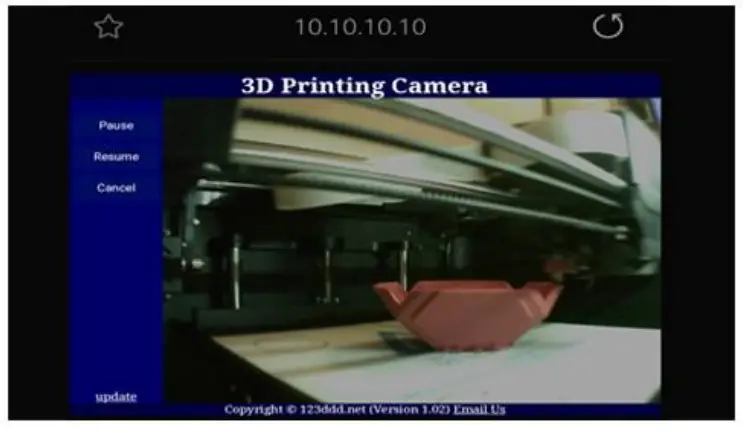
Through the interface, you can monitor the print progress in real-time, or pause, resume or stop printing.
 report this ad
![]()
QUALITY INNOVATION RESPONSIBILITY WIN-WINSHENZHEN SOONGON TECHNOLOGY CO. LTDB Unit 3F Building B, Xixiang Haoye Industrial Park, No. 162Fenghuang Ave, Fuyong Street, Baoan District, Shenzhen, ChinaTel: 86-0755-27370002Email: [email protected]Website: www.makerpi3d.com
[xyz-ips snippet=”download-snippet”]