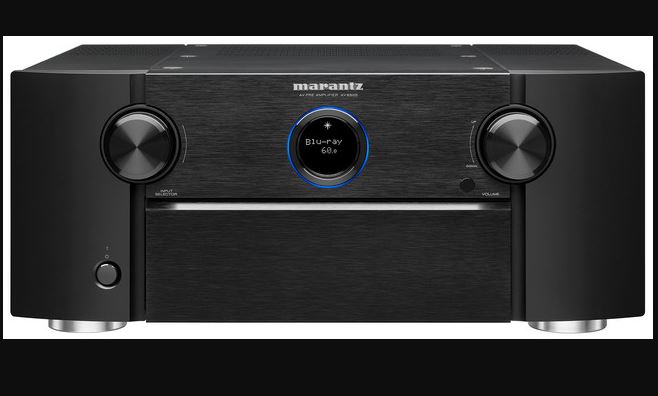
marantz AV8805 HDMI 8K Upgrade
User Guide
Read me first
This document describes the details and important notes about the upgrade service.
Upgraded Features
- One HDMI input connector (HDMI IN 7) and two HDMI output connectors (HDMI OUT MONITOR 1 and 2) support 8K 60/50 Hz and 4K 120/100 Hz pass-through.
 NOTE · The HDMI input 7 can not be selected for ZONE 2.
 - All HDMI input/output connectors support the HDR10+, Dynamic HDR, VRR (Variable Refresh Rate), QMS (Quick Media Switching), and QFT (Quick Frame Transport) functions.
- The copy protection standard HDCP 2.3 is supported.
- The HDMI input 7 will be assigned to “AUX2 (8K)” as a default input source.NOTE · Along with the above, the unassigned HDMI input connector is changed from HDMI 7 to HDMI 6.
- The following information will be displayed when “HDMI Signal Info.” or “HDMI Monitor 1 / HDMI Monitor 2” is selected in the setup menu.8K signal / HDR10+ / Dynamic HDR / ALLM (All Low Latency Mode) / VRR (Variable Refresh Rate) / QMS (Quick Media Switching) / QFT (Quick Frame Transport) / eARC (Enhanced Audio Return Channel)
- The “4K Signal Format” in the setup menu will be renamed as “4K/8K Signal Format” and “8K Enhanced” mode will be newly added. Select “8K Enhanced” mode to allow 8K or 4K 120Hz pass-through.NOTE · The default setting after the upgrade is changed from “Standard” to “Enhanced”.
- In the “Resolution” setting for i/p Scaler of the setup menu, the “8K” setting for 8K upscaling is added.NOTE · The “4K(60/50)” setting is integrated into the “4K” setting, the “1080p:24Hz” setting is integrated into the “1080p” setting, and the frame rate conversion function is removed.
- When powered ON, the front panel display shows “AV8805A” instead of “AV8805”. The added “A” means the product has been upgraded.
 NOTE · The HDMI input 7 can not be selected for ZONE 2.
Press INFO button on the remote control unit twice to display information about video input and output signals at the screen.
Important post-upgrade notes
- Once the upgrade is performed, the following settings will reset to factory default settings. The backup memory such as volume level will be erased as well. It is necessary to setup the product once again when the product is returned.
- Audyssey® Setup
- Speaker Config.
- Changing the “Smart Select Names”
- Network connection
- Last function memory
- Various settings using the custom installer
- All the other settings in the backup memoryNOTE • The “Save & Load” function does not work. The saved settings can not be restored once the upgrade is performed on the product.
- The warranty period of the product is the same as before the upgrade.
- If the upgrade is performed, the product cannot be returned to the state before the upgrade.
Packing the product (US and Canada only)
Once you received an empty box, follow the instructions below to pack the product. It will help prevent damages during shipment.
- Preparation
- Remove the left and right antennas on the rear panel. Keep the antennas at home and attach them again to the product once the product is returned after the upgrade.NOTE
- If the product is packed with the antennas attached, the antennas will be damaged.
- Also keep other accessories such as the remote control unit at home. They do not need to be shipped with the product.
- To protect the door during shipment, fix the door in place with tape.To tape up the door, use the blue tape affixed to the provided product packing sheet.
- Remove the left and right antennas on the rear panel. Keep the antennas at home and attach them again to the product once the product is returned after the upgrade.NOTE
- Packing
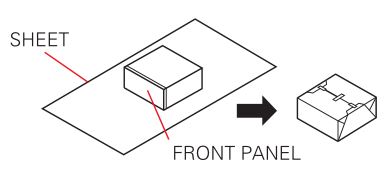
- Wrap the product with the provided sheet as shown in the diagram.To tape up the product, use the yellow tape affixed to the provided product packing sheet.
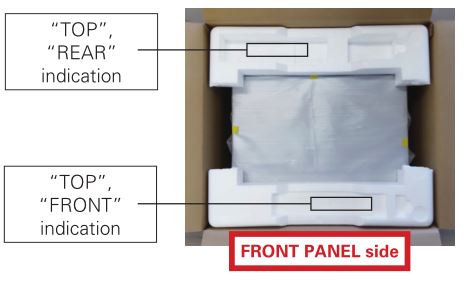
- Set the bottom cushions (front/ back) in the cardboard box in the orientation as shown in the diagram.
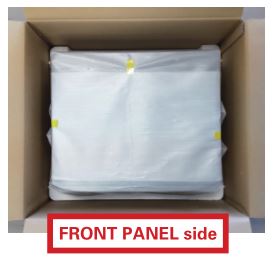
- Place the product in the box with the front panel facing the “FRONT” cushion.
- Set the top cushions (front/back) in the correct orientation.
- Close and tape the cardboard box for shipment. Follow the instructions from the servicer for shipment.
- Wrap the product with the provided sheet as shown in the diagram.To tape up the product, use the yellow tape affixed to the provided product packing sheet.


WWW.MARANTZ.COMYou Can Find Your Nearest Authorized Distributor or Dealer on Our Website![]() is a registered trademark.
is a registered trademark.
Printed in Japan 5411 11920 00AM© 2021 Sound United. All Rights Reserved.
[xyz-ips snippet=”download-snippet”]