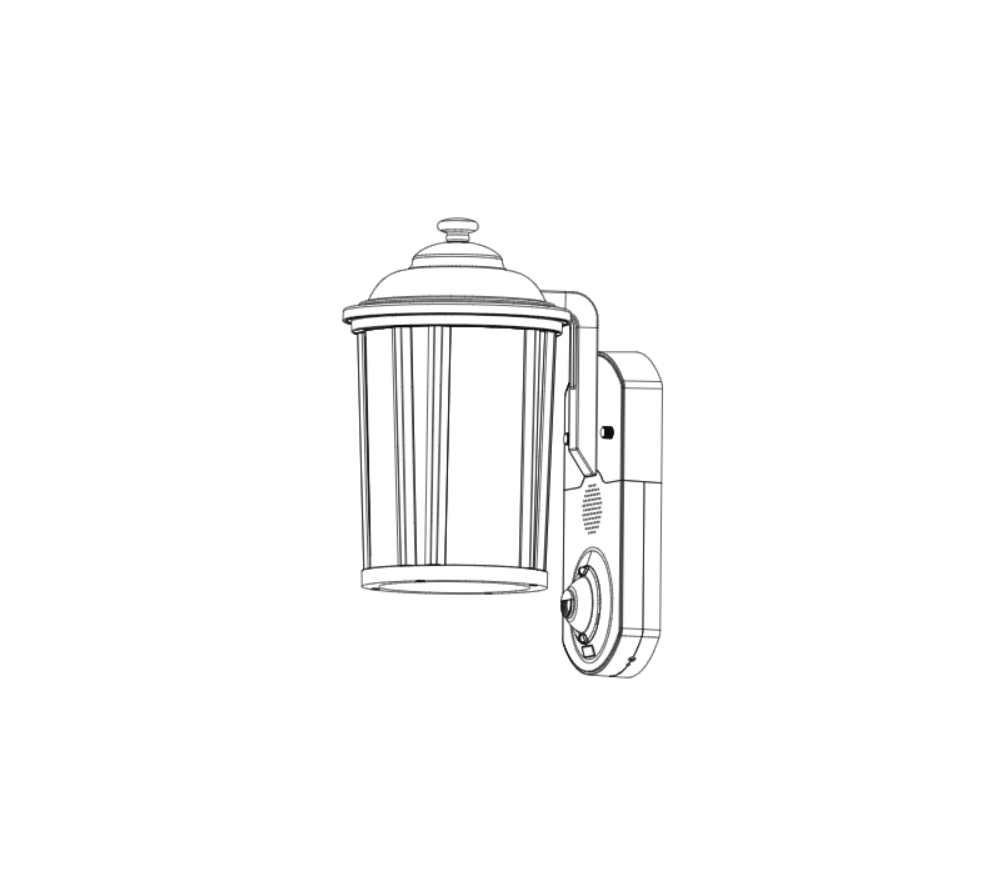
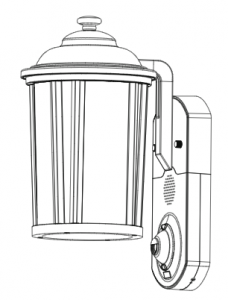
Maximus Smart Security Light Instruction Manual
For questions/replacement parts, call our customer service department at 1-855-869-0304,6:00am–6:00pm PST, Monday–Sunday or email:
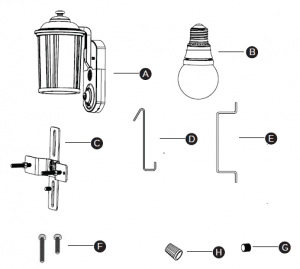
PACKAGE CONTENTS
PART |
DESCRIPTION |
QUANTITY |
|
A |
Fixture |
1 |
|
B |
Type A LED bulb, 6W |
1 |
|
C |
Mounting bracket with (2) long screws and (2) nuts |
1 |
|
D |
Fixture holding hook |
1 |
|
E |
Fixture screws length indicator |
1 |
|
F |
(2) long and short screws for junction box |
4 |
|
G |
Decorative fixture nuts |
2 |
|
H |
Wire nuts |
3 |
SAFETY INFORMATION
WARNING
- Risk of fire or electric shock. 120V light installation requires knowledge of luminaires electrical systems. If not qualified, do not attempt to install. Contact a qualified electrician.
- Disconnect power at fuse or circuit breaker before installing or servicing.
- No user serviceable parts inside. To avoid electrical shock, do not disassemble product.
- To prevent wiring damage or abrasion, do not expose wiring to edges of sheet metal or other sharp objects.
- Use only on 120V AC, 60 Hz circuits and with maximum 75W light bulb
PREPARATION
- Before beginning assembly of product, make sure all parts are present. Compare parts with package contents list. If any part is missing or damaged, do not attempt to assemble the product.
- Tools needed: Phillips screwdriver Step ladder Silicone sealant (optional)
INSTALLATION
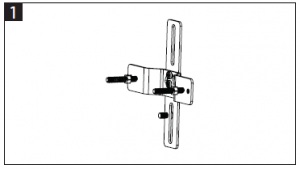 Disconnect power at fuse or circuit breaker before installing the light. Ensure fixture screws and nuts are inserted into the bracket as shown. Adjust the swivel angle based on your juction box.
 Tighten middle screws in the bracket so it’s firm and doesn’t wobble. Fasten bracket to junction box using 2 junction box screws. Choose short or long as needed.
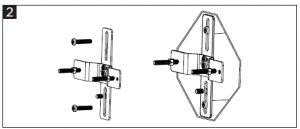
 Use the screw length indicator to adjust the length of the two long screws. Then, tighten the two nuts.
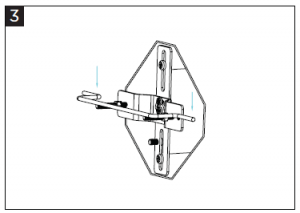
 Use the holding hook to suspend the light fixture and free up both hands for wiring. Connect the bottom of the hook (square) to the right screw pole. Hang the top of the hook onto the mounting bracket.
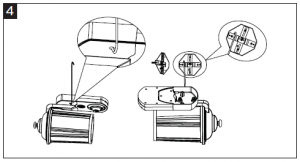
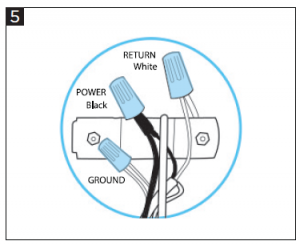 Use wire nuts to connect black wires together. Insert both wires all the way into the nut and twist until secure. Then repeat for the white wires and for the ground wires. Wall wire colors may vary. Recommended: Use of a voltage detector to confirm the power is off.
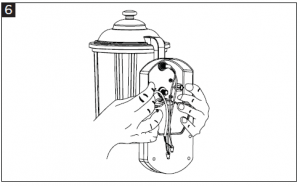 Holding light fixture with both hands, align the two fixture long screws into the light fixture screw posts.
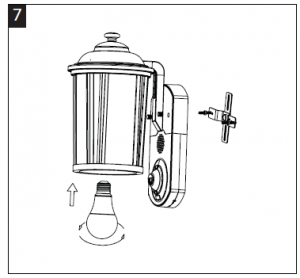 Mount the light fixture to the long screws as shown. Then, install both decorative nuts. Install the light bulb. Apply silicone sealant between the wall and the light fixture (optional).
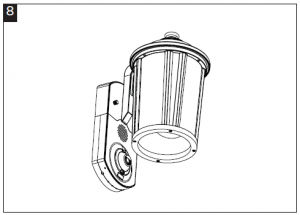 Adjust the angle of the camera lens, loosening up the locking ring. Use two fingers and turn it counter-clockwise. Lock it back up by turning the locking ring clockwise. For final adjustment, see the video feed on the phone after downloading the app and setting up WiFi.
WiFi Setup
- After installation, on your iOS or Android smartphone, please visit getkuna.com/app to download and install our free Kuna App.
- Follow in-app instructions to set up your Maximus Security Light.
Get powered. Get the app.
Welcometo the next generation in smart security!
Your MAXIMUS security light installs in minutes using existing wiring. It’s powered by the Kuna app for wireless intelligence.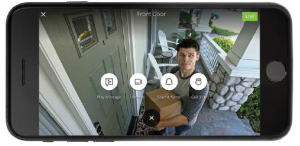
![]() Activate your light now! Visit getkuna.com/app to download the Kuna app on your Apple or Android mobile device.
Activate your light now! Visit getkuna.com/app to download the Kuna app on your Apple or Android mobile device.
![]() Create your account and connect your light.
Create your account and connect your light.
Read More About This Manual & Download PDF:
References
[xyz-ips snippet=”download-snippet”]

