
The expert for robots in your home
With one click to the online shop
myRobotcenter.eu myRobotcenter.co.uk
QUICK GUIDE

McCULLOCH Robotic Mower ROB S400/S500/S600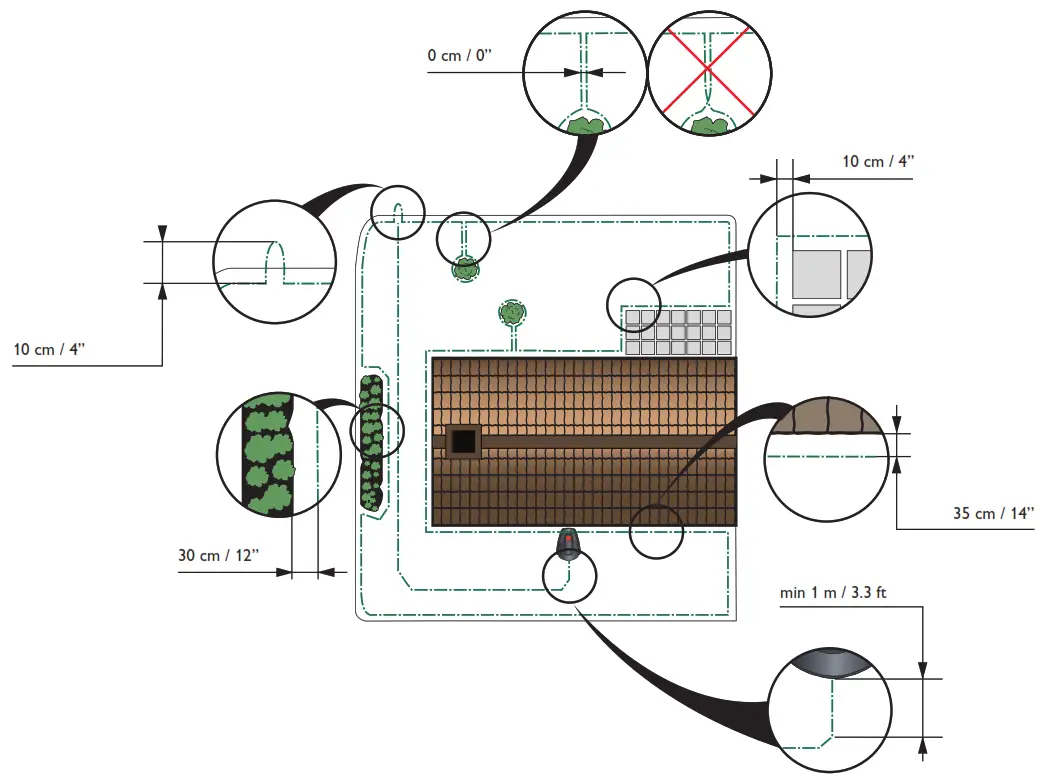
- PLACEMENT OF AND CONNECTING THE CHARGING STATIONSee chapter Installation in the Operator’s Manual1. Place the charging station at a central position in the working area, with a lot of open space in front of the charging station and on a relatively horizontal surface.2. Connect the power supply’s low voltage cable to the charging station and the power supply.3. Connect the power supply to a 100-240 V wall socket.4. Place the robotic lawnmower in the charging station to charge the battery while the boundary wire is laid. Press the ON/OFF button to turn the product on.
- PLACEMENT OF THE BOUNDARY WIRE AND THE GUIDE WIRESee chapter Installation in the Operator’s Manual1. Lay the boundary wire so that it forms a loop around the working area.2. Make an eyelet at the point where the guidewire will later be connected.3. Run the guidewire to the point on the boundary loop where the connection will be made. Avoid laying the wire at right angles.
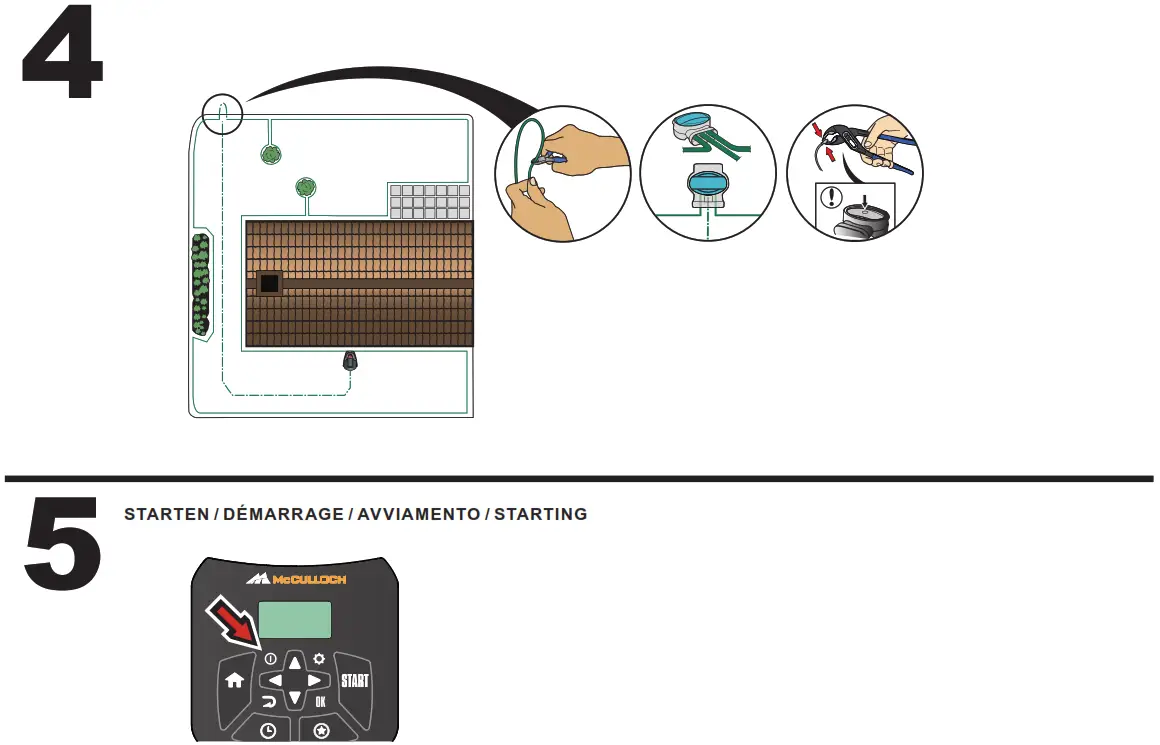
- CONNECTING THE BOUNDARY WIRE AND THE GUIDE WIRESee chapter Installation. in the Operator’s Manual1. Fasten the guidewire in snap locks at the bottom of the charging station.2. Open the connectors and lay the wire ends in the recesses on each connector.3. Press the connectors together using a pair of pliers.4. Cut off any surplus boundary wire. Cut 1 to 2 cm / 0,4 to 0,8” above the connectors.5. Press the connectors onto the contact pins, marked L (left) and R (right), on the charging station. It is important that the right-hand wire is connected to the right-hand contact pin and the left-hand wire to the left-hand pin.6. Fasten the connector to the contact pin marked Guide on the charging station.
- CONNECTING THE GUIDE WIRE TO THE BOUNDARY WIRESee chapter Installation in the Operator’s Manual1. Cut the boundary wire with wire cutters at the center of the eyelet that was made in step 2.2.2. Connect the guidewire to the boundary wire using the accompanying couplers. Press the couplers completely together with adjustable pliers.
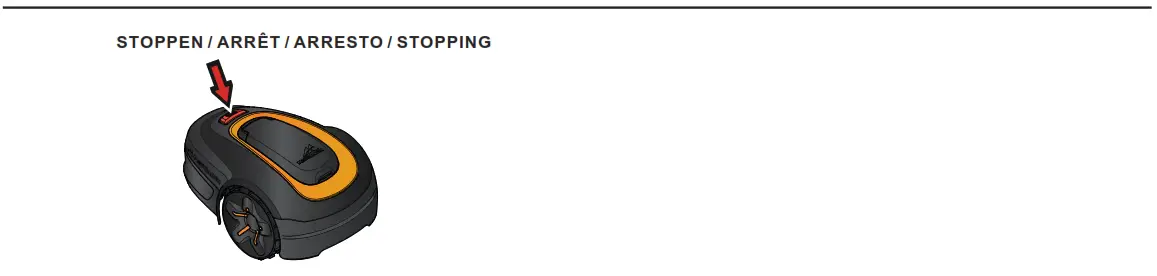
- STARTING AND STOPPINGSee chapter Operation in the Operator’s ManualSTARTING1. Open the hatch to the keypad.2. Push the ON/OFF button. The display is lit up.3. Use the up/down arrow buttons and the OK button to enter the PIN code. Close the hatch.STOPPINGPress the STOP button.
- ADJUSTING THE ROBOTIC LAWNMOWER TO SUIT THE SIZE OF YOUR LAWNSee chapter Operation in the Operator’s ManualThe mowing results depend on mowing time. Adjust the mowing time to suit your garden using the Schedule function. You decide what times during the day the robotic lawnmower is to work. The robotic lawnmower mows about 40-42 m² / 430-452 sq. ft. per hour and day. For example; if your garden consists of 300 m² / 3200 sq. ft. of grass, the robotic lawnmower should work on average 7-7.5 hours per day.
- MAINTENANCESee chapter Maintenance in the Operator’s Manual1. Turn off the product during all work on the product, such as cleaning or replacing the blades. Check that the indicator lamp on the keypad is not lit.2. Never use solvents for cleaning.3. All connections to the charging station (power supply, boundary, and guide wire) must be disconnected if there is a risk of a thunderstorm.4. Fully charge the battery at the end of the season before winter storage.
What is what?
| 1. On/Off | 9. Power supply |
| 2. STOP button | 10. Low voltage cable |
| 3. Charging strip | 11. Wire for boundary and guide* |
| 4. LED for function check of theboundary and guide wires | 12. Couplers* |
| 5. Cutting height indication | 13. Stakes* |
| 6. Display | 14. Connectors* |
| 7. Keypad | 15. Measurement gauge |
| 8. Charging station | 16. Screws for securing the charging station |
report this ad* Included in the Installation kit, not included in the purchase of the robotic lawnmower. Copyright © 2019 Husqvarna AB. All rights reserved. McCulloch and other product and feature marks are trademarks of the Husqvarna Group.

References
[xyz-ips snippet=”download-snippet”]