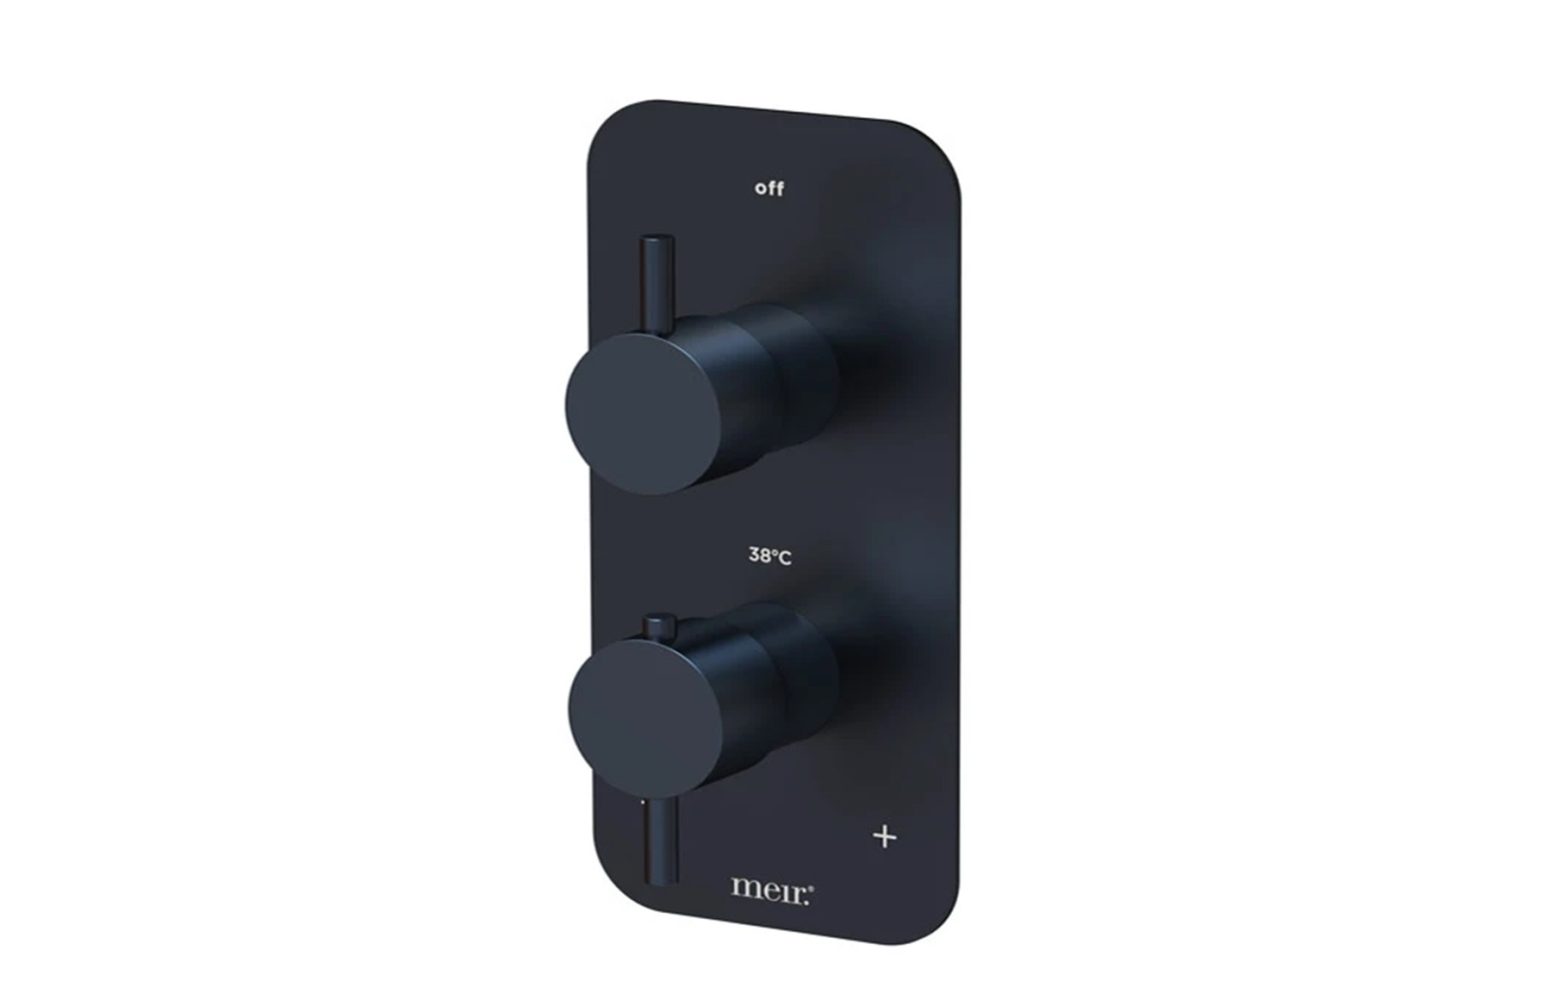
meir MTV01 Thermostatic Mixer Installation Guide
Description
A game changer in showering experience, beautiful, purposeful and safeWelcome to the new Meir thermostatic mixer valve
Using a high-quality temperature control mechanism, the water flow responds quickly to changing water temperature and Pressure.
Featuring the latest in wax temperature sensing technology. the Men CMV automatically maintains a consistent temperature.A s specially built in anti-scalding safety precaution will protect your loved ones from hot water burns while a safety override button Prevents the accidental selling of the water temperature above 38 degrees, making the MTV safe IO use for the family.
With a high—water flow rate (even al low pressure) this thermostatic mixer can be used in a wide range of installations and’ in most countries around the world
The be modern round design pairs perfectly wilh Meir’s extensive range of showers and accessories.
Technical Information
| Operating pressure | 50 kpa to 300kpa (1/2 bar to 3 bar) |
| Maximum static pressure: | 500kpa (5 bar) |
| Maximum hot water temperature: | 70 |
| Hot water temperature during initial setting: | 65 |
| Cold water temperature during initial setting: | 15 |
| Hot and Cold—water pressure during initial setting: | 300kpa(3 bar) |
| Minimum wall depth including wall finish thickness | 72mm |
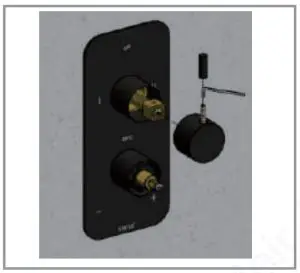
Note that the Meir Thermostatic @i “are supplied in 2 parts, the concealed in-wall body, and the finish parts.
This instruction manual covers both the 1-way and 2-way MTV installations.
Precautions for installation
- The MTV must be installed so that it is readily accessible for commissioning and future maintenance.
- The valve must be installed with isolation valves on both the hot and cold-water systems as close as possible to the valve. This is required for valve commissioning and testing.
- The thermostatic valve is supplied with integral strainers on the hot and cold-water inlets. It is still recommended to install separate easily accessible in-line strainers before the MTV.
- Operating pressures above 5 Bar will require the installation of a pressure reducing valve.
- Installation must only be completed by a licensed plumber or tradesperson.
- When installing products, all water pipes must be flushed clean just prior to installation.
- If the water temperature exceeds 70 C, an approved water tempering valve must be fitted.
- Check the installation tolerances for the MTV prior to installation.
- This MTV is intended for domestic use only.
- The plumber or tradesperson must generate a certificate or official statement showing the work and tests completed. This certificate or receipt must be kept and provided to Meir during any warranty claim request.
- Follow the ‘Care and Cleaning’ guide at: www.meir.com.au/pages/warranty
- Failure to comply with all the above instructions will void all warranties.
Installation Notes
- Please verify the following prior to installation:
- 1.1. The designation o+ Ehe thermostatic mixing valve matches your application.
- 1.2. The supply pressures are within the valves operating range.
- 1.3. The supply temperatures are within the valves operating range.
- 1.4. Isolating valves are used where required.
- The MTV is factory set to the standard temperature of 38 C with the temperature handle positioned at top dead centre. Check the valve after installation to ensure it operates at the correct outlet temperature. See temperature testing method below.
- The mixed water temperature should be set at the recommended application temperature with a maximum mixed water temperature setting of 43 C, The mixed water temperature should never exceed 46 C.
- After commissioning, carry out the cold failure test to ensure the valve is operating correctly. See testing method explained below.
- Water supplies shall be at reasonably balanced pressures from a common source (e.g. hot and cold supplies both from the same storage or both from a supply pipe). Where the fitting is supplied from unbalanced supplies (e.g. hot and cold supplies from separate sources) an ‘Approved’ single check valve or some other no less effective backflow prevention device shall be fitted immediately upstream of the MN and on both hot and cold-water inlets.
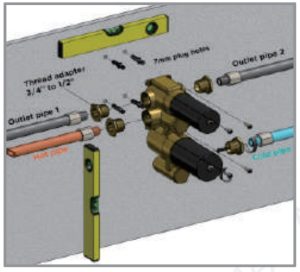
Installation Instructions
- Make sure the oody is vertically an.d horizontally level.

- Ensure no leaking of pipe connections.
- Note the tolerance for the wall finish. Adjust mounting depth of the body according to the expected wall finish thickness.
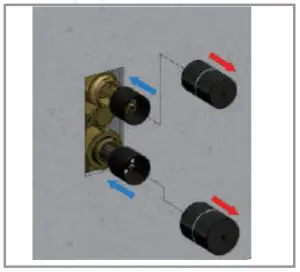
- Leave the protective plastic covers onto the body until the wall finish is complete.
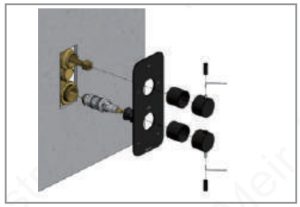
- Remove the plastic covers.
- Replace the screws used for the plastic covers back into the same cartridge spindles and tighten. Make sure to support the spindle head while tightening the screw into the spindle, and keep the black lines aligned during the tightening process.
- Install the cartridge sleeves by screwing them into the concealed body.
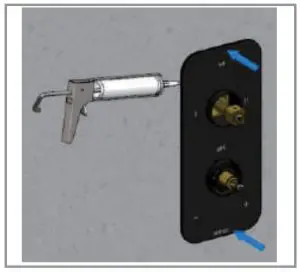
- Add some silicone sealer behind the back-plate.
- Slide the back-plate onto the cartridge sleeves until up against the wall finish.
- Install the diverter handle.
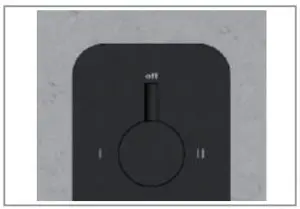
- First position the diverter spindle so that diverter is in the off position.
- Remove handle pin lever to access the grub screw.
- Use the grub screw to tighten the handle onto the spindle head, then install the pin lever and tighten.
- Install the temperature handle.
- First position the spindle so that the black lines are aligned for the 38°C position.
- Remove the pin lever and loosen the grub screw.
- Place the handle over spindle with the button pointing to the 38°C marking.
- Tighten the grub screw into the handle, then tighten the pin lever onto the grub screw.
- Test the diverter position and make sure you can move the handle to the different markings.
- Test the temperature handle with the button. Make sure you need to push the button in order to adjust the temperature past the 38°C marking.
- Your Meir thermostatic mixer is now ready for testing. See the below section on unit testing.


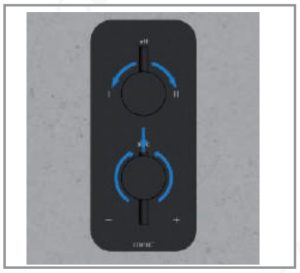
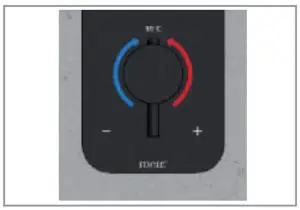
Operation
- With the diverter handle in the off position no water will flow out either of the water outlets. This is the off position.
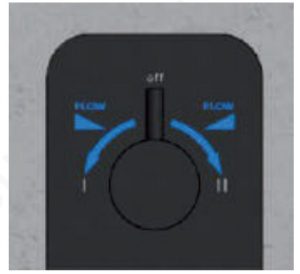
- Move the diverter to either position to select which outlet you want to use. The water flow will increase the more you move the handle to the outlet position.
- Adjust the water temperature by turning the handle to the left or right.
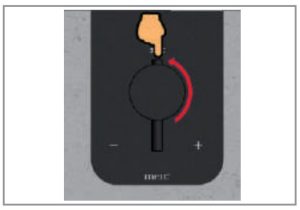
- To adjust the temperature past the 38″ , press the override button and then turn the handle anti clock wise to the desired setting.
Care Guide
- Do not install the tapware using any form of acetone silicones.
- Do not apply physical items (such as tools) directly to the product.
- Never use detergents, citrus based cleaners, or abrasive cleaners and do not use undue pressure.
- Where your tapware remains dry in use, a soft cloth can be used to remove surface dust. Alternatively, a wipe over with warm soapy water is all that is required to maintain the finish in perfect condition for a lifetime of use.
- Use of wax based furniture cream should be avoided as these can result in a buildup of deposits, which could detract from the appearance.
- Clean the temperature and diverter cartridge from time to time by following the instructions below.
Refer to www.meir.com.au for tolerances, flow rates and other additional information.
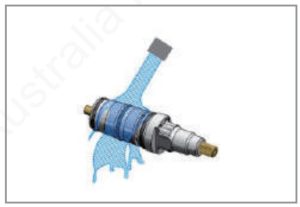
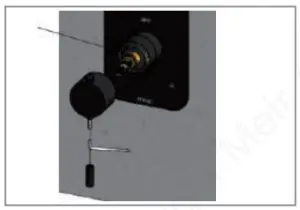
- First shut-off the water supply to both hot and cold inlets. Remove the handles, back plate and cartridge sleeves. Remove the locking nuts holding the cartridges in position. Remove the cartridges from the water cavities in the concealed body.
- Rinse the cartridges in warm water.A new cartridge , if required , can also now be installed.Re-assemble the cartridges and finish parts as described above.
Anti-scalding test and Temperature test
The MN should be tested after installation as well as at least once every 12 months. The test is required to ensure the temperature adjustment is still working and that the cold-water shut-off fail safe is still working.
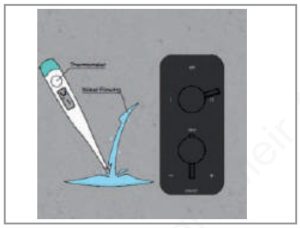
- Set the temperature handle to 38″c and run the water.when at operating temperature measure the water temperature. Call this temp1.
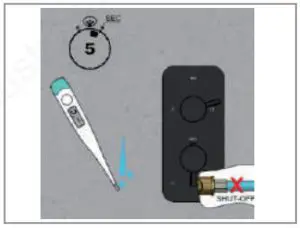
- Shut-off the cold-water supply to the unit and wait 5 secs. Measure both the temperature and note the rate of the water flow after 5 seconds. Call this Howl.
- Re-open the cold-water supply. Operate the unit again at 38°C and measure the water temperature. Call this temp2.

If the water flow rate (flowl) is a trickle after S seconds, the anti-scald fail/safe shut off is working. If there is no significant temperature change between the tempi and temp2 readings, then the valve is working correctly and no further service is required.
If the outlet temperature (temp2) has drifted by more than 2°Cfrom tempi, or if the fail/safe function does not work, a full service or re-commissioning is required. Meir recommends that in these circumstances you contact them for advice as valve servicing should only be undertaken by competent persons.
Adjusting Temperature
The thermostatic cartridge is pre-set to operate at 38°C when the handle is set to that position. This pre-set temperature is done using standard water inlet parameters listed earlier in this manual. If you would like to adjust the temperature of your installation to suit your water inlet parameters the following steps are required:
- Remove the temperature control handle by loosening the pin lever and unscrewing the grub screw. Rotate the cartridge spindle until the black lines line up together.
- Rotate the cartridge spindle to either increase or decrease the set temperature of the cartridge. Rotating the spindle anti-clockwise will increase the temperature setting, and clockwise decrease the temperature. Replace the temperature handle with the override button pointing to the 38°C marking.
Trouble shooting
| Fault | Cause | Remedy |
| Insufficient water flow | 1 Incoming water pressure is low.2 Thermostatic cartridge inlet is dirty or blocked | 1 Check with your local municipality regarding your water supply pressure2 Follow the cartridge cleaning instructions |
| Water temperature different to handle position temperature indicator. | 1 Your inlet water supply parameters are different to the standard cartridge testing parameters | 1 Follow the water temperature adjustment instructions |
| Temperature regulation not working | 1 Thermostatic cartridge is dirty.2 Faulty thermostatic cartridge | 1 Follow the cartridge cleaning instructions2 Apply to the Meir warranty procedure to have the cartridge replaced |
| Water dripping after closed | 1 Dirty diverter cartridge.2 Faulty diverter cartridge | 1 Follow the cartridge cleaning instructions2 Apply to the Meir warranty procedure to have the cartridge replaced |
| Override button sticking | 1 Corroded button mechanism2 Dirt has accumulated into the button mechanism | 1 Apply to the Meir warranty procedure to have the handle replaced2 Remove the handle and clean out the button mechanism |
| Selector handle stiff | 1 Dirty diverter cartridge.2 Faulty diverter cartridge. | 1 Follow the cartridge cleaning instructions2 Apply to the Meir warranty procedure to have the cartridge replaced. |
| Temperature handle stiff | 1 Thermostatic cartridge is dirty.2 Faulty thermostatic cartridge | 1 Follow the cartridge cleaning instructions2 Apply to the Meir warranty procedure to have the cartridge replaced |
Warranty
THE WARRANTY WILL NOT APPLY IF:
Normal and fair wear and tear, mis use, abuse, or mishap. Exposure to excessive moisture derived from lack of ventilation. Inability to provide proof of purchase.
Products not installed by a licensed tradesperson, failure to follow installation instructions or damage which arise from or during installation. Scratches or damage caused by applying physical and or abrasive contact directly to the product. The product has been damaged by accident, misuse or neglect. The product has not been used in accordance with any applicable instruction guide. The purchaser has attempted to modify or repair the product.
 report this ad
Full warranty and terms & conditions can be viewed at:www.meir.com.au/meir -australia-warranty/
[xyz-ips snippet=”download-snippet”]