![]()
User GuideAC1200 Wi-Fi Range ExtenderME30
COPYRIGHT & TRADEMARKSpecifications are subject to change without notice. ![]() is a registered trademark of MERCUSYS TECHNOLOGIES CO., LTD. Other brands and product names are trademarks or registered trademarks of their respective holders.No part of the specifications may be reproduced in any form or by any means or used to make any derivative such as translation, transformation, or adaptation without permission fromMERCUSYS TECHNOLOGIES CO., LIMITED. Copyright © 2021 MERCUSYS TECHNOLOGIES CO., LIMITED. All rights reserved.http://www.mercusys.com
is a registered trademark of MERCUSYS TECHNOLOGIES CO., LTD. Other brands and product names are trademarks or registered trademarks of their respective holders.No part of the specifications may be reproduced in any form or by any means or used to make any derivative such as translation, transformation, or adaptation without permission fromMERCUSYS TECHNOLOGIES CO., LIMITED. Copyright © 2021 MERCUSYS TECHNOLOGIES CO., LIMITED. All rights reserved.http://www.mercusys.com
CE Mark Warning
 This is a class B product. In a domestic environment, this product may cause radio interference, in which case the user may be required to take adequate measures.OPERATING FREQUENCY (the maximum transmitted power) 2400 MHz -2483.5 MHz (20dBm)5150 MHz -5250 MHz (23dBm)5250 MHz -5350 MHz (23dBm)5470 MHz -5725 MHz (30dBm)EU Declaration of ConformityMERCURY hereby declares that the device is in compliance with the essential requirements and other relevant provisions of directives 2014/53/EU, 2009/125/EC, 2011/65/EU and (EU)2015/863.The original EU Declaration of Conformity may be found at https://www.mercusys.com/en/ce RF Exposure InformationThis device meets the EU requirements (2014/53/EU Article 3.1a) on the limitation of exposure of the general public to electromagnetic fields by way of health protection.The device complies with RF specifications when the device used at 20 cm from your body.National RestrictionsAttention: This device may only be used indoors in all EU member states, EFTA countries and Northern Ireland.
 |
AT | BE | BG | CH | CY | CZ | DE | DK |
| EE | EL | ES | Fl | FR | HR | HU | IE | |
| IS | IT | LI | LT | LU | LV | MT | NL | |
| NO | PL | PT | RO | SE | SI | SK | UK(NI) |
UKCA Mark UKCA Declaration of ConformityMercusys hereby declares that the device is in compliance with the essential requirementsand other relevant provisions of the Radio Equipment Regulations 2017.
The original UK Declaration of Conformity may be found at https://www.mercusys.com/support/ukca/ National RestrictionsAttention: This device may only be used indoors in Great Britain.


Safety Information
- Keep the device away from water, fire, humidity or hot environments.
- Do not attempt to disassemble, repair, or modify the device. If you need service, please contact us.
- Do not use the device where wireless devices are not allowed.
- The socket-outlet shall be installed near the equipment and shall be easily accessible.
- Make sure the power socket has a good contact with the ground.
- Operating Temperature: 0℃ ~ 40℃ (32℉ ~ 104℉)
Please read and follow the above safety information when operating the device. We cannot guarantee that no accidents or damage will occur due to improper use of the device. lease use this product with care and operate at your own risk.
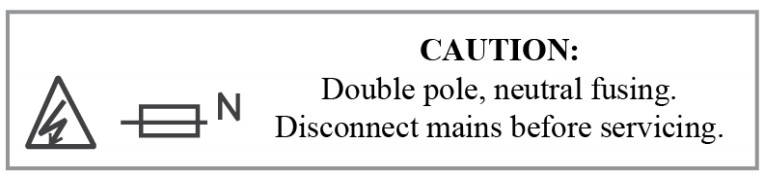
Explanation of the symbols on the product label
| Symbol | Explanation |
 |
Class II equipment |
 |
Class II equipment with functional earthing |
| Alternating current | |
 |
Indoor use only |
 |
Caution, risk of electric shock |
 |
Fuse is used in neutral N |
 |
RECYCLINGThis product bears the selective sorting symbol for Waste electrical and electronic equipment (WEEE). This means that this product must be handled pursuant to European directive 2012/19/EU in order to be recycled or dismantled to minimize its impact on the environment. User has the choice to give his product to a competent recycling organization or to the retailer when he buys new electrical or electronic equipment. |
Conventions
This guide is a complement to the Quick Installation Guide. The Quick Installation Guide provides instructions for quick internet setup, while this guide contains details of each function and demonstrates how to configure them in typical scenarios.Note: Features available in this range extender may vary by model and software version. Range extender availability may also vary by region or ISP. All images, steps, and descriptions in this guide are only examples and may not reflect your actual product experience.More InfoSpecifications and the latest software can be found at the product page at the official website http://www.mercusys.com.The Quick Installation Guide can be found where you find this guide or inside the package of the router.Speed/Coverage Disclaimer *Maximum wireless signal rates are the physical rates derived from IEEE Standard 802.11specifications. Actual wireless data throughput and wireless coverage per ft 2 are not guaranteed and will vary as a result of 1) environmental factors, including building materials, physical objects, and obstacles, 2) network conditions, including local interference, volume and density of traffic, product location, network complexity, and network overhead, and 3) client limitations, including rated performance, location, connection quality, and client condition. 01
Chapter 1 Introduction
Product Overview
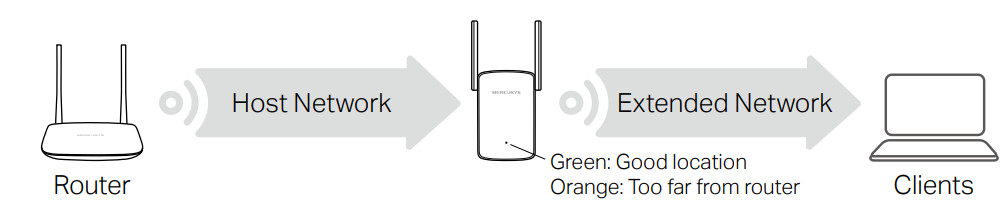
The range extender connects to your router wirelessly, strengthening its signal and expanding its coverage into areas that could not otherwise be reached.Multicolor LED helps you find the right location for your range extender for the best Wi-Fi extension.
Product Appearance
 LED Explanation
| LED | Status | Indication |
| Signal | Off | Power is off. |
| Blinkinggreen | The extender is starting, upgrading, or connecting to the router. | |
| Solid red | The extender is not connected to the router. | |
| Solid green | The extender is connected to the router, and is in a good location. | |
| Solidorange | The extender is connected to the router, but is too far away from the router. |
Item Explanation
| Item | Description |
| RESET/WPSButtonRESET/WPSButton | Press and hold this button for more than 5 seconds until the Signal LED turns off to reset the extender. Press for 1 second to use the WPS function. |
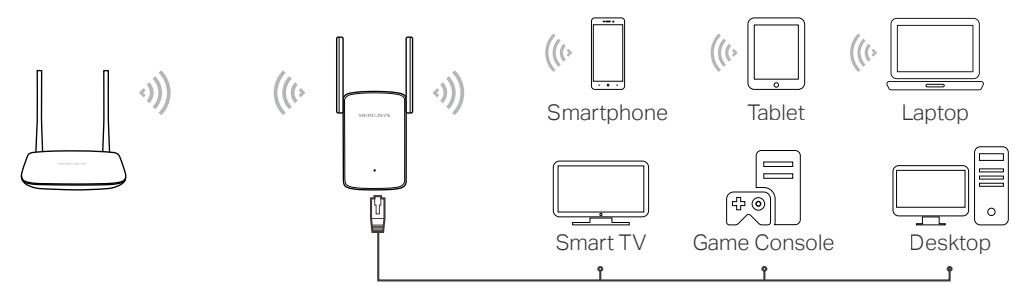
| EthernetPort | Connect your Ethernet-only device (such as a Blu-ray player, game console, DVR, or smart TV) to the Ethernet port of the extender tojoin the network. |
Chapter 2 Connect the Extender to the Internet
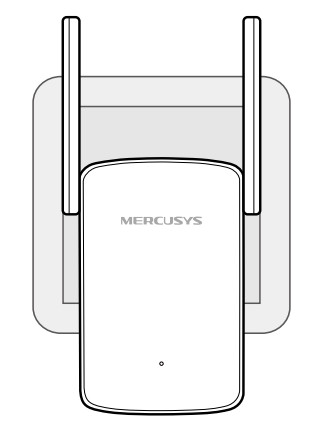
This chapter introduces how to boost your host wireless coverage. Please follow the step-by-step instructions to set up the internet connection.Power On Plug the extender into a power outlet near your router, and the Signal LED turns solid red.Note: For safety and best performance, we suggest that you position the extender vertically as shown below.
Method 1: Via a Web Browser
1. Connect your wireless device to the extender’s network MERCUSYS_RE_XXXX.Note:
- The default SSID (network name) is printed on the product label at the back of the extender.
- If you are using a computer, unplug the Ethernet cable from your computer first (if any).
2. Follow the instructions of the Quick Setup Wizard to connect the extender to your router.
- Launch a web browser and enter http://mwlogin.net in the address field.

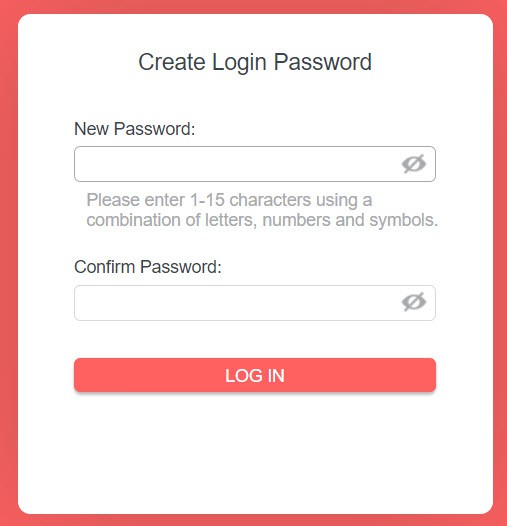
- A login window will appear. Create a password to log in. For subsequent logins, use the password you have set.
- The extender will scan and display all available 2.4 GHz networks. Select your router’s 2.4 GHz host network and enter the password to connect. Note:If the network you want to extend is on but not listed, please try the following steps.• Move the extender closer to your router and click Rescan.• Click Other… to manually enter the SSID (network name) and password of the network you want to extend.
- Select your router’s 5 GHz host network and enter the password to connect.
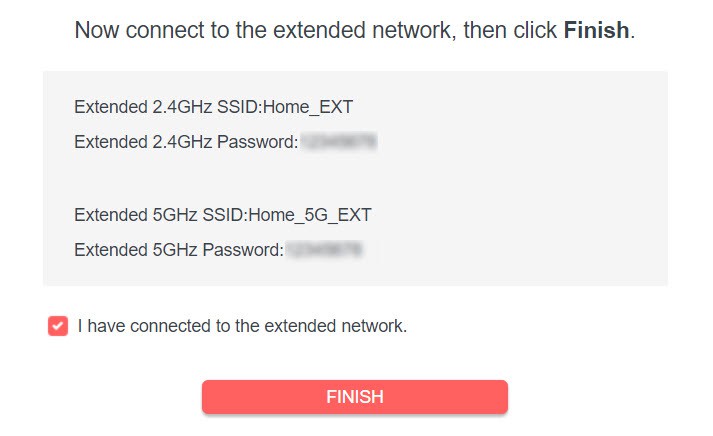
- Confirm the network passwords.
- Customize the extended network names or keep the default ones.
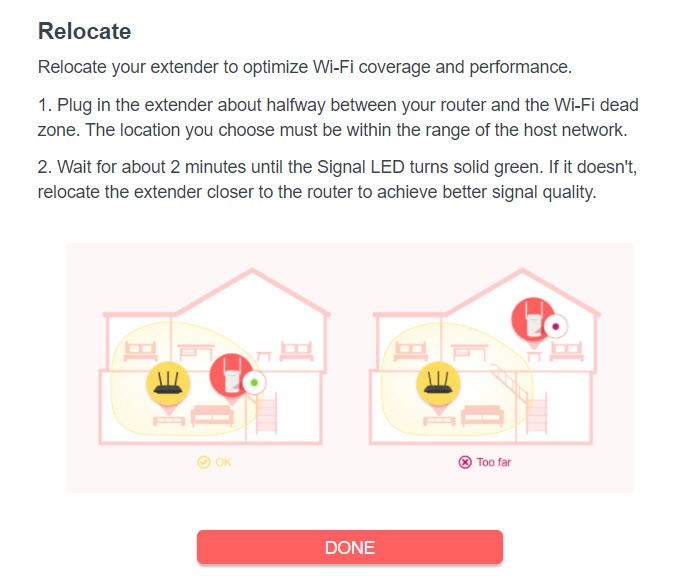
- Follow web instructions to relocate the extender.

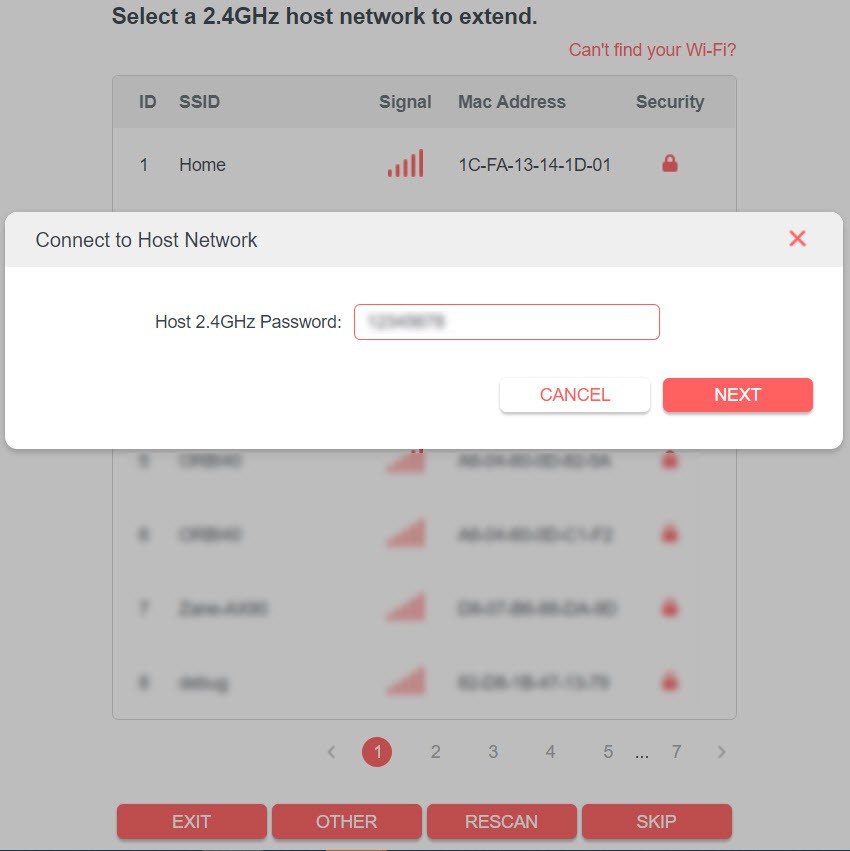 Note:If the network you want to extend is on but not listed, please try the following steps.• Move the extender closer to your router and click Rescan.• Click Other… to manually enter the SSID (network name) and password of the network you want to extend.
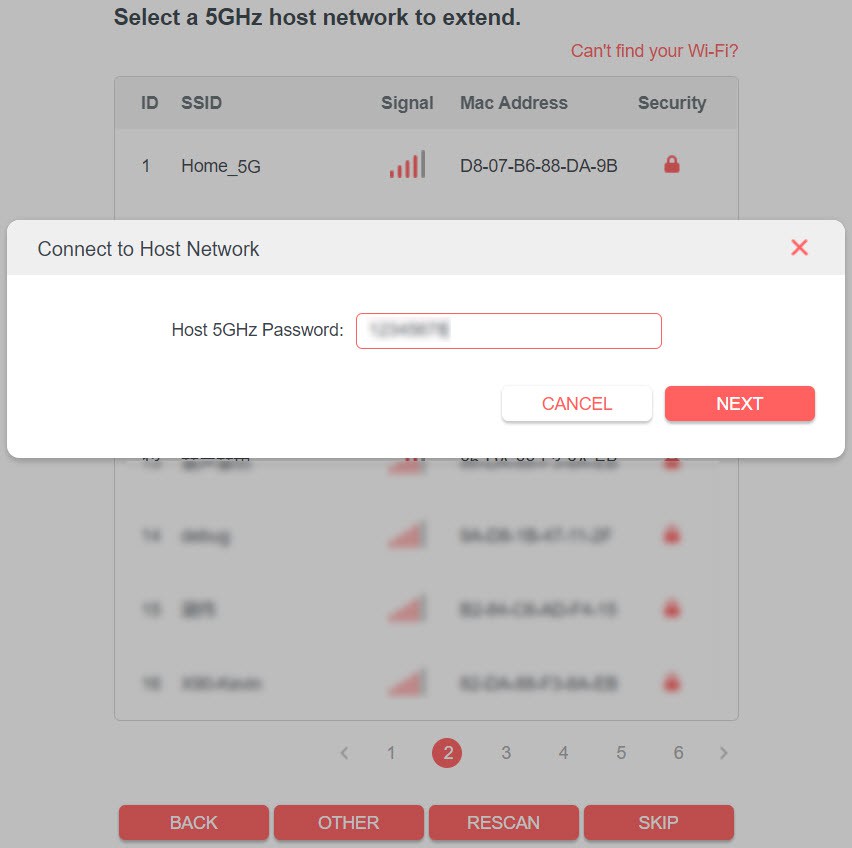


3. Done! Connect to the extended network and enjoy the internet.
Method 2: Via WPS
- Press the WPS button on your router.
- Within two minutes press the RESET/WPS button on your extender for 1 second.The Signal LED should change from flashing to solid green or orange, indicating a successful WPS connection.
- Relocate the extender.1) Plug the extender into an electrical outlet between your host router and the Wi-Fi “dead“ zone. The location you choose must be within the range of your existing host network. 2) Wait until the Signal LED is lit and solid green. If it’s not, relocate it closer to the host router to achieve better signal quality.
- Enjoy! Connect to the extended network and enjoy the internet.Extended Network Names:Router’s network name with EXT at the endPasswords:Same as your router
 2) Wait until the Signal LED is lit and solid green. If it’s not, relocate it closer to the host router to achieve better signal quality.
Chapter 3 Customize Your Network
This chapter guides you on how to configure network settings that are available for this extender.
Check Internet Status
You can view the internet status of your extender to check whether you have successfully set up the extended network(s).1. Visit http://mwlogin.net, and log in with the password you set for the extender.2. Go to Network Map to view the internet status of your extender.
- The extender runs normally.
- The extender fails to connect to the host networks. Please go to Wireless > Connect to Host Network to check whether the host network passwords are correct. If the problem still exists, relocate the extender closer to the router to achieve better signal quality.
- The extender is connected to the host networks but is not transmitting data. Please check the internet connection of your router.
- The extender is connected to the router abnormally. Please go to Settings > Network and try setting your extender to obtain an IP address automatically.


Click the icon of the Internet/Router/Range Extender/Clients to view corresponding information.
Configure Wireless Network
If you want to extend another host network after Quick Setup, you can refer tthis section. Moreover, you can change the wireless settings for your extended networks.Visit http://mwlogin.net, and log in with the password you set for the extender.• To extend another host network:
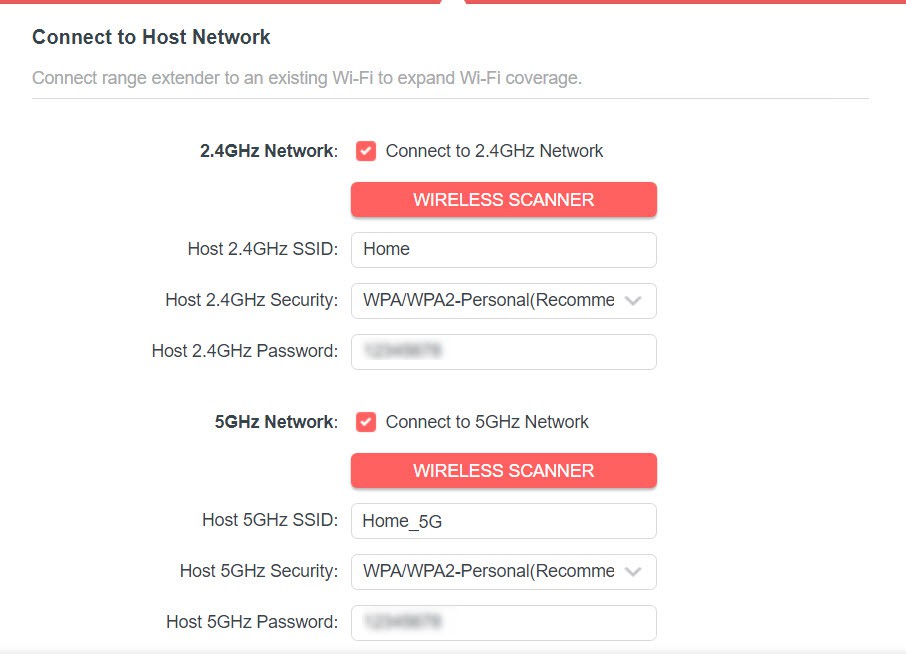
- Go to Wireless > Connect to Host Network.
- Enable Connect to 2.4GHz Network and click WIRELESS SCANNER to find all available networks.
- Select the 2.4GHz host network you want to extend.Note:If the network you want to extend is on but not listed, please try the following steps.Move the extender closer to your router, and click Refresh in the top-right corner of the list.You can manually enter the SSID (network name) and password of the network you want to extend, and click SAVE.
- Once a host network is selected, the SSID and security type will be automatically filled in. If the selected network is encrypted, enter the password in the Password field.
- Click SAVE.
• To enable or disable the extended network:
- Go to Wireless > Extended Network.
- Extended networks are enabled by default. If you want to disable the wireless function of a certain brand, just clear the Enable checkbox. In this case, all the wireless settings of this band will be invalid.
- Click SAVE.• To change the wireless network name (SSID):1. Go to Wireless > Extended Network.2. Create a new SSID in Extended 2.4GHz SSID or click COPY HOST SSID. The valueis case-sensitive.3. Click SAVE.Note:If you have changed the wireless settings via a wireless device, you will be disconnected after the settings are applied. Please write down the new SSID for future use.• To hide the SSID of the extended network:1. Go to Wireless > Extended Network.2. Select Hide SSID broadcast, and the corresponding SSID will not be displayed when wireless devices scan for local wireless networks. You need to manually enter the SSID to join the network.3. Click SAVE.

Change LAN Settings
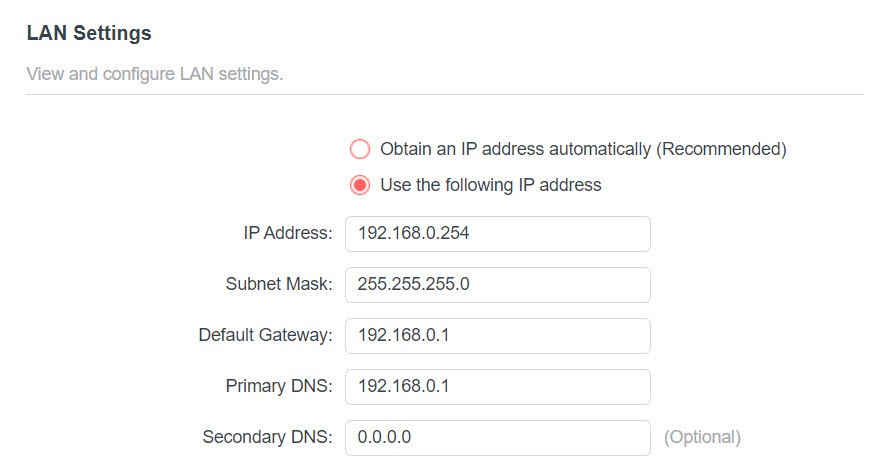
The extender is preset with a default LAN IP 192.168.0.254, with which you can log b into the web management page. The LAN IP address, together with the Subnet Mask, also defines the subnet that the connected devices are on. If the IP address conflicts with another device on your local network or your network requires a specific IP subnet, you can change it.
- Visit http://mwlogin.net, and log in with the password you set for the extender.
- Go to Settings > Network > LAN Settings.
- Select Use the following IP address.
- Enter a new IP Address as needed, and leave the Subnet Mask as the default settings.
- Enter the gateway that is in the same subnet as the IP Address. The gateway is usually the LAN IP address of your router.
- Leave the primary and secondary DNS addresses as the default settings.
- Click SAVE.
Specify DHCP Server Settings
By default, the DHCP (Dynamic Host Configuration Protocol) Server is auto and the extender acts as a DHCP server and dynamically assigns TCP/IP parameters to client devices from the IP Address Pool when the router’s DHCP server is disabled. You can change the settings of the DHCP server if necessary.
- Visit http://mwlogin.net, and log in with the password you set for the extender.
- Go to Settings > Network > DHCP Server.

- Select On to enable the DHCP Server of the extender.
- Enter the starting and ending IP addresses in the IP Address Pool.
- Enter other parameters if the ISP offers. The Default Gateway is automatically filled in and is the same as the LAN IP address of the router.
- Click SAVE.
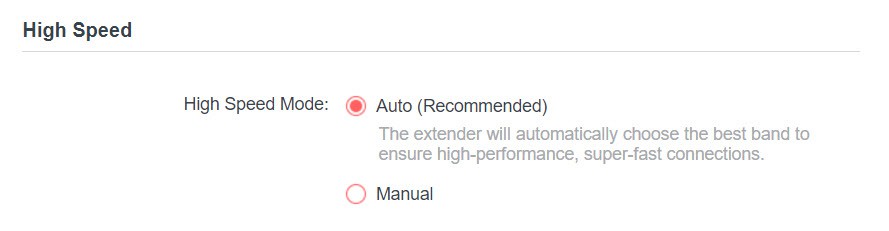
Set High-Speed Mode
The High-Speed feature switches off one of the wireless bands to leave one high-performance, super-fast network, ideal for HD streaming and gaming applications.If most of your devices are connected to one wireless band, this feature can increase the overall performance of your wireless network.Note:Before enabling this feature, please go to Settings > Wireless > Extended Network and check that the 2.4GHz and 5GHz bands are both enabled. Additionally, if you are going to disable the 2.4GHz network, it’s recommended to first make sure all your wireless devices support a 5GHz network connection.
1. Visit http://mwlogin.net and log in with the password you set for the extender.2. Go to Settings > Advanced Settings > High Speed.3. Enable High-Speed Mode.4. Select a high-speed mode as needed.
- Select the Auto mode. The extender will decide which band the high-speed the network will work on based on its wireless connection to your host router. The other band will be disabled.
- Select the Manual mode and choose to transmit 2.4GHz band or 5GHz band only.
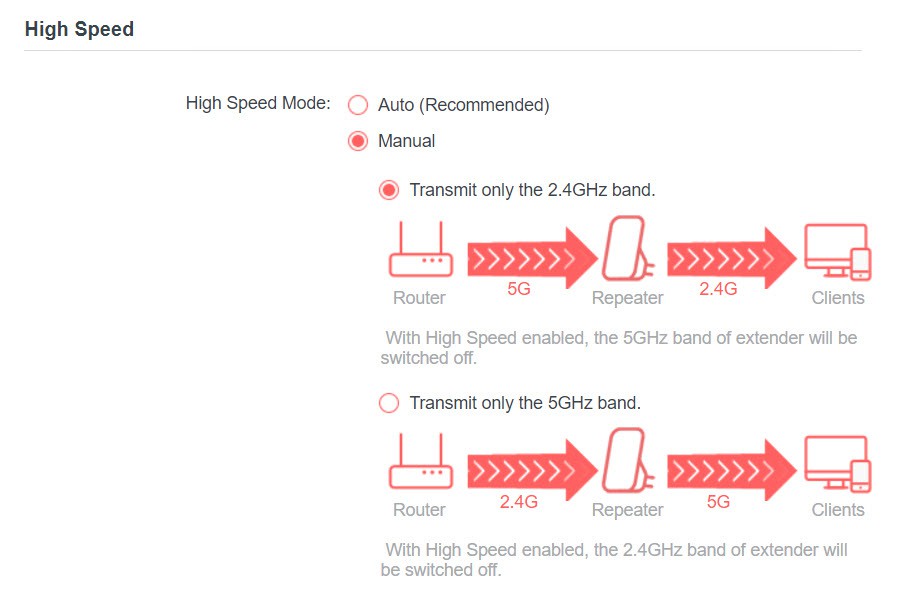
5. Click SAVE.
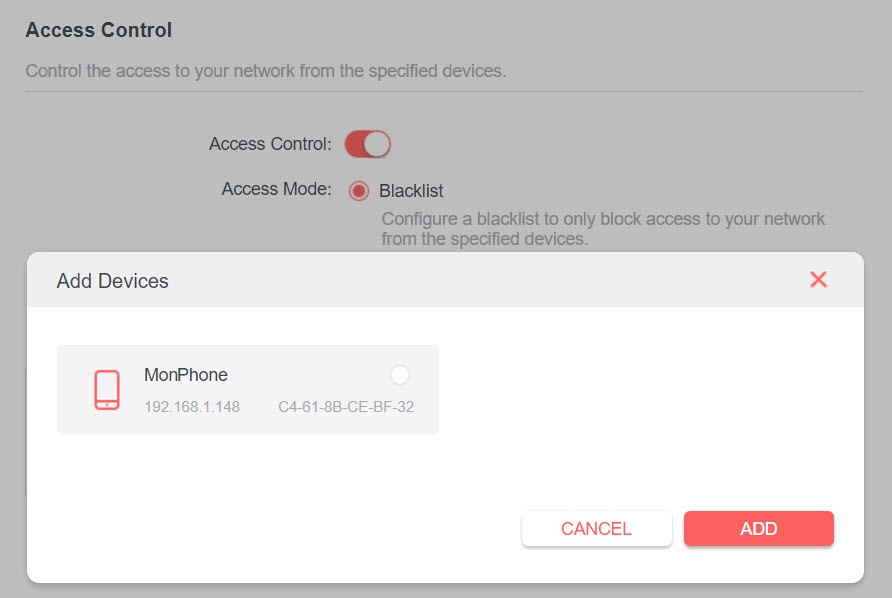
Set Access Control
Access Control allows you to permit or block specific devices from accessing the internet for a specific period.
- Visit http://mwlogin.net and log in with the password you set for the extender.
- Go to Settings > Advanced Settings > Access Control.
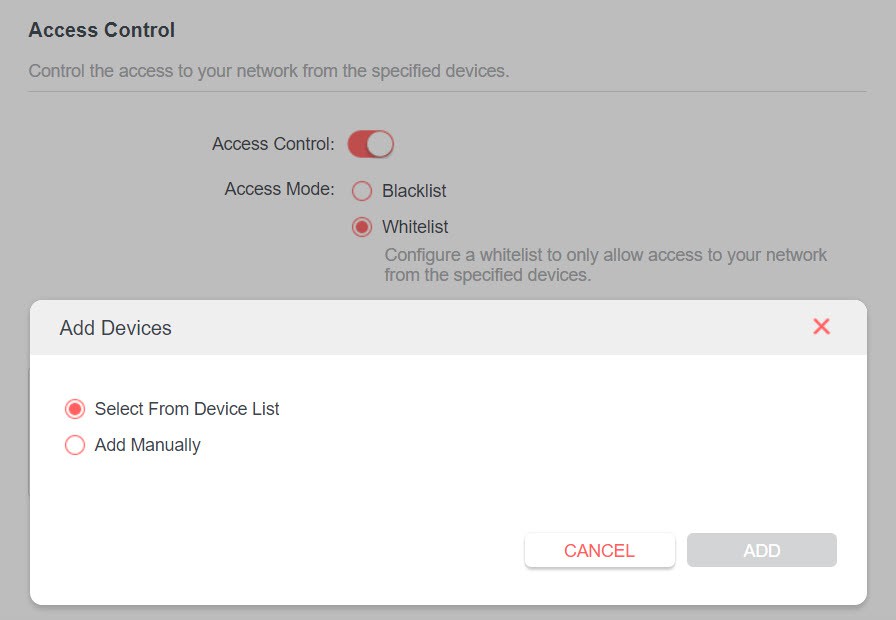
- Enable Access Control.

• To block specific device(s):Note:Devices connected to the extender via an Ethernet cable cannot be blocked.
- Select Blacklist and click Add.
- Select the device to be blocked in the Add Devices table.
- Click ADD and the selected device(s) will be added to the blacklist.
• To permit specific device(s):
- Select Whitelist and click Add.
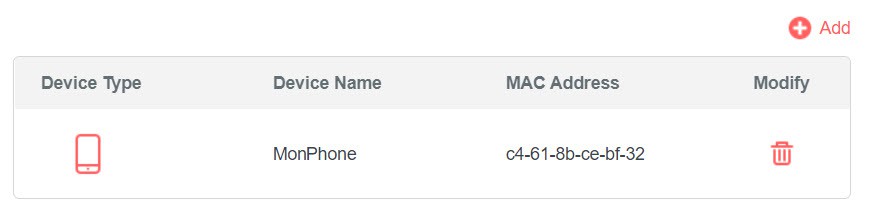
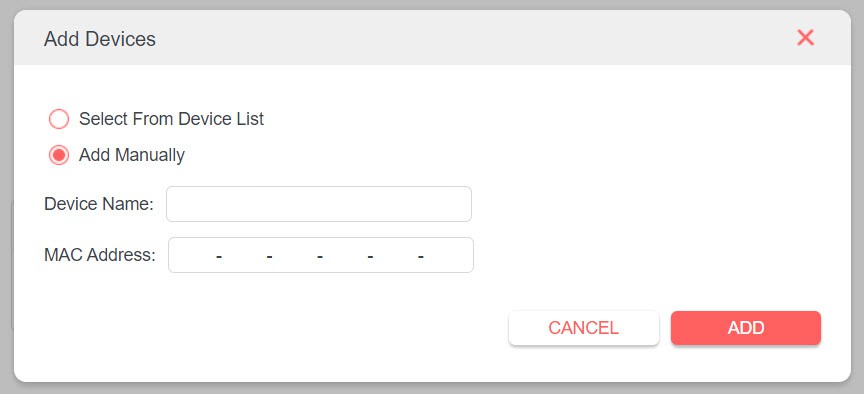
- Select from the Device List or add devices manually in the Add Devices table enter the Device Name and MAC Address if you add devices manually.
- Click ADD and the selected device(s) will be added to the whitelist.

Adjust Wi-Fi Coverage
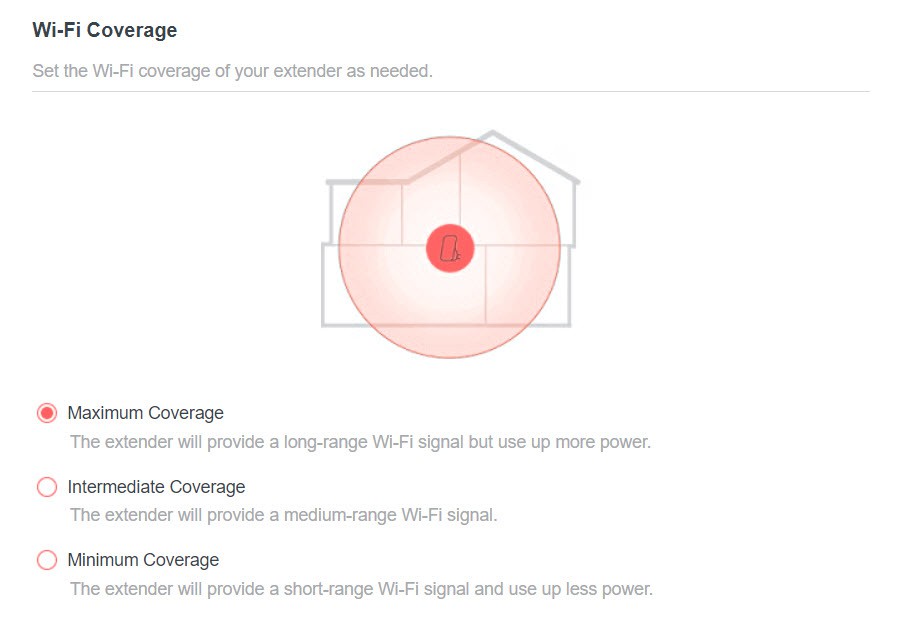
You can set the extender’s Wi-Fi coverage depending on how large you want your Wi-Fi area to be.
- Visit http://mwlogin.net and log in with the password you set for the extender.
- Go to Settings > Advanced Settings > Wi-Fi Coverage.
- Select your desired Wi-Fi coverage level for the extender.
- Click SAVE.
Chapter 4 Use Your Extender as an Access Point
The extender can work as an access point, transforming your existing wired network to a wireless one.

Set Up the Extender as an Access Point
- Connect your computer to the extender via an Ethernet cable.
- Visit http://mwlogin.net, and log in with the password you set for the extender.
- Click Change Mode in the top right corner of the page. Select Access Point Mode and click OK. The extender will reboot and switch to Access Point mode.
- Visit http://mwlogin.net, and log in with the password you set for the extender.
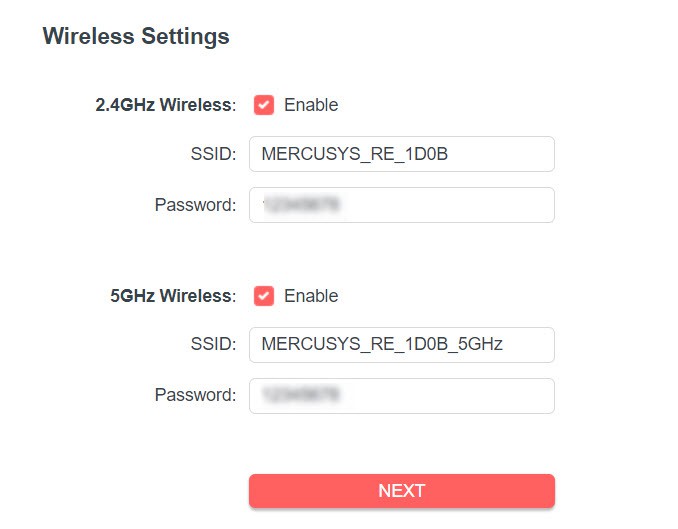
- Go to Settings > Quick Setup to configure your extender.1 ) Customize your wireless SSID and password and click NEXT.2 ) Confirm the information and click FINISH.
- Connect the extender to your modem or wired router via an Ethernet cable. Now you can enjoy Wi-Fi.

 2 ) Confirm the information and click FINISH.
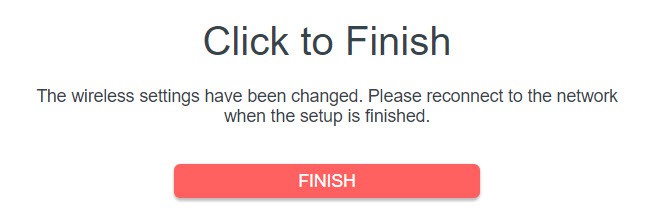
Connect Wireless Devices to the Extender
Method 1: Connect to the extender manuallyYou can connect your wireless devices to the extender by using the extender’s wireless network names and passwords.Method 2: Connect to the extender via WPS Wi-Fi Protected Setup (WPS) provides an easier way to set up a secure Wi-Fi connection.Wireless devices that support WPS, including Android phones, tablets, and most USB network cards, can be connected to your extender through this method (not supported by iOS devices).
- Visit http://mwlogin.net, and log in with the password you set for the extender.
- Go to Wireless > WPS.
- Enable WPS.
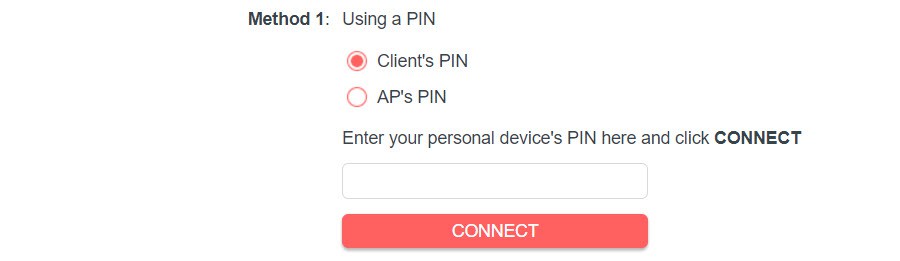
- Connect via WPS:• Client’s PIN: Enable Client’s PIN and enter your device’s PIN in the blank, and then click CONNECT.• AP’s PIN: Enable AP’s PIN and enter the PIN on your device. You can click GENERATE to get a new PIN or click DEFAULT to restore the PIN to its factory one. • Push Button (Recommended): Click Start and push the WPS button on the client device within 2 minutes.• Push AP’s WPS button: Press the AP’s WPS button, then enable WPS on your device within 2 minutes.

 • AP’s PIN: Enable AP’s PIN and enter the PIN on your device. You can click GENERATE to get a new PIN or click DEFAULT to restore the PIN to its factory one.
  • Push Button (Recommended): Click Start and push the WPS button on the client device within 2 minutes.
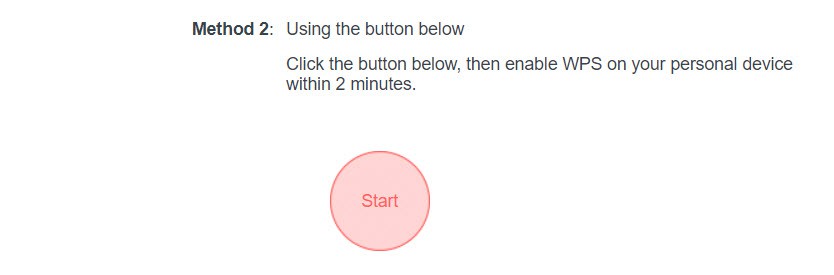 • Push AP’s WPS button: Press the AP’s WPS button, then enable WPS on your device within 2 minutes.
LED Explanation for the Access Point Mode
When the extender works in the Access Point mode, you can check its working status by following the LED Explanation table below.
| LED | Status | Indication (For Range Extender Mode) |
| Signal | Off | Power is off. |
| Blinkinggreen | The extender is starting, upgrading, or performing WPS connection. | |
| Blinkingred | WPS connection failed. | |
| Solidgreen | Both 2.4 GHz and 5 GHz Wi-Fi bands are working well. | |
| Solidorange | Either 2.4 GHz or 5 GHz Wi-Fi band is disabled. | |
| Solid red | Both 2.4 GHz and 5 GHz Wi-Fi bands are disabled. |
Chapter 5 Manage the Extender
This chapter presents how to manage and maintain your extender.
Set System Time
The System Time of the extender will be used for time-based functions such as the Power Schedule function. If you have enabled the Daylight Saving Time feature, the system time will be synchronized with the daylight saving time you configure.
- Visit http://mwlogin.net, and log in with the password you set for the extender.
- Go to Settings > System Tools > Time Settings.• To get system time:1. Select your local Time Zone from the drop-down list.
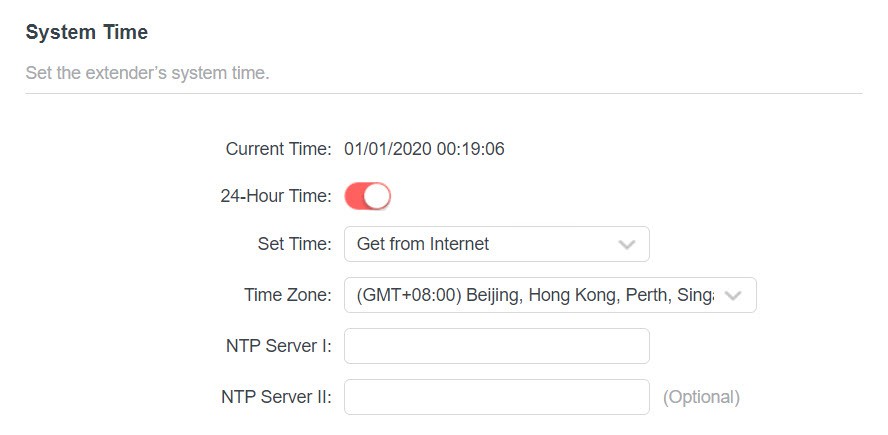
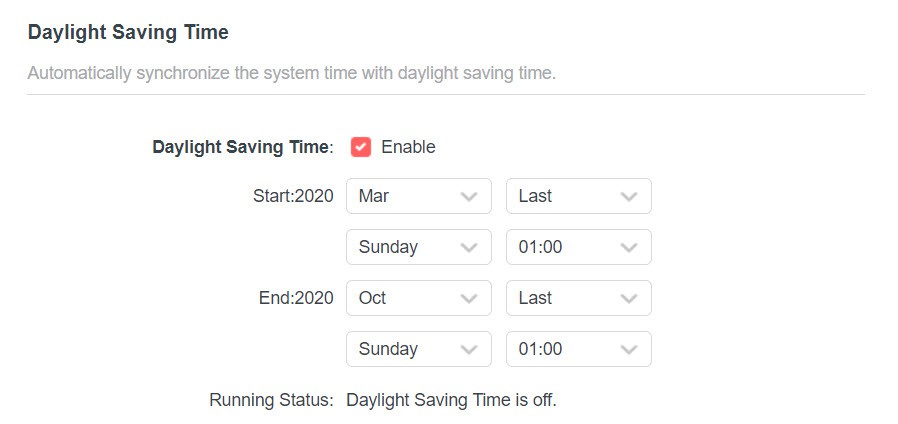
2. Click SAVE.• To set up Daylight Saving Time:
- Enable Daylight Saving Time.
- Select the Start and End date and time of the daylight saving time at your localtime zone.
- Click SAVE.
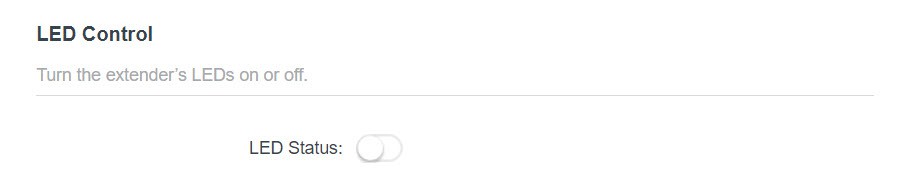
Control the LED
The LED of the extender indicates its activities and status. You can turn off the LED when you don’t need it.
1. Visit http://mwlogin.net, and log in with the password you set for the extender.2. Go to Settings > Advanced Settings > LED Control.
• To turn off the LED:Disable LED Status.
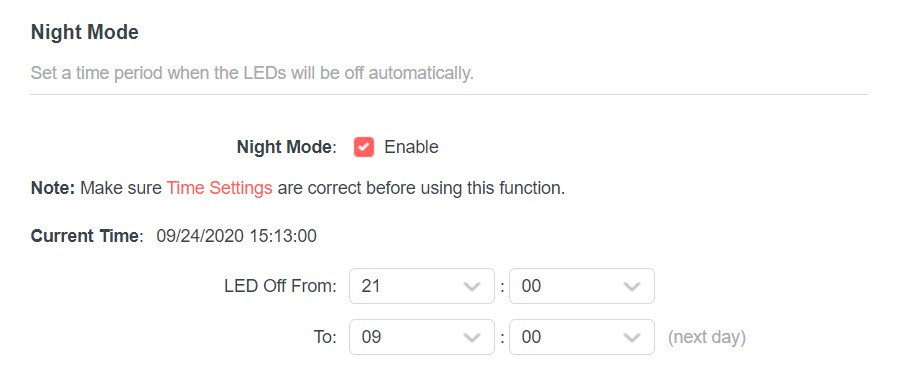
• To specify a time period when the LED turns off:
- Enable Night Mode.
- Specify the LED off time period.The effective LED off time is based on the time of the extender. You can go to Settings > System Tools >Time Settings to modify the time.
- Click SAVE.
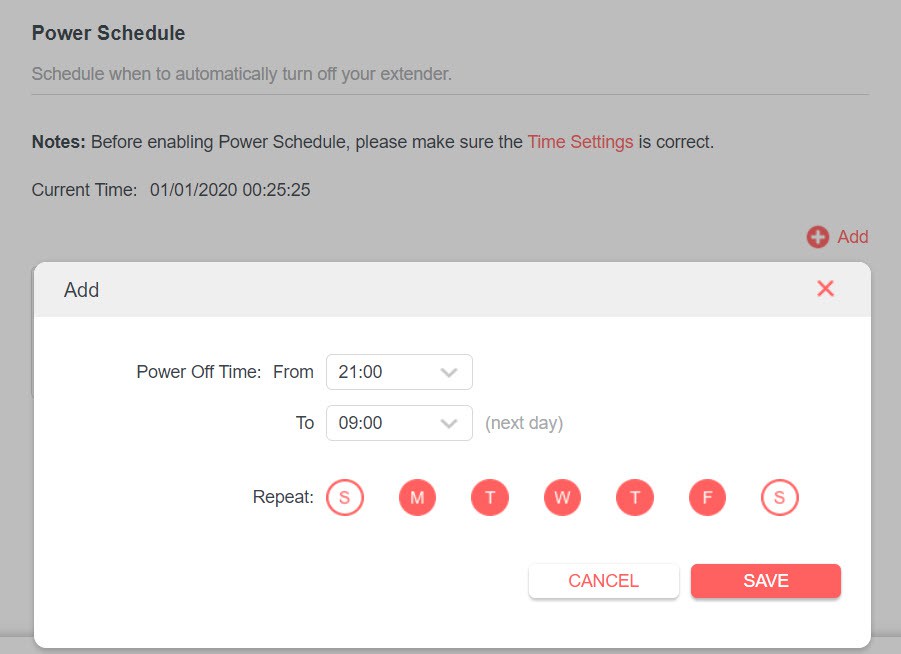
Set Power Schedule
The Power Schedule feature allows you to specify a time period during which the extender is off.1. Visit http://mwlogin.net, and log in with the password you set for the extender.2. Go to Settings > Advanced Settings > Power Schedule.• To specify a time period when the extender is off:
- Click Add.
- Specify the power of time period and repetitive days.Note:The effective power-off time is based on the time of the extender. You can go to Settings > System Tools > Time Settings to modify the time.
- Click SAVE.
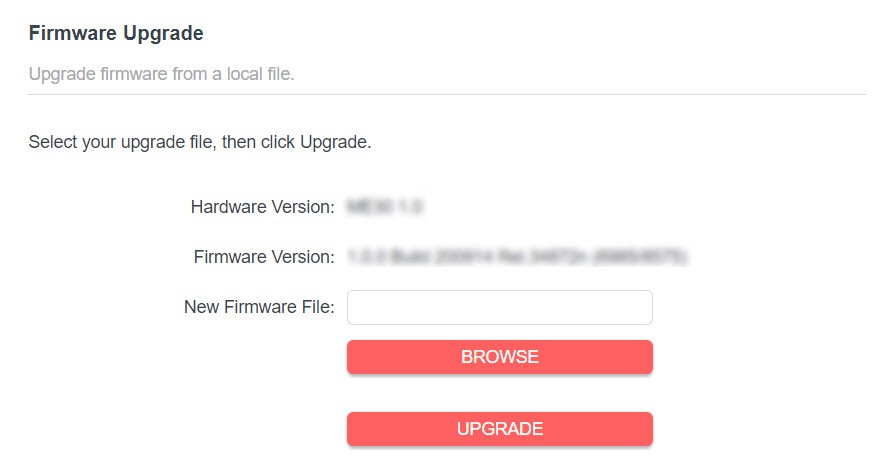
Upgrade the Firmware
You can download the latest firmware file from the Support page at our website www.mercusys.com and upgrade the extender to the latest firmware version.Note:
- Make sure the latest firmware file is matched with the hardware version.
- Make sure that you have a stable connection between the extender and your computer. It is NOTrecommended to upgrade the firmware wirelessly.
- We strongly recommend you back up the current configuration settings before the firmware upgrade.
- Do NOT power off the extender during the firmware upgrade.1. Download the latest firmware file for the extender from our website www.mercusys.com.2. Visit http://mwlogin.net, and log in with the password you set for the extender.3. Go to Settings > System Tools > Firmware Upgrade.4. Click BROWSE to locate the downloaded new firmware file, and then click UPGRADE.5. Wait a few minutes for the firmware upgrade to complete and the extender to reboot.
 5. Wait a few minutes for the firmware upgrade to complete and the extender to reboot.
Back up and Restore Configuration Settings
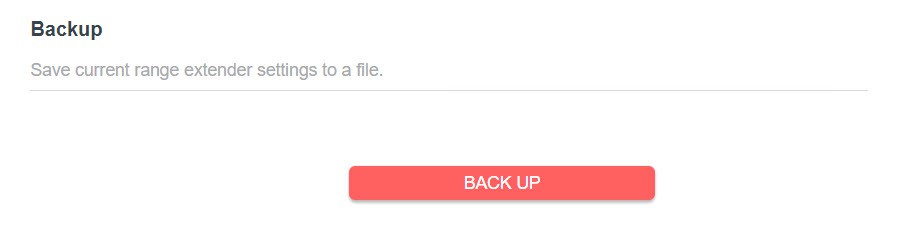
The configuration settings are stored as a configuration file in the extender. You can back up the configuration file and restore the extender to the previous settings from the backup file when needed. Moreover, if necessary, you can erase the current settings and reset the extender to the default factory settings.
- Visit http://mwlogin.net, and log in with the password you set for the extender.
- Go to Settings > System Tools > Backup & Restore.• To back up configuration settings:Click BACK UP to save a copy of the current settings to your local computer. A ‘.bin’ file of the current settings will be stored on your computer.
• To restore previous settings from a saved file:
- Click BROWSE to locate the backup configuration file stored on your computer, and click RESTORE.
- Wait a few minutes for the restore and reboot.Note: During the restore process, do not power off or reset the extender.

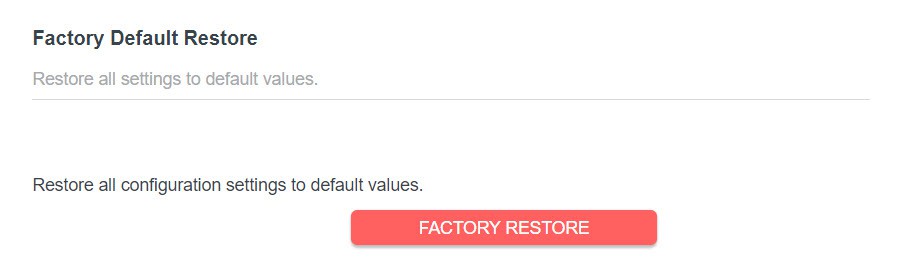
• To reset the extender to factory default settings:
- Click FACTORY RESTORE to reset the extender.
- Wait a few minutes for the reset and reboot.Note:1. During the reset process, do not power off or reset the extender.2. We strongly recommend you back up the current configuration settings before resetting the extender.
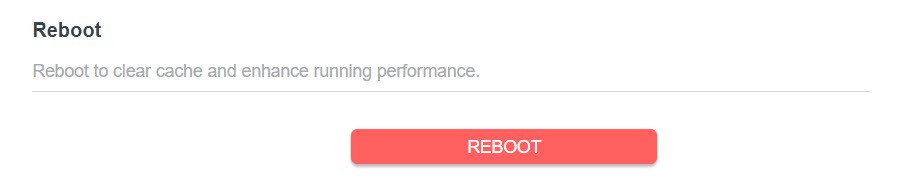
Reboot the Extender
You can reboot your extender to clear cache and enhance running performance if needed.1. Visit http://mwlogin.net, and log in with the password you set for the extender.2. Go to Settings > System Tools > Reboot.
- To reboot the extenderClick REBOOT and wait a few minutes.
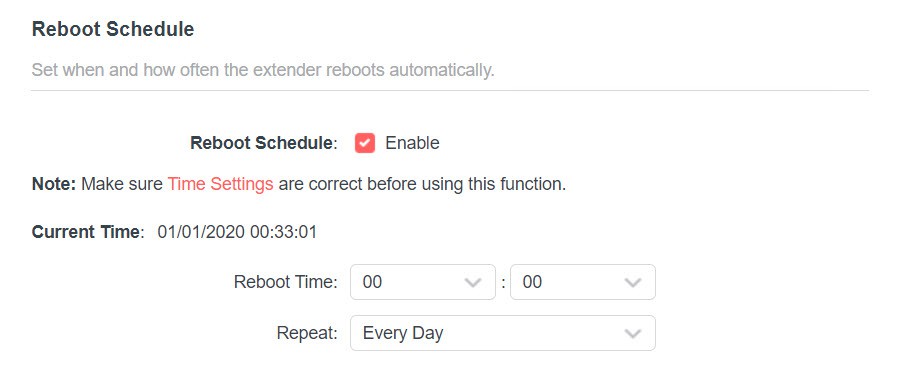
- To set up a reboot scheduleEnable Reboot Schedule and set the corresponding settings.
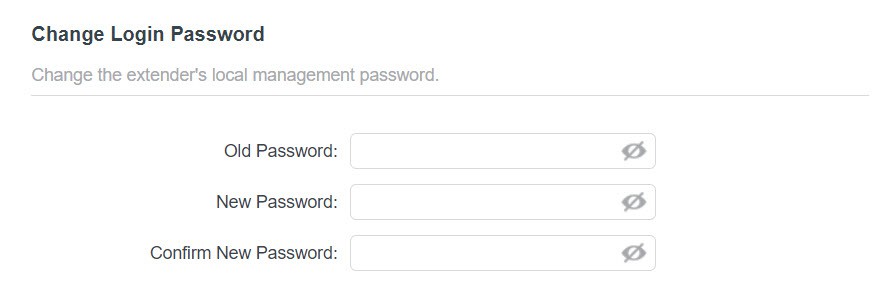
Change Login Password
The account management feature allows you to change your login username and the password of the web management webpage.
- Visit http://mwlogin.net, and log in with the password you set for the extender.
- Go to Settings > System Tools > Change Login Password.
- Enter the old password. Then enter the new password twice (case-sensitive) and click SAVE.
Check System Log
 Check System Log
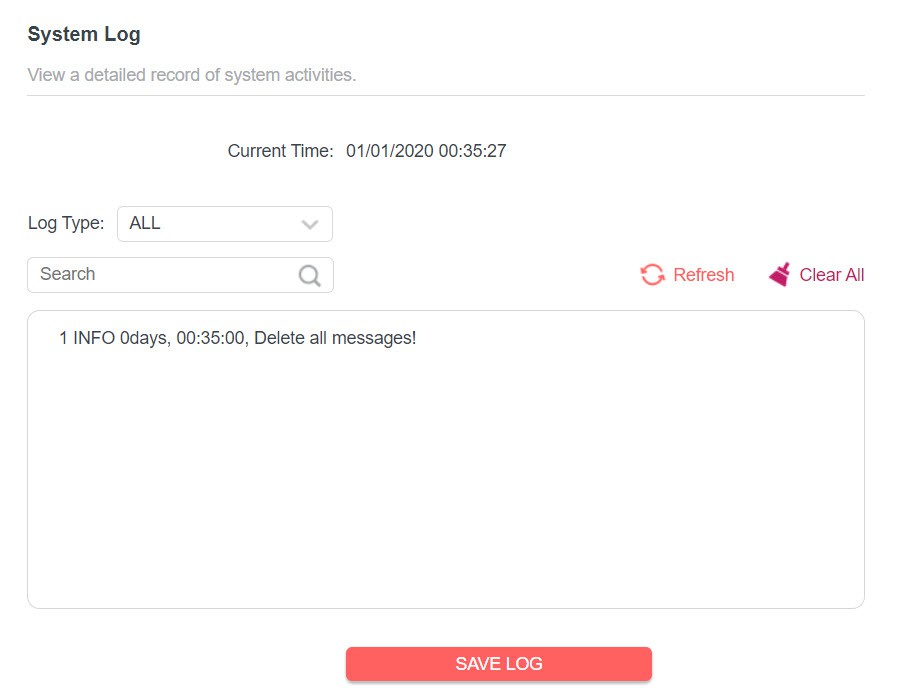
If the extender is not working properly, you can save the system log and send it toour technical support team.
- Visit http://mwlogin.net, and log in with the password you set for the extender.
- Go to Settings > System Tools > System Log.• To save the system log locally:1. Choose the type and level of the system log as needed.2. Click SAVE LOG to save the system logs to a local disk.
FAQ (Frequently Asked Questions)
Q1. How to restore my extender’s configuration to its factory default settings?
- Option 1: With the extender powered on, press and hold the RESET/WPS button for more than 5 seconds until the Signal LED turns off, then release the button.
- Option 2: Log in to the extender’s web management page, go to Settings > System
Tools > Backup & Restore, and click FACTORY RESTORE.Q2. What should I do if I forgot my login password?
- Restore the extender’s configuration to its factory default settings by referring to
Q1, then create a new password when prompted.Q3. What should I do if I cannot log in to the extender’s web management page?
- Make sure your wireless device is connected to the extended network using the extended SSID.
- Verify that http://mwlogin.net is correctly entered in the web browser.
- If you are using a computer, make sure it is set to obtain an IP address automatically.
- Refer to Q1 to reset the extender and try again.
References
[xyz-ips snippet=”download-snippet”]