
Merlyn Wetroom Straight Screen Installation Instruction
IMPORTANT NOTES:
Please Read Carefully & retain these instructions for Future Reference.
- For ease & safety we advise that two persons assemble this product.
- Protect shower tray surfaces at all times.
- Exposed glass corners / edges MUST NOT contact hard surfaces at any time.
- Check for cables, pipes etc before drilling walls.
- Ensure all surfaces are dry, clean & free of loose debris / dust.
- Unpack goods with care (small parts can become lodged in packaging & inadvertently discarded).
- Whilst precautions are taken in manufacture, care must be taken when handling as rail ends may have sharp edges.
- Before commencing, check:a) shower tray (or base) is level & completely sealed to finished / tiled walls.b) finished walls are square to the tray and sound & free of cracks, loose tiles / grout.
- AFTER INSTALLATION, DO NOT ‘WET’ ENCLOSURE FOR 48 HOURS TO ENSURE FULL CURE OF SILICONE SEALANT.
Installation Instructions
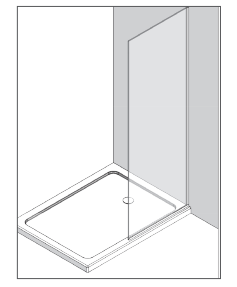
Prior to install check the tray is flat and square to the wall.
All tiling and grouting should be completed prior to fitting the screen.

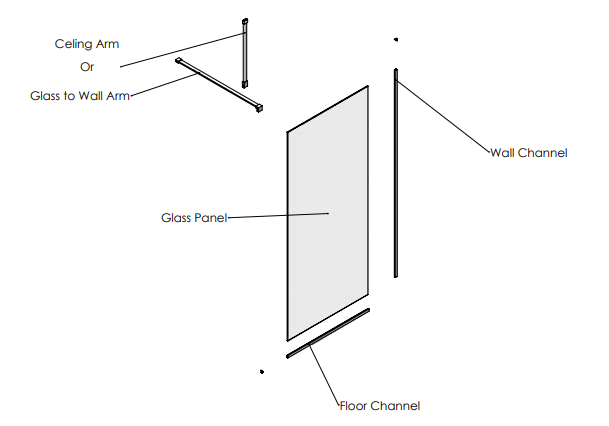
The channels supplied allow varying options for fitting:
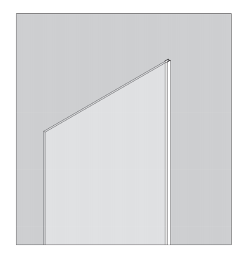
Option A: Wall Channel butt jointed onto floor channelOption B: Wall Channel Mitred into floor channelOption C: Wall Channel only
Using a hacksaw cut the channels according to the chosen installation option.
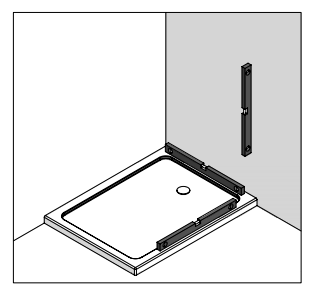
Mark the wall and channel for drilling avoiding areas such as tile edges.
We would advise on at least 3 fixing points.
Drill the channel using a 3mm HSS drill bit.
Mark the wall and drill for the wall plugs.
Secure the wall channel using screws and appropriate wall fixings.
If fitting the floor channel this is best secured using silicone sealant.
Apply glazing silicone sealant to the interior of the channels
Using two people fit the fixed panel into the channels ensuring it is pushed in firmly into the wall channel.

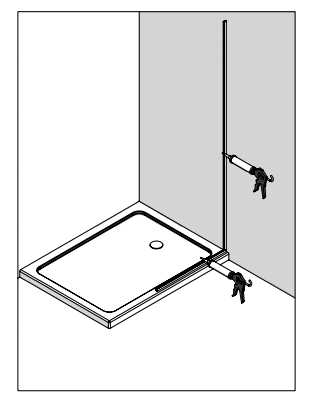
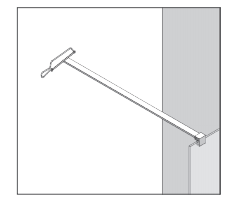
Depending where you have wall bar or ceiling bar: loosely fit the clamp to the screen and cut the ceiling bar to the required length using a hacksaw.
Measure no more than 10mm from the ceiling as a guide.
Or loosely fit the clamp to the screen and cut the wall bar to the required length using a hacksaw.
Measure no more than 10mm from the wall as a guide.
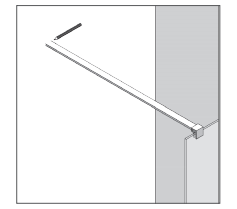
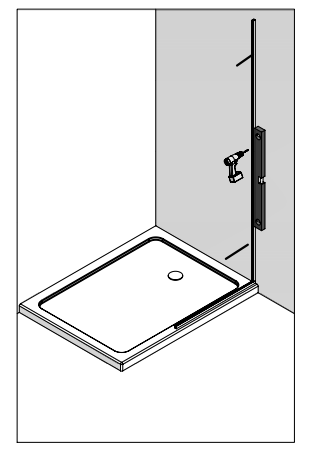
Mark the wall or ceiling to indicate the location for the wall clamp.
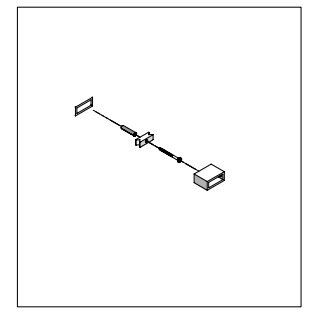
Drill the wall or ceiling and mount the fixing as shown.
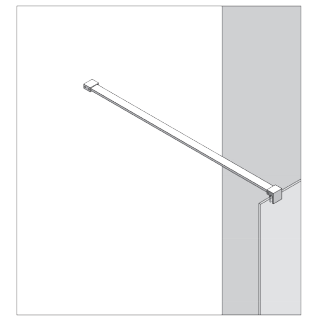
Fully secure the wall or ceiling bar by tightening the grub screws.
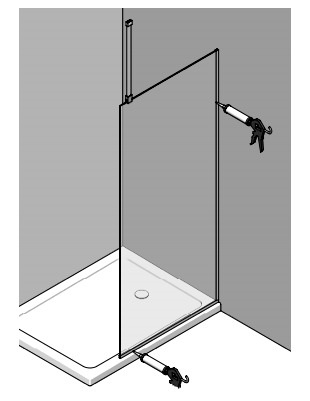
Apply silicone sealant to the outside of the fame where the channels meet the tiles and tray.
LEAVE FOR AT LEAST 24 HRS BEFORE USING
![]()
[xyz-ips snippet=”download-snippet”]