![]()
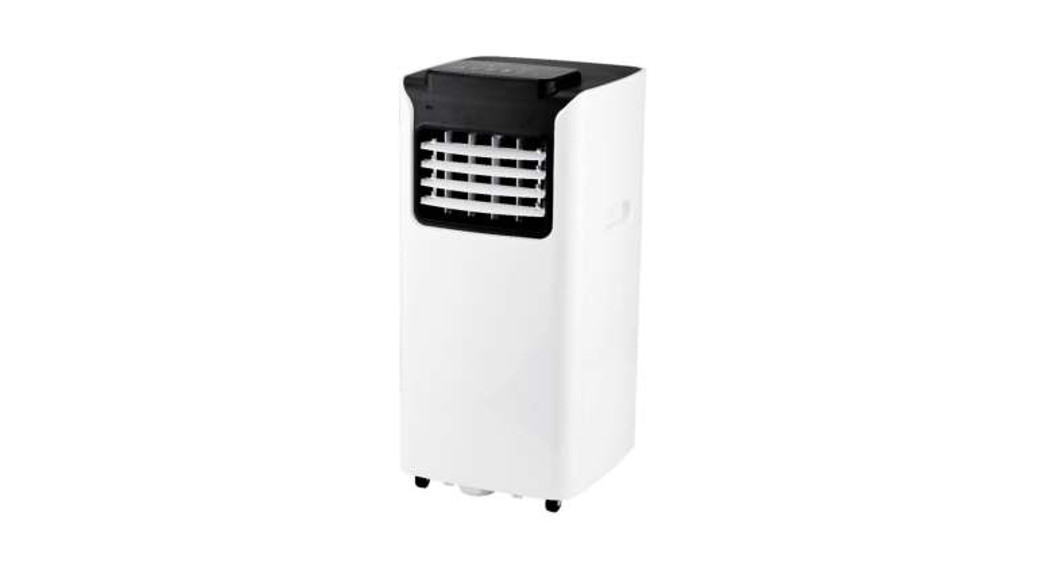
Mobiles Klimagerät – Portable air conditioner –Instruction Manual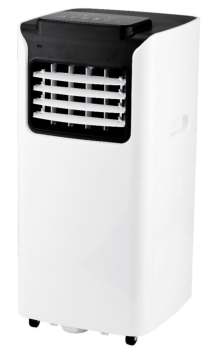
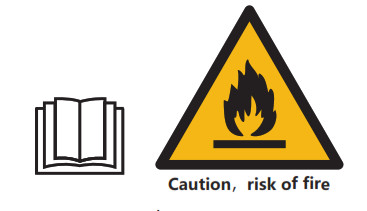
Before using this appliance, read the safety instructions carefully.
Safety Precautions
Warning:
- Ensure that the unit is always placed on a sturdy, flat and horizontal surface. Ensure that the unit has a free space of at least 50 cm on each side.
- Only connect the device to an earthed socket! Before use, check whether the socket is not damaged and the voltage that you will be using corresponds to the specification plate on the unit.
- Do not tilt the unit more than 35 ℃ or upside-down during transport.
- After installation of the air conditioner, ensure the plug is intact and can be inserted into the socket securely.
- Keep the air inlet and outlet free.
- The unit must be connected according to local, regional and national rules.
- The air conditioner shall be placed far away from gasoline, cooking stoves, or other combustibles and heat-generating sources.
- Always keep wires ordered to avoid stumbling or pulling out the plug.
- Do not use the unit if the electrical cable, plug, or device is damaged or broken. The device, plug, and/or cable must be repaired/replaced by an electrician or another suitably qualified person
- This appliance can be used by children aged from 8 years and above and persons with reduced physical, sensory or mental capabilities or lack of experience and knowledge if they have been given supervision or instruction concerning the use of the appliance in a safe way and understand the hazards involved. Children shall not play with the appliance. Cleaning and user maintenance shall not be made by children without supervision.Prohibitions:
- The air conditioner unit is only suitable for indoor use
- Do not move the unit by tugging on the electric cable and never remove the plug from the socket by pulling the cable.
- Do not place objects on the air conditioner.
- Never block the grilles for incoming or outgoing air (not even partially). In order to prevent overheating, never cover the device!
- Do not use the air conditioning unit in the vicinity of flammable or explosive substances or fuels. Never use any paint, cleaning sprays, anti-insect sprays, or similar near the unit; this could deform the plastic or cause electrical damage.
- Do not use the air conditioning unit in a damp or wet environment and never splash water, oil, or any other liquid onto the device. Do not touch the device with wet hands, or when you have bare feet.
- Do not clean the air conditioner with water but wipe it with a semi-wet soft cloth.
- Do not wipe the air conditioner with chemical solvents such as benzene, gasoline, alcohol, etc. If the air conditioner is dirty, please scrub with neutral detergents.
- Do not place the device in direct sunlight. Do not use it outside.
- Always remove the plug from the socket when the unit is not in use.
- Always switch the unit off and unplug it before:
- refilling watero cleaning the unito carrying out maintenance on the unito touching or moving the unit. Use the handles for this!

- Do not use a timer or a similar product to automatically switch on the unit. Always perform safety checks before using the cooler!
- Remove the water and dry the tank if the unit is not to be used for some time, for winter storage or before you transport it. This will prevent moisture vapors and bad odors.
Recommendations:Recommended environment temperature : 17 ℃-35 ℃, relative humidity: 20-85% RH.
NAME OF PARTS:

| 1. Control panel2. Remote control3. Signal receiver4. Cold air outlet | 5. Transport handle6. Air outlet (hose)7. Air inlet8. Drainpipe |
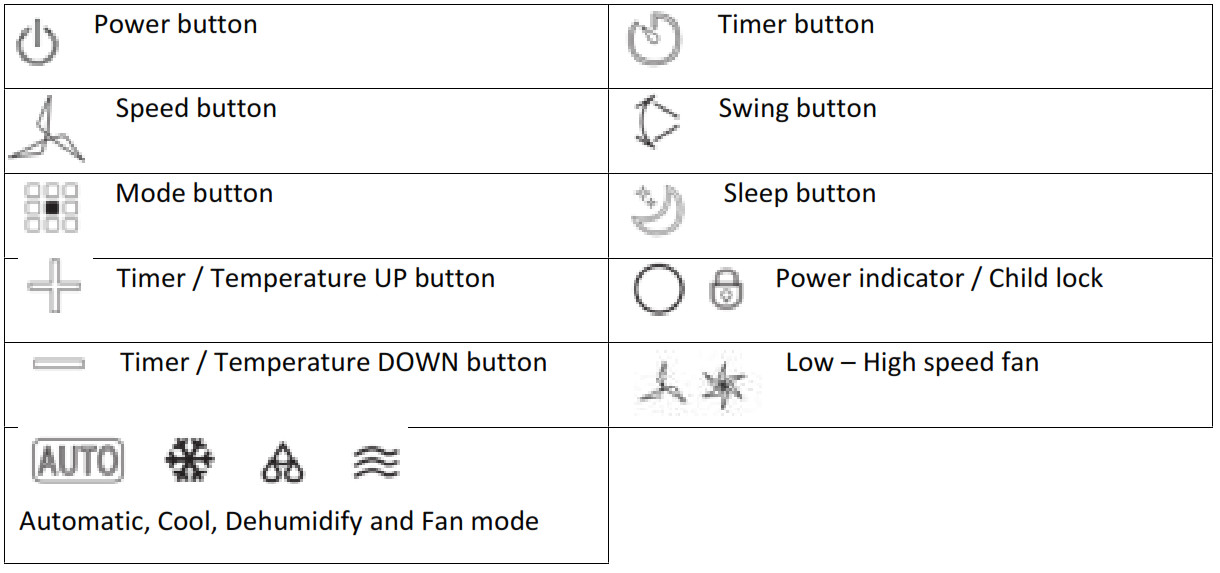
CONTROL PANEL 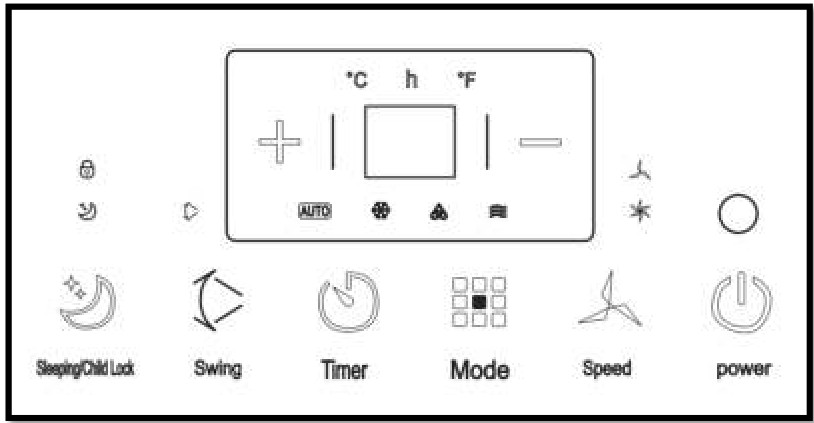
CONTROL PANEL OPERATION
- Turn on the unita. Plug it into the socket. The unit beeps and the power indicator light ` ´ lights on.b. Press the Power button to turn on the unit. The LED displays show the room temperature and operate in Automatic mode.
- Select operation modePress the Mode button to select the desired mode.
- Adjust the temperatureThe temperature can be set within a range of 15°C to 31°C by 1°C at a time.Press the + or – button to increase or decrease the temperature.The LED display shows the target temperature for 5 seconds and then shows the room temperature.
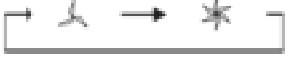
- Adjust the fan speedPress the Speed button to select the desired fan speed.
- Power offWhen you press the Power button again, the unit will show ̎di̎ The power indicator light ` ´ goes out and stops working.

MODE operation explanation– AUTO modeOnce the AUTO mode is selected, the indoor temperature sensor operates automatically to select the desired operation mode with ![]() or
or![]() .– When the room temperature is ≥ 24 ℃, the unit will automatically select
.– When the room temperature is ≥ 24 ℃, the unit will automatically select ![]() mode.– When the room temperature is < 24 ℃, the unit will automatically select
mode.– When the room temperature is < 24 ℃, the unit will automatically select![]() mode.– DEHUMIDIFY modeThe fan will run at low speed. The speed cannot be adjusted.The compressor stops after running 8 minutes, then starts again after 6 minutes.The unit uses a constant temperature in the dehumidifying mode. Adjusting the temperature is not effective.– COOL modeWhen the room temperature is higher than the set temperature, the compressor starts to run.When the room temperature is lower than the set temperature, the compressor stops and thefan operates at an original set speed.– FAN modeThe fan runs at a set speed and the compressor does not run.Adjusting the temperature is not effective.– TIMER function– Press the TIMER button to set the `Automatic OFF time´ while the unit is running.– Press the TIMER button to set the `Automatic ON time´ while is unit is ready for use.The time can be adjusted within a range of 1 hour to 24 hours. Press the + or – button toincrease or decrease the time 1 hour by pressing once.– SLEEP functionThe function can be set when using the COOL mode.– Press the SLEEP button in the COOL mode, then the unit will work in sleep mode and the upper fan will turn to low speed automatically. The set temperature will increase 1 ℃ after one hour, and increase 2 ℃ after two hours. After six hours, the unit stops.– Press the child lock button for 3 seconds to make all the other functions unable to use.– Press this button again for 3 seconds and it will unlock the child lock function.– SWING functionWhen the unit is on, press the SWING button and the oscillation of the louvers starts. Press again and it will stop. The louvers can swing back and forth within 120 degrees.NoticeThe main control board has a memory function, when the unit is ready and stops working, the main control board can memorize the initialization of working mode. When you turn on the unit, it will work in the same model as last time, no need to reset the working mode again. (This condition is not available when the unit is under AUTO mode).REMOTE CONTROLThe remote controller transmits signals to the system.
mode.– DEHUMIDIFY modeThe fan will run at low speed. The speed cannot be adjusted.The compressor stops after running 8 minutes, then starts again after 6 minutes.The unit uses a constant temperature in the dehumidifying mode. Adjusting the temperature is not effective.– COOL modeWhen the room temperature is higher than the set temperature, the compressor starts to run.When the room temperature is lower than the set temperature, the compressor stops and thefan operates at an original set speed.– FAN modeThe fan runs at a set speed and the compressor does not run.Adjusting the temperature is not effective.– TIMER function– Press the TIMER button to set the `Automatic OFF time´ while the unit is running.– Press the TIMER button to set the `Automatic ON time´ while is unit is ready for use.The time can be adjusted within a range of 1 hour to 24 hours. Press the + or – button toincrease or decrease the time 1 hour by pressing once.– SLEEP functionThe function can be set when using the COOL mode.– Press the SLEEP button in the COOL mode, then the unit will work in sleep mode and the upper fan will turn to low speed automatically. The set temperature will increase 1 ℃ after one hour, and increase 2 ℃ after two hours. After six hours, the unit stops.– Press the child lock button for 3 seconds to make all the other functions unable to use.– Press this button again for 3 seconds and it will unlock the child lock function.– SWING functionWhen the unit is on, press the SWING button and the oscillation of the louvers starts. Press again and it will stop. The louvers can swing back and forth within 120 degrees.NoticeThe main control board has a memory function, when the unit is ready and stops working, the main control board can memorize the initialization of working mode. When you turn on the unit, it will work in the same model as last time, no need to reset the working mode again. (This condition is not available when the unit is under AUTO mode).REMOTE CONTROLThe remote controller transmits signals to the system.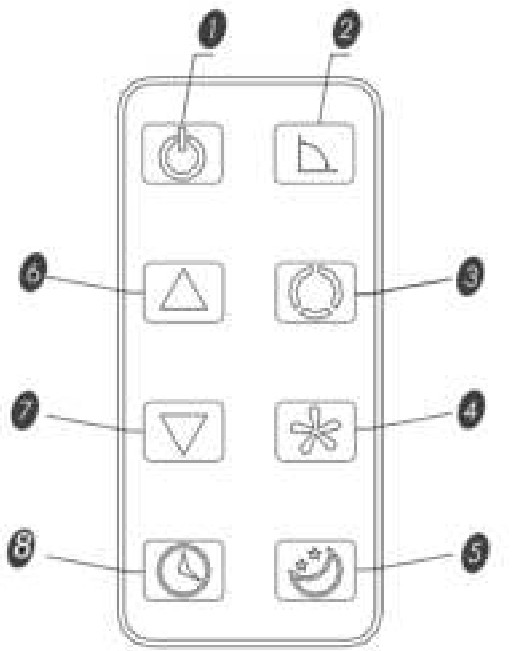
- BUTTONPress this button to turn ON or turn OFF the unit
- BUTTONPress this button to turn ON or turn OFF the auto swing function
- BUTTONPress this button to select the operation mode. Automatic, Cool, Dehumidify, and Fan.
- BUTTONPress this button to select the FAN speed.
- BUTTONPress this button to set or cancel the SLEEP function.
- (7) ANDUse these buttons to adjust the temperature and the timer.
- BUTTON
Press this button to set the Automatic OFF time or Automatic ON time.REMOTE CONTROLLER
- Open the back cover and take off the isolation film on the batteries
- Put the battery inside the slot.
- Put in back the cover. Be sure the direction is correct.
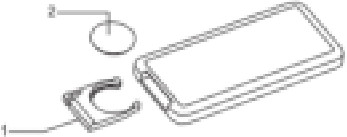
Notice: Take out the battery if you don’t use it for a while.
HOW TO USETo operate the air conditioner, aim the remote controller at the signal receptor. The remote controller will operate the air conditioner at a distance of up 5m, when pointing at the signal receptor of the air conditioner.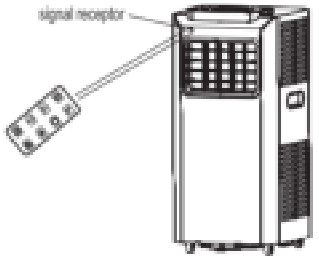
DRAINAGE SYSTEMWhile using the unit in “DRY” and “COOL” mode, continuous water drainage is recommended.
- Unplug the unit from the power source.
- Remove the draining plug. While doing this operation some residual water may spill, use a tray to collect the water.
- The water can be drained in a floor drain or bucket
- You can now use the unit again.
PROTECTION SYSTEMThis appliance features a protective device that, for safety reasons, will power off the applianceautomatically in the following cases:A. COOL– Indoor air temperature is over 43 ℃– Room temperature is below 15 ℃B. DRY– Room temperature is below 15 ℃– If the air conditioner is running in COOL or DRY mode with the door or the window opened for a long time.– When the relative humidity is above 80% condensation drops may drop down from the outlet.– To restart the unit after it has automatically shut down, wait three minutes.– If the appliance has been unplugged, the unit will operate in the default mode and you will have to set the timer again.NoteWhen the water reaches the max. level, the float switch, and the tank full indicator light will remind you to empty the water tank.Emptying the water tank
- Unplug the unit from the power source.
- Place a shallow tray under the lower drain plug.
- Remove the lower drain plug. Water will drain out and be collected in the shallow tray.
- After the water is drained, replace the lower drain plug firmly.
- You can now turn on the unit again.
CLEANING AND MAINTENANCE– Always unplug the appliance before cleaning and maintenance.– Wipe the outer surface of the appliance with a soft dry cloth. Is the appliance very dirty, dampen the cloth with lukewarm water.– Do not clean the appliance with scourers, alcohol a solvent cleaning products to avoid damaging the surface.– Never immerse the appliance or sprinkle it with water.To clean the air filter:
- Unplug the appliance and remove the air filter.
- Rinse it in lukewarm water. After cleaning, dry in a shaded and cool place, then reinstall.
Note:– If the filter has stubborn dirt or tough stains, you can dilute some detergent in the water.– If the environment is very dusty, clean the filter every two weeks.– Empty the condensed drain pan before storing the appliance for a long period of time to prolong the service life of the appliance.– Keep the appliance running with only the fan for a half-day during a sunny day to dry the appliance on the inside and prevent it from going moldy.– Always cover all the drain plug properly before storing them.
INSTALLATION ACCESSOIRIES

| 1. Air exhaust duct2. Connector of the air exhaust duct3. Air exhaust duct window adapter | 4. Remote control5. Window seal plate |
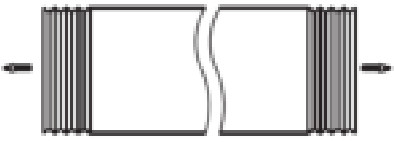
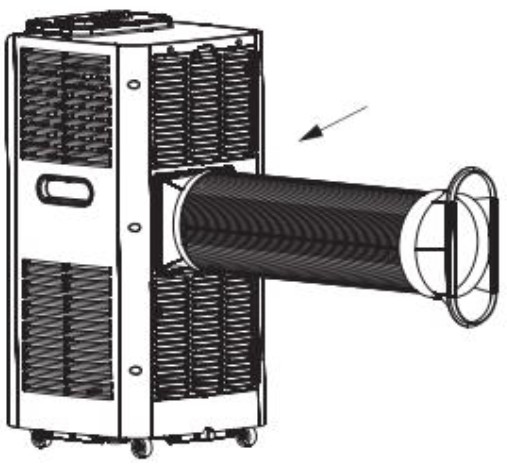
INSTALL EXHAUST HOSE AND ADAPTERHow to connect the connectors to the air exhaust duct:
- Extend the air exhaust duct by drawing out the two ends of the duct.
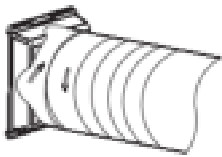
- Screw the air exhaust duct into the connector of the air exhaust duct.
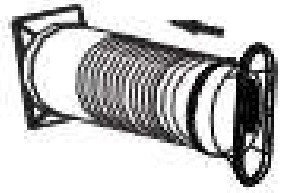
- Screw the connector of the window into the plastic window adapter.
- Connect the connector of the air exhaust duct to the unit.
| Faults | Check | Solutions |
| The air conditioner does not work | – Power off?Is- Plug not inserted?Is- Fuse burnt out or is the power supply turned off?– Time set properly?– Water full alarm? | – Turn the power on.– Insert power plug steadily. – Replace the fuse or turn on the power supply.– Change time setting.– Pour water. |
| COOL effect not good | Is- Air inlet/outlet blocked?– Filters too dirty?– Temperature setting appropriate? – Fan speed set at LOW?– The machine has entered anti-frost protection?– There is a door or a window opened?– The room temperature is lower than the set temperature? | – Remove blocking.– Clean the filters first.– Change the temperature.– Select the appropriate speed.– The unit will switch on automatically when the anti-frost protection is over.– Close the door or window.– The unit starts working when the room temperature is higher than the set temperature. |
| Too much noise and shaking | – Body skew?– Ground uneven? | Put the air conditioner on even ground. |
| The appliance automatically stops. | – You have set the timer ON and the time has run out.– It has reached the set temperature.– The air outlet is blocked. | – Turn the appliance back on.– Wait for it to automatically turn back on.-Remove any objects that may be blocking the air outlet. |
| Water is leaking from the unit | – The water tank is full. – The floor isn’t level. | – Empty the tank when full and before moving the appliance. – Place the unit on a flat level surface. |
Error code E2: Room temperature sensor is damaged.Replace the room temperature sensor.Error code E3: Evaporator coil pipe sensor is damaged.Replace the evaporator coil pipe sensor.Error code E4: The water tank is full.Empty the tank.
MAINTENANCE
- Cut off the power supply: Turn off the appliance first before disconnecting from the power supply.
- Wipe with a soft and dry cloth. Use lukewarm water (below 40 ℃) to clean if the appliance is very dirty.
- Never use substances such as gasoline or polishing powder to clean the appliance.
- Never sprinkle water onto the main unit.
Air filter maintenanceIt is necessary to clean the air filter after using it for about 100 hours. Clean as follows: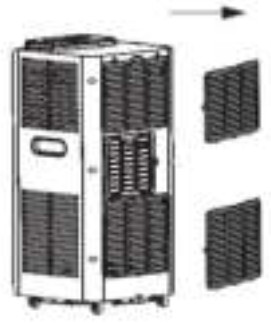 A. Unplug the unit and remove the air filter.B. Clean and reinstall the air filterIf the dirt is stubborn, wash it with a solution of detergent in lukewarm water. After cleaning, dry it in a shaded and cool place, then reinstall it.C. Clean the air filter every two weeks if the air conditioner operates in an extremely dusty environment.
Maintenance after using
- If the unit will not be used for a long time, be sure to pull out the primary and the secondary rubber plug of the drain port to drain the water.
- Keep the appliance running with a fan for a half-day during a sunny day to dry the appliance inside and prevent it from going moldy.
- Stop the unit and pull out the power supply plug, then take out the batteries of the remote control and store the unit properly.
- Clean the air filter and reinstall it.
- Remove the air hose and store them properly, and cover the hole tightly.
Correct Disposal of this product![]() This marking indicates that this product should not be disposed of with other household wastes throughout the EU. To prevent possible harm to the environment or human health from uncontrolled waste disposal, recycle it responsibly to promote the sustainable reuse of material resources. To return your used device, please use the return and collection systems or contact the retailer where the product was purchased. They can take this product for environmentally safe recycling.
This marking indicates that this product should not be disposed of with other household wastes throughout the EU. To prevent possible harm to the environment or human health from uncontrolled waste disposal, recycle it responsibly to promote the sustainable reuse of material resources. To return your used device, please use the return and collection systems or contact the retailer where the product was purchased. They can take this product for environmentally safe recycling.
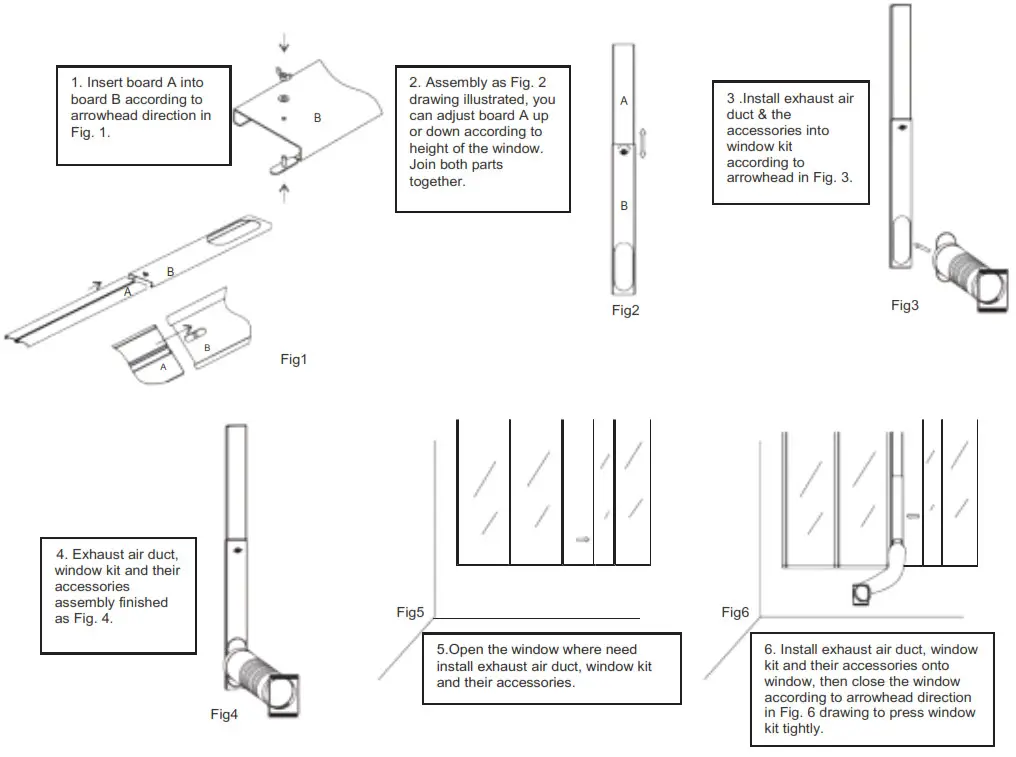
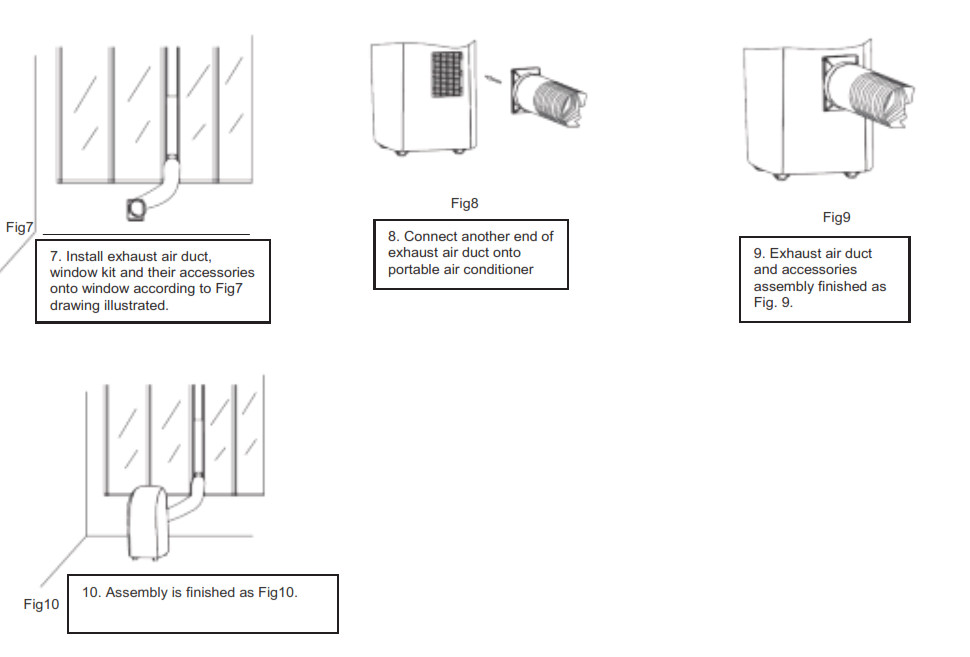
THE WAY OF WINDOW KIT
References
[xyz-ips snippet=”download-snippet”]