METER Aroya Hardware
AROYA HARDWARE
Introduction
The AROYA system works in a wireless mesh network. A wireless mesh network allows data and files to be transferred from one device to another through wireless transmission. The AROYA system components are FCC approved (Class A) and can communicate wirelessly between each other. The Gateway, Repeater, and Climate Station all use Power over Ethernet (PoE) that is compliant with IEEE 802.3af PoE standards.
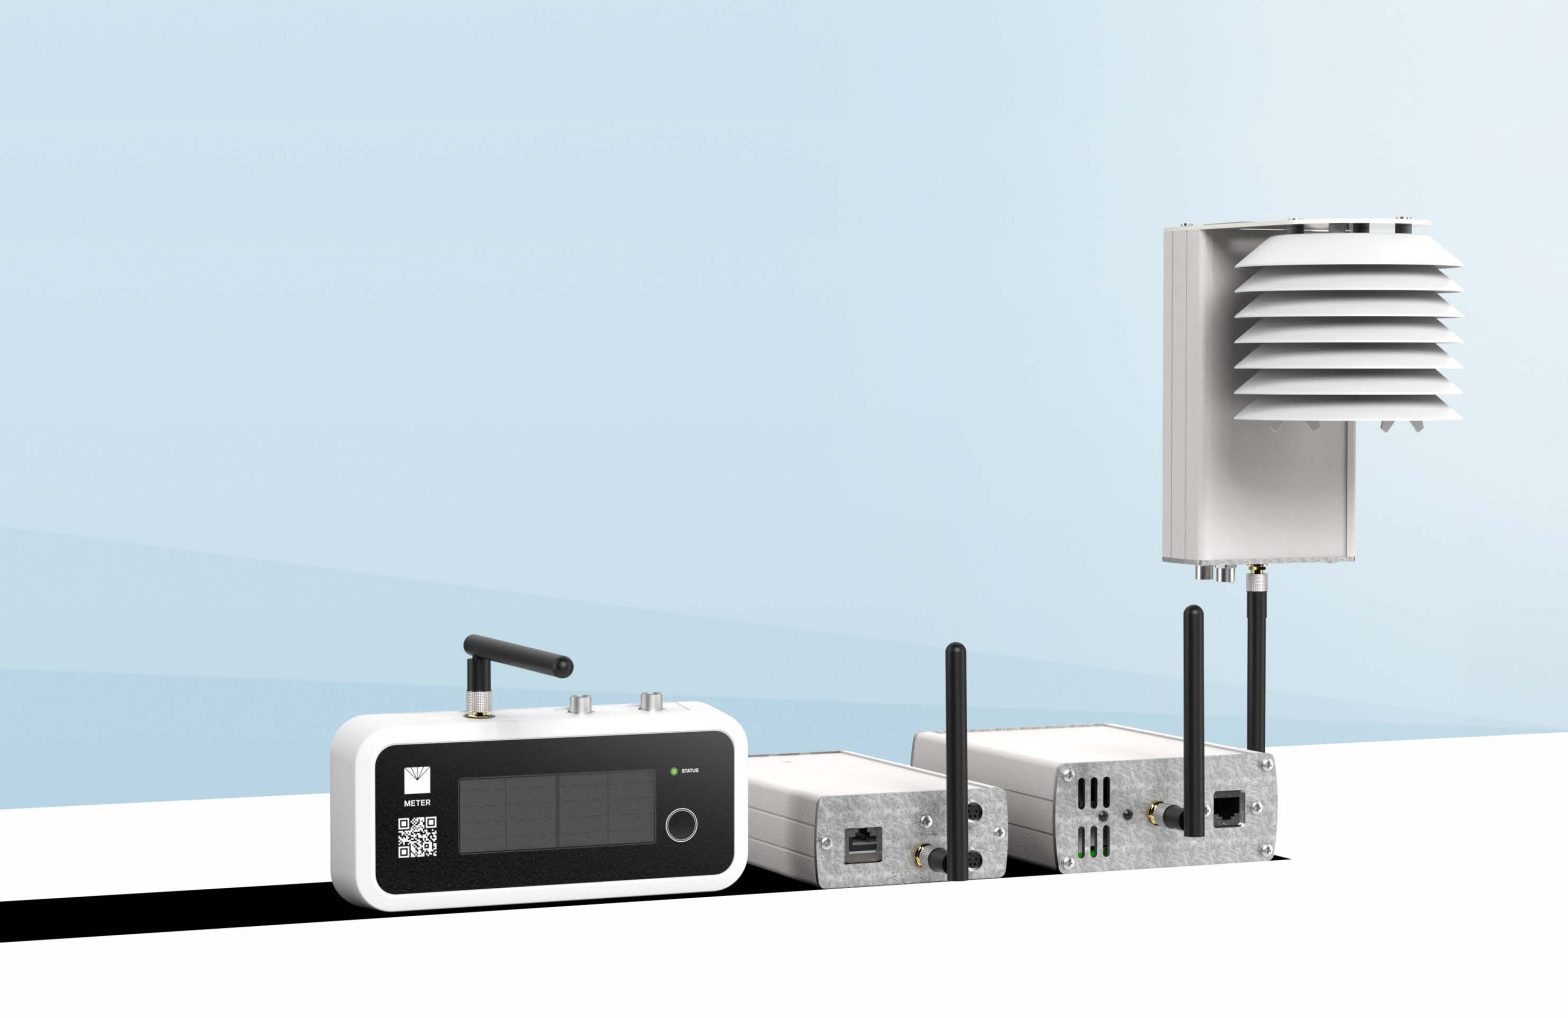
Gateway (H210)—sends and receives data transmitted by the Repeater or Sensor Nose and provides the system with an active connection to the cloud server where all data is processed and presented to the user.
Repeater (H110)—functions as a range extender, receiving data from the Sensor Nose and transmitting data wirelessly to the Gateway.
Climate Station (H111)—includes a Repeater and an ATMOS 14 temperature and relative humidity (RH) sensor. The ATMOS 14 supports SDI-12 sensor communication to capture microclimate sensor data. Data collected by the sensor is transmitted wirelessly to the Gateway.
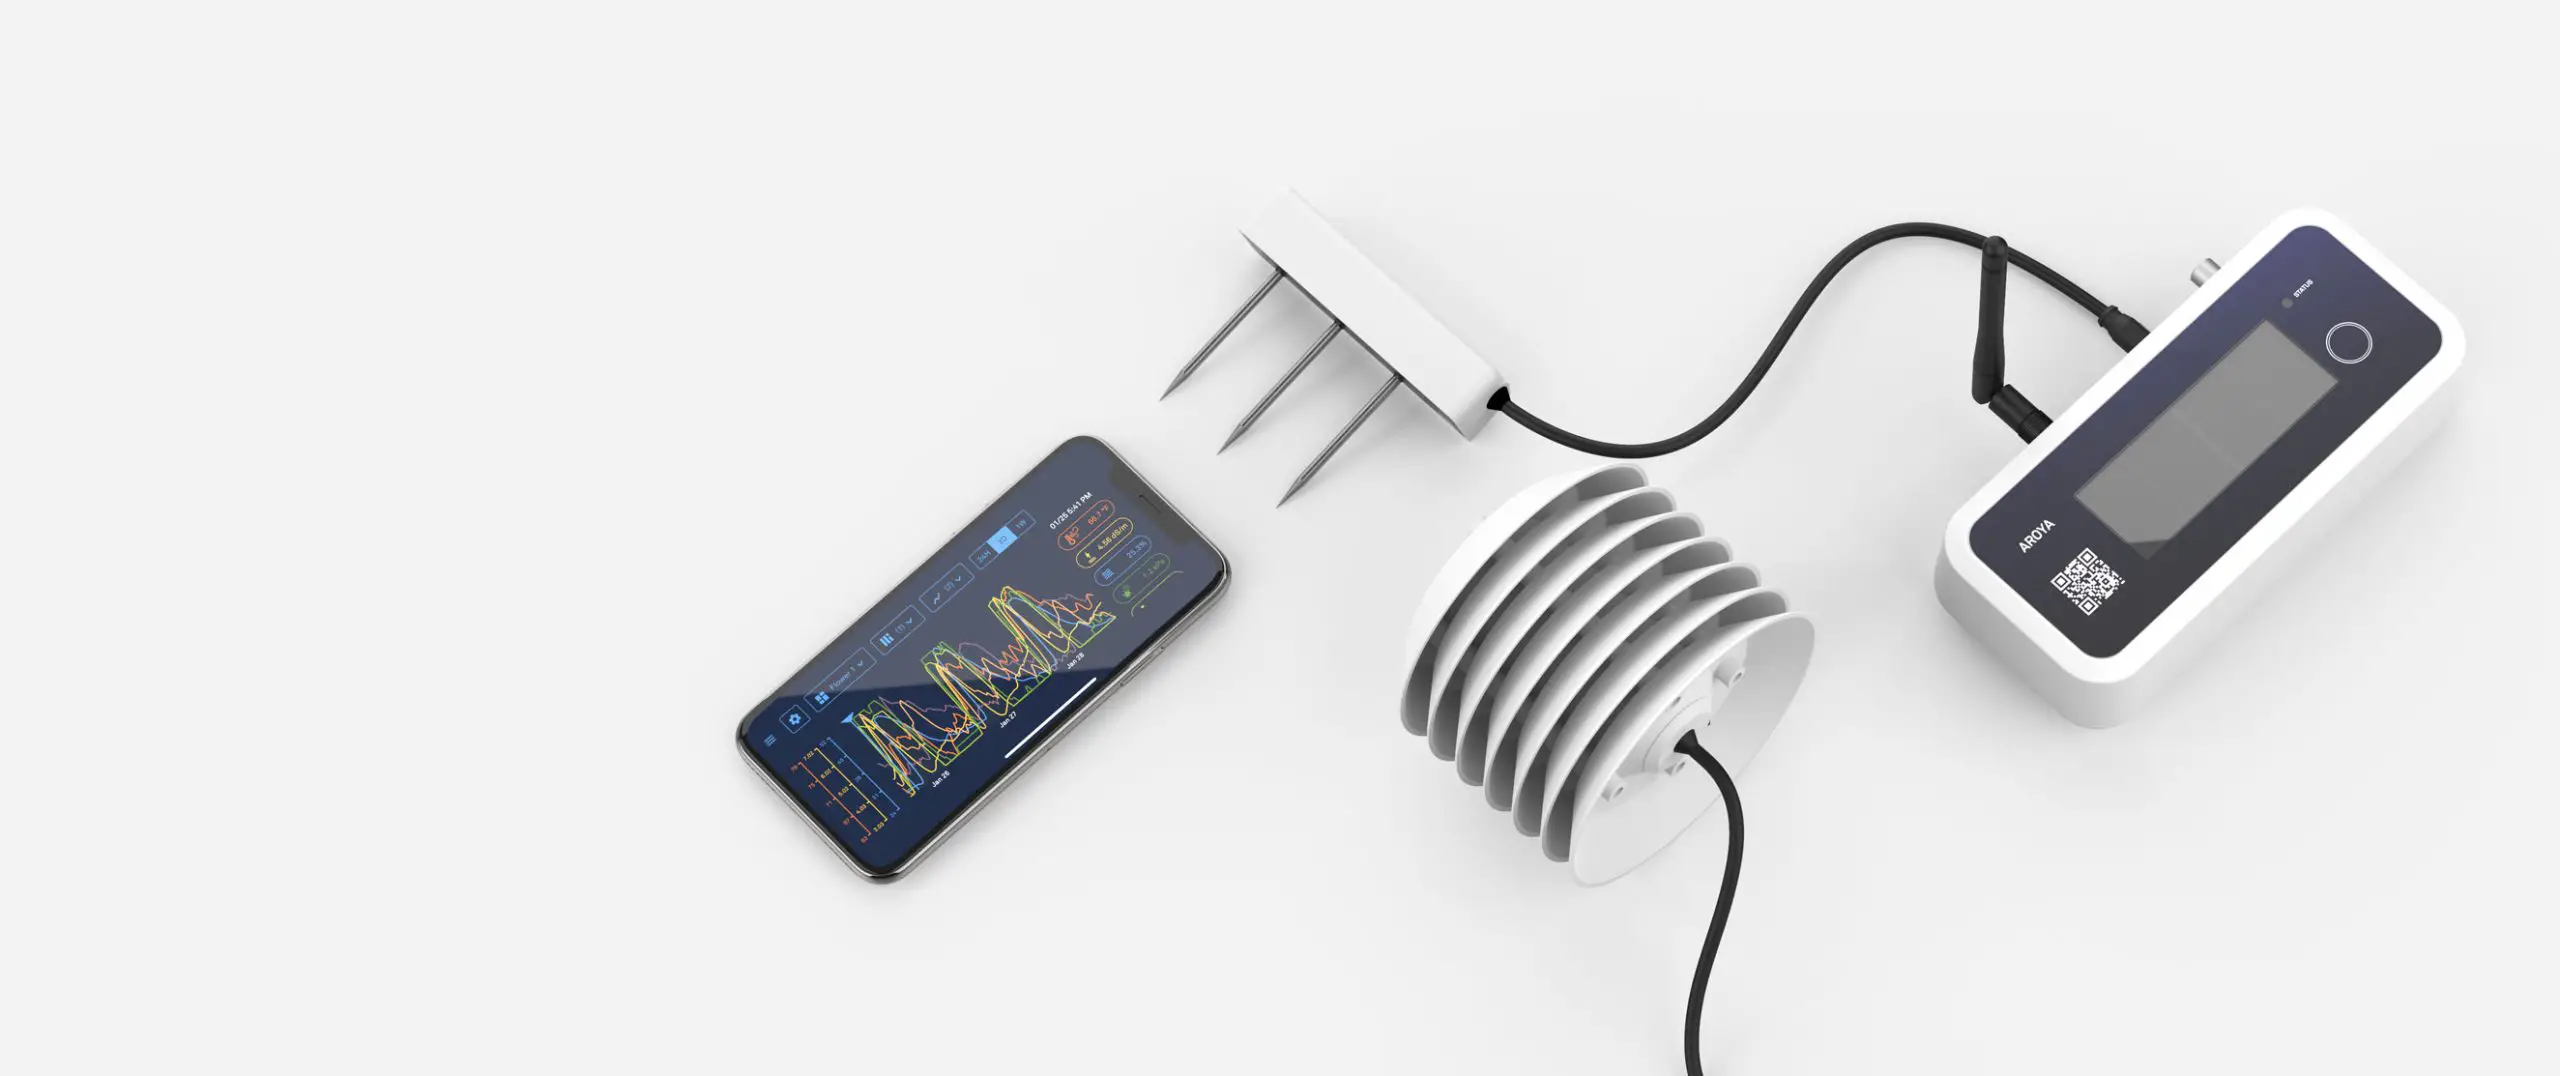
Sensor Nose (H321)—has communication components and an antenna to transmit data to the Repeater or directly to the Gateway if the Sensor Nose is close enough. The Sensor Nose connects to variety of sensors.
Preparation
The following tools are included with the AROYA hardware shipment:
• PoE injectors• Ethernet cables• Climate Station ratchet hangers• Alignment toolThe supplies listed below are also recommended.• Zip ties• Screw gun (optional)
AROYA Software Interface
The AROYA software, located at app.aroya.io, is the primary interface to the AROYA hardware system. The software allows constant monitoring of data as well as staff and device management. A lightweight version of the interface is available as a mobile app from the Apple® App Store® or Google Play store. For more information about the system features and functionality, please read the full AROYA manual or visit aroya.io
- Log In to AROYA SoftwareAfter the facility introduction and dashboard creation meeting, listed facility administrators will receive an email to set up a username and password at app.aroya.io.Administrators should now be able to log into the AROYA software.

- Add Facility MembersAdministrators select the Setup menu item.Click on the Staff tab at the top of the screen. Click on the Add staff member button.Enter the new member’s name, email, and user role; click on the Save account button.An email explaining how to create a username and password will be sent to the new user.

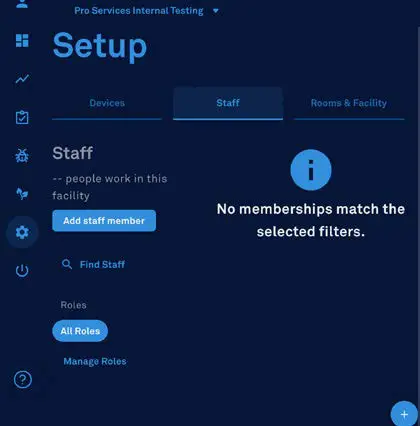
Manage RolesClick on the Manage roles link on the Setup page. Then select either Add Role, Edit Role, or Delete Role link or button.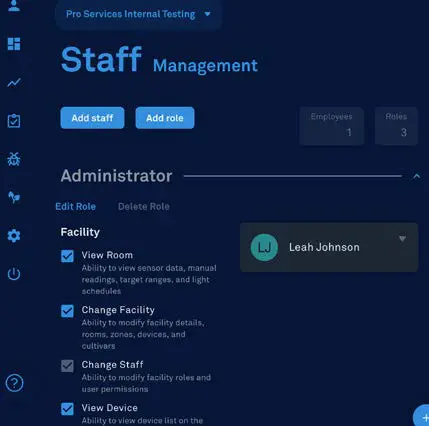
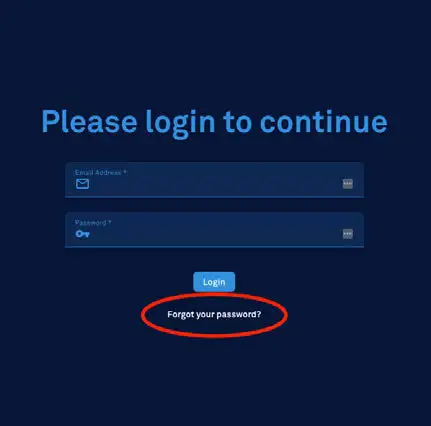
Reset PasswordUse the Forgot your password? link on the login screen.Enter the user’s email address and click on the Reset your password button.An email containing a link that directs the user to set a new password will be sent.
AROYA Gateway Installation
The AROYA Gateway (H210) is powered over a PoE-enabled device that is compliant with IEEE 802.3af PoE standards. The Gateway manages data to and from other AROYA devices and provides the system with an active connection to the cloud server where all data is processed and presented to the user.
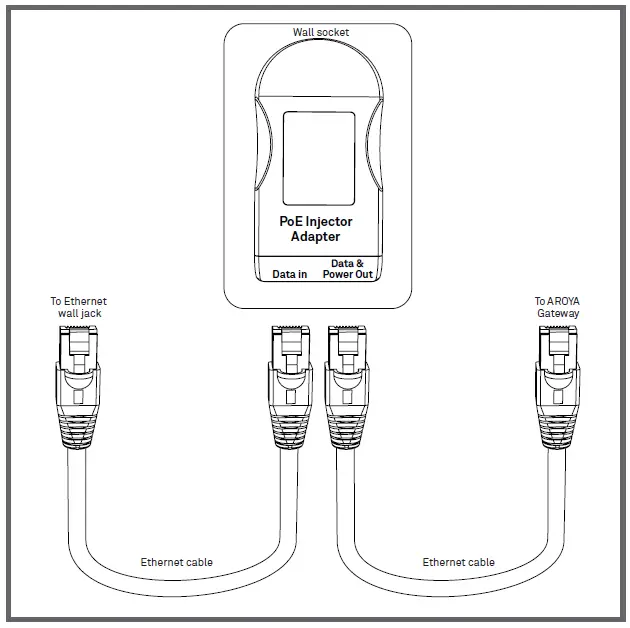
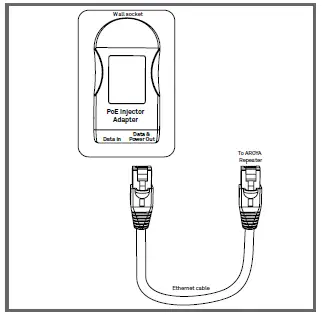
- Connect to NetworkPlug the Gateway into the existing customer network with Ethernet access. Use a PoE injector if no PoE is present.
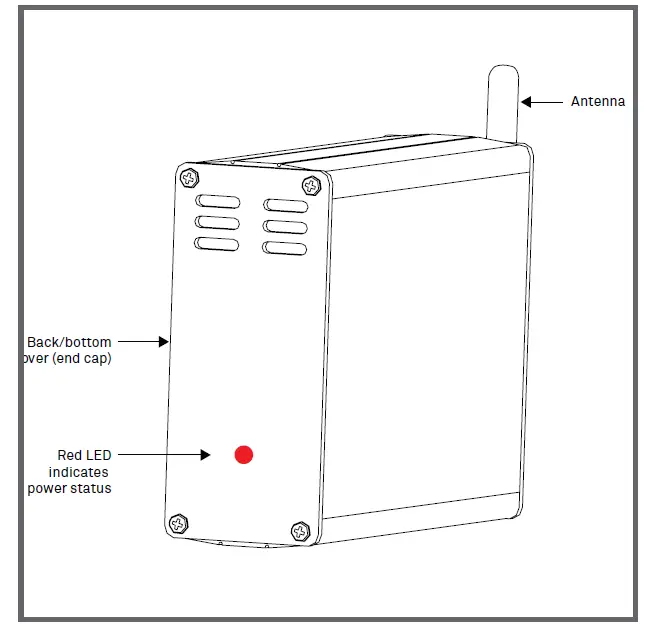
- Verify Power to GatewayThe red indicator light on the back, bottom side of the Gateway should be on when power is reaching the Gateway.
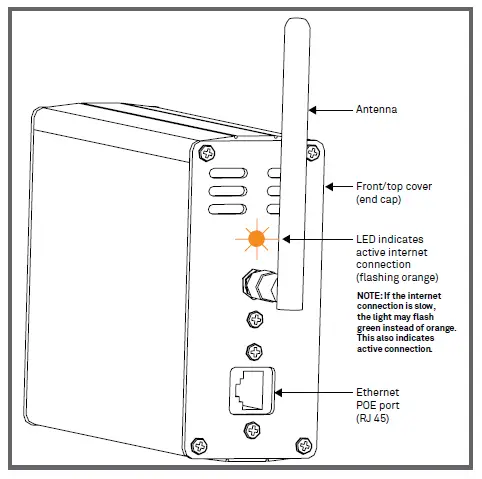
- Verify Network ConnectionWhen the light flashes orange or green, it indicates there is an active network connection.
- Verify Internet ConnectionLog into the AROYA software or mobile app.Go to the Devices page.Select Gateway under All Devices.A check mark icon indicates the Gateway is connected to the internet.

AROYA Climate Station Installation
The AROYA Climate Station (H111) acts as a signal repeater in addition to reporting air temperature, relative humidity, above-canopy light indicator, and vapor pressure deficit.
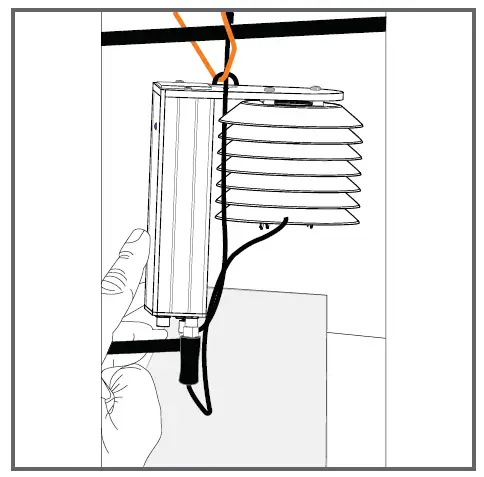
- Install Climate StationMETER recommends installing the Climate Station in the center of the room just over the canopy using the light hanger pulley provided.NOTE: Route Ethernet cable through mounting plate to keep the climate station level.
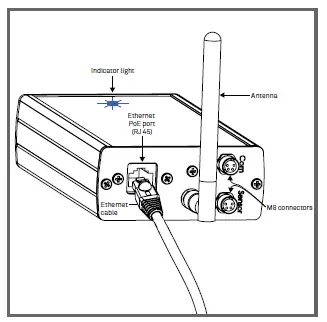
- Connect Sensor to PowerPlug the supplied Ethernet cable into the PoE side of the power adapter.Plug the opposing end of the Ethernet cable into the Climate Station near the antenna).Check to make sure the blue light located on the serial number side of the Climate Station is on.
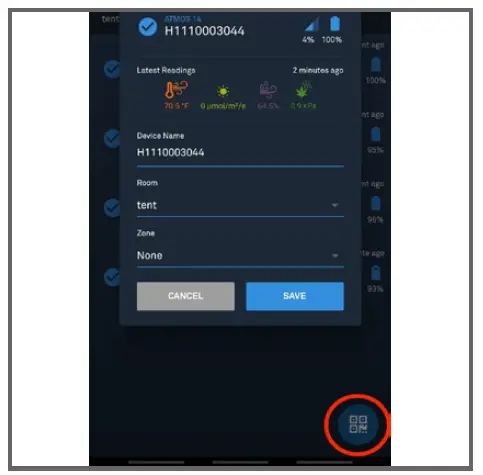
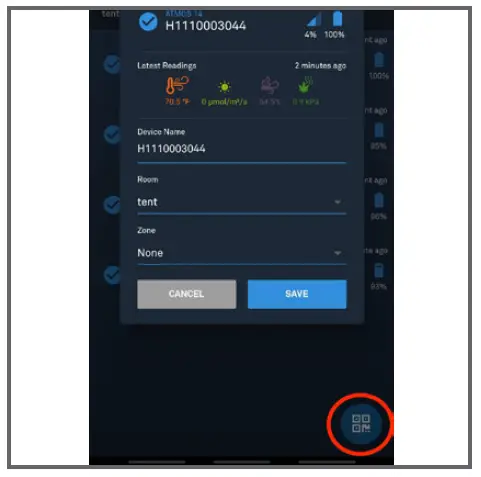
- Assign to RoomIf using the mobile app, tap on the Scan code icon in the lower right and scan the QR code on the Climate Station’s serial number label.Select the room where the device is located and assign it to that room.
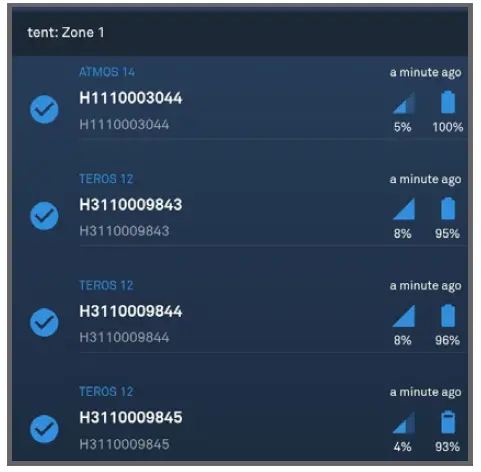
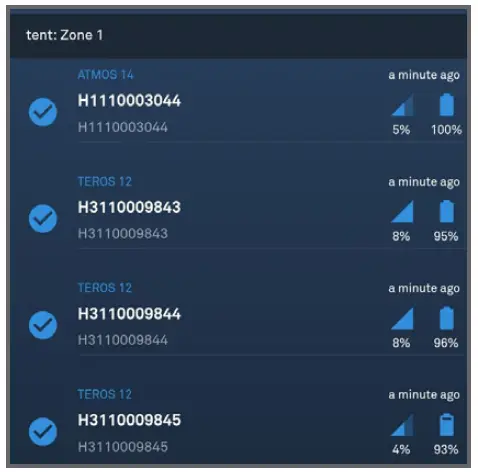
- Verify Sensor Is OnlineLog into the AROYA software or mobile app.Go to the Devices page.Select Climate Station under All Devices.A check mark icon indicates the Climate Station is online.


AROYA Repeater Installation
The AROYA Repeater (H110) is powered over Ethernet cable and wirelessly boosts the signal. The Repeater receives data from the sensor devices and transmits data to the AROYA Gateway (H210).
- Install the RepeaterMETER recommends installing the Repeater in the hallways about shoulder height to enhance transmission of data from sensors throughout the facility back to the Gateway.
- Connect to Power PoE InjectorPlug Ethernet connector into the PoE side of the injector. Plug the other end of the Ethernet cable into the Repeater (H110).
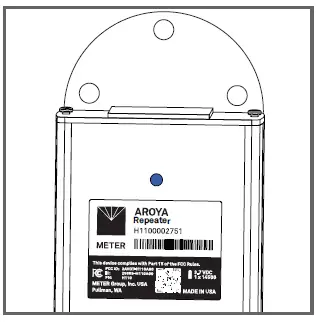
- Verify Device PowerCheck to make sure the blue light located on the serial number side of the Repeater has turned on.
- Verify Sensor Is OnlineLog into the AROYA software or mobile app.Go to the Devices page.Select Climate Station under All Devices.A check mark icon indicates the Repeater is online.
AROYA Sensor Nose and Sensor Installation
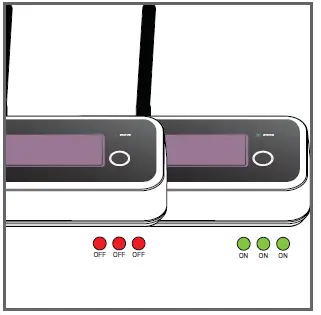
The AROYA Sensor Nose (H321) relays data from the connected sensor. AROYA substrate sensors are solar powered and shipped in deep sleep mode to conserve the batteries. Wake up the sensors before assigning or installing so they can communicate with the AROYA Gateway. Tap the button on the front of the nose 2–3 times until the LED STATUS light flashes green.NOTE: The status LED flashes when the button is pushed, but it will not remain lit. To perform a hard reset, press and hold the button for 5s.
- Turn Sensor OnWake up the sensors before assigning or installing so they can communicate with the AROYA Gateway.Tap the button on the front of the nose until the LED STATUS light flashes green and stop.NOTE: The status LED flashes when the button is pushed, but it will not remain lit.
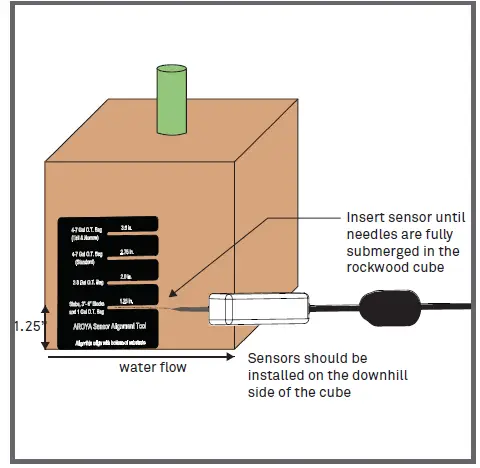
- Install SensorInstall sensor according to the sensor quick start or user manual.Ensure the cable from sensor is securely connected to Sensor Nose.Use the AROYA sensor alignment tool to ensure sensor is correctly and consistently installed.The TEROS 12 sensor is shown here as an example.
- Assign to RoomIf using the mobile app, tap on the Scan code icon in the lower right and scan the QR code on the Sensor Nose front panel.Select the room where the device is located and assign it to the appropriate room and zone.New sensor data is automatically uploaded every 3 min.
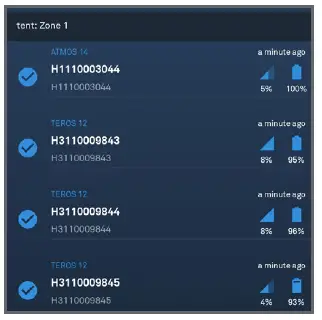
- Verify Sensor Is OnlineIn the AROYA software or mobile app go to the Devices page and select Sensor Nose under All Devices.Check the software dashboard to determine if the device is online. When the device is online, it will display a check mark inside a blue dot. (If there is a yellow zzz, the device is still sleeping.)
SUPPORT
 report this ad
Have a question or problem? Our support team can help.We manufacture, test, calibrate, and repair every instrument in house. Our scientists and technicians use the instruments every day in our product testing lab. No matter what your question is, we have someone who can help you answer it.Email: [email protected]Phone: +1.509.332.5844
References
[xyz-ips snippet=”download-snippet”]