![]()
95-7807INSTALLATION INSTRUCTIONS
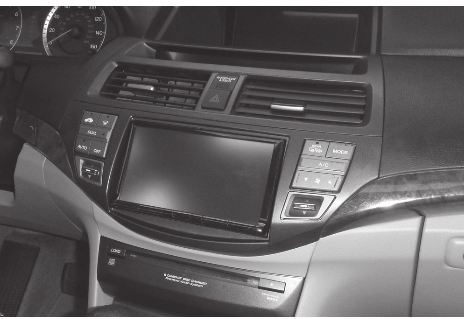
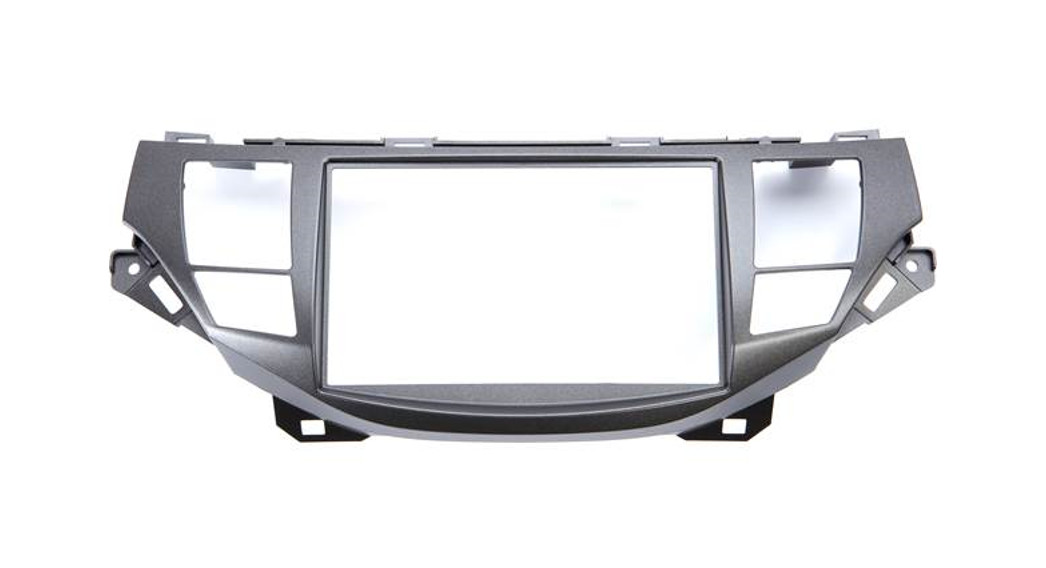
Honda Accord 2008-2012*Honda Accord Crosstour 2010-2011,Crosstour 2012* For navigation models with dual-zone automatic climate controlsNOTE: Factory NAV screen not retainedVisit MetraOnline.com for more detailed information about the product and up-to-date vehicle specific applicationsKIT FEATURESDouble DIN radio provision
- 95-7807 painted Dark Charcoal and 95-7807T painted Taupe
KIT COMPONENTS
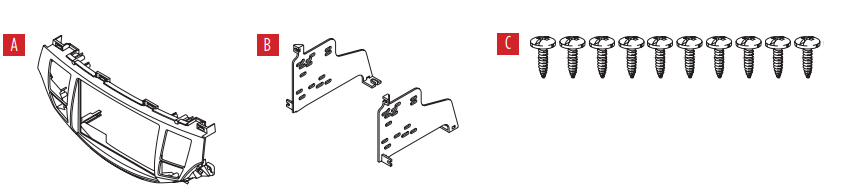
- A) Radio housing trim panel
- B) Brackets
- C) (10) #8 x 1/2″ Phillips screws
WIRING & ANTENNA CONNECTIONS (sold separately) Wiring Harness: • 70-1730 premium sound harness Antenna Adapter: • 40-HD10TOOLS REQUIRED• Panel removal tool • Phillips screwdriverAttention! With the key out of the ignition, disconnect the negative battery terminal before installing this product. Ensure that all installation connections are secure before cycling the ignition to test this product.
DASH DISASSEMBLY
| Unclip and remove the trim panel from above the glove box located on the right side of the factory radio. (Figure A) | 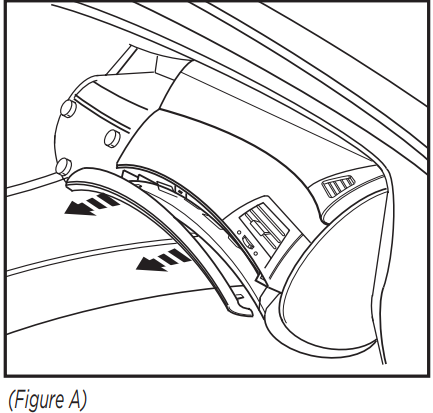 |
Unclip and remove the trim panel from above the glove box located on the left side of the factory radio. (Figure B) | 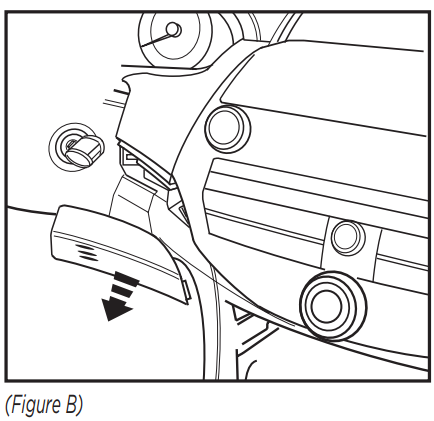 |
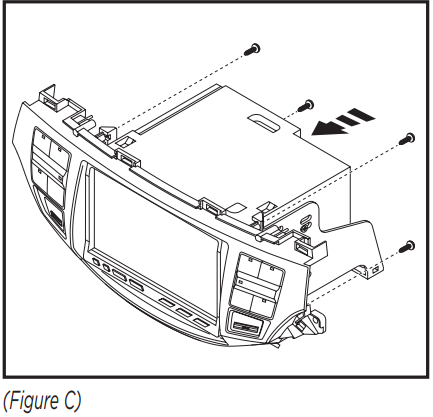
| 3. Remove the (2) Phillips screws from the left and right sides of the factory radio. (Figure C) | 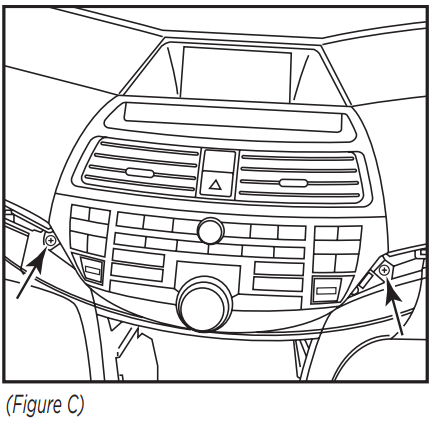 |
4. Unsnap and remove the factory air vents located above the radio. (Figure D) Continue to the next page |  |
| 5. Unclip and remove the top of the center console, including the cup holders. (Figure E) | 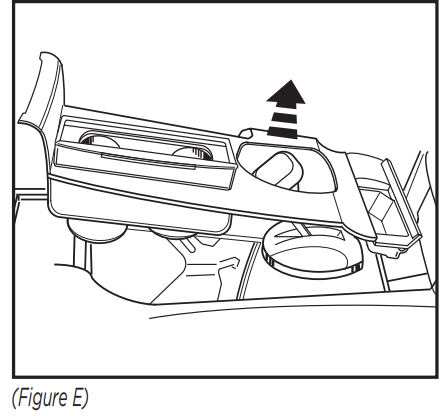 |
6. Remove (2) Phillips screws at the bottom edge of the pocket assembly. (Figure F) | 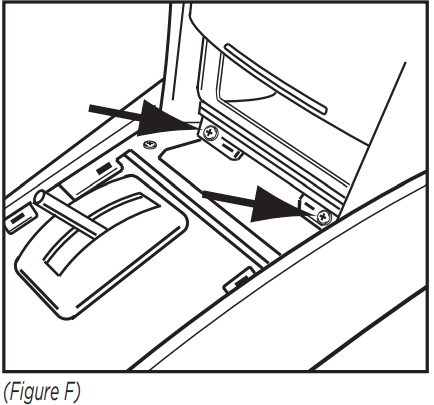 |
| 7. Remove (2) Phillips screws facing up inside of the pocket below the factory radio. (Figure G) | 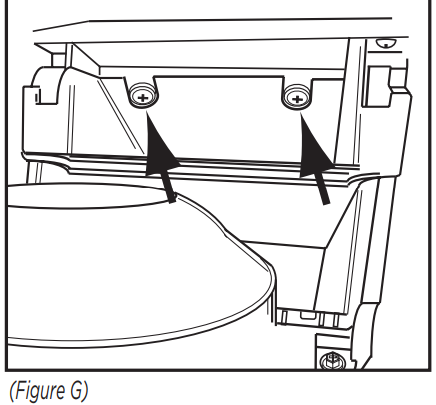 |
8. Unsnap and remove the pocket assembly. (Figure H) | 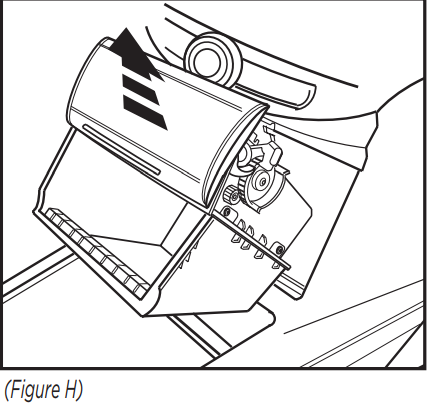 |
| 9. Remove (2) screws from the side brackets and pull out the NAV disc player. (Figure I) | 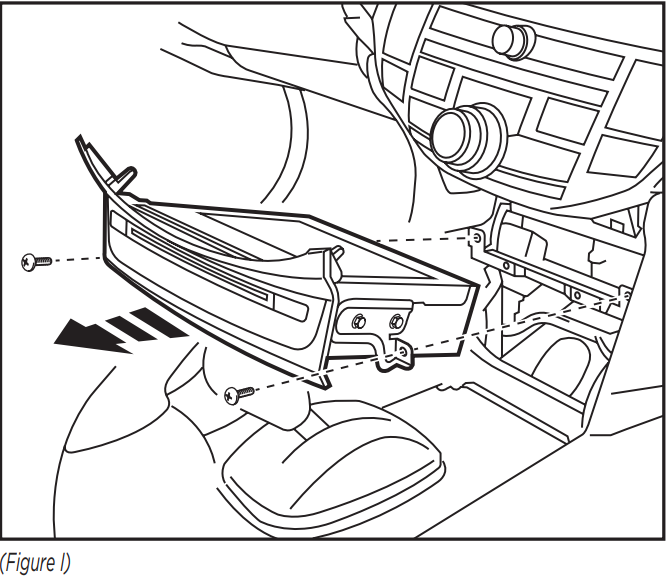 |
10. Remove (2) screws facing out from the bottom of the factory radio. (Figure J) | 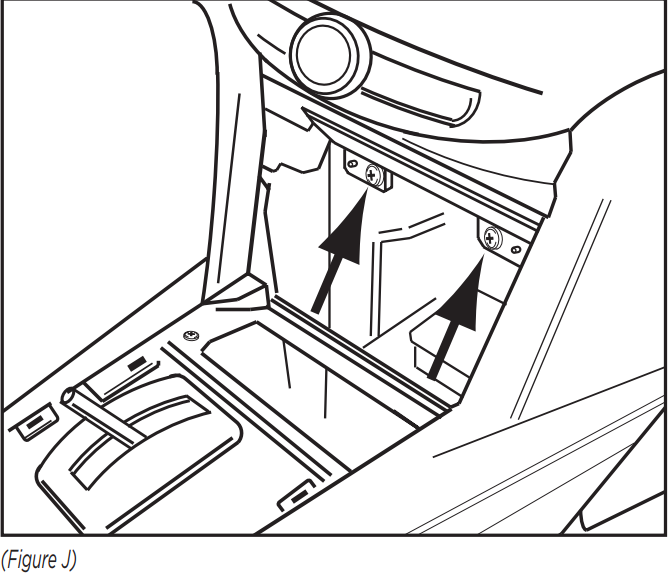 |
| 11. Unclip and detach the factory radio/ climate assembly. (Figure K) | 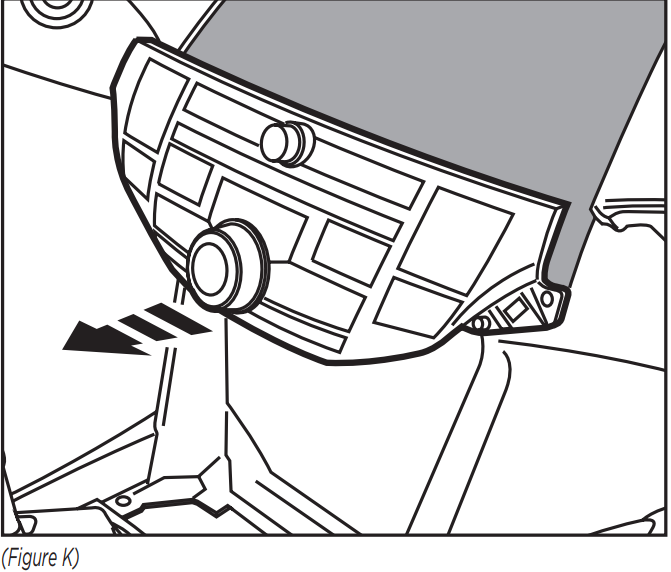 |
Remove (4) screws each and pull out the climate control switches from the factory radio assembly. (Figure L)Unsnap the (2) factory panel clips on the factory radio and save them for kit assembly. (Figure L) |  |
KIT ASSEMBLY
 |
 |
Affix (2) factory clips to the radio housing. (Figure A)Double DIN radio provision
- Attach the climate switches to the radio housing using (6) of the #8 x 1/2″ screws on the upper and outside mounts. (Do not install the screws on the bottom mounts shared by the radio brackets until installing the radio/bracket assembly.) (Figure A)
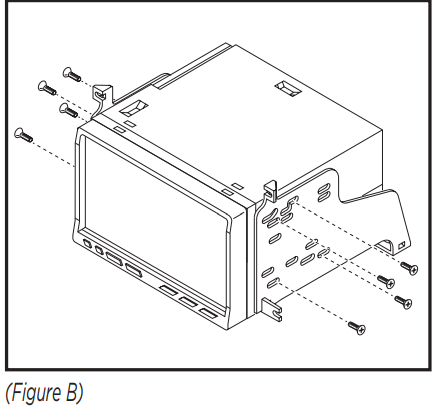
- Mount the radio to the brackets with the screws provided by the aftermarket radio. (Figure B)
- Mount the radio assembly to the radio housing by installing (4) of the supplied #8 x 1/2″ screws to the shared radio brackets. (Figure C)
- Locate the factory wiring harness and antenna plug in the dash. Metra recommends using the proper mating adapters from Metra and AXXESS.
- Clip the new radio assembly into the dash and reassemble the dash in reverse order of disassembly.

Having difficulties? We’re here to help. Contact our Tech Support line at:386-257-1187
 Or via email at: [email protected]Tech Support Hours (Eastern Standard Time)Monday – Friday: 9:00 AM – 7:00 PMSaturday: 10:00 AM – 7:00 PMSunday: 10:00 AM – 4:00 PM
![]() KNOWLEDGE IS POWER
KNOWLEDGE IS POWER
Enhance your installation and fabrication skills by enrolling in the most recognized and respected mobile electronics school in our industry.Log onto www.installerinstitute.edu or call386-672-5771 for more information and take stepstoward a better tomorrow. Metra recommends MECPcertified techniciansMetraOnline.com
© COPYRIGHT 2021 METRA ELECTRONICS CORPORATION
References
[xyz-ips snippet=”download-snippet”]