
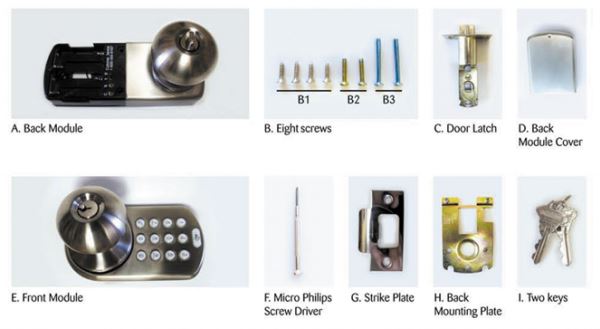
Installation Instructions
Adjusting Door Latch backset
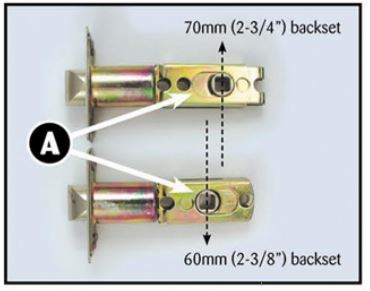
A. You may need to adjust the backset on your latch (the backset is the distance from the edge or the door to the center of the door hole). To adjust this on your latch press and slide the adjustable center piece (the square hole, see A above) until it is centered in the door hole.
Installing Door Latch
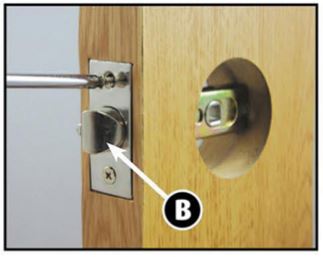
- A. Insert Door Latch into end of door as shown.
- B. Make sure beveled side or latch is facing the door frame.
- C. Using a Phillips screwdriver, screw Door Latch into place with 2 wood screws (81) provided.
Installing Front Module
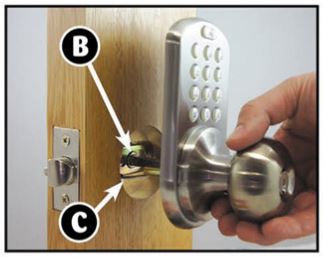
- A. Remove key
- B. On exterior side of door, insert Front Module driver bar through Door Latch as shown.
- C. Pass wiring through door hole as shown.
Installing Back Mounting Plate
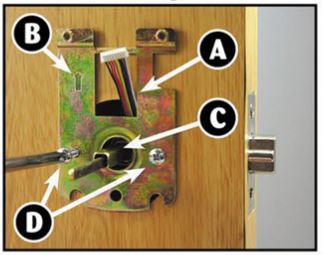
- A. With Front Module in place. pull the wires through the top hole of Mounting Plate.
- B. Be sure arrow shows on Plate.
- C. Insert driver bar through the center hole of Mounting Plate.
- D. Bolt Mounting Plate into back or Front Module using 2 long bolts (83) provided.
Connecting the Back Module
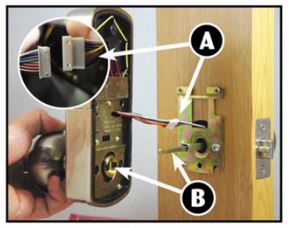
- A. Attach the wire loom from the Front Module to the Back Module by matching up the colored wires.
- B. Fit the driver bar from the Front Module into the Back Module.
Installing the Back Module
- A. Bolt the Back Module to the Mounting Plate using 2 medium sized bolts provided (82) as shown. Do not over tighten.
- B. Install 4 premium, size·AA alkaline batteries (not included).
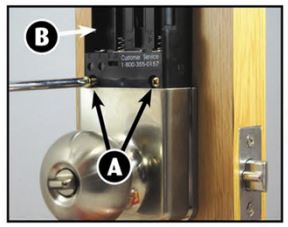
Installing the Back Module cover

- A. Using the small screwdriver provided, screw battery cover into place as shown.
MiLocks Installation Instruction manual – MiLocks Installation Instruction manual –
[xyz-ips snippet=”download-snippet”]