moa Pasta Maker Instruction Manual
Notice and Instructions
Warning!To reduce the risk of fire, electric shock and injury to people when using the electrical appliances, it is recommended that you should always observe the basic safety precautions, including the following precautions:
Read these instructions before putting the product in operation and well preserve these instructions.
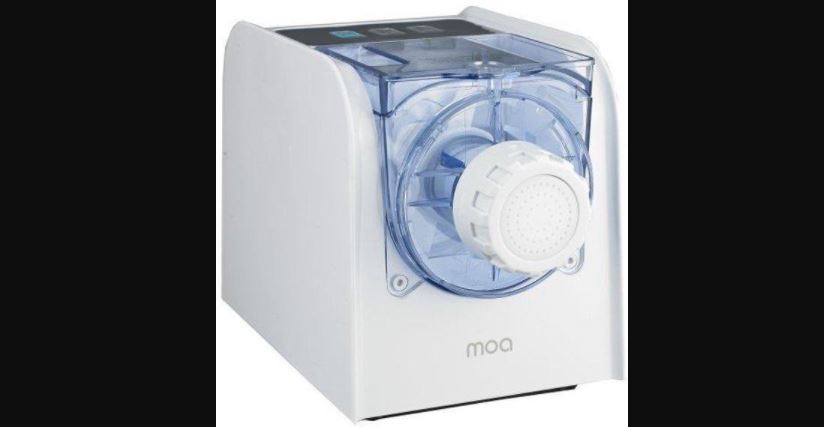
Description of the Apparatus

1. Socket2. Base of the unit3. Mixture container4. Cover5. Kneading turbine6. Evacuation conduit7. Worm8. Pasta Grid9. Nut of the gridl 0. Flour cup11. Liquid cup
Safety Instructions
- Please always verify that the voltage of electricity grid matches what is indicated on the nameplate before connecting the apparatus to the electricity grid.
- Don’t touch the moving parts of the apparatus.
- Please verify the device status before using it: don’t connect the apparatus to electricity grid if it hos any anomaly.
- Always unplug the apparatus after use, during its assemblage or for cleaning.
- Never get the apparatus immerged, even partially, with the exception of the detachable pieces of the unit base.
- The apparatus is not intended to be used by the following people (including children): those who lack the physical, sensory or mental capacity, or those who lack experiences or knowledge. They can’t use the apparatus unless they ore supervised by people who ore responsible for their safety and use the apparatus under the instructions.
- Never leave the apparatus unattended or within reach of children.
- Do not let the power cord hong over the edge of table or counter.
- Do not use the apparatus when it is proximate the heat source, such as a hotplate.
- Never connect the apparatus to the electricity grid if the power cord is damaged. In this case, the power cord must be replaced by the manufacturer, its after-soles service or people of similar qualification in order to avoid danger.
- Do not disassemble the apparatus. If the apparatus should be disassembled for some reasons, please contact the manufacturer, its after-sales services or people of similar qualification in order to ovoid danger.
- This apparatus is intended for home use, and it should not be used industrially.
- Do not attempt to replace the internal parts or repair the apparatus by yourself.
- The apparatus is for indoor use only, not for outdoor use.
- This product is not o toy. Please keep it out of reach of children.
- Make sure the flour and water mix evenly and then exist or the dry flour will jam the attachment.
- Before using, check if the power cord, socket, container, and worm damaged or not, if found which part is broken, it can’t be repaired by yourself but send to the service center to ovoid the danger.
- When the product is working, it can’t be poured into any solid objects except the flour( egg should be mixed with water evenly).
- When the product is working, it is strictly prohibited to open the cover of container or fetch out the attachment or touch the worm and knead turbine by hand to avoid the danger.
- Don’t block or jam the air vents of the apparatus, if there are some flour in the air vents, please tilt the apparatus and shake lightly to get rid of the flour.
- The product cant be disinfected by disinfection cabinet to avoid change the shape under heating. The parts material should be clean and healthy which touch with the food and need approved by LFGB certificate.
- Don’t put the body of apparatus into water.
- Don’t use the metal cleaner or abrasive cleaner or corrosive liquid cleaner.
- This product is used repeatedly can’t exceed for three times.
- The apparatus need take a rest for 30minutes after work after 3 times using.
- The maximum amount of pasta: Flour, 400g; Water, 150ml.
- This product can’t be cleaned by dishwasher.
- Don’t put the apparatus under the blazing sun for a long time to avoid changing the color.
- Don’t split the apparatus.
- Don’t heat the parts of apparatus.
Before the First Use
- Clean thoroughly all parts which are in contact with food with hot soapy water (with the exception of the base unit). For more details, please refer to paragraphs about cleaning and maintenance.
- Place the apparatus on an appropriate surface.
- Please be familiar with the apparatus before connecting it to the power grid.
Functions of Switches
“AUTO /STOP”:
- Press this function, the indicator will glow, the machine start mixing for 4 minutes and then exiting automatically.
- The machine will stop work automatically after finished. It will take 15 minutes for the whole work.
- In the work process, press “AUTO /STOP”, the machine will stop work.
“MANU/MIX”:
- Press this function, the indicator will glow, the machine start mixing.
- In the mixing state, press “AUTO /STOP”, the machine will stop work.
“MANU/EXT”:
- Press this function, the indicator will glow, the machine start exiting.
- The machine will stop work automatically after finished.
- In the exiting state, press “AUTO /STOP”, the machine will stop work
Disassembling
Make sure your machine is disconnected to power grid before disassembling.
- Twirl counterclockwise the Nut of grid, take down the Die shape and worm.
- Press the hook and open the upper cover of the container with your hands.
- Twirl counterclockwise the container to put “Lock” into “Open” and toke down the front cover.
- Toke down the kneading turbine and container.
Assembling
Make sure your machine is disconnected to power grid before assembling.
- Fix part container on a horizontal plane.Place the unit base on o horizontal and stable working plane.Insert the container horizontally on the unit base by thoroughly pushing it to the back of unit base.
- Fix the kneading turbine into the container.
- Fix the front cover and worm into the container and twirl clockwise to put “Open” into “Lock”.
- Fix the Die shape with Nut of grid and twirl clockwise tightly.Before using, the customer con fetch out the Die shape and make it soak into water for some time which is better for using smoothly.
- Targeting the screens and insert the upper cover into the back of unit base, and then press down it to fix properly.
After use, unplug the apparatus, wait for the complete shutdown of the device and then remove the accessories.It’s easy to clean the Die shape after dried it and pot it.
Cleaning
ATTENTION: Make sure the appliance is off and unplugged before disassembling it.
- After use, remove all components from the appliance, by carrying out the procedures described for assembly in the reverse order.
- Use a clean and soft cloth only for cleaning the motor base (A).
- All components may be cleaned using warm water and any kind of dish detergent. TO remove pasta residues from the various components, it is recommended to rinse them under running water by using the brush (V) supplied.
ATTENTION:In order to make components cleaning easier, after use, let them immersed in warm water with a little dish detergent for 10 minutes. Never put the motor base (A) or all components in the dishwasher. Do not use abrasive tissues or corrosive detergents for cleaning. After cleaning, let any port completely dry before mounting.

This marking indicates that this product should not be disposed with other household wastes throughout the EU. To prevent possible harm to the environment or human health from uncontrolled waste disposal, recycle it responsibly to promote the sustainable reuse of material resources. To return your used device, please use the return and collection systems or contact the retailer where the product was purchased. They can take this product for environmental safe recycling.
References
[xyz-ips snippet=”download-snippet”]