![]()
QUICKSTART GUIDE

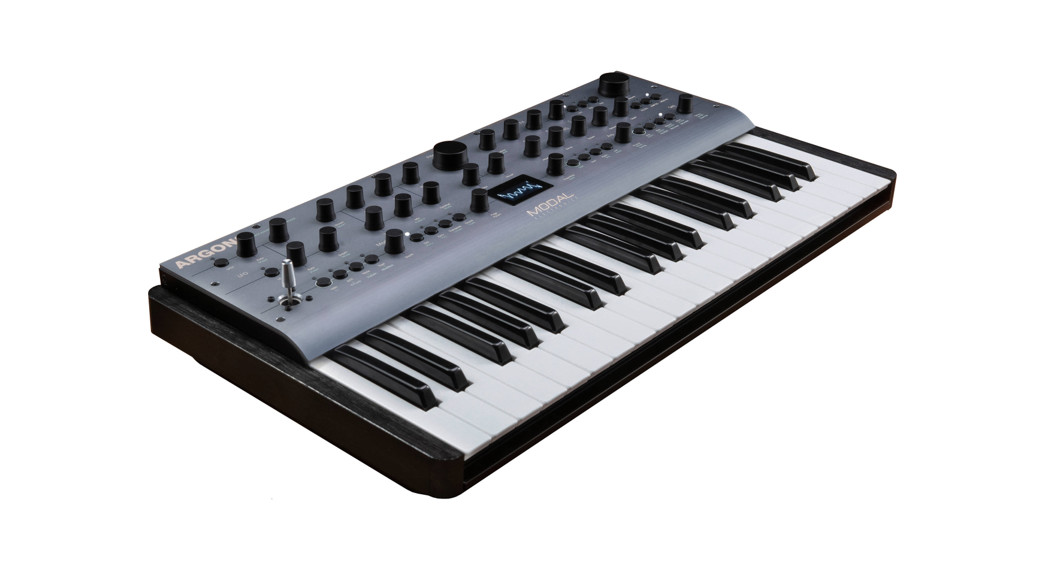
Modal Argon8X is an 8 voice polyphonic wavetable synthesizer. It features 120 crafted wavetables split into 24 banks of 5 morphable waveform sets, 32 oscillators in total (4per voice) and a huge range of wavetable and oscillator modifiers.Beyond the oscillators, there is a multi-mode filter, 3 envelope generators, 2 audio-rate LFOs, 3 powerful independent and user-configurable stereo FX engines, a real-timesequencer, a programmable arpeggiator, and an extensive modulation matrix.Shift functions – parameters in light blue can be accessed by entering ‘Shift’ mode using the button to the right of the screen with a light blue ring. Shift can be momentary byholding the button and changing a parameter or latched by pressing the shift button.Alt functions – parameters in light grey can be accessed by holding the button with the light grey ring in the same section (Velo or Arp). ‘Alt’ mode is always momentary andyou will exit ‘Alt’ mode on release of the button.
Screen NavigationThe two switched encoders on either side of the screen are used for screen navigation and control:Page/Param – When this encoder is in ‘Page’ mode it cycles through the parameter pages (e.g. Osc1, Osc2, Filter); when it’s in ‘Param’ mode it cycles through the parameters on that page. Use the switch to toggle between the two modes, the model is displayed on the screen with a line at top for ‘Page’ mode and at the bottom for ‘Param’ mode.Preset/Edit/Bank – This encoder/switch is used to adjust the value or ‘trigger’ the currently displayed parameter. When on the ‘Load Patch’ parameter when the panel is in ‘Shift’ mode this encoder is used to select the patch bank number.
PresetsPatch/Seq – this button is primarily used to switch the screen to either the ‘Load Patch’ or ‘Load Seq’ param for loading patches or sequences, however, this button also puts the panel into either ‘Patch’ mode or ‘Seq’ mode. This changes the ‘Save’ and ‘Init’ buttons to either affect Patch preset management in ‘Patch’ mode or Sequencer preset management in ‘Seq’ mode.‘Init / Rand’ – this button/function only responds on a button hold.Argon8X can have a large dynamic range so there is a Patch Gain control that can be used to equalize patch volumes. Hold the ‘Patch’ button and turn the ‘Volume’ encoder to control the ‘Patch Gain’ parameter.
ConnectionsHeadphones – 1/4” stereo jack socketRight – Audio Out for the right stereo channel. 1/4” unbalanced TS jack socketLeft/Mono – Audio Out for left stereo channel. If there is no cable plugged into the Right socket then sum to Mono. 1/4” unbalanced TS jack socketExpression – user-configurable pedal input, 1/4” TRS jack socketSustain – works with any standard, open momentary footswitch, 1/4” TS jack socketAudio In – stereo audio input, to process your audio source with Argon FX engines, 3.5mm TRS jack socket Sync In – analog clock in. 3.3v, rising edge, 1 pulse per 16th note signal, 3.5mm TS jack socketSync Out – analog clock out, the same configuration as the clock in, 3.5mm TS jack socket MIDI Out – used to control other MIDI hardware, 5-pin DIN MIDI socket MIDI In – used to be controlled from other MIDI hardware, 5-pin DIN MIDI socket USB MIDI – MIDI in/out to a USB MIDI host, connect Argon8 to a laptop/tablet/mobiledevice for the optional software editor, ModalApp, full-size USB-B socket Power – 9.0V, 1.5A, center-positive barrel power supply
Preset SavingPress the ’Save’ button to enter the ‘full’ save procedure or hold the ‘Save’ button to perform a ‘quick’ save (saving preset into current slot with current name).Once you are in the ‘full’ save procedure, presets are saved in the following way:Slot selection – Use the ‘Edit’ encoder to select the preset bank/number to save into, and press the ‘Edit’ switch to select itNaming – Use the ‘Page/Param’ encoder to select the character position and use the ‘Edit’ encoder to select the character. Press the ‘Edit’ switch to finish editing the name.There are a number of panel shortcuts here:Press ‘Oct-‘ to jump to lowercase charactersPress ‘Oct+’ to jump to uppercase charactersPress ‘Transpose’ to jump to numbersPress ‘Chord’ to jump to symbolsPress the ‘Page/Param’ switch to add a space (increment all above characters)Press ‘Init’ to delete the current character (decrement all above characters)Hold ‘Init’ to delete the entire namePress the ‘Edit’ switch to confirm the settings and save the preset.At any point during the procedure hold the ‘Page/Param’ switch to move back a step.To exit/quit the procedure without saving the preset, press the ‘Patch/Seq’ button.
LFOTurn the ‘Rate’ encoders into the negative range to access synced rates
Quick RecallsArgon8X has 8 Quick Recall slots for quickly loading patches. Quick Recalls are controlled using the following button combos:Hold ‘Patch’ + hold one of the eight buttons on bottom left of the panel to assign the currently loaded patch to a QR slotHold ‘Patch’ + press one of the eight buttons on bottom left of the panel to load the patch in the QR slotOscillatorsHold the ‘Patch’ button and turn the ‘Wave1’ or ’Wave2’ encoder to control the WavMod parametersFilterHold the ‘Patch’ button and turn the ‘Cutoff’ encoder to control the Filter Type parameterEnvelopesHold any of the EG buttons for one second and then turn the ADSR encoders to adjust all envelopes simultaneouslyPress the MEG button when MEG is already selected to latch MEG assignSequencerHold the ‘Mute’ button to clear the sequencer notesHold the Anim1 / Anim2 / Anim3 / Anim4 buttons to clear an animation laneWhen the screen is displaying the ‘Linked Sequence’ parameter, hold the ‘Edit’ switch to set the value to be the currently loaded sequence.ArpHold the ‘Arp’ button and press keys on the internal or an external keyboard to add pattern notes or press the‘Rest’ button to add a rest to the patternHold the ‘Patch’ button and turn the ‘Division’ encoder to control Arp GateGlobal SettingsWhen the screen is displaying the ‘Reset’ option, hold the ‘Edit’ switch to trigger the ‘Reset’ function.
Keyboard/VoicePress ‘Unison’ repeatedly to cycle through the different unison modes; press ‘Stack’ repeatedly to cycle through the different stack modesPress ‘Chord’ whilst holding a chord on the internal or an external keyboard to set the chord mode chord.Hold ‘Transpose’ and press a key on the internal keyboard to transpose all notes, where the central C key is the root note. Press ’Transpose’ with no keyboard interaction to reset the transpose value back to 0.ModulationTo assign a Mod Slot either hold (momentary) or latch the desired Mod source button – then set a depth by turning desired modulation destination parameterWhen latched in a Mod Source assign mode pressing the flashing Mod Source button again will exit assign modeMod source button + ‘Depth’ encoder – set global depth for that mod sourcePress ModSlot repeatedly to cycle through and view all mod slot settings on the screenWhen the screen is displaying a mod slot ‘Depth’ parameter (most easily accessed via assigning modulation using the panel or via the ModSlot button), hold the ‘Edit’ switch to clear the mod slot assignment.To assign a mod source to an osc’s global frequency destination, use either of the fine tune controls. ‘Tune1’ will assign to Osc1 tune, ‘Tune2’ will assign to Osc2 tune.FXPress FX1 / FX2 / FX3 button repeatedly to change the FX type of the slotHold FX1 / FX2 / FX3 button to reset the FX type of the slot to ‘None’Turn the ‘B’ encoder into the negative range for the slot with a Delay FX assigned to access synced delay timesPress FX1 + FX2 + FX3 to jump to the ‘FX Preset Load’ parameter
[xyz-ips snippet=”download-snippet”]