
MOES Smart Wi-Fi Infrared Controller
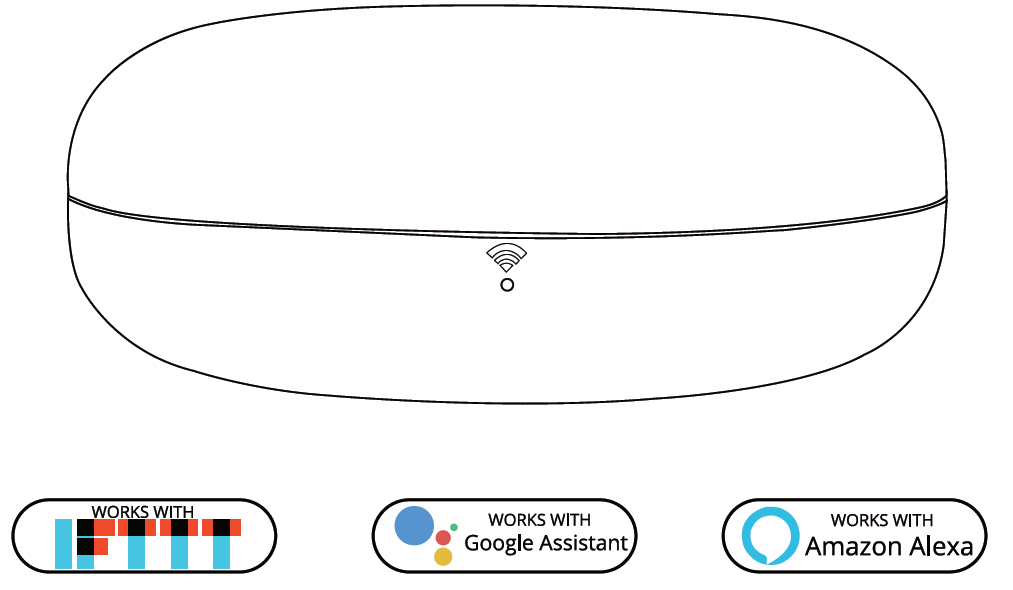
Indicator Light Status

Add Moes SMART IR
Download Smart Life Registration or log in
- Download “Smart Life” Application.
- Enter the Register/Login interface: tap” Register” to create an account by entering your phone number to get verification code and “Set pass-word”. Choose “Log in” if
Configure the APP to Moes Smart IR
Preparation: Ensure the device has connected with electricity ; ensure your phone has connected to WIFI router and is able to connect to the internet .Note: this device only supports 2.4G network. If you have connected 5G network, please disconnect 5G network
- Tap the icon”+” at the top right corner and Select Device Type: tap “All” and choose “Infrared Universal Remote Control”. Add Device interface will be available then.
- Press and hold the reset button for at least 5 seconds until the network configuration indicator blinks
- Press “Confirm indicator rapidly blink” After Device added successfully, it can be found on “My Family” list.
Add Remote Control
Choose your existing appliance and add remote , such as Air conditioner, TV,STB,,TV box ,FAN (support more than 4000+main brand).You can also choose “Copy button” function to learn if some of the appliance cannot be controlled.
If you cannot find the remote which is able to control appliance, you can learn the function through copy button.(Notice: Currently copy button function only support TV / STB /TV BOX / FAN, exclude Air conditioner)
Step 1: Click to enter the connected deviceStep 2: Click the edit button in the upper right cornerStep 3: Select “Copy button” in the popup menu barStep 4: Click the on/off buttonStep 5: Press your original remote button, APP will redirect to next step automatically.Step 6: Finish copying one button, you should press the related button on APP to check if works fine.
DIY OPERATION
If you can’t find your IR appliance in existed appliance form, you may ask DIY function for help.
Step 1: Click the DIY button.Step 2:Click “next step”.Step 3: Ress your original remote button, APP will redirect to next step automatically.Step 4: RechristenStep 5: Save settings
If need to change or add more button, you can choose up right corner “Edit” button for help.
NOTICE:
- Support learning of 38K carrier frequency, if you cannot receive instruction from original remote, the main reason maybe mismatching of carrier frequency. In this case, you cannot learn the instruction from original remote.
- Insure MOES SMART IR receive instruction regularly, please do not long press original remote to give instruction, a short press
Set your Echo speaker by Alexa APP
- If you have finished to install Smart Life then open Amazon Alexa App: sign in your Alexa account and enter password.
- Click the menu on the left corner-click “Settings: choose “Set up a new device”(choose a device ,like Echo)Note: When the below page appears, long press the small dot on your Echo device until the light turns to yellow. Then Click Continue on App
Note: at this moment, the mobile phone cannot open a variety of VPN software.
Choose your own WiFi and wait for a few minutes. After an introduction video, click next step, it will enter Home page automatically. Now the Echo had connected to Wi-Fi successfully.
Enable Smart Life Skill in Alexa

Step 1: Choose “Skill” in the option bar, and then search “SMART Life” in the input box.Step 2: Select Smart Life in the search results, and then click “Enable Skill”.Step 3: Then input the user name and password of Smart Life APP that you had previously registered.
Control the device by voice
After the above operation is successful, you can control the device via Echo.
Discover Device
Firstly , you need to say to the Echo:Echo (or Alexa), discover my devices.Echo will start to find the device which is added in the Smart Life APP.It will take about 20 seconds, then Echo will tell you the result. You can also click “Discover devices” in Alexa APP , then it will show the devices that have been found successfully .
Control Device by Voice
Note: The name of the device must be consistent with the addition of Smart Life APP.You can also group the device and give instructions to control them together.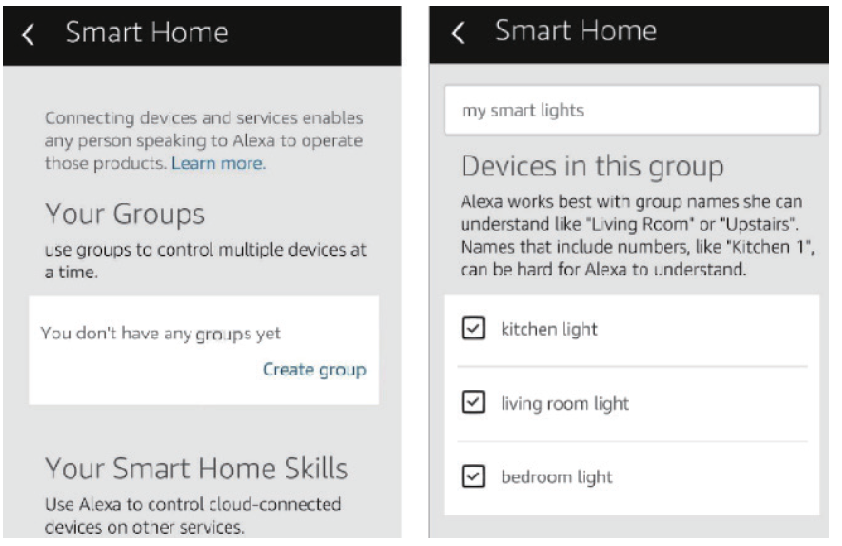
Note: Echo is one of the wake –up names, which can be any of the three names (Settings) Alexa, Echo, Amazon.
Support Skill List
You can control the devices by instructions like these:Alexa(or Echo, turn on the DevicesAlexa(or Echo),turn off the Devices.
Preparation
- Have downloaded the Google Home App-compatible With Android(4.2 or higher) or ISO(8.0 or higher)smartphones or tablet.
- Have registered your google Account.
- Have paired Device with Smart Life App and named it with a recognizable name.
- Have finished setting up Google Home
Step 1: Open Google Home App ;tap( )on the upper left corner; select “More Settings :to enter the next interface.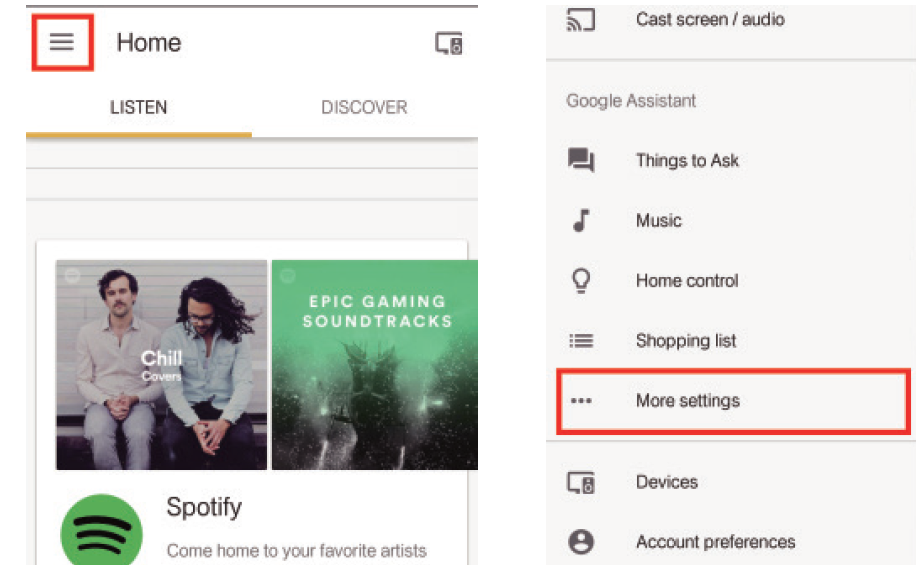 Step 2: Choose “Services” in the options bar and select “Smart Life” to enter the next interface.
 Step 3: Tap “ Link Account “,then sign in your smart Life Account.
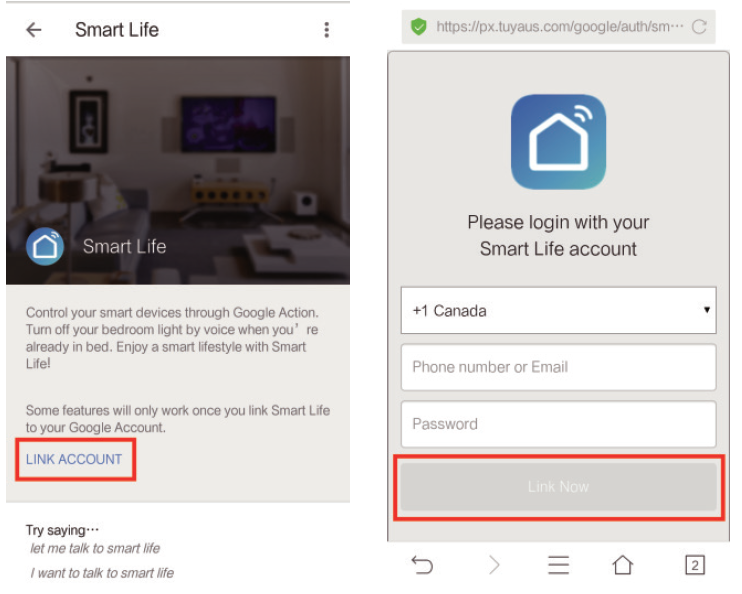 Step 4: Tap “Link Now”, after your Smart Life account had linked to Google Assistant, the smart devices will automatically appear.
Command the Device through Your
Firstly ,you need to say “OK Google ,talk to Smart Life” to wake up the Smart Life. Then you can control the device by instructions like these:Turn on the/Turn off theNote: After Smart Life has been wakened up ,you may say “Cancel “or “Stop” to exit Smart Life or say “Nothing” when you hear “what can I do for you “ .Then you can say “OK Google, talk to Smart Life” to start voice control.
IFTTT-Setup and Usage
Get Started: How to connect the product to IFTTT?
Visit the IFTTT official website on your PC and sign in with your IFTTT account.Note: You can also use IFTTT app and follow similar steps to connect your device to the IFTTT. In the FAQ we take the website setting method for example.Search for “Smart Life”, and then click “Smart Life” serviceClick “Connect”, then log in your Smart Life ID and tap “Link Now”. (The Smart Life ID is the same with that of Smart Life APP)After successfully connecting your IFTTT account to your Smart Life ID.
Voice Control Instruct
| Device | Alexa command list |
|
AC |
Alexa, turn on ‘device name’ Alexa, turn off ‘device name’
Alexa, set ‘device name’ temperature to ** degrees Alexa, increase ‘device name’ temperature |
|
STP |
Alexa, turn on ‘device name’ Alexa, turn off ‘device name’ Alexa, channel up on ‘device name’
Alexa, channel down on ‘device name’ Alexa, volume up/down ‘device name’ Alexa, change channel of ‘device name’ to ‘channel number’ |
| TV | same as STP |
| Device | Google Home command list |
|
AC |
Hi google,turn on/turn off the ‘device name’
Hi google, set ‘device name’ temperature to ** degrees Hi google, make ‘device name’ warmer/cooler |
| STP | Hi google,turn on/turn off the ‘device name’ |
| TV | Hi google,turn on/turn off the ‘device name’ |
FAQ
Product1.1:Built-in Battery included?A:No built-in battery,need connect with power directly(USB line & Power adapter available);
1.2:5G wifi supportable?A:Only support 2.4G wifi, no 5G wifi acceptable
1.3:Is this IR universal works with internal code library ?A:Code library keeps in cloud, you must connect with internet 2、Application
2.1:Appliance compatible?A: Support majority leading top brand include TV /STP /AC/DVD
2.2: Brand Applicable?A: Please check brand list in App
3、Smart Device compatible?A: Google Alexa, ECHO
4、Can they go through-wall or control AC from up stair or down stair?A: No , Infrared cannot go through-wall
5、 Is this device work with WIFI ?Must they use with smart gateway ?A:Moes Smart IR work completely with WIFI control, no smart gateway required
6、How many home appliances can Moes Smart IR control at the same timeA:Moes Smart IR can control multiple appliances in one room through “Smart Life” APP;
7、What is the scope can Moes Smart IR worksA: Within Diameter 16 meters。
8、How to use Moes Smart IR learning function?A:Please check copy button instruction.
| Size | By Customer |
| SOC Chip | ESP8266 |
| Module | TUYA E3s |
| Power Input | DC 5V/1A(Micro Usb2.0) |
| Stand-by Power | ≤0.4W |
| Controlling Distance |
Horizontal direction ≤8m,Opposite Direction ≤15m(Finally effect by environment) |
| No of transmitting tube | 7 |
| IR control direction | Multiple Way |
| Operating Temperature | -10℃~50℃ |
| Operating humidity | ≤85%RH |
| Connection type | 2.4GHz 802.11b/g/n |
| Carrier | 38KHZ |
| APP SUPPORT | Android 4.0/IOS 8.0 above |

[xyz-ips snippet=”download-snippet”]