
MONOPRICE 3D Printer User Guide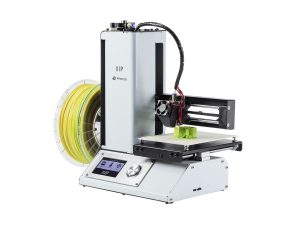
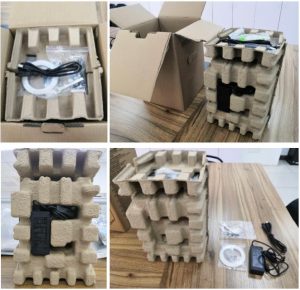
- Remove the Printer and Accessory Box from the packaging.

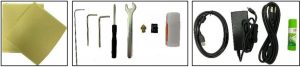
- Open the Accessory Box and verify that you have all the parts listed below:1x Platform Sticker, 1x 1.5mm Hex Wrench, 1x 2.0mm Hex Wrench1x 2.5mm Hex Wrench, 1x Phillips Screwdriver, 1x 8mm Wrench1x M6 Brass Nozzle, 1x MicroSD™ Card, 1x MicroSD Card Reader1x USB Cable, 1x AC Power Adapter, 1x AC Power Cord1x Stick of Glue, 1x Package Sample Filament (200g), 1x Quick Start Guide
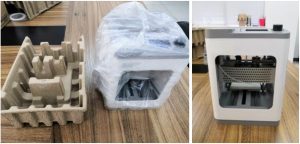
- Remove the eggshell carton and plastic bag from the printer, then place the printer on a table or desk.
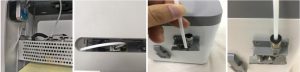
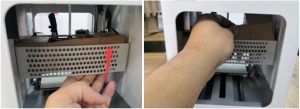
- Remove the cardboard block from inside the printer.
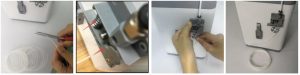
- Insert the Filament Guide Tube into the black Pneumatic Connector on top of the Extruder.
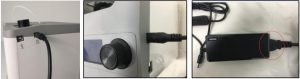
- Ensure that the power switch on the inline control on the AC Power Adapter is in the OFF position (O). Plug the DC barrel connector on the AC Power Adapter into the Power Port on the right side of the printer. Plug the included AC Power Cord into the AC Power Adapter, then plug the other end into a nearby AC power outlet.
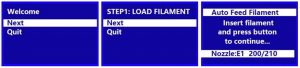
- Flip the power switch on the inline control to the ON position (I). After the printer finishes booting, you will see the following wizard. Depress the Knob on top of the printer to select Next on the Welcome Screen, then again to select Next on the STEP 1: LOAD FILAMENT Screen.
- Using a pair of scissors or side cutters, cut about an inch off the end of the filament, then gently straighten the end of the filament. Squeeze the lever on the Extruder, insert the filament into the bottom until you encounter resistance, then release the lever.
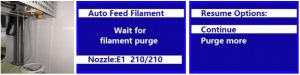
- Press the Knob to start loading filament. Once filament starts extruding from the Nozzle, press the Knob again to stop extrusion. Clean the extruded filament, then press the Knob to select the Continue option.
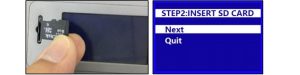
- Remove the included microSD™ card from the Accessory Box, then insert it into the microSD card slot to the left of the LCD Screen. Press the Knob to select Next on the wizard.
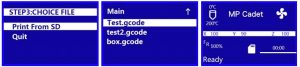
- Press the Knob to select Print From SD. Rotate the Knob to highlight a .gcode file on the microSD card, then press the Knob to begin printing the highlighted model.
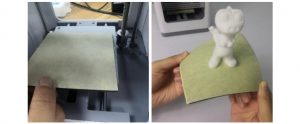
- Once the print is finished, remove the Magnetic Print Bed from the metal print platform, then bend it to remove the model. Replace the Magnetic Print Bed on the metal print platform.
Use the QR code at the right to download the manual or go to the website to download it from the product page (40108).
[xyz-ips snippet=”download-snippet”]