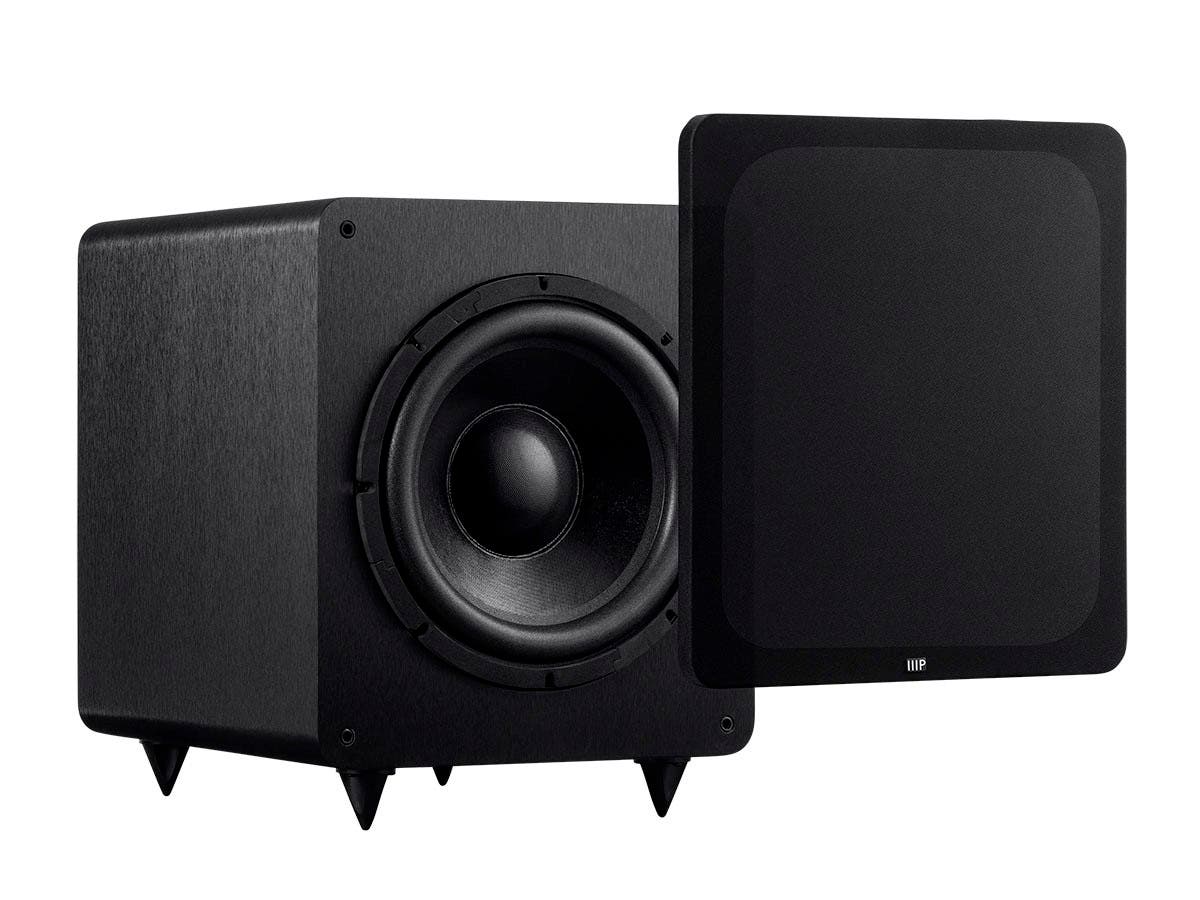

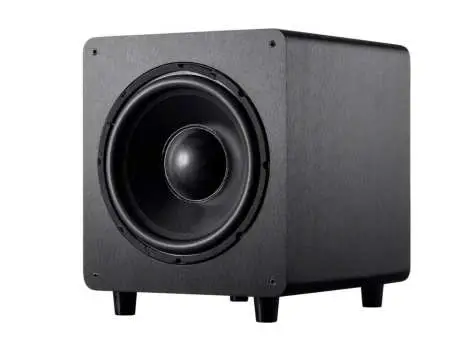
MONOPRICE 41499SW-15 15 inch 600 Watt Powered Subwoofer
SAFETY WARNINGS AND GUIDELINES
Please read this entire manual before using this device, paying extra attention to these safety warnings and guidelines. Please keep this manual in a safe place for future reference.
- This device is intended for indoor use only.
- Do not expose this device to water or moisture of any kind. Do not place drinks or other containers with moisture on or near the device. If moisture does get in or on the device, immediately unplug it from its power source and allow it to fully dry before reapplying power.
- Do not touch the device, the power cord, or any other connected cables with wet hands.
- If operating this speaker in a humid environment, ensure that no condensation occurs. Condensation could cause damage to the speaker cone and could cause a short in the amplifier, which in turn could cause fire or severe electric shock.
- Do not expose this device to excessive vibration.
- Do not subject the product to extreme force, shock, or fluctuations in temperature or humidity.
- Do not expose this device to excessively high temperatures. Do not place it in, on, or near a heat source, such as a fireplace, stove, radiator, etc. Do not leave it in direct sunlight.
- This device ventilates excessive heat through the slots and openings in the rear panel. Do not block or cover these openings. Ensure that the device is in an open area where it can get sufficient airflow to keep from overheating.
- Do not place or install this device in an area where it can be exposed to excessive amounts of dust, humidity, oil, smoke, or combustible vapors.
- Prior to operation, check the unit and power cord for physical damage. Do not use if physical damage has occurred.
- Before plugging the unit into a power outlet, ensure that the outlet provides the same type and level of power required by the device.
- Disconnect the unit from the power source when replacing the fuse. Replace the fuse only with the same type.
- Unplug this device from the power source when not in use.
- Take care to prevent damage to the power cord. Do not allow it to become crimped, pinched, walked on, or become tangled with other cords. Ensure that the power cord does not present a tripping hazard.
- Never unplug the unit by pulling on the power cord. Always grasp the connector head or adapter body.
- Ensure that power is turned off and disconnected before making any electrical connections.
- Clean using a soft, dry cloth only. Do not use chemical cleaners, solvents, or detergents. For stubborn deposits, moisten the cloth with warm water.
- This device has no user-serviceable parts. Do not attempt to open, service, or modify this device.
CUSTOMER SERVICEThe Monoprice Customer Service department is dedicated to ensuring that your ordering, purchasing, and delivery experience is second to none. If you have any problem with your order, please give us an opportunity to make it right. You can contact a Monoprice Customer Service representative through the Live Chat link on our website www.monoprice.com or via email at [email protected]. Check the website for support times and links.
PACKAGE CONTENTS
Please take an inventory of the package contents to ensure you have all the items listed below. If anything is missing or damaged, please contact Monoprice Customer Service for a replacement.
- 1x SW-12 12″ 400-Watt Powered Subwoofer
- 1x User’s Manual
PRODUCT OVERVIEW
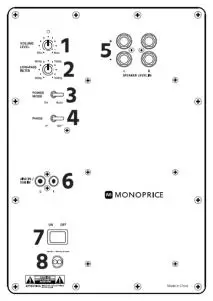
- VOLUME LEVEL: Sets the output volume level.
- LOW-PASS FILTER: Sets the crossover frequency between the subwoofer and the main speakers between 40 ~ 150 Hz.The subwoofer handles all frequencies below the crossover frequency.
- POWER MODE: Determines whether the subwoofer will go into Standby mode or not. When the switch is set to the On position, the subwoofer On/Off status is determined solely by the POWER switch. When set to the Auto position, the subwoofer will automatically enter Standby mode after about 2 minutes with no input and will turn back on when audio material is detected. The POWER switch must be in the ON position for the Auto Standby function to operate.
- PHASE: This control allows you to alter the phase of the subwoofer’s output signal to 0° or 180° to correct for a possible mismatch in phase, which results in cancellation between the subwoofer and your main speakers. To adjust the PHASE, listen to the system with music playing and switch between 0° and 180° while listening for a change in mid-bass output. The correct position will have a higher amount of apparent mid-bass output.
- SPEAKER LEVEL IN: If your amplifier lacks both a dedicated subwoofer output or preamplifier outputs, connect the stereo speaker outputs on your amplifier to the SPEAKER LEVEL IN inputs using 2 speaker wires (not included).
- LINE IN/SUB IN: If your amplifier has a dedicated subwoofer output (usually labeled SUB or LFE), use a mono RCA cable (not included) to connect the SUB/LFE output on your amp to the left (L) input on the subwoofer. Alternatively, you can use an RCA splitter cable (not included) to connect it to both the L and R inputs. If your amp does not have a dedicated subwoofer output but does have a preamplifier output, use a stereo RCA cable (not included) to connect the stereo preamplifier output to the L and R inputs.
- POWER: Use the switch to turn the subwoofer ON or OFF. If you are using the Auto Standby feature, the switch should be left in the ON position.
- 120V ~ 60Hz: Plug the power cord into a nearby AC power outlet. The subwoofer requires a nominal 120 VAC, 60Hz power source.
CONNECTING TO YOUR SYSTEM
Connecting to a SUB/LFE OutputThe best connection to the subwoofer is using a dedicated subwoofer output, if your amplifier has one, using a single, mono RCA cable (not included). Perform the following steps to connect the subwoofer to a dedicated SUB/LFE output on your receiver or amplifier. Note that any receiver that can decode Dolby Digital™ or DTS® soundtracks will have a dedicated SUB/LFE output.
- Power off and unplug all equipment to be connected.
- Using a single, mono RCA cable (not included), plug one end into the LINE IN/SUB IN L input on the subwoofer, then plug the other end into the dedicated SUB/LFE output on your amplifier.
- Turn the VOLUME LEVEL and LOW-PASS FILTER knobs fully counter clockwise to the minimum position.
- Ensure that the POWER switch on the subwoofer is in the OFF position.
- Plug the Power Cord into a nearby AC power outlet. The subwoofer requires a nominal 120 VAC, 60Hz power source.
- Plug in and power on all connected equipment.
- Set the POWER switch on the subwoofer to the ON position.
- Start playing audio material with significant low frequency content. Adjust the main system volume control until it is at a comfortable listening level.
- Slowly turn the VOLUME LEVEL knob clockwise until the bass content from the subwoofer is at about the same volume level as the audio from your main speakers.
- Slowly rotate the LOW-PASS FILTER knob clockwise until the low frequency content from the subwoofer blends smoothly with the audio from the main speakers in the crossover region. If the crossover frequency is set too high, the bass will sound “boomy” and male voices will have an unnatural “chesty” quality.
Connecting to a Stereo Preamplifier Output
The next best type of connection is to connect to the stereo preamplifier output on an amplifier or receiver using a stereo RCA cable (not included). Perform the following steps to connect the subwoofer to a stereo preamplifier output.
- Power off and unplug all equipment to be connected.
- Using a stereo RCA cable (not included), plug the connectors on one end into both LINE IN/SUB IN L and R inputs on the subwoofer, then plug the other end into the stereo preamplifier outputs on your amplifier. Because the subwoofer is monophonic, there is no need to match left and right channels.Note: If you are using an external power amplifier and your preamplifier has only a single preamp output, use RCA Y-cables (not included) on each output to allow both the power amplifier and the subwoofer to be connected to each output.
- Turn the VOLUME LEVEL and LOW-PASS FILTER knobs fully counter clockwise to the minimum position.
- Ensure that the POWER switch on the subwoofer is in the OFF position.
- Plug the Power Cord into a nearby AC power outlet. The subwoofer requires a nominal 120 VAC, 60Hz power source.
- Plug in and power on all connected equipment.
- Set the POWER switch on the subwoofer to the ON position.
- Start playing audio material with significant low frequency content. Adjust the main system volume control until it is at a comfortable listening level.
- Slowly turn the VOLUME LEVEL knob clockwise until the bass content from the subwoofer is at about the same volume level as the audio from your main speakers.
- Slowly rotate the LOW-PASS FILTER knob clockwise until the low-frequency content from the subwoofer blends smoothly with the audio from the main speakers in the crossover region. If the crossover frequency is set too high, the bass will sound “boomy” and male voices will have an unnatural “chesty” quality.
Connecting to Speaker Level Outputs
The least desirable connection is to connect to the stereo speaker outputs on your amplifier using a pair of speaker wires (not included). Perform the following steps to connect the subwoofer to speaker level outputs on your amplifier.
- Power off and unplug all equipment to be connected.
- Using a speaker wire (not included), plug one end into the SPEAKER LEVEL IN L input, then plug the other end into the left channel speaker level output on your amplifier. If your amplifier has more than 2 speaker outputs, use the main or front speaker outputs. Take care to ensure that polarity is properly maintained. Repeat using a second speaker wire (not included) for the R channel.
- Turn the VOLUME LEVEL and LOW-PASS FILTER knobs fully counterclockwise to the minimum position.
- Ensure that the POWER switch on the subwoofer is in the OFF position.
- Plug the Power Cord into a nearby AC power outlet. The subwoofer requires a nominal 120 VAC, 60Hz power source.
- Plug in and power on all connected equipment.
- Set the POWER switch on the subwoofer to the ON position.
- Start playing audio material with significant low-frequency content. Adjust the main system volume control until it is at a comfortable listening level.
- Slowly turn the VOLUME LEVEL knob clockwise until the bass content from the subwoofer is at about the same volume level as the audio from your main speakers.
- Slowly rotate the LOW-PASS FILTER knob clockwise until the low-frequency content from the subwoofer blends smoothly with the audio from the main speakers in the crossover region. If the crossover frequency is set too high, the bass will sound “boomy” and male voices will have an unnatural “chesty” quality.
SUBWOOFER POSITIONING
In most rooms, the optimum location for your subwoofer is in the closest solid front corner or somewhere along the front wall in line with your front speakers. This location typically offers optimal energy coupling with the room, front speakers, and the deepest low frequency extension, with the best high impact bass. Try to avoid a location that is far away from walls or near the center of your room.
Bass output is maximized when the subwoofer is tucked into a corner. An ideal corner is far from wall divisions and has at least 6 feet or more of wall to either side. Try to keep the subwoofer placement away from any large openings into other rooms. When corner loading a subwoofer, you might want to experiment with how close the subwoofer sits to the closest wall, with a general rule of thumb that it should be within 1 foot.
Placing the subwoofer in close proximity to the seating position, for example, right next to or behind the sofa, maximizes the output and can reduce room effects on the subwoofer.A great technique for determining the best placement for your subwoofer is known as the Subwoofer Crawl. The first step is to place the subwoofer at your listening position. Ensure that audio with constant bass content or a test tone is playing. Next, crawl around the room (after all, the subwoofer will not be 5 feet in the air) and listen for where the bass sounds most full and has definition, punch, and depth. This will generally be the best location in your room.
TECHNICAL SUPPORT
Monoprice is pleased to provide free, live, online technical support to assist you with any questions you may have about installation, setup, troubleshooting, or product recommendations. If you ever need assistance with your new product, please come online to talk to one of our friendly and knowledgeable Tech Support Associates. Technical support is available through the online chat button on our website www.monoprice.com or through email by sending a message to [email protected]. Check the website for support times and links.
SPECIFICATIONS
| Model | 41499 |
| Speaker Type | Bass reflex with down firing port |
| Woofer Driver | 15″ reinforced paper cone |
| Frequency Response | 30 ~ 150 Hz (-10dB) |
| Variable Low-pass Filter | 40 ~ 150 Hz @18dB/octave |
| Variable Phase Control | 0° or 180° |
| Amplifier Output Power | 600 watts @ THD < 0.5% |
| Inputs | Stereo line level and speaker level |
| Dimensions | 18.1″ x 21.0″ x 22.7″ (460 x 533 x 577 mm) |
| Weight | 66.1 lbs. (30.0 kg) |
REGULATORY COMPLIANCE
This device complies with Part 15 of the FCC rules. Operation is subject to the following two conditions: (1) this device may not cause harmful interference, and (2) this device must accept any interference received, including interference that may cause undesired operation.
Modifying the equipment without Monoprice’s authorization may result in the equipment no longer complying with FCC requirements for Class B digital devices. In that event, your right to use the equipment may be limited by FCC regulations, and you may be required to correct any interference to radio or television communications at your own expense.
This equipment has been tested and found to comply with the limits for a Class B digital device, pursuant to Part 15 of the FCC Rules. These limits are designed to provide reasonable protection against harmful interference in a residential installation. This equipment generates, uses and can radiate radio frequency energy and, if not installed and used in accordance with the instructions, may cause harmful interference to radio communications. However, there is no guarantee that interference will not occur in a particular installation. If this equipment does cause harmful interference to radio or television reception, which can be determined by turning the equipment off and on, the user is encouraged to try to correct the interference by one or more of the following measures:
• Reorient or relocate the receiving antenna.• Increase the separation between the equipment and receiver.• Connect the equipment into an outlet on a circuit different from that to which the receiver is connected.• Consult the dealer or an experienced radio/TV technician for help.
Notice for Industry CanadaThis Class B digital apparatus complies with Canadian ICES-003.Cet appareil numérique de la classe B est conforme à la norme NMB-003 du Canada.
 report this ad
Monoprice™ and all Monoprice logos are trademarks of Monoprice Inc.Dolby®, Dolby Digital™, Dolby Audio™, and the double-D symbol are trademarks of Dolby Laboratories.DTS®, the Symbol, and DTS and the Symbol together are registered trademarks of DTS, Inc.
References
[xyz-ips snippet=”download-snippet”]