
MONSTER POWER MPSOP1001 Smart Power Wall Tap User Guide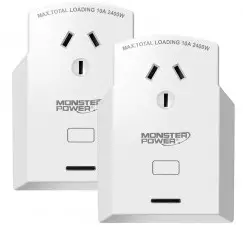
Getting Started
What You Need:
- 2.4 GHz WiFi Connection (Including Router Name and Password)
- Smart-phone with Wifi or Data Access
- Smart Life App & Account
- Wall Outlet/Socket Compatible with this Device
Specification
| Wi-Fi Specifications | ||
| Working Frequency | 2.4 GHz | |
| Network | Standard | Wireless Standard IEEE802.11b/g/n |
| Wireless | Security | WPA-PSK WPA2-PSK |
| Compliance Standards | EN 61058, EN 62368, RED | |
| Supported Devices | IOS 9.0+ / Android’ 5.0 Lollipop + | |
| Technical Specifications | ||
| Rated Voltage | AC240V / 50Hz | |
| Maximum Power | MAX2400W | |
| Protection Level | IP20 | |
| Indicator Light | Flashing Red = Pairing Ready, Green = Connected | |
| Usable Environment | Temperature: -10-35°, Humidity <85% |
Features
- Slim and Durable Design
- Timer & Scheduling Options
- Compatible with the Google Assistant and Amazon Alexa
- 24 Hour Countdown Control
- Easy-to-see LED Indicator Light – Control Remotely via the Smart Life App
Compatibility
This Monster Smart Power Wall Tap is compatible with voice assistants such as the Google Assistant and Amazon Alexa.

Amazon, Alexa, and all related logos are trademarks of Amazon.com, Inc. or its affiliates.
Google, Android, Google Play, and Google Home, are trademarks of Google LLC.
Safety & Warnings
TURN POWER OFF BEFORE INSTALLING, HANDLING, OR REMOVAL OF ELECTRICAL FIXTURES.
DO NOT EXPOSE DIRECTLY TO WATER OR WEATHER AFFECTS. NOT INTENDED FOR USE IN THE BATHROOM OR OTHER DAMP ENVIRONMENTS. DO NOT USE NEAR FLAMMABLE OBJECTS OR EXPLOSIVES.
DEVICE NOT INTENDED FOR USE WITH MEDICAL EQUIPMENT.
DO NOT EXCEED THE MAXIMUM POWER USAGE FOR THIS PRODUCT.
DO NOT DISASSEMBLE THE PRODUCT WITHOUT AUTHORIZATION.
KEEP AWAY FROM MAGNETS AND MAGNETIC FIELDS AS THIS MAY DAMAGE THE PRODUCT AND CAUSE INJURY.
WARNING: RISK OF ELECTRICAL SHOCK. DISCONNECT ALL POWER SOURCES AT THE FUSE OR CIRCUIT BREAKER BEFORE INSTALLING, HANDLING OR REMOVING THE FIXTURE.
Installation
WARNING: TURN THE POWER OFF BEFORE INSTALLATION! ENSURE YOUR SMART WALL TAP IS WITHIN RANGE OF YOUR WI-FI NETWORK FOR A SUCCESSFUL PAIRING AND CONNECTION BETWEEN THE DEVICE AND THE ROUTER.
PLEASE NOTE: MAKE SURE THE DEVICE AND A: YOUR SMARTPHONE ARE ON THE SAME NETWORK. (ONLY COMPATIBLE WITH 2.4 GHz CONNECTIONS. 56 NOT SUPPORTED)
Step 1: Downloading the Smart Life App
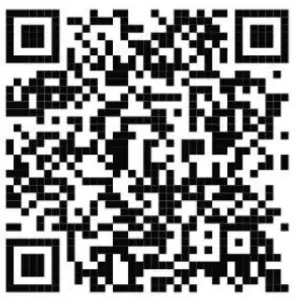
- A: Download the Smart Life App via the Apple App Store or on the Google Play Store, or scan the below QR code with your phone.

- B: Install the Smart Life App. Upon completion open the Smart Life App.
- C: At the Login Screen, log into your Smart Life Account. If you area new user, click register and enter your location and preferred phone number or email address. A verification code will be sent to your selected method.
- D: Once received, enter the code, create a password and click the “Complete” button.
- E: Create a Family (aka a location, such as Your Home) and Name the Family (Example: Smith Residence) or choose an existing family you would like to add your device to.
Step 2: Wi-Fi Connection and Set-Up
- A: Connect your smartphone to your preferred 2.4 GHz Wi-Fi Network via your smartphone’s Wi-Fi settings.
Note: If you are having trouble determining what Wi-Fi type to use, see the following tips.
Tip 1: If you have two network names available, select the network name that does not have a -5G at the end of its name. (5G networks are not supported or compatible at this time.)
Tip 2: Make sure you use a network that has a WEP, WPA, or WPA2 security type.
Step 3: Adding your Device to your Smart Life App
- A: Before beginning this step, make sure your smartphone is already connected to your preferred 2.4 GHz Wi-Fi (The one you wish to use with this device and the Smart Life App) and you have your Wi-Fi password handy.
- B: In the Smart Life App select the group or room you wish to use for your location.
- C: Plug in your device to a compatible wall socket and turn on the power to the device.
- D: Once fully powered, press and hold the switch button for five seconds, causing the red LED indicator light to begin flashing. When flashing, the device is searching and ready for pairing.
- E: Return to the Smart Life App and Select the “Add Device” or “+” button in the upper right corner of the screen.
- F: Select the “Electrical Engineering” Option.
- G: Select the “Socket (Wi-Fi)” Option.
- H: A screen will appear asking you to confirm that your device’s indicator light is rapidly flashing. If so, click confirm. (If your device’s indicator light is no longer flashing, repeat the previous steps to begin re-pairing before continuing on.
- I: A pop up will ask for your Wi-Fi password to connect. Enter this information and click “Confirm.”
- J: The App will attempt to pair and connect your new device. Please wait until the loading screen has reached 100% before leaving the app. This may take a while depending on your internet speed and distance from the router. The closer the device and your phone are to the router, the better chance the pairing will succeed. Should the pairing fail, repeat this step.
- K: Once the device is connected and successfully paired with the App, the indicator light will stop flashing. (If it does not stop flashing and your phone reads “connection timed out”, then pairing has failed, please repeat the previous steps to try again.)
- L: Rename your device and confirm the new name.
- M: Thats it! You are ready to use your new smart device.
Add a Device to a Room
- A: Open the Smart Life App and select the “Room Management” Section.
- B: Select the room you wish to manage. A list of all current and available devices should populate on the screen.
- C: To add devices to the room tap or click on the “+” next to the devices’ name.
- D: When you are finished adding devices, tap or click on the “save” button in the top right hand corner of the screen.
Removing a Device
- A: Open the Smart Life App and select the device you wish to remove.
- B: Open the device’s control panel and select the “…” button in the top right hand corner.
- C: Scroll until you see the “Remove Device” option and select it.
- D: When the device is successfully removed, the led indicator light will begin to rapidly flash again signifying it is not currently paired.
NOTE: REMOVING THE DEVICE WILL CLEAR THE DEVICE’S MEMORY WHICH MEANS ERASING ALL INFORMATION ABOUT THE WI-Fl NETWORK AND CONFIGURATION.
Grouping Multiple Devices
- A: Select one of the devices you wish to create a new group for.
- B: Open the device’s control panel and select the “…” button in the top right hand corner.
- C: Scroll down to find the “Create Group” option.
- D: On the next screen, from the available devices, select and add the devices you wish to group.
- E: Once you have selected all of the devices you wish to add, tap or click “confirm”.
- F: Name your new group (Example: Living Room Outlet) and save the group.
- G: You will now see your new group in the devices section of your App. Making changes in this group, will change all devices in this group, when applicable.
Restore Factory Settings
- A: Open the Smart Life App and select the device you wish to restore to defaults.
- B: Open the device’s control panel and select the “…” button in the top right hand corner. C: Scroll until you see the “Restore Factory Default” option and follow the instructions on screen.
Dismissing a Group
- A: Open the Smart Life App and select the device group you wish to remove.
- B: Open the group’s control panel and select the “…” button in the top right hand corner.
- C: Tap or Click on the “Dismiss Group” Option.
- D: Click Confirm to remove the group.
Tips & FAQ
- A: Make sure both your phone and device are connected to the same Wi-Fi Network.
- B: Every time you change the router or Wi-Fi network name and/or their respective passwords, you will need to restore all devices to factory default and reconnect them following the earlier installation instructions.
- C: Each Smart Device can only be paired with and controlled by one mobile phone at a time. If another phone needs control of the device, you may share the device in the app via the sharing section.
Connecting to the Google Assistant
- A: Add the device to and name it within the Smart Life App. (See previous installation steps.)
- B: Go to the Google Apps homepage menu and click on “Home Control”
- C: Click on the “+” symbol.
- D: In the list select “Smart Life” option.
- E: Select the group where your “Smart Life” device is located and enter your account name and password, then click “Connect Now.”
- F: Once Connected the devices in your “Smart Life” app will appear in your Google Home app list, ready for voice control.
Connecting to Amazon Alexa
- A: Add the device to and name it within the Smart Life App. (See previous installation steps.)
- B: Enter the Amazon Alexa App. C: Select “Skills” in the main menu and search for “Smart Life” in the search window.
- D: Select “Smart Life” and click “Enable” to enter the three party link interface.
- E: In the link interface, enter your “Smart Life” App account and password.
- F: Click “Link Now” to link your Smart Life account to the Amazon Alexa App. Wait until the Amazon Alexa app has successfully connected to the “Smart Life” account. When complete, you are ready to begin using voice control with your new device.
COMPLIANCE
EU Directuves
Radio Equipment Directives (RED) 2014/5E/EU2011/65/EU and its amendment 2015/863/EU (ROHS)2009/125/EC ERP
Conforms to standards
Article 3.1 (a) Safety: EN 62368-1:2014+A11:2017Article 3.1 (a) Health: EN 62479:2010Article 3.1 (b) EMC: Draft EN 301 489-1 V2.2.0(2017-03)EN 301 489-3 V2.1.1 (2017-02ROHS: 2011/65/EU and its amendment 2015/863/EUERP: ERP Directive if Applicable
![]() The symbol indicates Alternating Current (AC)
The symbol indicates Alternating Current (AC)
 report this ad
![]() Indicates that the product must not be processed with household waste. It must be brought to an electric and electronic waste collection point for recycling and disposal. By ensuring the appropriate disposal of this product you also help in preventing potentially negative consequences for the environment and human health. The recycling of materials helps preserve our natural resources. For further information regarding the recycling of this product, please contact your municipality, local waste disposal center or the store where the products was purchased.
Indicates that the product must not be processed with household waste. It must be brought to an electric and electronic waste collection point for recycling and disposal. By ensuring the appropriate disposal of this product you also help in preventing potentially negative consequences for the environment and human health. The recycling of materials helps preserve our natural resources. For further information regarding the recycling of this product, please contact your municipality, local waste disposal center or the store where the products was purchased.
[xyz-ips snippet=”download-snippet”]