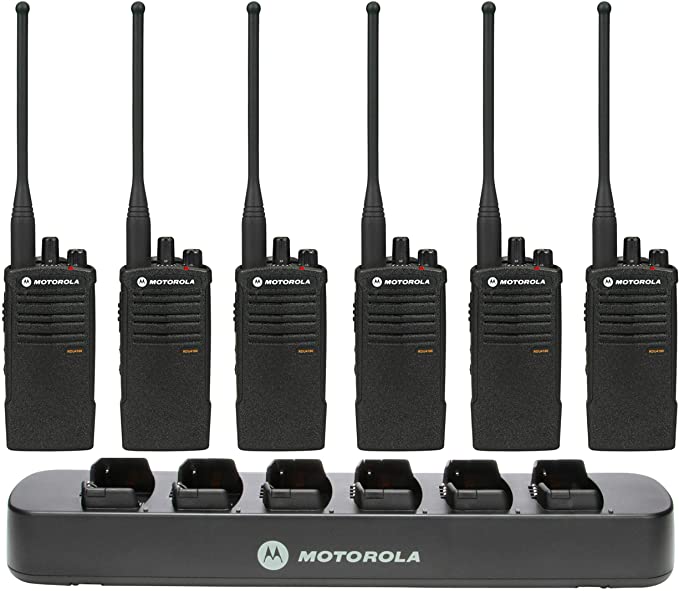
Motorola CLS Series Charger
![]()
Note:This equipment has been tested and found to comply with the limits for a Class B digital device, pursuant to part 15 of the FCC Rules. These limits are designed to provide reasonable protection against harmful interference in a residential installation. This equipment generates, uses and can radiate radio frequency energy and, if not installed and used in accordance with the instructions, may cause harmful interference to radio communications. However, there is no guarantee that interference will not occur in a particular installation. If this equipment does cause harmful interference to radio or television reception, which can be determined by turning the equipment off and on, the user is encouraged to try to correct the interference by one or more of the following measures:
- Reorient or relocate the receiving antenna.
- Increase the separation between the equipment and receiver.
- Connect the equipment into an outlet on a circuit different from that to which the receiver is connected.
- Consult the dealer or an experienced radio/TV technician for help.
Important Safety Instructions
Save these instructions. This document contains important safety and operating instructions. Read these instructions carefully and save them for future reference.Before using the battery charger, read all the instructions and cautionary markings on (1) the charger,(2) the battery, and (3) the radio using the battery.
WARNING:
- To reduce risk of damage to the power cords, pull the plug rather than the cord when disconnecting from the AC outlet or the charger.
- An extension cord should not be used unless absolutely necessary. Use of an improper extension cord could result in risk of fire and electric shock. If an extension cord must be used, make sure that the cord size is 18 AWG for lengths of up to 6.5 feet (2.0 m), and 16 AWG for lengths up to 9.8 feet (3.0 m).
- To reduce risk of fire, electric shock, or injury, do not operate the charger if it has been broken or damaged in any way. Take it to a qualified Motorola Solutions service representative.
- Do not disassemble the charger. It is not repairable and replacement parts are not available. Disassembly of the charger may result in risk of electric shock or fire.
- To reduce risk of electric shock, unplug the charger from the AC outlet before attempting any maintenance or cleaning.
- To reduce risk of injury, charge only the rechargeable Motorola Solutions Authorized Batteries listed in Table 1. Other batteries may explode, causing personal injury and damage.
- Use of accessories not recommended by Motorola Solutions may result in risk of fire, electric shock, or injury.
- Ensure the area behind the mounting surface is always free of electrical wires, cables, and pipes before cutting, drilling, or installing the mounting screws.
- Do not install the product where the weight cannot be supported. If the strength of the location where the wall mount is installed is not strong enough, it can fall off and cause an injury.
- Do not install on a structure that is prone to vibration, movement, or chance of impact.
Operational Safety Guidelines
- Turn off the radio when charging the battery.
- The equipment shall be connected to a nearby and easily accessible socket outlet.
- This equipment is not suitable for outdoor use. Use only in dry locations or conditions.
- Maximum ambient temperature around the charger must not exceed 40 °C (104 °F).
- Connect the charger only to an appropriate power supply and power cord listed in Table 2 and Table 3.
- Make sure the power cord is located where it will not be stepped on, tripped over, or subjected to water, damage, or stress.
- Connect the power cord only to an appropriately fused and wired AC outlet with the correct voltage, as specified on the product.
- Disconnect from line voltage by removing the power cord from the AC outlet.
Warranty
The Charger Kit for North America is covered under the Motorola Solutions one year limited warranty. If your charger is defective, please contact your Motorola Solutions Partner where the unit was purchased. Order a Replacement Charging Kit if necessary.For product-related questions, contact: 1-800-448-6686 (US & Canada)For more information, contact Motorola Authorized Dealer or visit us at www.motorolasolutions.com
Product Overview
CLS Single Unit Charger (SUC)
![]()
CLS Multi-Unit Charger (MUC)
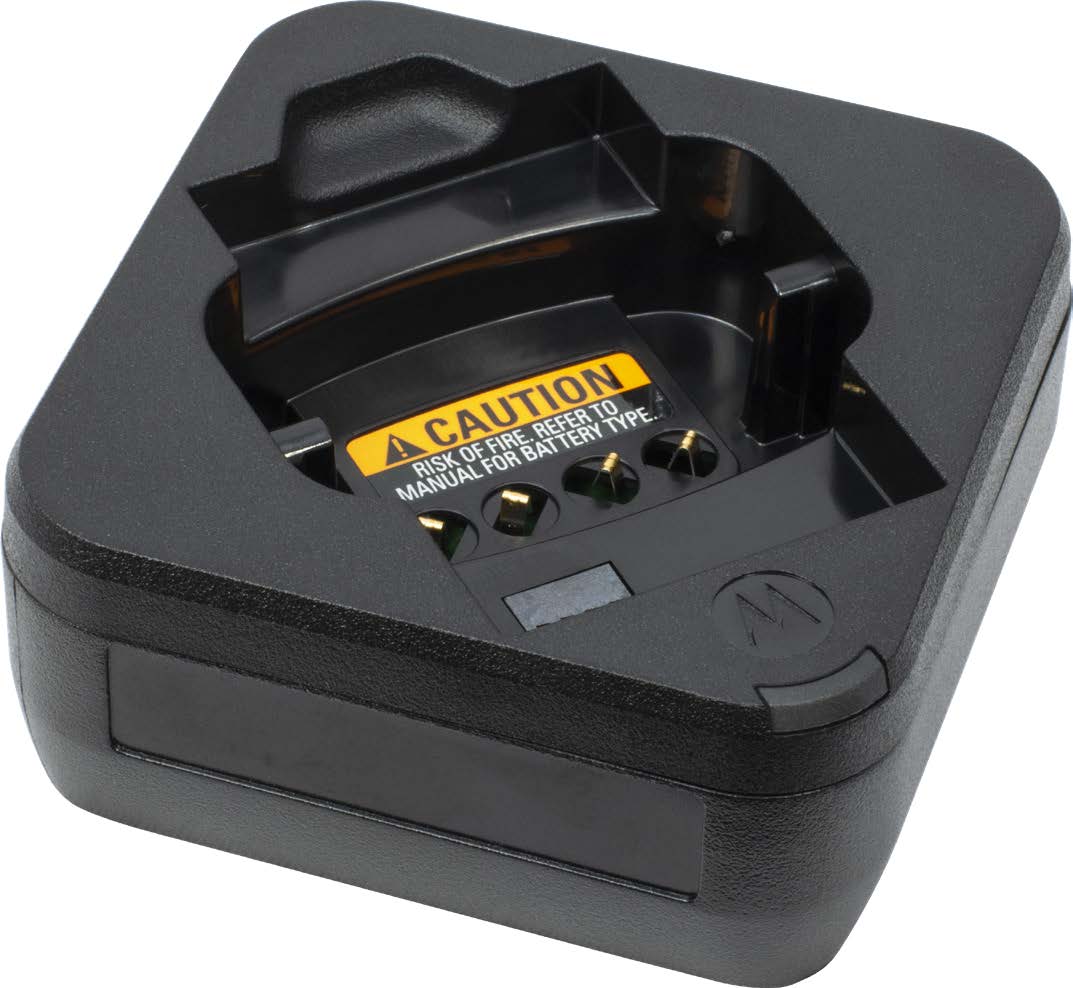
Table 1: Motorola Solutions Authorized Battery
| Kit Number | Description |
| PMNN4497_ | Li-Ion Battery |
Table 2: Motorola Solutions Authorized Single Unit Charger And Power Supplies
| Charger Kit | Description | Power Supplies |
| PMPN4528_ | CLS Single Unit Charger (SUC) Tray | None |
| PMPN4529_ | CLS Single Unit Charger (SUC) Kit for North America | PS000228A01 |
| *UL certification only applied when charger kits shipped with the power supplies listed above. |
Table 3: Motorola Solutions Authorized Multi-Unit Charger And Power Cords
| Charger Kit | Description | Power Cords |
| HCTN4002_ | CLS Multi-Unit Charger (MUC) Tray | None |
| PMPN4530_ | CLS Multi Unit Charger (MUC) Tray with Power Supply | PS000443A01 |
CLS Single Unit Charger (SUC) Kit Operating Instructions
NOTICE: Prior to charging a battery with radio, turn off the radio. Batteries charge best at room temperature.
- This CLS Single Unit Charger (SUC) Kit is able to charge CLS Series radios with batteries or radios with batteries and holsters.
- This CLS Single Unit Charger (SUC) Kit is able to charge standalone batteries as listed in Table 1.
Charging Procedure
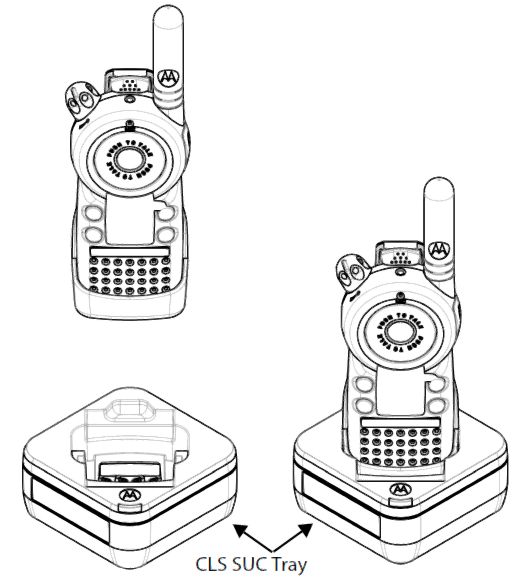
To charge the battery (with the radio attached), place it in a Motorola Solutions approved CLS SUC Tray (see Table 2):
Procedure:
- Place the CLS SUC Tray on a flat surface.
- Insert the connector of the power supply into the port on the side of the drop-in tray charger.
- Plug the wall receptacle end of the power supply cord into appropriate AC outlet. A successful power-up sequence in indicated by a SINGLE FLASH GREEN on the charger indicator.
- Turn the radio off.
- Insert the radio into the tray with the front of the radio facing the front of the charger, as shown.
Charging A Stand-Alone Battery
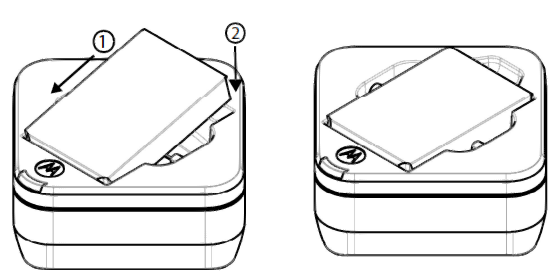
To charge a battery, insert the battery into the charger pocket by:Procedure:
- Aligning the raised tab on each side of the battery with the corresponding groove on each side of the charger pocket.
- Pressing the battery toward the rear of the pocket.
- Sliding the battery into the charger pocket, ensuring complete contact between the charger and battery contacts.
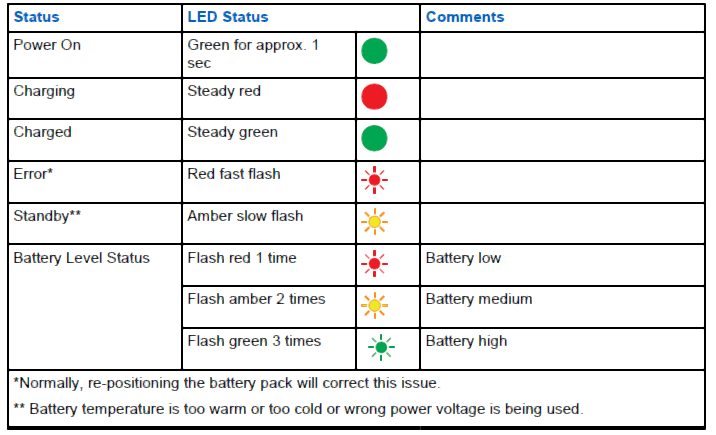
- When the battery is properly seated in the pocket, the charger indicates the Battery Level status as shown in Table 4. The RED LED illuminates to indicate that the battery is charging rapidly.
- The LED changes to a STEADY GREEN light to indicate that the battery is nearly or fully charged.
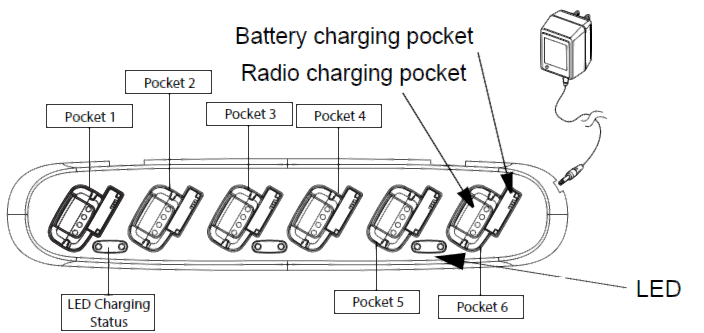
Operating Instructions For CLS 6-Pocket Multi-Unit Charger Kit
The charger pockets 1–6 will accommodate either a radio with battery attached or stand-alone battery.
NOTICE: Prior to charging a battery with radio, turn off the radio. Batteries charge best at room temperature.
- This CLS 6-Pocket Multi-Unit Charger (MUC) Kit is able to charge CLS Series radios with batteries, or radios with batteries and holsters.
- This CLS 6-Pocket Multi-Unit Charger (MUC) Kit is able to charge stand-alone batteries as listed in Table 1.
Charging Procedure
The Multi-Unit Charger (MUC) allows drop-in charging of up to 6 CLS Series radios or batteries.
Batteries can charged inside the radios or removed and place in the MUC separately. Each of the 6 charging pockets on the MUC can hold a radio or battery. Batteries are charged in 3 to 6 hours.Procedure:
- Insert the power cord plug into the jack on the MUC.
- Plug the cord into an AC outlet.
- Turn the radio off.
- Insert the radio or battery into the charging pocket.
NOTICE: The charging status LED is solid red when the battery is charging, and solid green when charging is complete.
Cloning Radio Settings
The cloning feature duplicates radio settings for radio fleet configuration of the CLS Series radios. All selectable settings are sent from one radio (the source) to a second radio (the target).When and where to use:You can clone only one radio at a time. A multi-channel radio can clone to a single-channel radio, but only the first channel is cloned. When cloning, the MUC does not need to be plugged into a power source, but ALL radios require charged batteries.Procedure:
- On the source radio, press and hold Push to Talk and for 3 seconds while turning on the radio ON. The radio beeps and display .
- Place the source radio in one of the charging pockets.
- Turn the target radio ON and place it in the charging pocket that is paired with the pocket containing the source radio. There are 3 paired charging pockets as indicated by the 3 pairs of charging status LEDs (pocket 1-2, 3-4 and 5-6).
- Press and hold on the source radio. The source radio enters cloning mode and transmits its settings to the target radio. If cloning was successful, P or Pass displays on the source radio and the target radio displays all feature icons. If cloning was not successful, F or Fail displays on the source radio.
- Turn the target radio OFF and back ON again to use.
- To clone another radio, repeat steps 3 and 4.
- To exit programming mode on the source radio, press and hold Push to Talk until no longer appears.
Troubleshooting
When and where to use: When troubleshooting, always observe the color of the LED:
Procedure:
- If there is NO LED indication, check that the radio, or stand-alone battery, is inserted correctly.
- Ensure the power supply is plugged into an appropriate AC outlet. (for CLS Single Unit Charger (SUC) Tray only).
- Ensure the USB connector of the power supply is plugged securely into the charger socket (for CLS Single Unit Charger (SUC) Tray only).
- Ensure the power cord is plugged securely into the charger socket with an appropriate AC outlet and there is power to the outlet (for CLS 6-Pocket Multi-Unit Charger Tray only)
- Confirm that the battery used with the radio is Motorola Solutions authorized batteries listed in Table 1.
Addendum to CLS Multi-Unit Charger
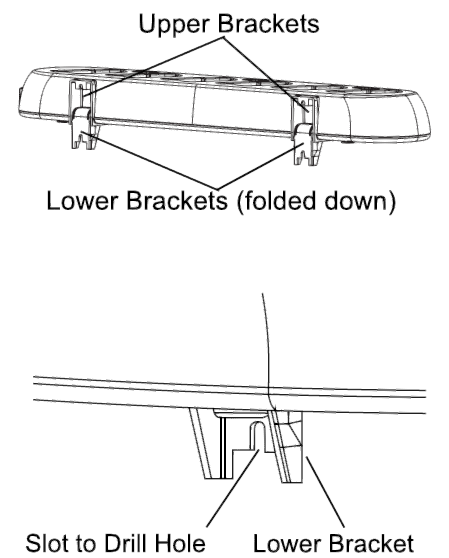
Mount the Motorola CLS Multi-Unit Charger (MUC) either to a wall or place it on a flat surface such as a table or desk. Wall mounting the MUC requires 4 holes to be drilled into the wall (2 holes each side). Then secure the MUC to the wall using 4 screws or fasteners appropriate for particular wall mounting surface material.Procedure:
- Fold down the lower mounting brackets on the rear of the MUC.
- Hold the MUC against the wall in the desired location.
- From this position, raise the MUC approximately 1.6 inch, then use the slots in the lower mounting bracket as a guide to mark and drill a hole for each upper bracket.
- Install 2 fasteners appropriate for the wall material, but do not tighten fasteners flush to the wall.
- Hang the MUC on the 2 fasteners by the upper mounting brackets.
- Use the slots in the lower mounting brackets as a guide to mark and drill the lower mounting holes.
- Install 2 fasteners, appropriate for the wall material, and tighten them against the lower mounting brackets.
 report this ad
![]()
References
[xyz-ips snippet=”download-snippet”]