
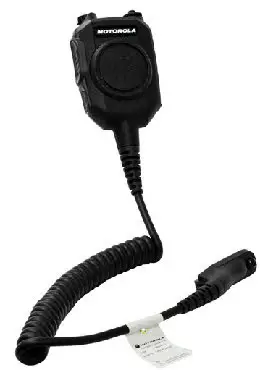
MOTOROLA PMMMN4109 Impres Atex Omnidirectional Remote Speaker Microphone MTP8000Ex
MOTOROLA, MOTO, MOTOROLA SOLUTIONS and the Stylized M logo are trademarks or registered trademarks of Motorola Trademark Holdings, LLC and are used under license. All other trademarks are the property of their respective owners.© 2016 and 2021 Motorola Solutions, Inc. All rights reserved.
FOREWORDRF ENERGY EXPOSURE AND PRODUCT SAFETY GUIDE FORMOBILE TWO-WAY RADIOS
Before using this product, read the RF Energy Exposure and Product Safety Guide that ships with the radio which contains instructions for safe usage and RF energy awareness and control for compliance with applicable standards and regulation.The Remote Speaker Microphone is compatible with these radio models, DP4401 Ex, DP4801 Ex, DP4401 Ex Ma, DP4801 Ex Ma, XiR P8608 Ex, XiR P8668 Ex, DGP 8050 Ex, and DGP 8550 Ex, with the software version R02.40.01 or later.
ACOUSTIC SAFETY
Exposure to loud noises from any source for extended periods of time may temporarily or permanently affect your hearing. The louder the radio’s volume, the less time is required before your hearing can be affected. Hearing damage from loud noises is sometimes undetectable at first and can have a cumulative effect.To protect your hearing:
- Use the lowest volume necessary to do your job.
- Increase the volume only if you are in noisy surroundings.
- Reduce the volume before connecting headset or earpiece.
- Limit the amount of time you use headsets or earpieces at high volume.
- When using the radio without a headset or earpiece, do not place the radio’s speaker directly against your ear.
REMOTE SPEAKER MICROPHONE (RSM) OVERVIEW
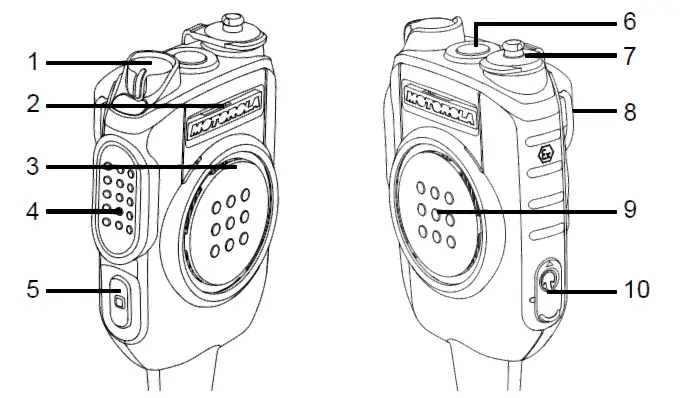
- Hi-Lo Volume Toggle Knob *
- Omni Microphone
- Speaker
- Side Push-To-Talk (PTT) Button
- 1-Dot Programmable Button
- Accessory Orange Button
- Nexus Jack
- Belt Clip
- Front PTT Button
- 3.5 mm Audio Jack **
* Applicable to RSM Speaker only.** 3.5 mm Audio Jack is compatible with PMLN7188_ kit only.
SERVICE AND WARRANTY
The RSM is not repairable.The following optional accessories and replacement parts are available for order from Motorola Solutions Radio Products and Services Division (RPSD) or Accessories and Aftermarket Division (AAD).
The RSM is covered under the standard Motorola Solutions one-year limited warranty. Refer to your Motorola Solutions dealer or point-of-purchase for detailed information on warranty replacement.
AUDIO ROUTING PRIORITIZATION
| Audio | Transmit | Receive |
| RSM only | RSM | RSM |
| RSM + Nexus Accessories | Nexus Accessories | Nexus Accessories |
| RSM + Nexus Accessories +
3.5 mm Receive-Only Jack |
Nexus Accessories | Nexus Accessories |
| RSM + 3.5 mm Receive-Only Jack | RSM | 3.5 mm Receive-Only Jack |
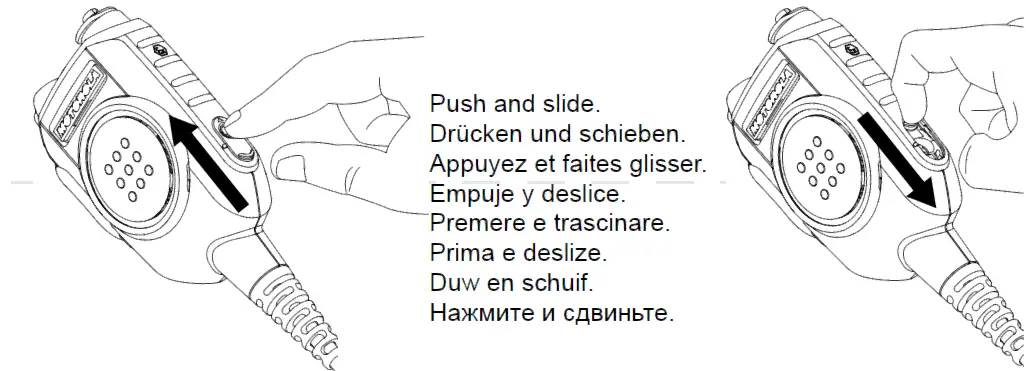
ATTACH AND DETACH RSM
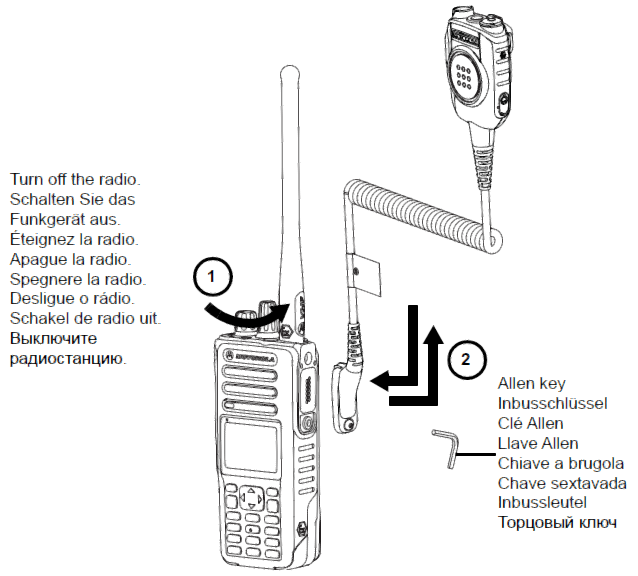
NOTE: Use an Allen key (size 3 mm) to tighten or loosen the screw.
RECEIVE FROM RSM
NOTE: Refer to the table in the Audio Routing Prioritization section for more information.
TRANSMIT FROM RSM
Press and hold the PTT button.
NOTE: The microphone and PTT button of the radio are not disabled when RSM is connected. Check with your dealer or system administrator on the operational details for the microphone and PTT button.
OPEN AND CLOSE AJ COVER
PLUG IN AUDIO JACK
UNPLUG AUDIO JACK
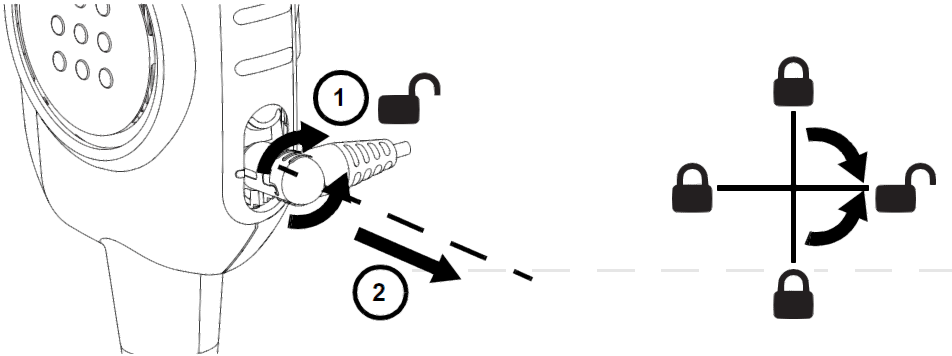
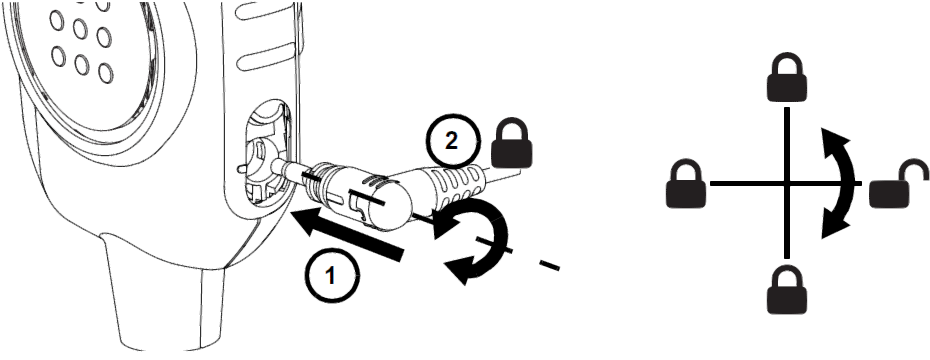
PLUG IN NEXUS JACK
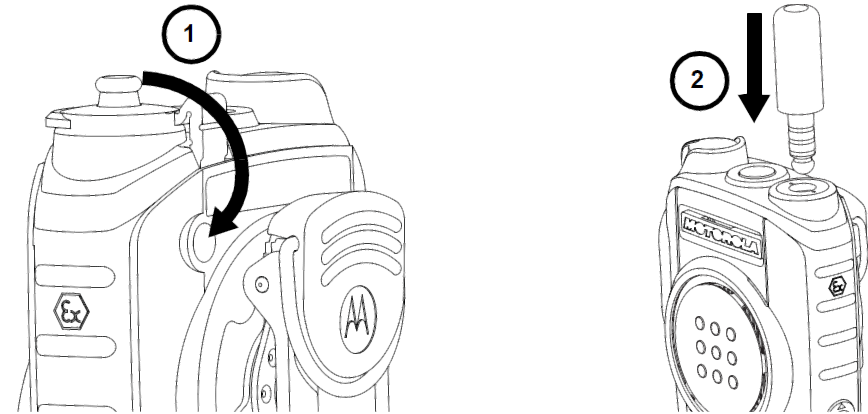
NOTE: It is recommended to turn off the radio before plugging in or unplugging the Nexus accessories. It is also recommended to close the dust cap when the Nexus Jack is not plugged in.
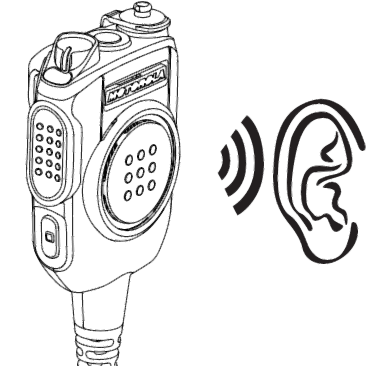
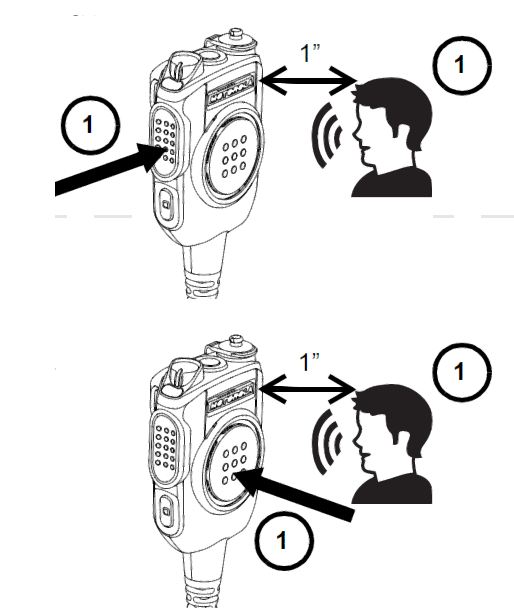
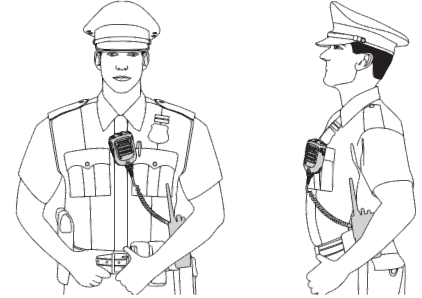
RECOMMENDED WEARING POSITION
CLEANING PROCEDURES
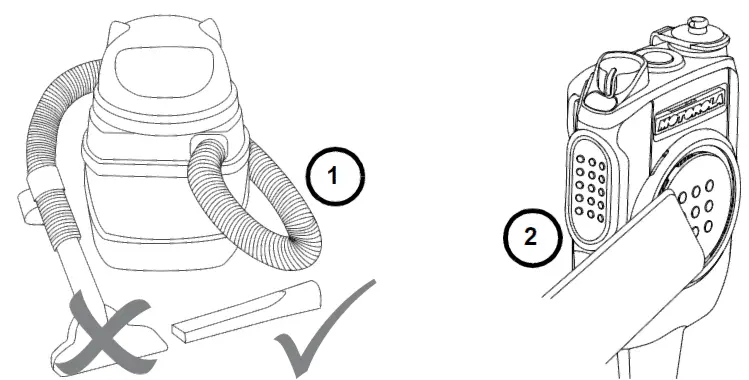
WARNING: Use of more than 4 hp/3 kW vacuum, any nozzle other than a crevice nozzle, and/or any other cleaning method will void the warranty.
GENERAL CLEANING
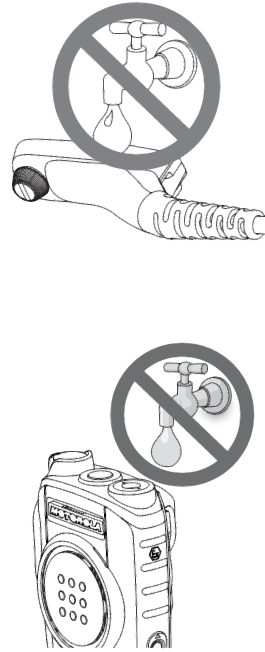
WARNING:
- Do not get connector wet at all.
- Do not fill water into the Nexus Jack.
- Use only dish soap and water. Other cleaning solutions may permanently damage the RSM housing and will void the warranty. Do not soak more than 30 minutes.
- Mix one teaspoon of mild dishwasher detergent to one gallon of water (0.5% solution).
- Apply solution with a stiff, nylon, short-bristled Brush.WARNING: Do not allow the bristles to enter the speaker or microphone porting areas which can cause internal damage and will void the warranty.
- Fully rinse the RSM with cold water and dry thoroughly with soft lint-free cloth.
- Hold the RSM with the front surface down, and lightly shake it a few times to clear out water that may be underneath the speaker openings or microphone ports.
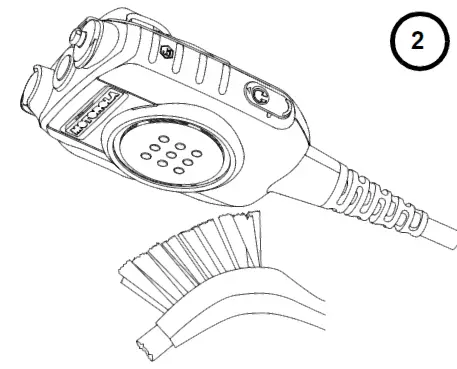 WARNING: Do not allow the bristles to enter the speaker or microphone porting areas which can cause internal damage and will void the warranty.
![]()
[xyz-ips snippet=”download-snippet”]