![]()
COMPACT AND HEAVY DUTY MICROPHONESRMN5052, RMN5053USER GUIDE
![]()
FOREWORD
Product Safety and RF Exposure Compliance
 Before using this product, read the operating instructions for safety usage contained in the Product Safety and RF Exposure booklet enclosed with your radio.
ATTENTION!
These microphones, when attached to the mobile radio, are restricted to occupational use only to satisfy FCC RF energy exposure requirements. Before using this product, read the RF energy awareness information and operating instructions in the Product Safety and RF Exposure booklet enclosed with your radio to ensure compliance with RF energy exposure limits.
INTRODUCTION
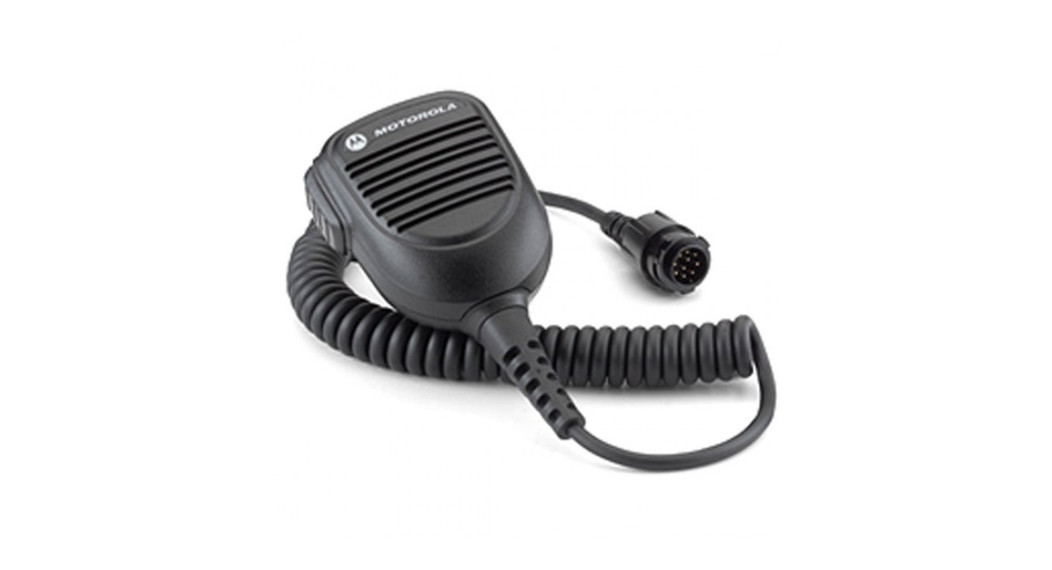
The RMN5052 and RMN5053 Compact and Heavy-Duty Microphones provide a convenient means of communicating by having a microphone and a push-to-talk (PTT) button in a single, handheld accessory. Both microphones include a coiled cord with strain relief, a hang-up clip with mounting hardware (HLN9073), and a connector that plugs into the mobile radio.
The RMN5053 Heavy-Duty Microphone has a removable coiled cord and two programmable side buttons for additional functionality. These microphones are not backwards compatible with other legacy mobile radios.
INSTALLATION
Carefully select the installation location for the microphone. Plan the installation so that the microphone’s location is within convenient reach of the user, but will not interfere with the vehicle’s operation. Also, consider the operation of other vehicle accessories.
VEHICLES EQUIPPED WITH AIRBAGS
WARNINGAn airbag inflates with great force.DO NOT place objects, including communication equipment, in the area over the airbag or in the airbag deployment area. If the communication equipment is improperly placed and the airbag inflates, this could cause serious injury.CautionIf mounted on an insecure or hollow mounting surface, the bracket could loosen, and the unit could break free on collision. Mount the bracket only in a location that allows the self tapping screws to solidly anchor into a metal surface.Caution The mounting screws can damage cables and wires that run under some mounting surfaces in the vehicle. Be careful to avoid mounting the bracket above those locations.
Mounting the Hang-Up Clip
Once an installation location has been decided, perform the following steps:
- Verify that the selected mounting surface is strong enough to support the mounting hardware and the microphone.
- Use the base of the hang-up clip as a template to center punch and drill two 3mm (1/8”) diameter holes. Be careful not to damage any wires or any other vehicle components when drilling the holes.
- Use the two self tapping screws provided to mount and secure the hang-up clip.
Making Final ConnectionsWhen the hang-up clip is installed and secured:
- Snap the microphone into the hangup clip.
- Connect the microphone’s coiled cord plug to the microphone connector on the front of the radio. Align the connector pins then twist outer collar clockwise to lock in place.
MICROPHONE OPERATION
Transmitting
To transmit using your microphone:
- Hold the microphone approximately five centimeters (two inches) from your mouth.
- Press the PTT button.
- Speak directly into the grill openings located in the upper center of the microphone face.
- Release the PTT to listen.
The Accy (Accessory) 1-dot and Accy 2-dot buttons on the microphone are programmable through the radio’s Customer Programming Software (CPS). Your radio’s user guide contains a full description of the programmable functions that are available through these buttons. Check with your dealer for more information supporting the programmable buttons.
Disconnecting the Microphone from Radio English
- Turn the locking collar on the radio end of the microphone 1/4 turn counterclockwise.
- Pull cable from accessory interface connector to release.
COILED CORD REPLACEMENT
To remove the RMN5053 coiled cord:
- Rotate the locking collar at the base of the microphone in a counterclockwise direction until it stops.
- Pull the cord out and away from the base of the microphone.Install a coiled cord in the reverse order of removal.
SERVICE
 report this ad
Other than the replaceable cords, the RMN5052 and RMN5053 Compact and Heavy-Duty Microphones are not repairable. Order replacement microphones as required.The following replacement parts are available through your Motorola Solutions service representative.
| Part Description | Part Number |
| Replacement Cord, Compact | RLN6276 |
| Replacement Cord, H/D | RLN6277 |
MOTOROLA, MOTO, MOTOROLA SOLUTIONS and the Stylized M logo are trademarks or registered trademarks of Motorola Trademark Holdings, LLC and are used under license. All other trademarks are the property of their respective owners.© 2016 and 2021 Motorola Solutions, Inc. All rights reserved.
 6881098C80-ACPrinted in
[xyz-ips snippet=”download-snippet”]