Projector MountParts & Assembly Instructions
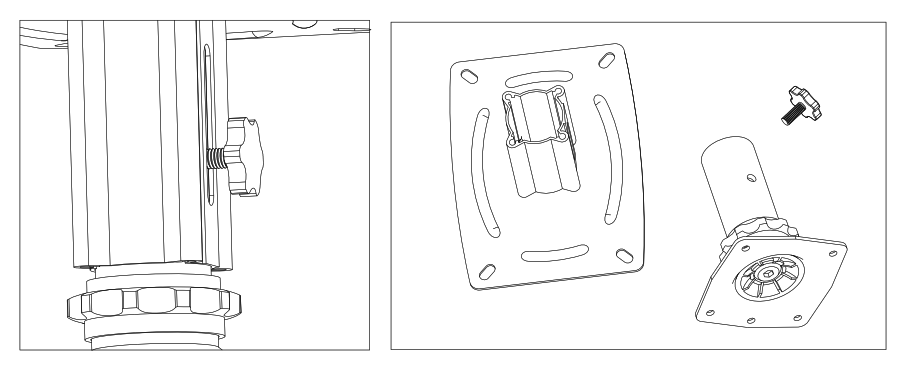
*** Depending on your mount model-The Top mounting plate may need to be assembled to the adjustment pole.***
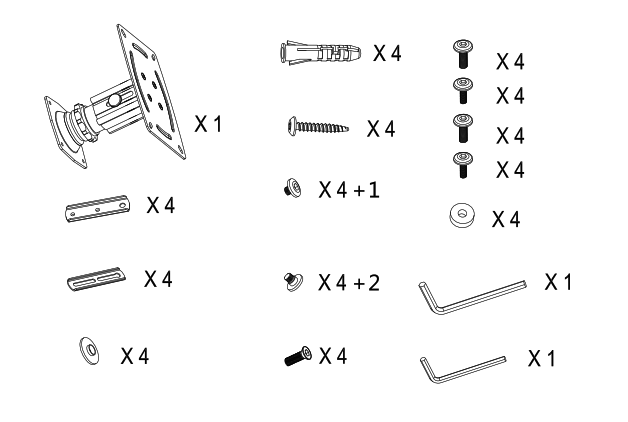
Use the small hex key tool and the 4 flat head screws
Assembly Instructions
Step 1
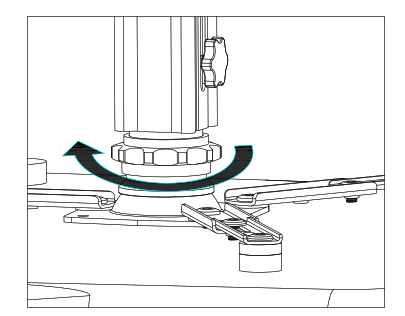
This is the most important step- Using the large hex key, tighten the main bolt very tightly.
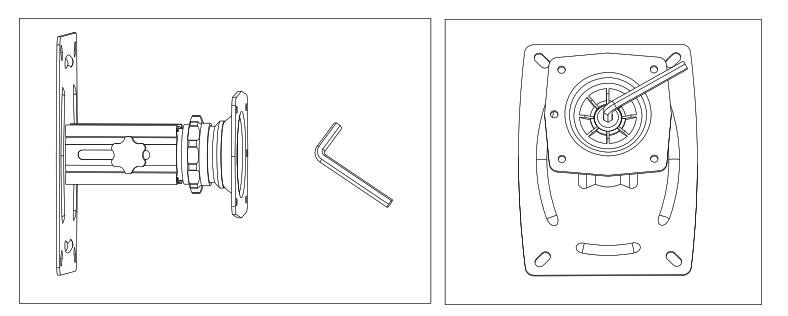
Make sure the adjustment knob stays loose even after the main bolt is tight. If the adjustment knob is tight, loosen it and retighten the main bolt. Continue this process until you can not tighten the main bolt anymore. The adjustment knob needs to remain loose so that the base plate can swivel, rotate and tilt.

Step 2
Remove the thumb bolt to separate the base plate from the mounting plate.
Step 3
Prepare the top plate to be mounted on the ceiling. Fasteners for certain types of ceiling are supplied, but the proper fastener for your particular ceiling may not be supplied. It is important that the correct type of fastener be used. A local professional can help you determine the proper fastener for your ceiling.
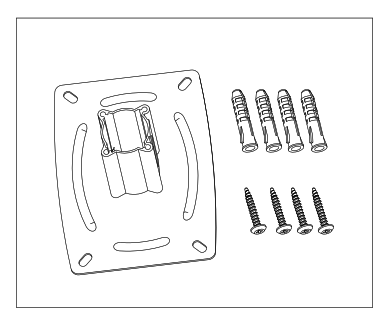
Place the mount top plate on the ceiling and mark the holes with a pencil. Then, attach it to the ceiling with the proper fasteners.

Step 4
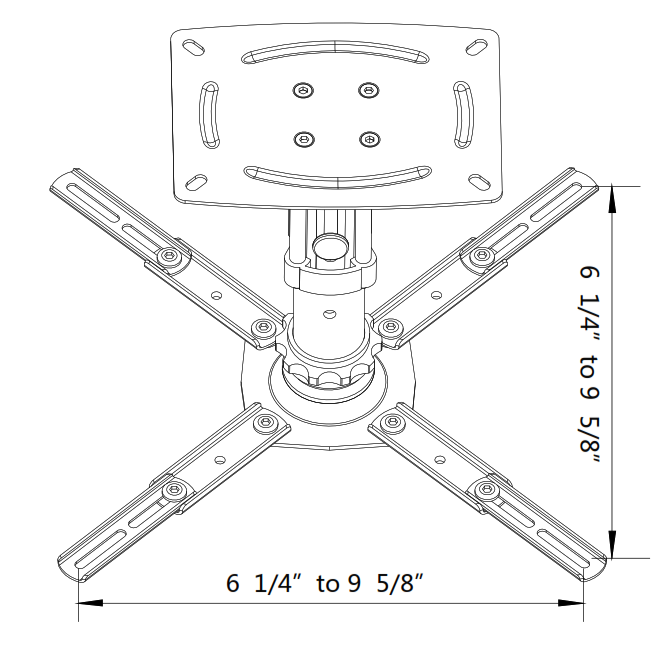
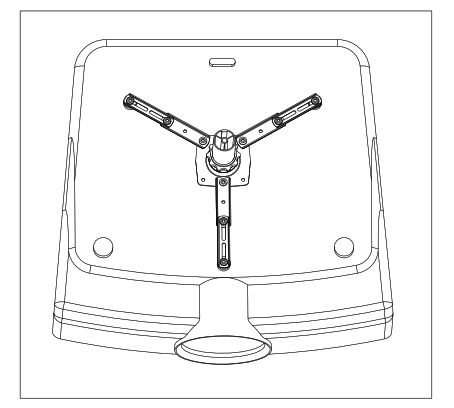
Prepare the base plate for your projector.

It is very important to use the partially threaded screws and the plastic washer to attach the legs to the base plate. The fully threaded screws are for extending the legs.

The assembly goes as follows: baseplate – plastic washer – leg – partially threaded screw.
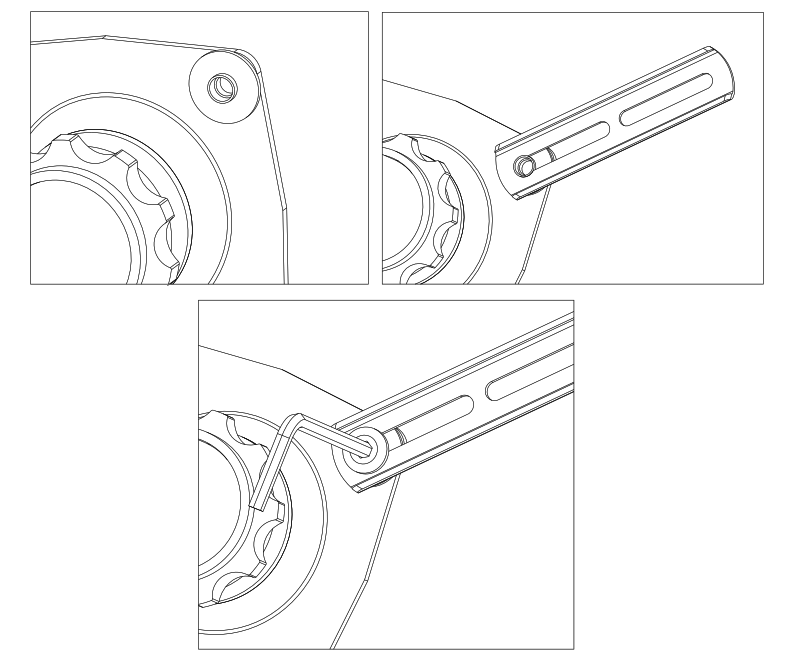
There are many different ways to use the parts to accommodate different size projectors.

Step 5
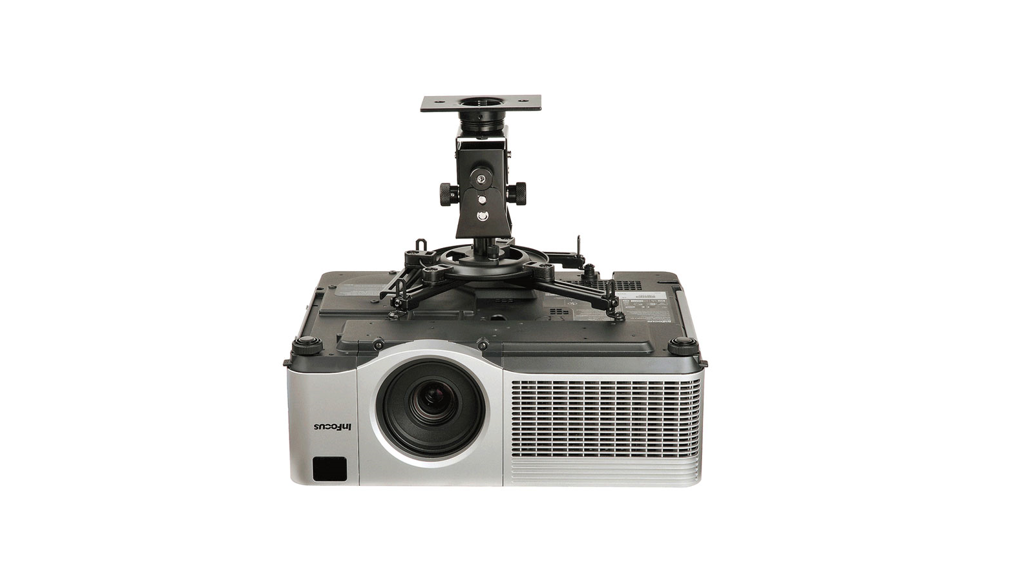
Attach the base plate to your projector after preparing it.
 Projector fasteners vary in size and length. Provided with the mount are the most frequently used fasteners. If the fasteners provided do not fit your projector, research the correct type of fastener in your projector manual and purchase them at your local hardware store.Included are rubber spacers that may or may not be needed to attach the legs to your projector.
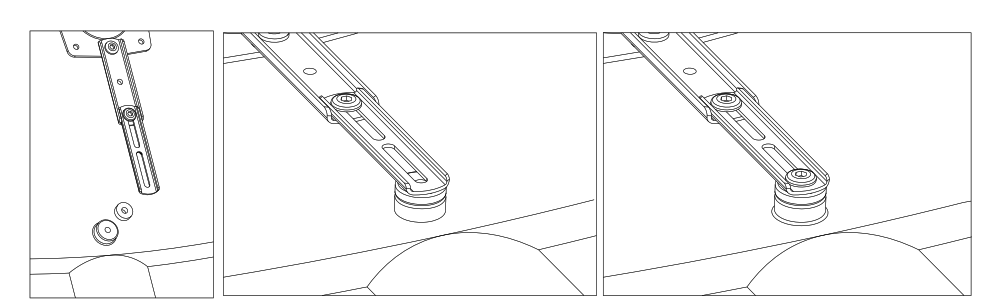
Attach all legs.
Step 6
Reattach the base plate to the top mounting plate using the thumb bolt.

Step 7
For the final step, lock the projector in place by turning the adjustment knob until it is tight.

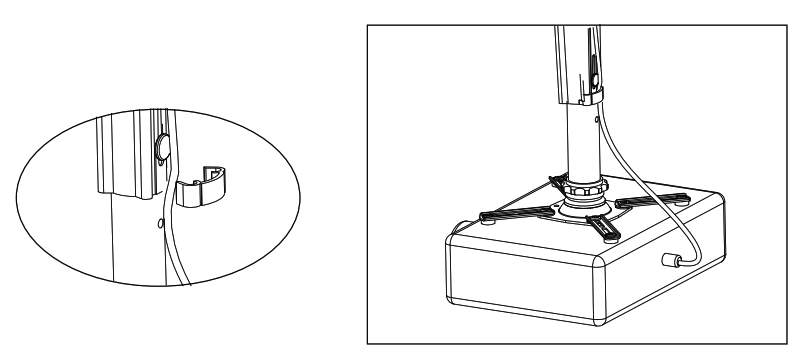
Note: The longer option mounts include a cable clip.

Projector Mount Parts and Assembly Instruction Manual – Projector Mount Parts and Assembly Instruction Manual –
[xyz-ips snippet=”download-snippet”]