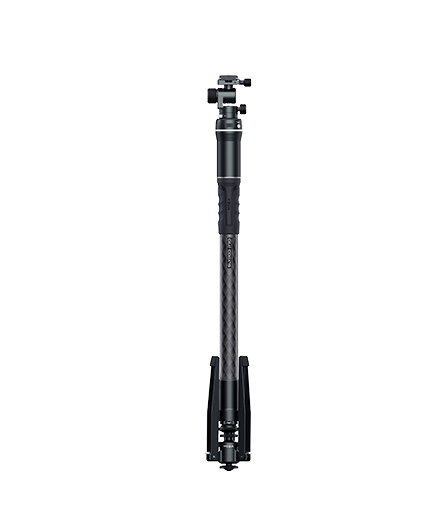

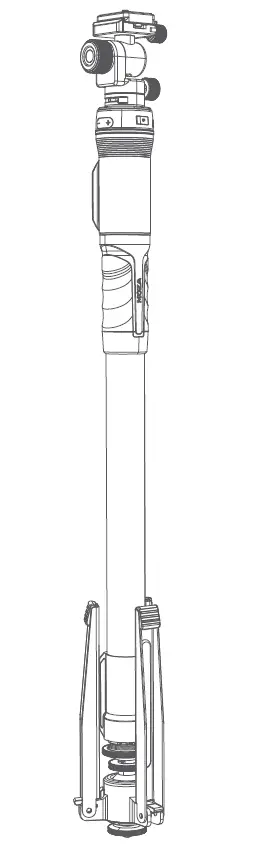
MOZA SLYPOD PRO MU1
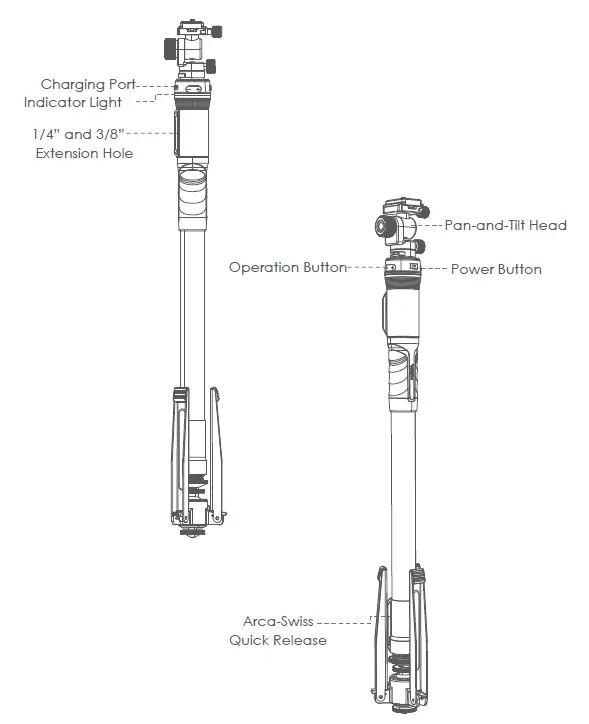
Battery and Charging
The MOZA SLYPOD PRO comes with a built-in lithium battery. Before using the SLYPOD PRO, please fully charge the SLYPOD PRO to activate the battery. To charge use the Type-C USB port and a USB power source like a phone charger or power bank. Solid red indicates the SLYPOD PRO is charging, solid blue indicates the charging has finished. The SLYPOD PRO will automatically stop charging when the battery is full.
Note:1. It’s recommended to use the original charging cable provided in the package.2. Do not overcharge or over-discharge the battery, otherwise, the battery cell will get damaged.3. If the battery is idle for a long time, please recharge and discharge it every 3 months to keep it active.
MOZA SLYPOD PRO Overview
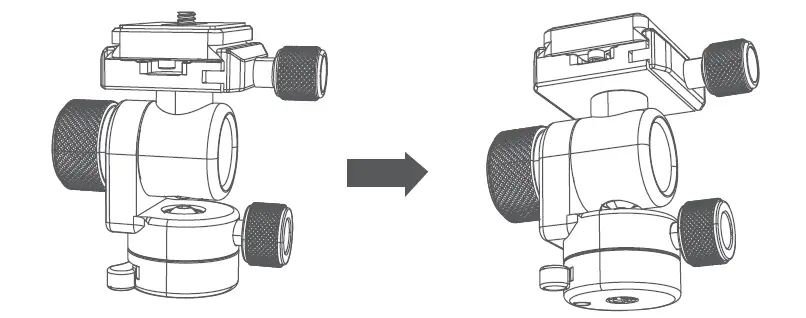
Pan-and-Tilt Head
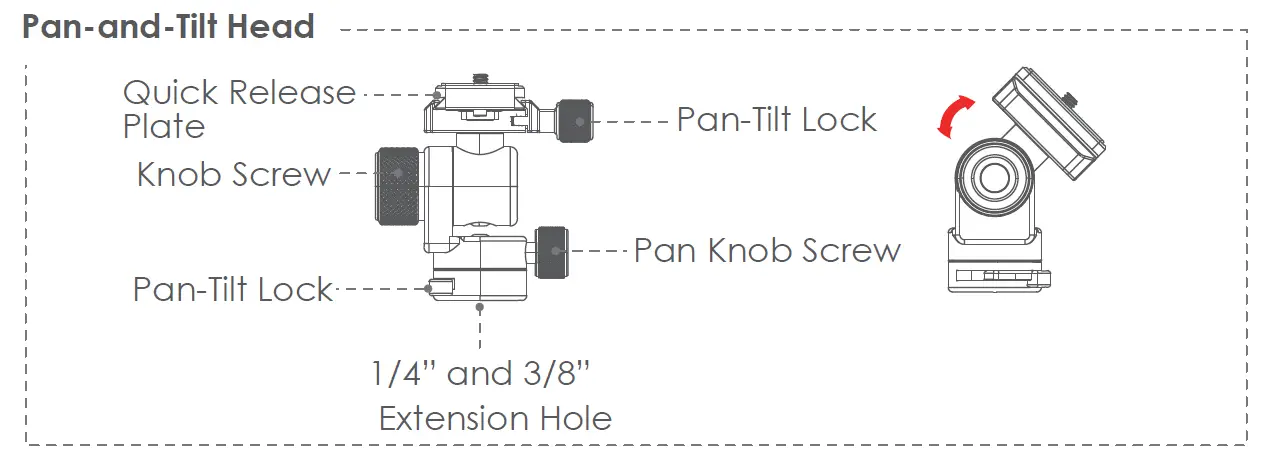
● Release the heading adjustment knob to adjust the heading angle of gimbal and ensure the gimbal’s position and level.● Release the roll and pitch adjustment knob and adjus the angle of roll/pitch at the same time, and then screw it when it is suitable.● Release the gimbal lock and install the standard Arca quick release plate, then lock the gimbal.
Arca-Swiss Quick Release

The SLYPOD PRO’s body is supported by an Arca-Swiss quick release plate with a 1/4” and a 3/8” mount. Use the SLYPOD PRO like a motorized slider by mounting the SLYPOD PRO horizontal.
Install
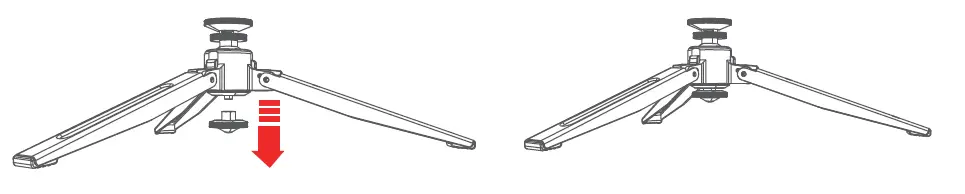
- Attaching the Tripod to The SLYPOD PROAlign the tripod with the 1 / 4″ mount of the SLYPOD PRO. Rotate the tripod until it is hand tight.

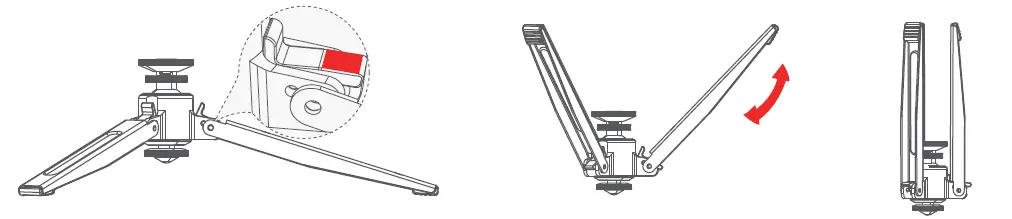
- The folding method of tripod
- Retroflex Folding
- Shaking the lock to fold
- Shaking the damping
- Retroflex Folding
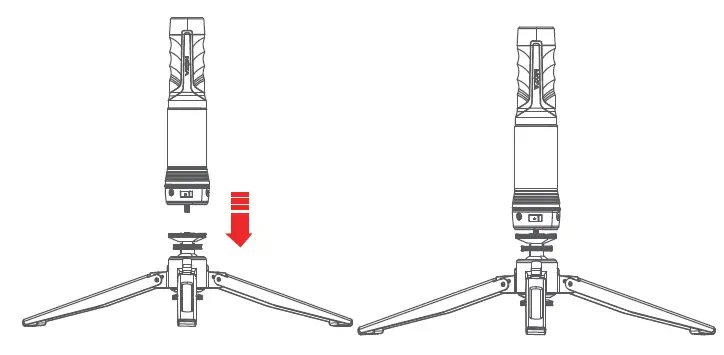
- Main body and gimbalTighten the gimbal head to the 1/4 screw of the main body, and then tighten the wrench to fix the head.

Getting Started
Power on/off: Long press the power button 3 seconds.

App DownloadScan the QR code below or search the App Store to download the MOZA Master App.
Device Connection (Wireless)Download the “MOZA Master” App.
a. Turn on the SLYPOD PRO and mobile phone Bluetooth.b. Launch the “MOZA Master”, select the device to connect.c. Enter the operation interface after the connection is completed.
App Operation
Before the first operation, it is required to setup the SLYPOD PRO according to the instructions. Please use the latest App version. For App updates, please check our official website and App store. When the SLYPOD PRO is controlled by the App, buttons will be disabled. (Except for the power button).
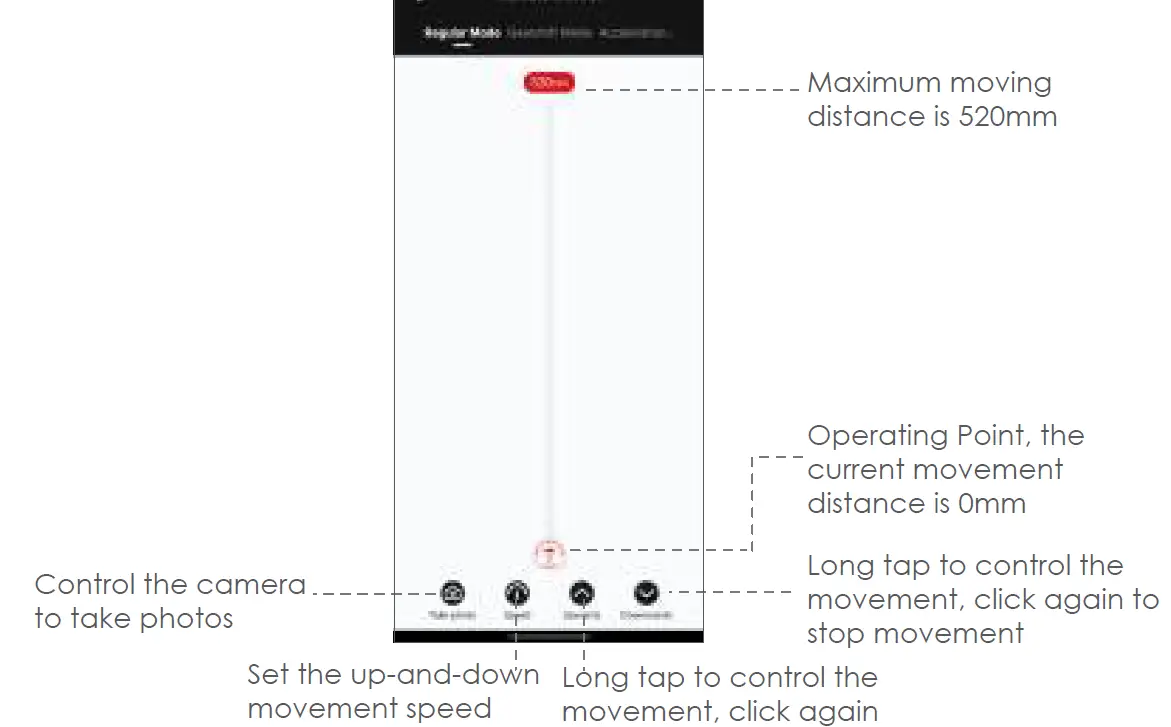
Regular ModeSlide the red operating point from the starting point to any position, the SLYPOD PRO will move accordingly. Release the operating point, the SLYPOD PRO will stop moving. Long tap the“Downwards” or “Upwards” icon, the SLYPOD PRO will automatically move up or down. Tap the “Downwards” or “Upwards” icon again to stop the movement. Tap the ‘Take photo’ icon, and SLYPOD PRO will control the camera to take a photo. (Please make sure your SLYPOD PRO is connected with the camera control cable, the camera control cable needs to be purchased separately). Speed Setting: Click Speed icon to set the speed, and the SLYPOD PRO will move according to the set speed.
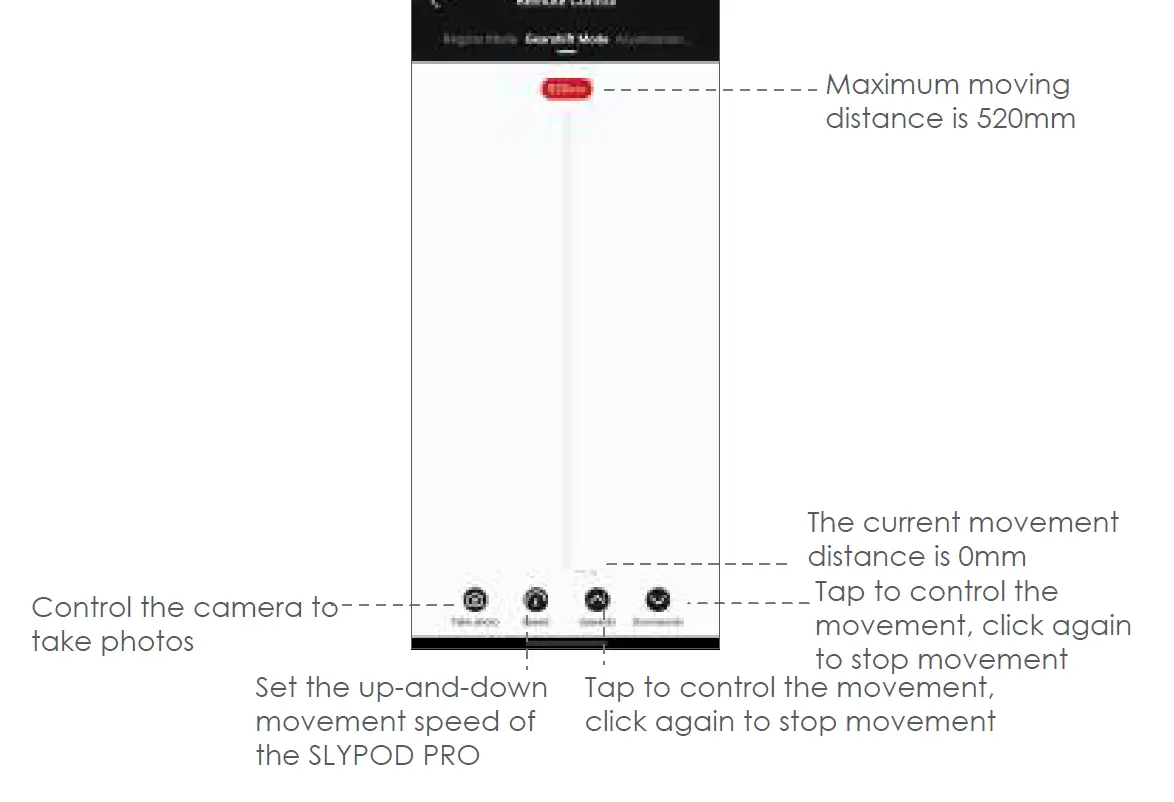
Gearshift ModeTap the “Upwards” or “Downwards” icon to control the movement of SLYPOD PRO. Tap again to stop the movement. Tap Take photo icon to control the camera to take a photo. (Please make sure your SLYPOD PRO is connected with the camera control cable, the camera control cable needs to be purchased separately). Speed Setting: Tap speed icon to set the speed, the SLYPOD PRO will move from the current speed to the set speed and then decelerates to the end position. (The end position speed is 0)
Acceleration ModeTap the “Upwards” and the device will move up automatically; Tap again and the device stops moving. Tap the “Downwards” and the device will move down automatically; Tap again and the device stops moving. Tap ‘Take photo’, the SLYPOD PRO controls the camera to take a photo.(SLYPOD PRO needs to be connected to the camera with the camera control cable, the camera control cable needs to be purchased separately) Speed setting: Drag the white mark to set the device acceleration speed, and the device will continue to accelerate to the end position according to the set speed (When the SLYPOD PRO extends to 520mm or retracts to 0mm,it will reach the setting speed)
Segmentation ModeSelect the segmentation mode, add a path (Click to add the path. 5 paths is the most that can be added, tap confirm before adding the next path).Slide the S operating point and the E operating point to any position to set the starting position and end position of the first path. Slide the E operating point to set the end position of the second, third, fourth or fifth path. Then the starting point of the next path will be the end position of the previous one.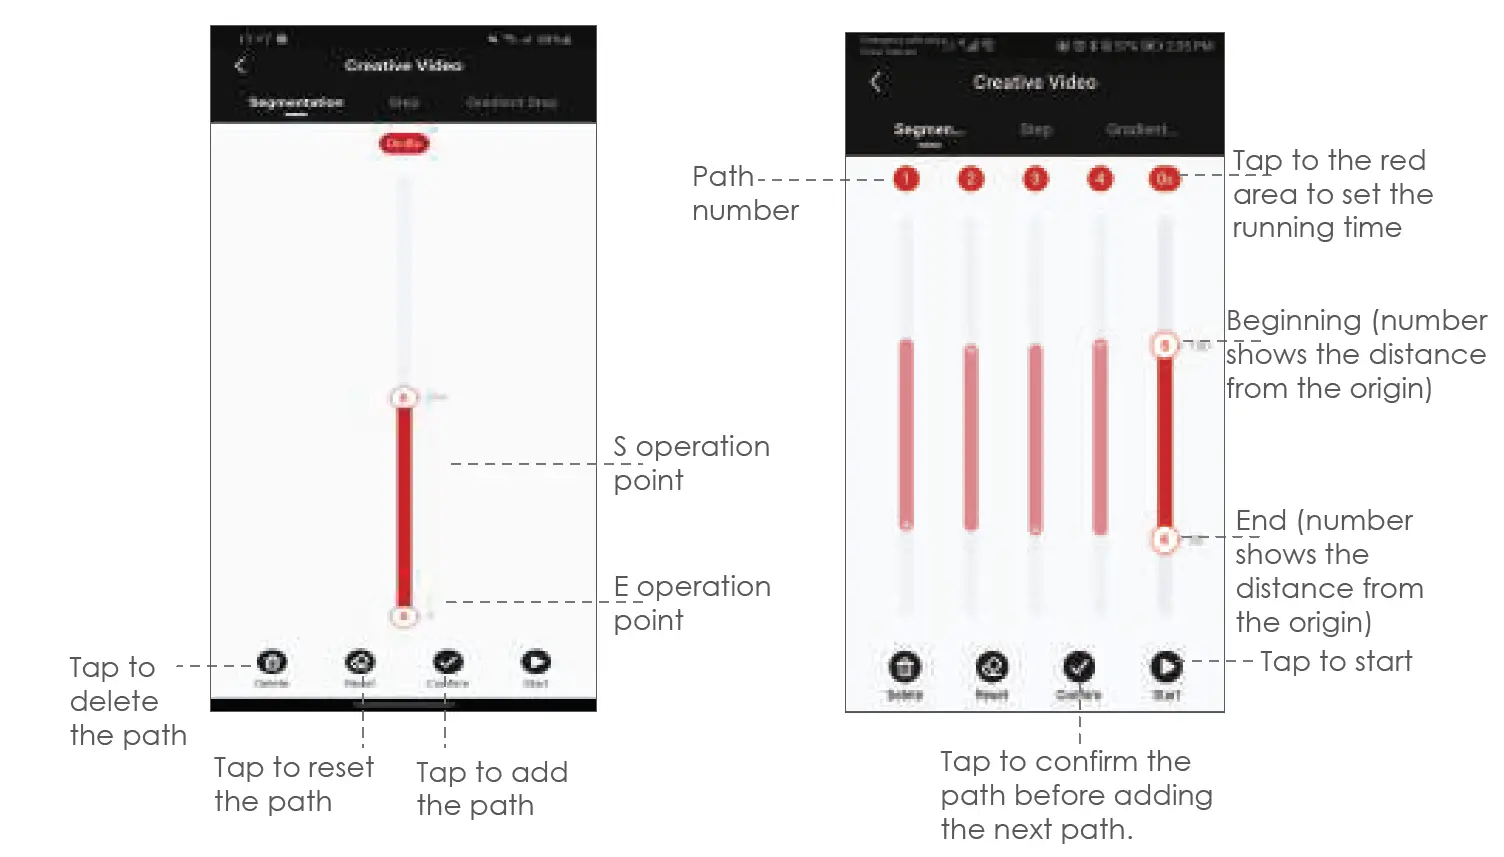
Tap to confirm the path and set the running time. After confirming the first path, another path can be added. Tap Confirm and the SLYPOD PRO will run according to programed movement. Using Segmentation mode and the camera connection cable the SLYPOD Pro will activate the camera’s shutter for a motion controlled time-lapse.
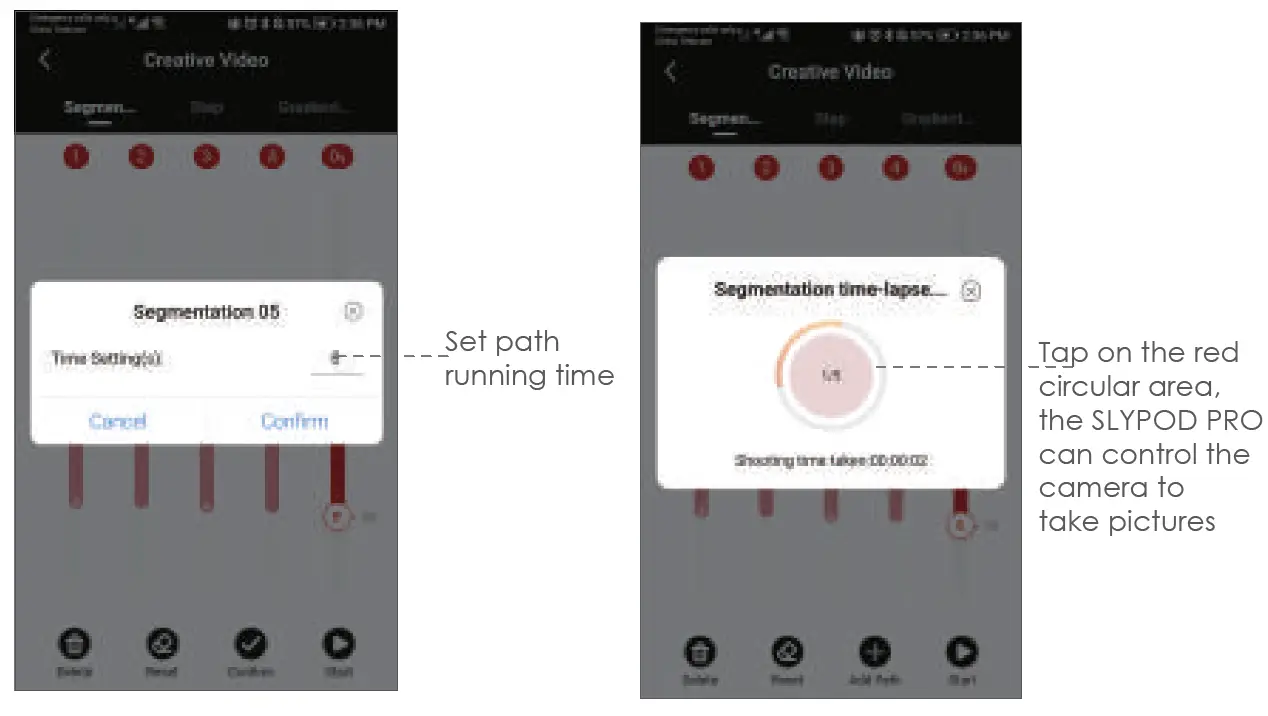
Step Time-LapseSelect Step mode to set Travel Distance, Frame Number, Cycle Setting, Exposure Time, Interval Time and FPS. Click “+”“-” to adjust the parameter, click to start, the SLYPOD PRO will run according to the set parameters, the interface will display Shooting Time Taken, Total Shooting Time, Total number of photos. Enter the Step Time-lapse interface, click on the red circular area, the SLYPOD PRO can control the camera to take pictures. (SLYPOD PRO needs to be connected to the camera with the camera control cable)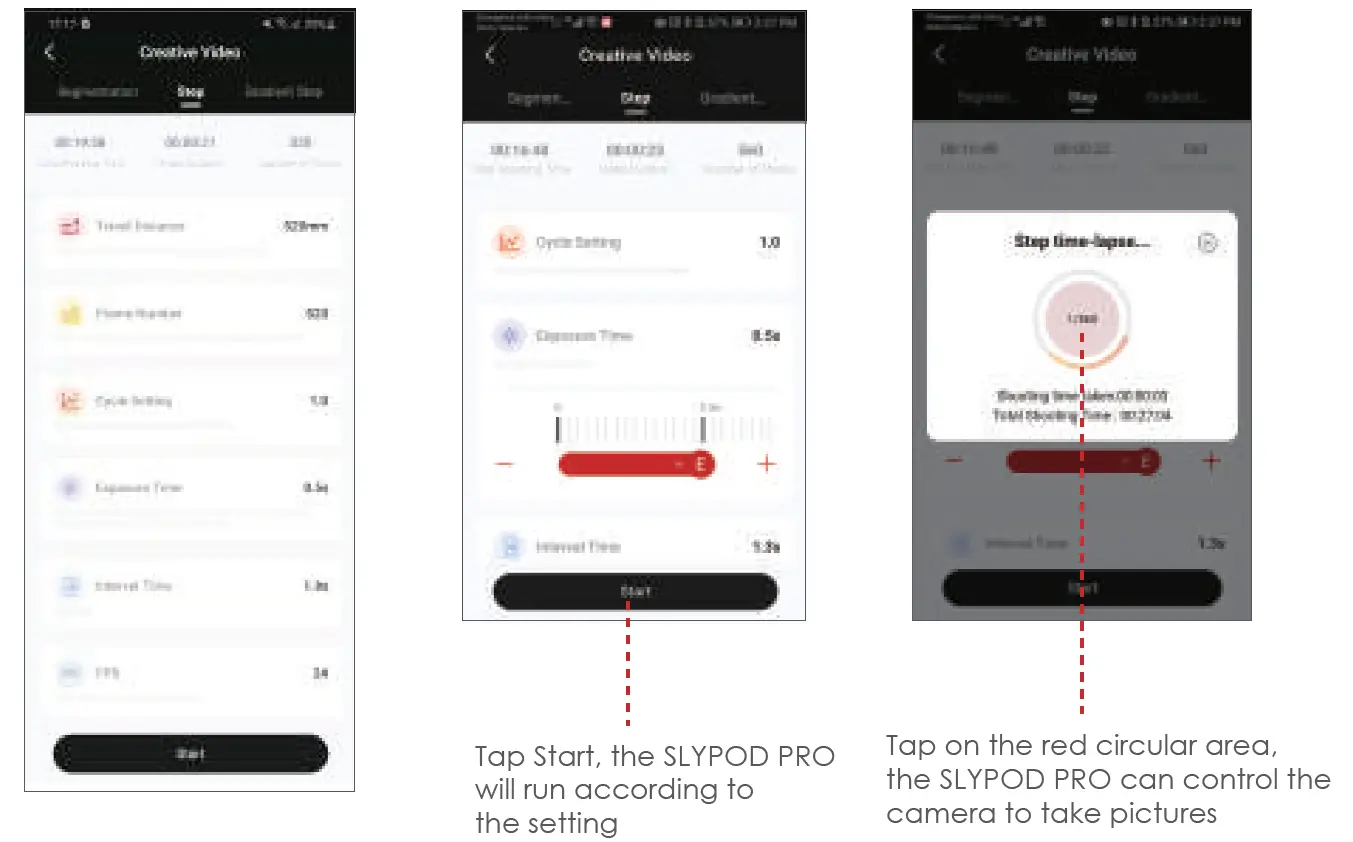
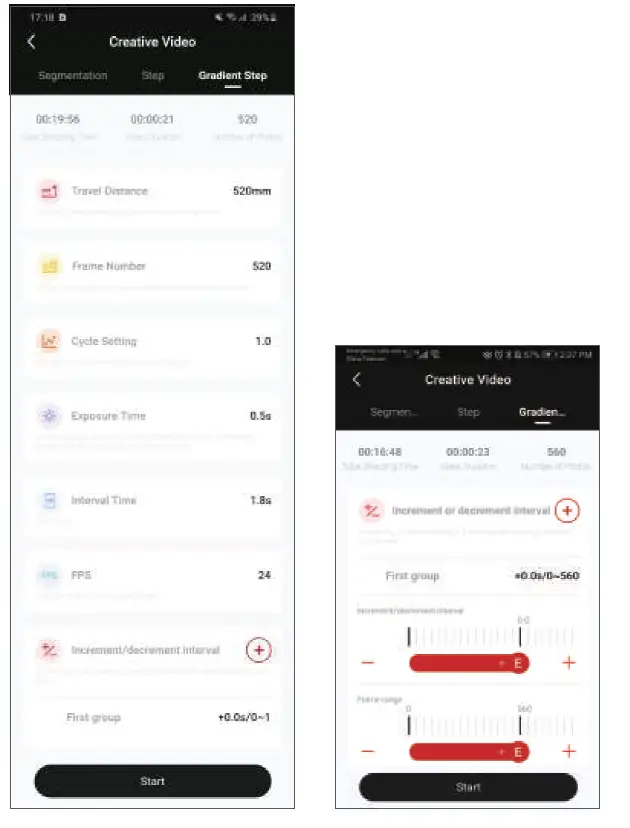
Gradient Step Time-LapseSelect Gradient Step Time-lapse, set the travel distance, frame number, cycle setting, exposure time, interval time, FPS, increment and decrement of interval. Tap to add the first group of increment or decrement of time and frame number. Tap again to add a second group (5 groups can be added at most). Tap Start, the device will move according to the settled parameters. The interface will show the total shooting time, video duration, and the number of photos. During the shot, click the center red area, the SLYPOD PRO will control the camera to take photos.(SLYPOD PRO and camera need to be connected with camera shutter control cable)
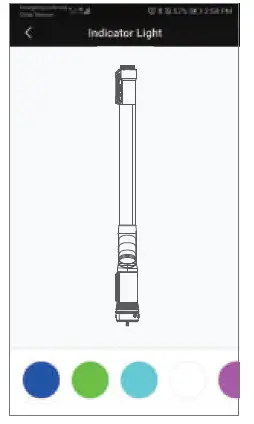
Indicator Light Color SettingEnter the operation interface, select Setting-Indicator Light, up to 5 kinds of indicator light colors can be set based on personal preference.
Firmware UpgradeUpdating the firmware of SLYPOD PRO should be done in the charging state. When in charging state, turn on the device, connect the SLYPOD PRO to the App, enter the operation interface and start the firmware upgrade. The SLYPOD PRO must be restarted after the firmware upgrade succeeds. If the upgrade fails, the process needs to be repeated until the upgrade succeeds.
Color Definition
| Charging | Solid red |
| Charging completed | Solid blue |
| Power on | Solid green |
| Low-voltage alarm | Red Light and Green Light on (Solid Orange) |
| Low voltage alarm | Red light flashing + automatic homing stop (press the start button, red light flashing, no start) |
ChargingLift the rubber dust cover from the charging port to access a Type-C port. The SLYPOD PRO can be charged by mobile phone charger, mobile power bank, etc. It will automatically stop charging when the battery is full. Please disconnect the charger when the SLYPOD PRO is full. It is recommended to use the original charging cable provided.
CalibrationCalibration is needed when there is an abnormality with the movement. There are two ways to calibrate the SLYPOD PRO: Click all three buttons (power, +, -) at the same time or enter the operation interface to start calibration in the App.Subscribe Gudsen MOZA official YouTube channel for the latest tutorials.
Specifications
| SLYPOD PRO | |
| Size | Storage Length:650mm(Main Body) |
| Storage Length:865mm (Main Body andTripod) | |
| Expanded Length:1180mm(Main Body andTripod) | |
 report this ad report this adWeight |
Main Body: 1460g |
| PTZ Head: 330g | |
| Tripod:520g | |
| Payload | Vertical: 6kg |
| Horizontal: 3.5Kg | |
| Operating speed | Highest: 40mm/s Lowest: 0.5mm/s |
| Operating Voltage | 11.4V~16.8V |
| Battery Life | 90 min |
| Working Temperature | -10℃~50℃ |
| Communication Interface | Bluetooth |
| 2.4G | |
| Type-C | |
| Battery Model | Lithium-ion Battery |
| Battery Capacity | 2600mAh |
| Battery Voltage | 14.4V |
| Charging Port | Type-C USB |
| Charging Voltage | 5V 2A/9V 2A/12V 1.5A |
| Charging Time | 4H |
References
[xyz-ips snippet=”download-snippet”]