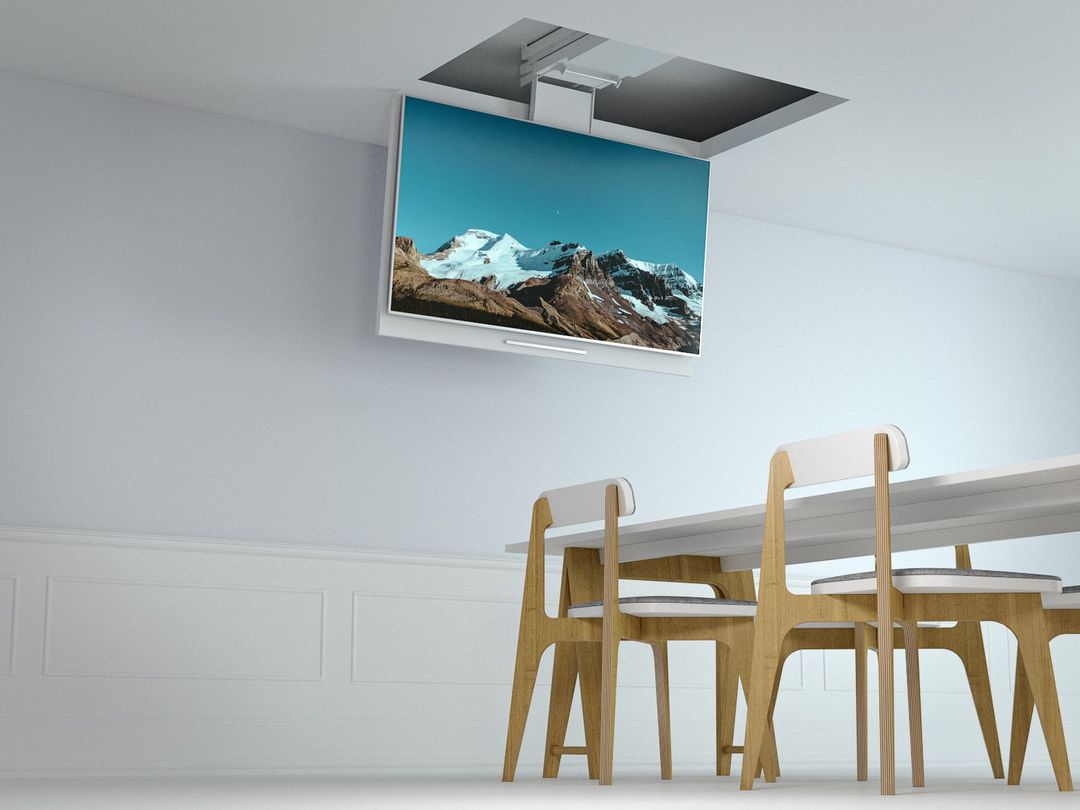
Multi Brakets M Motorized Ceiling mount Pro SD
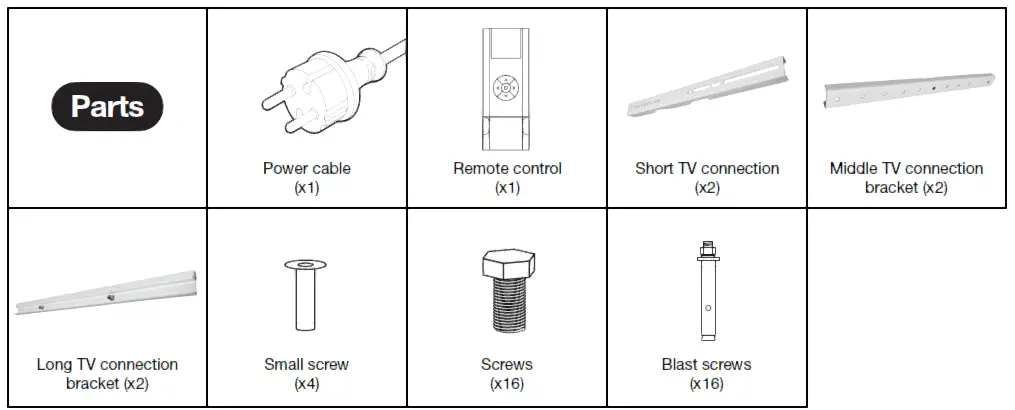
Parts
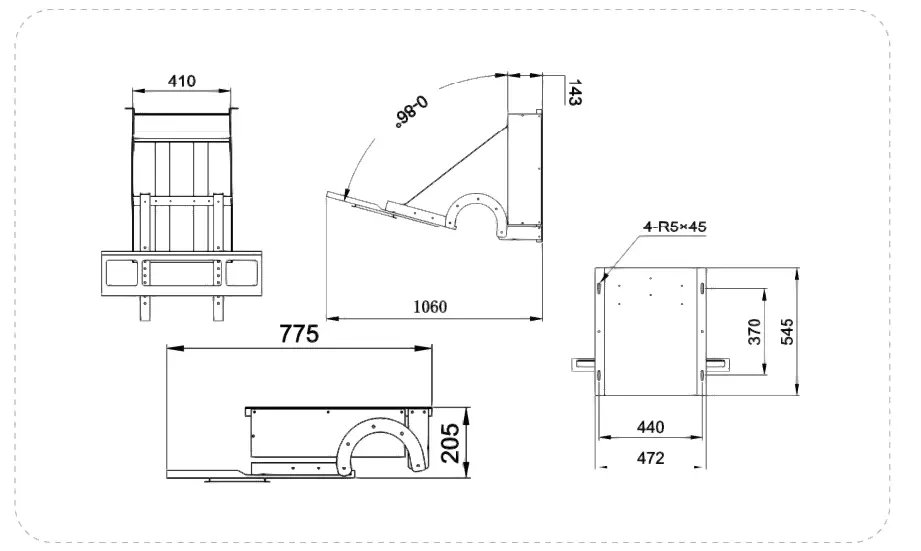
Product dimensions
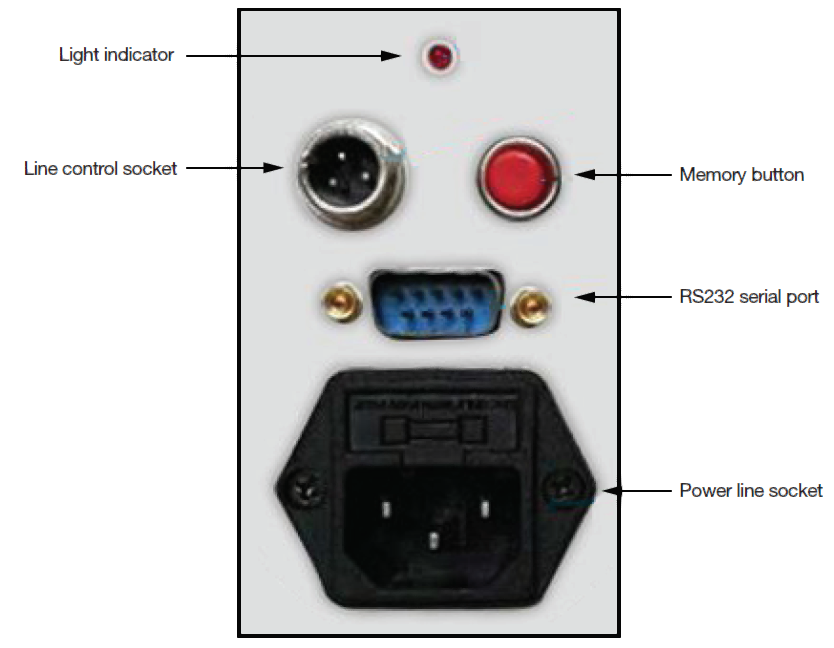
Connectivity
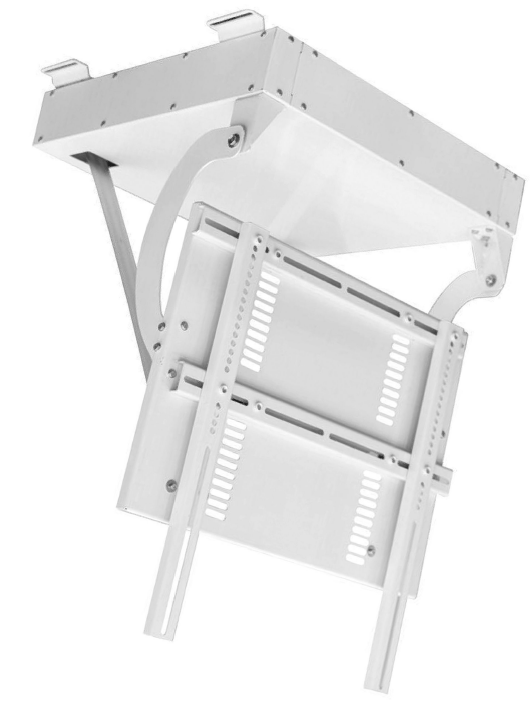
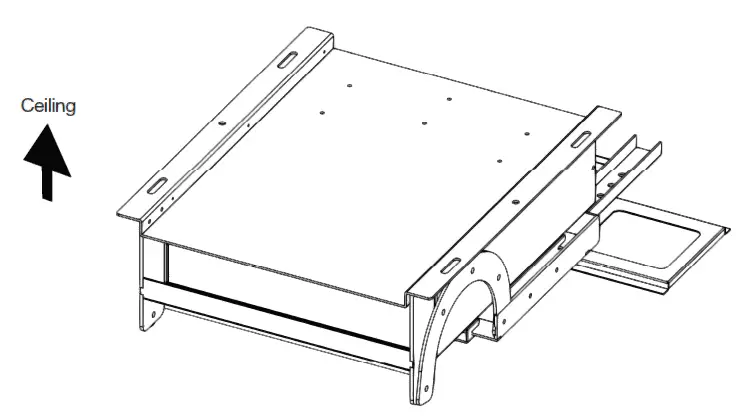
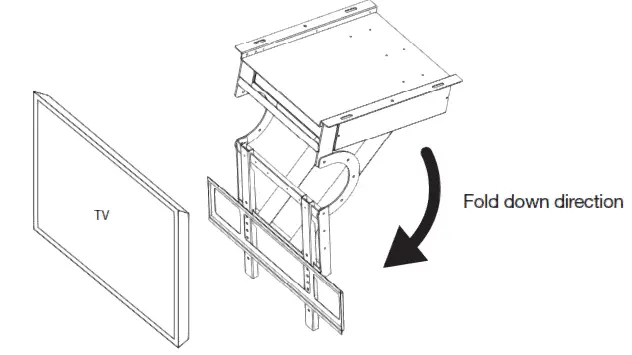
Product installation
- Always consult a professional installer when installing this item.
- Make sure there is space for the display in the area where the screen is moved up into ceiling position. Inspect the area and that there is no obstruction by pipes or other objects stopping the screen from moving into position.
- The ceiling opening size is generally required to be minimum equal to or greater than the size of the TV.
- It is recommended to reserve an inspection port in the ceiling for easy maintenance.
- IMPORTANT: During installation, there should be no people standing under the ceiling mount.
Overview
Remote control
Overview
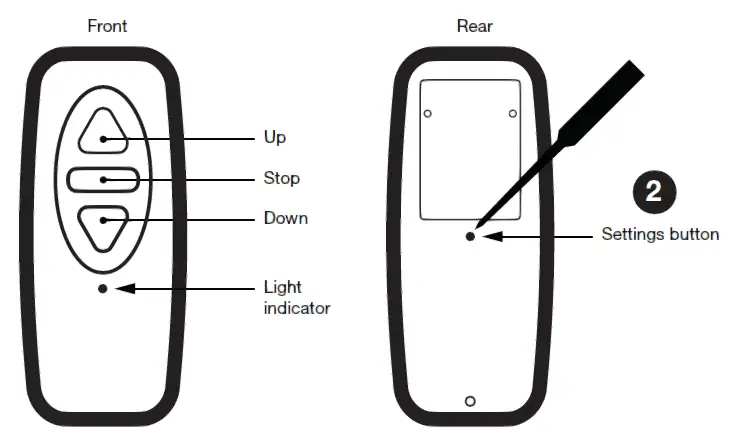
Code matching mode for ceiling mount & remote control
- First press the memory button on the panel, the indicator light starts to flash.
- Release the memory button (1), press the settings button (2) on the back of the remote control and hold it down. The light indicator stops flashing. This indicates that the code has been successfully written and the remote control can be used. If not, repeat the above steps and try a few more times.
Learn mode
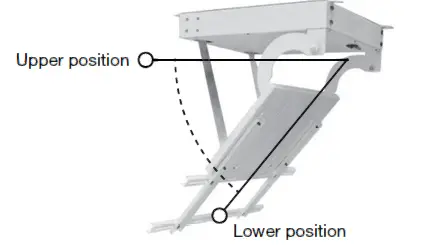
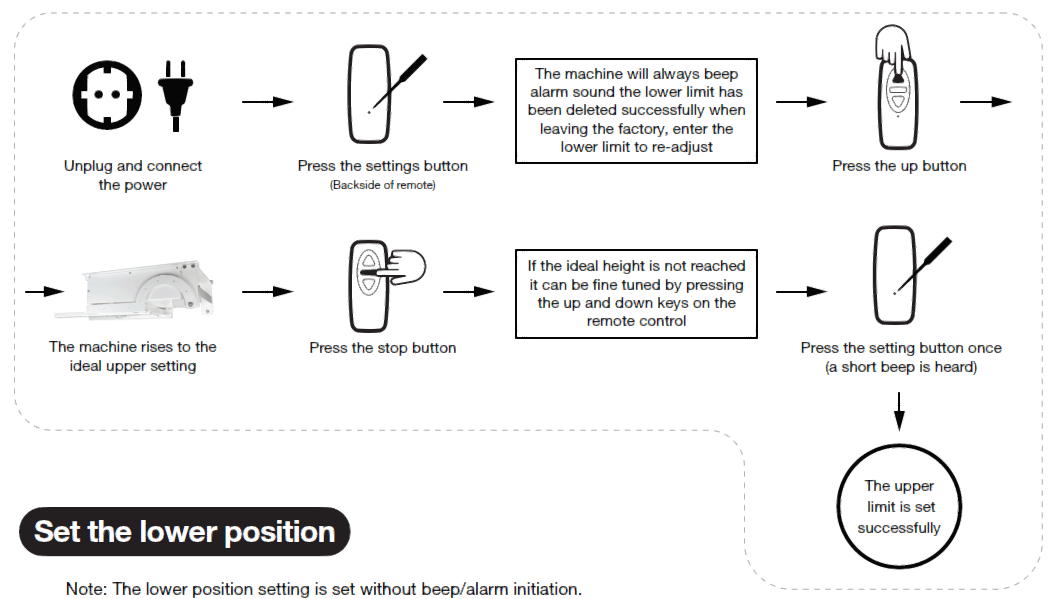
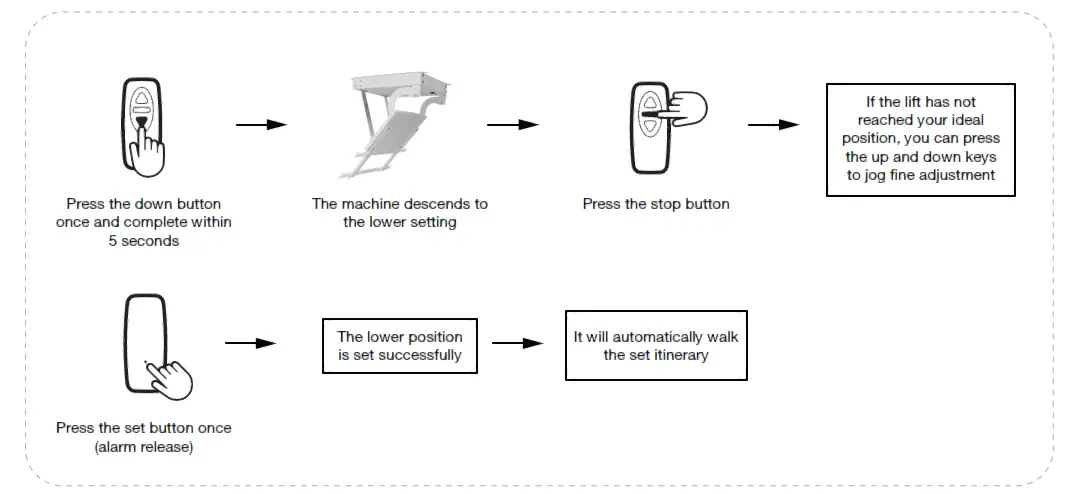
How to set upper and lower ideal position
Set the upper position
We recommend to set the upper position first, then the lower position. You can always restart the position setup process by unplugging the power and follow the steps below again.
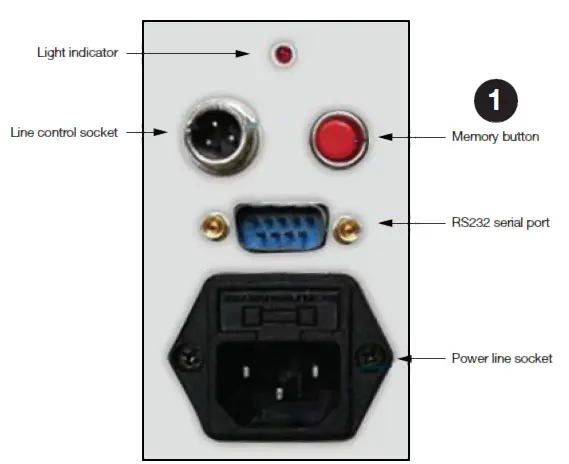
RS 232 OVERVIEW
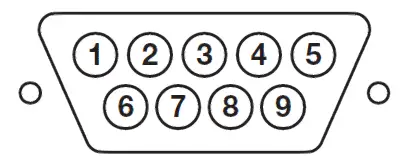
Center control wiring10 contact control (manual switch control, four -wire switch or three wire switch) DB9 Mother Head6-feet public 7-feet up 8-feet down 9-feet stop6 and 7, go up6 and 8, go down6 and 9, stopRS232 control (Machine Interface is DB9 mother head )
Serial Port setting:Baud rate 2400.Data bit :8check bit :NStop bit :1
Machine connection2 feet (signal reception) 5 feet (signal ground wire )
![]()
[xyz-ips snippet=”download-snippet”]