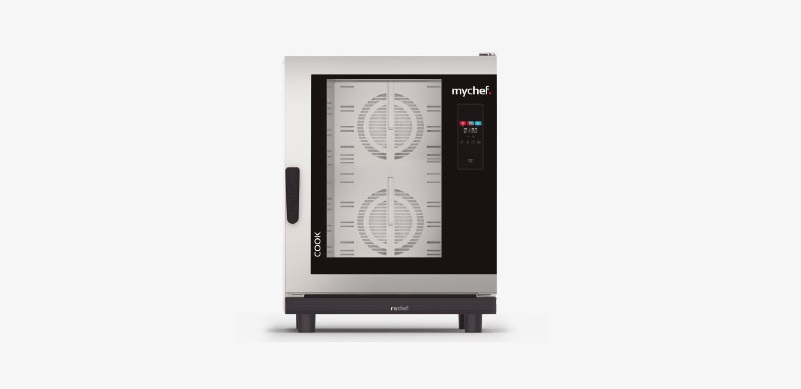
Cook UP 10 GN 1/1 Steam oven
COOKCOOK UP | COOK PROProduct ManualInstallation, use and maintenance
mychefcooking.com
PRODUCT MANUAL COOK UP | COOK PRO – DT.MP.CK.2102.2
1
INDEX1. INTRODUCTION ………………………………………………………………………………. 4 2. TECHNICAL CHARACTERISTICS …………………………………………………………. 52.1. Main characteristics Mychef Bake …………………………………………………………….. 5 3. GENERAL SAFETY AND ACCIDENT PREVENTION REGULATIONS ……………….. 63.1. Personnel responsible for using the equipment ……………………………………….. 6 3.2. Electrical hazard ………………………………………………………………………………………. 6 3.3. Thermal hazard………………………………………………………………………………………… 6 3.4. Corrosion hazard …………………………………………………………………………………….. 7 4. RECEPTION, TRANSPORT AND POSITIONING ……………………………………… 8 4.1. Reception ………………………………………………………………………………………………… 8 4.2. Transport…………………………………………………………………………………………………. 8 4.3. Positioning ………………………………………………………………………………………………. 9 5. INSTALLATION ………………………………………………………………………………. 11 5.1. Electrical connection ……………………………………………………………………………… 115.1.1. Three-phase connection 400V 3L+N ……………………………………………. 12 5.1.2. Three-phase connection 230V 3L ………………………………………………… 12 5.1.3. Single-phase connection 230V L+N …………………………………………….. 12 5.2. Water connection…………………………………………………………………………………… 13 5.2.1. Water input …………………………………………………………………………………. 13 5.2.2. Drain …………………………………………………………………………………………… 14 5.3. Vapour condensation hood ……………………………………………………………………. 15 6. USE……………………………………………………………………………………………….16 6.1. Control Panel …………………………………………………………………………………………. 16 6.1.1. Switching on the equipment………………………………………………………… 21 6.1.2. Cooking modes …………………………………………………………………………… 21 6.1.3. Cooking control…………………………………………………………………………… 23 6.1.4. Start of the cooking cycle …………………………………………………………….. 25 6.1.5. End of cycle…………………………………………………………………………………. 26 6.1.6. Speed selection …………………………………………………………………………… 26 6.1.7. Automatic cleaning ……………………………………………………………………… 27 6.2. NightWatch……………………………………………………………………………………………. 30 6.3. Errors and alarms …………………………………………………………………………………… 31
mychefcooking.com
PRODUCT MANUAL COOK UP | COOK PRO – DT.MP.CK.2102.2
2
7. REMOTE CONTROL USE…………………………………………………………………..33 7.1. Remote control setup …………………………………………………………………………….. 33 7.1.1. Creating a new user …………………………………………………………………….. 33 7.1.2. Wi-Fi connectivity ………………………………………………………………………… 34 7.1.3. Linking the oven to the device (mobile phone, tablet or computer) 36 7.1.4. Control panel ………………………………………………………………………………. 37 7.2. Google home setup and voice assistant …………………………………………………. 40 7.2.1. Synchronizing oven to Google Home…………………………………………… 40 7.2.2. Voice commands for oven control ……………………………………………….. 44 7.2.3. Adding automated routines…………………………………………………………. 45 7.3. Support functions…………………………………………………………………………………… 49 7.3.1. Reset Wi-Fi settings……………………………………………………………………… 49 7.3.2. Show MAC address……………………………………………………………………… 49 7.3.3. Unlink the “Mychef Control” service …………………………………………….. 49 7.3.4. Desktop application for intelligent control …………………………………… 50 7.4. Table of states ……………………………………………………………………………………….. 51 7.5. Recipes ………………………………………………………………………………………………….. 518. MAINTENANCE ……………………………………………………………………………… 52 8.1. Cleaning ………………………………………………………………………………………………… 52 8.1.1. MyCare ……………………………………………………………………………………….. 52 8.1.2. Suction………………………………………………………………………………………… 53 8.1.3. Door gasket ………………………………………………………………………………… 53 8.1.4. Outer housing……………………………………………………………………………… 54 8.1.5. Control panel ………………………………………………………………………………. 54 8.1.6. Front water drain …………………………………………………………………………. 54 8.1.7. Interior/exterior door compartment …………………………………………….. 54 8.2. Preventive maintenance …………………………………………………………………………. 56
mychefcooking.com
PRODUCT MANUAL COOK UP | COOK PRO – DT.MP.CK.2102.2
3
1. INTRODUCTIONThis manual has been carefully prepared and reviewed to provide reliable information and assistance for proper installation, use, and maintenance that will ensure proper operation and prolong the life of the oven. This manual is divided into three parts, the first part dedicated to the installation of the equipment at the working point, and the second part focused on the use and the third part in the cleaning and maintenance of the oven.Before any intervention or use of the equipment, it is necessary to read this manual carefully and completely.The manufacturer declines all implicit or explicit responsibility for any errors or omissions it may contain.– The oven may not be used by personnel who have not received any kind of training, and who do not have the necessary skills or experience for the proper functioning of the equipment. Do not let children use or play with the equipment.– The owner of the equipment is obliged to have this manual read by personnel responsible for its use and maintenance and to keep this manual in a safe place for use by all users of the equipment and for future reference. If the equipment is sold to others, they must be given this manual.– This oven must only be used for its intended purpose, i.e., cooking, heating, regenerating or dehydrating food. Any other use can be dangerous and can result in personal injury and property damage.– The equipment is shipped from the factory once it has been calibrated and has passed rigorous quality and safety tests that ensure its correct operation.The manufacturer will disclaim any responsibility for problems caused by improper installation, modification, use or maintenance.
mychefcooking.com
PRODUCT MANUAL COOK UP | COOK PRO – DT.MP.CK.2102.2
4
2. TECHNICAL CHARACTERISTICS
2.1. Main characteristics Mychef Cook
Exterior dimensions (Width x Depth x Height) (mm)CapacityDistance between guides (mm)
COOK 4 GN 1/1 760x785x7504 600×400 85
COOK 6 GN 1/1 760x785x8656 600×400 85
COOK 10 GN 1/1 760x785x115510 600×400 85
Meals/day
35-90
40-110
80-160
Table 1. Main characteristics of Mychef Cook ovens
The maximum recommended food load per GN 1/1 tray of 65mm is 5 Kg.
mychefcooking.com
PRODUCT MANUAL COOK UP | COOK PRO – DT.MP.CK.2102.2
5
3. GENERAL SAFETY AND ACCIDENT PREVENTION REGULATIONS3.1. Personnel responsible for using the equipmentThe use of the equipment is reserved for trained personnel.Personnel who perform any action on the oven, such as operation, cleaning, installation, handling, etc., must be familiar with the safety regulations and the Operating Instructions.Do not allow unauthorized personnel to use, handle or clean the equipment.3.2. Electrical hazardWork on the electrical supply side and access to live parts may only be carried out by qualified personnel under their own responsibility. In any case, such access must be made with the equipment disconnected from the power supply. If the appliance is placed on a cart or on tables that have some mobility, do not allow it to move while connected to the power supply to avoid possible damage to wiring, drainage pipes or water inlets. If the equipment is to be moved or repositioned, the cables and the drainage and water intake pipes must be disconnected.3.3. Thermal hazardWhen the equipment is in operation, the door should be opened slowly and carefully to avoid possible burns from steam or hot air that may escape from inside the cooking chamber.Keep the ventilation openings free of obstacles. Do not install the equipment in the vicinity of flammable products. Avoid positioning the oven near heat sources such as stoves, grills, fryers, etc. Check the safety distances in chapter Positioning.DANGER OF ACCIDENT! Be careful when using food containers in the oven when the top tray is 160 cm or more high. There is a risk of injury caused by the hot contents of the trays.While the oven is in operation, avoid touching metal parts and the door glass as they may exceed 60°C. Touch only the handle and the control panel.
mychefcooking.com
PRODUCT MANUAL COOK UP | COOK PRO – DT.MP.CK.2102.2
6
3.4. Corrosion hazardWhen using cleaning products, special attention and appropriate safety measures should be taken when handling these products. Always read the safety data sheet for the different chemicals before use and follow the instructions for use. These products in contact with any part of the body are abrasive and can cause skin and eye irritations and causticity.During cleaning of the oven and in the event of aerosols or mist forming when handling cleaning products, wear a mask with a P2 / P3 type particle filter, goggles for protection against splashes and/or splashes and chemical protection gloves.MyCare CleanDuo and DA21 cleaning products have been specially formulated for the correct cleaning and protection of Mychef ovens with automatic washing. The product contains, in addition to detergent, polish for a perfect finish. The use of this detergent is mandatory in the Mychef Cook ovens.Use CleanDuo in the Mychef Cook ovens equipped with the automatic washing system. The use of other products will void the warranty.
mychefcooking.com
PRODUCT MANUAL COOK UP | COOK PRO – DT.MP.CK.2102.2
7
4. RECEPTION, TRANSPORT AND POSITIONINGBefore carrying out the installation, the dimensions of the site where the equipment is to be placed and the electrical and water connections must be verified and seen to be within the parameters detailed in section 4.3.4.1. ReceptionOnce the oven has been received, check that the model purchased corresponds to the order. Check that the packaging has not been damaged during transport and that no parts of the equipment are missing. If you detect any anomaly or problem, contact your dealer immediately.4.2. TransportThe equipment should be transported in its original packaging to the closest location to the point of installation to avoid damage as much as possible. It is recommended to keep the original packaging until the equipment is properly installed and in operation. To move the equipment and place it in your workspace, the following observations should be taken into account:– The measurements of the different models to pass through narrow places (corridors, doors, narrow spaces). See chapter 2.– The handling must be done with the necessary personnel to move the load of the furniture taking into account the current occupational safety regulations at the place of installation.– The oven must always be in an upright position during transport. It must be lifted perpendicularly to the ground and transported parallel to it.– Make sure that during transport it does not tip over and is not hit by any object.Be careful with the legs and the siphon when positioning the oven on the final location.
mychefcooking.com
PRODUCT MANUAL COOK UP | COOK PRO – DT.MP.CK.2102.2
8
4.3. Positioning– Place the oven at a comfortable distance from the wall so that the electrical and water connections can be made. There must be a minimum clearance from the oven parts to allow for proper ventilation and cooling. This minimum distance is:o 50mm on the left and right sides o 50mm from the back o 500mm from the top– The equipment should be placed on a Mychef support table or wall mount.– If there are sources of heat or steam near the equipment (stove, grill, iron, deep fryer, pasta cooker, kettle, tilting frying pan etc.), these must be at a distance of more than 1 metre.– Check that the oven is not exposed to hot air or vapours in the areas where the cooling fans are located (front right and rear left).
Figure 1. Suction areas for cooling– Once it is placed in the workspace, check that it is level.
mychefcooking.com
PRODUCT MANUAL COOK UP | COOK PRO – DT.MP.CK.2102.2
9
50mm
500m
50mm
50mm
1000mm
Figure 2. Example of a suitable location for installationBe extremely careful with the cooling areas of the oven. If it sucks in vapours or hot air it can drastically reduce the life span of the components. For the installation of Mychef stacked ovens, follow the instructions supplied with the corresponding stacking kit.
mychefcooking.com
PRODUCT MANUAL COOK UP | COOK PRO – DT.MP.CK.2102.2
10
5. INSTALLATION
5.1. Electrical connection
Check that the voltage reaching the point where the oven is to be switched on corresponds to the operating voltage of the equipment.
The following table indicates the electrical characteristics of each oven:
4 GN 1/1 6 GN 1/1 10 GN 1/1
Voltage
Power (kW)
Rated current (A)
Cross-section cable (mm2)
400/3L+N/50-60
6.3
10
1.5
230/3L/50-60
6.3
17
2.5
230/L+N/50-60
6.3
27
4.0
400/3L+N/50-60
9.3
14
1.5
230/3L/50-60
9.3
25
2.5
400/3L+N/50-60
18.6
29
4.0
230/3L/50-60
18.6
50
10.0
Table 2. Electrical connection characteristics
Before carrying out any electrical work, make sure that no electrical current is supplied at the point of connection of the equipment.
The device must be connected to the mains via an all-pole switch with a contact opening distance of more than 3mm. Also install a class A differential device and an overcurrent protection.
Always ensure effective grounding.
Connect the equipment to an equipotential bonding system using the contact specially provided for this purpose (see equipotential bonding sign on the bottom left of the equipment). If two pieces of equipment are stacked, both must be connected to the equipotentiality system.
The connection to an equipotential system guarantees additional safety in case of simultaneous earth leakage and differential failure.
The wiring and other safety devices used for the electrical installation must have the appropriate section for the equipment in question.
In any case, respect the regulations in force for the connection of the equipment to the low voltage network.
mychefcooking.com
PRODUCT MANUAL COOK UP | COOK PRO – DT.MP.CK.2102.2
11
Before starting the electrical installation, check that the electrical requirements of the oven and the power supply are the same.Never connect a phase to neutral or ground. Check that the installation voltages correspond to those of the equipment.
The following subchapters show the three possible types of connections for Mychef ovens. The voltage of each oven can be found on its identification sticker.
5.1.1. Three-phase connection 400V 3L+N
Color
Cable
Brown
L1
Black
L2
Grey
L3
Blue
Neutral
Green-yellow
Grounding
Table 3. Three-phase cable 400V 3L+N
5.1.2. Three-phase connection 230V 3L
Color
Cable
Brown
L1
Black
L2
Grey
L3
Green-yellow
Grounding
Table 4. Three-phase cable 230V 3L
5.1.3. Single-phase connection 230V L+N
Color
Cable
Brown
L1
Blue
Neutral
Green-yellow
Grounding
Table 5. Single-phase connection 230V L+N
mychefcooking.com
PRODUCT MANUAL COOK UP | COOK PRO – DT.MP.CK.2102.2
12
5.2. Water connection5.2.1. Water inputCold water (max. 30°C) ¾ inch 150 to 400 kPa dynamic flow pressure. Drinking quality water with the following characteristics:– Hardness between 3º and 6º FH – PH between 6.5 and 8.5 – Chlorides (Cl-) less than 30 mg/L – Chlorine (Cl2) less than 0.2 mg/L – Iron (Fe) less than 0.1 mg/L – Manganese (Mn) less than 0.05 mg/L – Copper (Cu) less than 0.05 mg/L – Conductivity less than 20uS/cm Use of descaler and Mychef filter mandatory.The use of water with different characteristics than those indicated may cause serious problems in the components of the oven, such as corrosion in the cooking chamber or the glass, premature failure of the solenoid valves, etc.Periodically check the quality of the water in the oven.The oven has a water inlet ¾” at the back of the oven for steam generation and for selfcleaning processes.
Figure 3. Water intake
mychefcooking.com
PRODUCT MANUAL COOK UP | COOK PRO – DT.MP.CK.2102.2
13
In the case of a new installation, the water must be left to run until the connection is completely purified. This operation must be repeated each time work or repairs are carried out on the water system that feeds the oven.5.2.2. DrainFor the correct operation of the steam system of the Bake ovens, the equipment must be connected to a drainage system with a nominal diameter of 40mm (DN40) through a heatresistant pipe. The Mychef Cook Pro oven incorporates an internal system to block any odours that may come from the drain. The Mychef Cook Up does not incorporate an odour blocking system. It can be ordered as an accessory.
Figure 4. DrainageFor correct operation, bear in mind that the pipe must have a constant slope of at least 5º.The drain must be a maximum of 1 meter long, have a diameter greater than the drain connection and be free of bottlenecks.
mychefcooking.com
PRODUCT MANUAL COOK UP | COOK PRO – DT.MP.CK.2102.2
14
5.3. Vapour condensation hood Refer to the installation manual supplied with the fume hood for installation.The vapour condensation hood is an optional extra. The hood can be installed once the oven is installed.
mychefcooking.com
PRODUCT MANUAL COOK UP | COOK PRO – DT.MP.CK.2102.2
15
6. USE6.1. Control PanelThe figure below shows the control panel for the Mychef Cook ovens. It consists of a central screen with displays, indicators, and buttons.
Figure 5. Control panel
mychefcooking.com
PRODUCT MANUAL COOK UP | COOK PRO – DT.MP.CK.2102.2
16
The functionality of each of them is explained below:
A
C
E
B
D
G
H
F I
J
K
L
M
N
O
Figure 6. Control panel detail
mychefcooking.com
PRODUCT MANUAL COOK UP | COOK PRO – DT.MP.CK.2102.2
17
Block A B C D E F GHI J K L M NO
Function Convection button Convection mode indicator Mixed mode button Mixed mode indicator Steam button Steam mode indicatorDisplayAdjustment button –Adjustment button +Moisture button Temperature button Time button Fan speed button Self-cleaning CLEAN button
Description Convection mode selection button.Mark the chosen mode.Mixed mode selection button. Mark the chosen mode. Steam mode selection button. Mark the chosen mode. Displays the selected parameter: humidity, temperature, time, or fan speed. Decreases the selected parameter: humidity, temperature, time, or fan speed. Increases the selected parameter: humidity, temperature, time, or fan speed. Moisture selection button. Temperature selection button. Time selection button. Fan speed selection button.Button for selecting the self-cleaning program.Oven on/off and start/stop button.
START/STOP button
If the oven is on, but not cooking/washing, slight pressure will start the cooking/washing cycle.
If the oven is on and cooking/washing, slight pressure will cancel the cooking/washing cycle.Table 6. Control panel description
The central display is a very important part when interacting with the oven, since it indicates the value of each cooking parameter.
mychefcooking.com
PRODUCT MANUAL COOK UP | COOK PRO – DT.MP.CK.2102.2
18
Figure 7. Central screen
The parameter display format is explained below:Icon
Function
The moisture level is shown with an H in the first digit. The humidity value is shown next.
The chamber temperature is shown with a T in the first digit. The temperature value in degrees Celsius is shown next.The cooking time is shown with the two central points. The two digits on the left are the hours, and the two digits on the right are the minutes.Cooking can also be continuous. In this case, CONT appears on the display. For continuous cooking, press the adjustment key until CONT appears in the display.
The fan speed is shown with an F in the first digit. If the convection fan is on high speed, HI is displayed. Otherwise, if the convection fan is at a low speed, LO appears.
mychefcooking.com
PRODUCT MANUAL COOK UP | COOK PRO – DT.MP.CK.2102.2
19
If the self-cleaning button is pressed, the central display will show the message CLN. However, if the temperature in the cooking chamber is too high to perform the self-cleaning process, the message COOL is displayed, indicating that cooling of the chamber must be performed prior to selfcleaning. To start both self-cleaning and cooling, press START/STOP.This icon indicates that a cooking or cleaning process has been completed.The DOOR message appears when the door is opened during a cooking or cleaning process.The PREHEAT message is displayed during the oven preheating processes, alternatively with the current oven chamber temperature.The LOAD message indicates that the oven has reached preheat temperature and the oven is ready to charge. By closing the door, the cooking cycle will start.In the case of an error, the first two digits of the display show ER, followed by the error number. Refer to the chapter on errors for more information.It is possible to change the operating parameters of the oven. In the parameter edit menu, the central display shows a P, followed by the parameter number. The two digits on the right show the value of the parameter. Refer to the chapter on the configuration menu for more information. Table 7. Description of messages on the central screen
mychefcooking.com
PRODUCT MANUAL COOK UP | COOK PRO – DT.MP.CK.2102.2
20
6.1.1. Switching on the equipment The equipment is switched on or off by pressing the START/STOP button for two seconds.In order to protect the oven from possible overheating, some protective elements may work even when the oven is switched off. When the oven is at a safe temperature it will automatically turn off.If the equipment does not turn on, check the status of the safety thermostat and the service switch, located at the rear of the equipment.
Figure 8. Safety thermostat (A) and service switch (B)6.1.2. Cooking modes There are three cooking modes: convection, mixed and steam. To select a particular mode, tap on the corresponding button.
Figure 9. Cooking mode selectorThe convection mode acts as a forced convection oven without adding or removing moisture from the cooking chamber.
mychefcooking.com
PRODUCT MANUAL COOK UP | COOK PRO – DT.MP.CK.2102.2
21
The mixed convection mode allows to regulate, in an intelligent and controlled way by the oven, the elimination or contribution of humidity in the cooking chamber. To do this, press the humidity button and adjust with the +/- buttons to the desired value. This value is shown in the central indicator.
Figure 10. Humidity setting in mixed mode
The steam mode saturates the cooking chamber with moisture.
The table below summarizes the characteristics of each of them.
Mode
Icon
Temperature
Moisture
Convection
30ºC to 260ºC
0%
Mixed
30ºC to 260ºC
-99 to 100%, in jumps of 20%
Steam
30ºC to 130ºC
100%
Table 8. Cooking modes in Mychef ovensIn order to prolong the life of your oven, it may automatically reduce the maximum temperature of the cooking chamber.
mychefcooking.com
PRODUCT MANUAL COOK UP | COOK PRO – DT.MP.CK.2102.2
22
In all cooking modes it is possible to humidify the chamber at will. To do so, press the HUMIDITY button until the oven sprays water into the cooking chamber.6.1.3. Cooking controlTemperature and time-controlled cookingIn this mode the oven automatically brings the temperature in the chamber up to the value selected by the user so that when the door is opened and the food loaded, the temperature in the chamber will be the same as the one selected at the start of cooking. The oven automatically calculates the air temperature in the chamber and decides whether to heat it up to the value to be reached.In the temperature and time control mode with temperature setting we choose a certain temperature and time by adjusting with the +/- buttons after having pressed the TEMPERATURE and TIME buttons respectively.By pressing the START/STOP button, the oven will start to preheat the chamber and will stop when it has reached a level determined by the oven according to the temperature requested by the user. At this point the display will show “Pht” alternately with the temperature of the chamber.
Figure 11. Preheating indicatorThe preheating process can be skipped by slightly pressing the START/STOP key. When it has reached the set temperature, the oven will warn the user with a buzzer and indicate “Load”.
mychefcooking.com
PRODUCT MANUAL COOK UP | COOK PRO – DT.MP.CK.2102.2
23
Figure 12. Load indicatorOnce the oven is loaded and the door is closed, the cooking time will start to be deducted until it is finished. At this point, the time indicator will display the keyword “End”, the oven will beep for one second and the interior light will light up until the user finishes cooking by pressing the START/STOP button slightly. Example of cooking at 90º for 10 minutes:Figure 13. Example. Cooking at 90ºC for 10 minutes
mychefcooking.com
PRODUCT MANUAL COOK UP | COOK PRO – DT.MP.CK.2102.2
24
Figure 14. Oven temperature6.1.4. Start of the cooking cycleOnce the cooking parameters have been selected, either in manual mode or in a certain program, the process can be started. To do so, slightly press the START/STOP key to start preheating (see 6.1.3.1). If preheating is not necessary, the two central points will flash every second, indicating that the cooking process is underway. If a parameter other than time is selected on the display, the last point of this will flash to indicate that cooking is in progress.
Figure 15. Cooking indicatorIf the door is opened during cooking, the timer stops, and the following message is shown in the central display:
mychefcooking.com
PRODUCT MANUAL COOK UP | COOK PRO – DT.MP.CK.2102.2
25
Figure 16. Door open indicator6.1.5. End of cycleAt the end of a cooking cycle, the unit signals this status visually and acoustically. Specifically:– A beep is emitted. – The light in the oven chamber turns on. – The keyword END appears in the central display until the user finishes thecooking. Press START/STOP to end the cooking process.6.1.6. Speed selectionIn any cooking mode the user can select the speed of the convection fan that best suits his needs. To do so, press the fan speed button. Then select the appropriate speed with the +/buttons.
Figure 17. Maximum speed (HI) and reduced speed (LO)
mychefcooking.com
PRODUCT MANUAL COOK UP | COOK PRO – DT.MP.CK.2102.2
26
6.1.7. Automatic cleaningOnly available in models with MyCare self-cleaning system.Self-cleaning and rinsing programUsing the MyCare cleaning system allows for automatic cleaning of the cooking chamber and has a washing program specifically designed to use CleanDuo detergent. The special formulation of this product stands out for having twice the concentration of active product than most similar products available on the market. It also includes a polishing additive for a perfect all-in-one finish. This allows you to use only one CleanDuo tablet per wash, with the consequent savings and ease of use.Use CleanDuo in Cook ovens that are equipped with the automatic selfcleaning system. The use of other products will void the warranty.For the use of the cleaning processes and for the handling of the products used in the process, appropriate protections should be used. Never touch the detergent with your hands.
The time required to perform the self-cleaning program is listed in the table below:
Program
Description
Duration
CLN
ECO self-cleaning program
65 min
Table 9. Self-cleaning and rinsing program
Before starting any cleaning process, make sure that the water passage to the equipment is open.
Prior to the self-cleaning cycle, remove any solid food pieces/rests from the chamber by hand. Do not use the hand shower accessory to remove food residues from the cooking chamber, remove them first and prevent them from going down the drain. No trays or grids should be placed during the washing process. It should always be done without load, to ensure that the equipment is properly cleaned.The automatic cleaning cycle can then be started. To do this, select the cleaning program on the control panel by pressing the CLEAN button. The cleaning program appears on the central display.
mychefcooking.com
PRODUCT MANUAL COOK UP | COOK PRO – DT.MP.CK.2102.2
27
Figure 18. Self-cleaning programFast cooling Before placing the CleanDuo tablet, check that the temperature of the cooking chamber is not too high. If the oven is too hot, the central display will show that cooling is required.
Figure 19. Required temperature settingIn this mode the convection fan is turned on and the resistors are turned off. In this particular case, even if the oven door is opened the process will not stop and the fan will continue to rotate. In this way, and with the door open, the temperature of the chamber can be lowered in a few seconds. Once in this mode, the display alternately shows the temperature of the cooking chamber. To exit the fast cooling mode, briefly press START/STOP.Please note that in this mode the convection fan works with the door open. Take the appropriate precautions.Once the oven is at a low enough temperature, it will show that you can cancel the cooling process:
Figure 20. Cooling completed
mychefcooking.com
PRODUCT MANUAL COOK UP | COOK PRO – DT.MP.CK.2102.2
28
At this point it is important to stop the fan using the START/STOP button, open the door and insert the CleanDuo tablet into the dedicated place. Once entered, close the door again to start the cleaning program.Never place the detergent with the convection fan running.If cooling is not required, you can place the MyCare detergent directly in its allocated space, and start the cleaning or rinsing cycle by pressing the START/STOP key. Place as many tablets as there are holes in your oven.
Figure 21. CleanDuo holderBefore starting any cleaning process, check that no temperature adjustment of the cooking chamber is required.To introduce the CleanDuo tablet into the chamber it is essential to stop the fan. It is important not to introduce the CleanDuo while it is in operation in order to prevent the detergent from being dragged away by the air current which could endanger the health of the user.Once the automatic washing process has started, do not open the door under any circumstances, as chemicals used for cleaning may escape and come out as steam. This situation would entail a significant risk of corrosion and burns.
mychefcooking.com
PRODUCT MANUAL COOK UP | COOK PRO – DT.MP.CK.2102.2
29
Never open the oven door during an automatic cleaning process.The process can be stopped in an emergency with the START/STOP button.If the cleaning process has been stopped without automatic completion, it is mandatory to remove all undissolved detergent tablet pieces from the chamber before proceeding with the final rinse.If, at the end of any of the automatic cleaning processes, you find that there are still traces of detergent in the chamber (even behind the fan protection plate), run a self-cleaning program without detergent again or carry out a thorough manual rinse of the cooking chamber. If there is a power failure during the cleaning process, the oven will resume the cleaning process from the beginning. The oven will turn off automatically at the end of the cleaning process (only firmware 1.7 and higher).6.2. NightWatchNightWatch allows the oven to automatically continue a cooking process after a power failure. This functionality is especially useful for unattended cooking.This function will only continue with one cooking in the event of a power failure and subsequent recovery of the power supply.This function can be disabled by your dealer. Make sure that you fully understand the risks of its use.When a power failure and subsequent restoration of the power supply occur, the oven recovers the cooking in progress (if any) and continues it with the same parameters as before the power failure. In the event of a power failure during a wash, the oven starts the self-cleaning process from scratch.
mychefcooking.com
PRODUCT MANUAL COOK UP | COOK PRO – DT.MP.CK.2102.2
30
6.3. Errors and alarmsErrors and alarms can occur during the preparation and execution of cooking or washing processes. If this is the case, the central display will show the error or alarm code.
Figure 22. Error indicator
The table below shows the various errors and alarms, as well as possible solutions to them:
Error Internal definition
Clarification
0 NO ERROR
No error.
1
ERROR GENERAL PURPOSE INPUT
Reserved. Not used.
2 ERROR OVERTEMPERATURE
Reserved. Not used.
Overtemperature PCB. Check that the electronics’
3
ERROR OVERTEMPERATURE PCB
cooling fans are working properly, that there is enough space between the rear part and the wall,
and that the ambient temperature is not excessive.
4 ERROR COMMUNICATION
Inter-board communication not responding. Check the cable between the power board and the control board.
5 ERROR EEPROM
Processor communication and EEPROM not working. Check the control board.
6 ERROR MOTOR
Engine error. Check the motor wiring. Overtemperature in the engine. Engine nailed down.
7 ALARM WATER 8 ERROR WASHING
Reserved. Not used. Reserved. Not used.
9
ERROR PROBE1 TEMP SENSOR NOT CONNECTED
Reserved. Not used.
10
ERROR PROBE1 TEMP SENSOR SHORTED
Reserved. Not used.
11
ERROR PROBE2 TEMP SENSOR NOT CONNECTED
Reserved. Not used.
12
ERROR PROBE2 TEMP SENSOR SHORTED
Reserved. Not used.
13
ERROR PROBE3 TEMP SENSOR NOT CONNECTED
Reserved. Not used.
mychefcooking.com
PRODUCT MANUAL COOK UP | COOK PRO – DT.MP.CK.2102.2
31
14
ERROR PROBE3 TEMP SENSOR SHORTED
Reserved. Not used.
15
ERROR PROBE4 TEMP SENSOR NOT CONNECTED
Reserved. Not used.
16
ERROR PROBE4 TEMP SENSOR SHORTED
Reserved. Not used.
17
ERROR PROBE5 TEMP SENSOR NOT CONNECTED
Reserved. Not used.
18
ERROR PROBE5 TEMP SENSOR SHORTED
Reserved. Not used.
19
ERROR PROBE6 TEMP SENSOR NOT CONNECTED
Reserved. Not used.
20
ERROR PROBE6 TEMP SENSOR SHORTED
Reserved. Not used.
21
ERROR PROBE7 TEMP SENSOR NOT CONNECTED
Reserved. Not used.
22
ERROR PROBE7 TEMP SENSOR SHORTED
Reserved. Not used.
23
ERROR PROBE8 TEMP SENSOR NOT CONNECTED
Probe camera not connected. Check the probe and wiring.
24
ERROR PROBE8 TEMP SENSOR SHORTED
Probe camera short circuited. Check the probe and wiring.
25
ERROR PROGRAM NOT TERMINATED
Reserved. Not used.
26
ERROR CLEANING PROGRAM NOT TERMINATED
Reserved. Not used.
27
ERROR CLEANING TEMPERATURE TOO HOT
Reserved. Not used.
28
ALARM RECOVERY TEMP TOO LOW
Reserved. Not used.
29 ERROR INVERTER
Reserved. Not used.
Table 10. Errors, alarms and possible solutions
mychefcooking.com
PRODUCT MANUAL COOK UP | COOK PRO – DT.MP.CK.2102.2
32
7. REMOTE CONTROL USE7.1. Remote control setup7.1.1. Creating a new userThe first step to configure the remote control is to create a user, with which the different ovens to be controlled will be linked later. Create a user through the following link or QR code: https://mychef-432df.firebaseapp.com/1
Figure 23. Authentication panel
Figure 24. New user creation form
Once in the authentication panel, select “Create account” to create a new user account.Note: the password must contain at least 6 characters.To link a device (mobile phone, tablet or computer) it is first necessary to set up a Wi-Fi connection in the oven. The following section (7.1.2 Wi-Fi connectivity) explains in detail how to set up this configuration.
1 It is recommended to use the Google Chrome browser for better performance.
mychefcooking.com
PRODUCT MANUAL COOK UP | COOK PRO – DT.MP.CK.2102.2
33
This web address has the functionality to send notifications when the cooking of the different linked ovens is finished, so that, if you want to enjoy this service, you have to give permission for the sending of pop-ups from this address.7.1.2. Wi-Fi connectivity2Once the oven is connected to the power outlet, it can be viewed as a Wi-Fi network from any device (mobile phone, tablet or computer). The Wi-Fi network will appear with the name “Mychef” followed by a number in parentheses (the MAC address of the device).
Figure 25. Access point of the oven from WindowsThen, this Wi-Fi network will be selected on the device with which we want to link the oven. After selecting the Wi-Fi network, enter the code or password given by Mychef and wait for a configuration web portal3 to open automatically.
In this configuration web portal, you will enter the data of your usual Wi-Fi network and the one you want to connect the oven to the internet (SSID).
2 You can reset your Wi-Fi network settings at any time. See section 7.3.1.3 If the configuration portal does not open automatically, open a web browser (Google Chrome is recommended) from a device connected to the Wi-Fi network and enter the following IP address in the browser: 192.168.4.1.
mychefcooking.com
PRODUCT MANUAL COOK UP | COOK PRO – DT.MP.CK.2102.2
34
In the field “Mychef login email” you must enter the username that was created previously 4 ( 7.1.1 Creating a new user).It is important to write down the MAC address 5 that appears in the different points of the configuration, since this is unique for each device and will be necessary to link the equipment to the remote control. We recommend copying the number after the title “MAC Address:” so you can paste it later.
Figure 26. The Wi-Fi network settings screen from different devices
Once all the fields have been completed, you should select the “Save” button to save the changes and start the connection.
4 If for any reason an invalid user is entered, it is possible to reset this configuration. See section 7.3.1.5 If the MAC address of the equipment has not been noted, it can be displayed in the control panel of the oven once the Wi-Fi network has been set up. See section 7.3.2.
mychefcooking.com
PRODUCT MANUAL COOK UP | COOK PRO – DT.MP.CK.2102.2
35
It is important that you connect to a Wi-Fi network with a 2.4GHz frequency band, as 5GHz networks are not compatible with Smart Control functionality.Once the Wi-Fi network is configured, it is important to wait a few minutes until the Wi-Fi network disappears (Mychef + MAC address), if this does not happen it means that the configuration data entered to authenticate the Wi-Fi network is not correct, then the process must be started again.7.1.3. Linking the oven to the device (mobile phone, tablet or computer) Once an Internet connection6 has been established, the Wi-Fi network will no longer be visible. The next step will be to link our oven to the remote control. To do so, visit the following web address: https://mychef-432df.firebaseapp.com/ or code QR, log in with the user created in section 7.1.1 and linked to the oven in section 7.1.2.If this is the first time you are linking a device, you will see the button combination shown in Figure 27. To add a new device, select the “Add new device” button and fill in the form in Figure 28 with a name for the device (which will serve to identify it) and the MAC address 7 of the oven that we have previously copied. Finally, we select the “Add device” button at the end of the form to add the remote control of the oven to our device (mobile phone, tablet or computer).
6 See section 7.1.2 to configure the Internet connection.7 The MAC address consists of six two-character blocks that can be either a number from 0 to 9 or a letter from A to F. If the MAC address of the equipment has not been noted, it can be displayed on the control panel of the oven. See section 7.3.2.
mychefcooking.com
PRODUCT MANUAL COOK UP | COOK PRO – DT.MP.CK.2102.2
36
Figure 27. Session started without any linked device
Figure 28. Form for adding a new device
If all
the previous steps have been carried out correctly, the control panel of the oven will appear
with the different buttons and text boxes to display and change the different parameters
that are configured in the linked equipment, as well as the actual values of temperature,
humidity and cooking time.
It should be noted that when the user makes a change in this control system there is a delay between the database being updated and the change being sent to the equipment.
7.1.4. Control panel In the Figure 29 shows the control panel for the ovens linked to the user account. The functionality of each panel element is explained below.
mychefcooking.com
PRODUCT MANUAL COOK UP | COOK PRO – DT.MP.CK.2102.2
37
Figure 29. Control panel detail
mychefcooking.com
PRODUCT MANUAL COOK UP | COOK PRO – DT.MP.CK.2102.2
38
Block A B C D E F GHIJ K L M N O P Q RS
Function
Description
Device selection box
In this selection box, a list of all devices linked to the user account will appear.
On/Off button
Equipment on/off button.
Start/Stop button
On/off and start/stop button for the oven.
Door status indicator
Indicates whether the door is open or closed.
Equipment status indicator
Indicates the different states of the equipment, see section 7.4.
Wi-Fi indicator
Indicates by a percentage the strength of the Wi-Fi signal.
Input/indicator target temperature of the oven (Set Point)
Allows you to enter the desired temperature value in the range [30,300] ºC for manual cooking or indicates the target temperature value for a given recipe.
Input/target moisture indicator of the oven (Set Point)
Allows you to enter the desired moisture value in the range [-100,100] % for manual cooking or indicates the target moisture value for a given recipe.
Input/indicator target cooking time of the oven (Set Point)
Allows you to enter the desired cooking time value in the range [0-5940] minutes for manual cooking or indicates the target cooking time value for a given recipe.
Real oven temperature indicator (Real Point)
Indicates the real time temperature value of the oven’s cooking chamber.
Real oven humidity indicator (Real Point)
Indicates the real time humidity value of the oven cooking chamber.
Real oven cooking time indicator (Real Point)
Indicates the value of the cooking time that has passed since the start of the cooking process.
Fan speed button
Fan speed selection button, can be low speed (Slow) or high speed (Fast
Recipe selection box
A list of all recipes entered by the user will appear in this selection box.
“Add Recipe” button
Button to add a new recipe to the user’s recipe list. See section 7.5.
“Edit Recipe” button
Button for editing the cooking parameters of the recipe selected in the “recipe selection box” (N). See section7.5.
“Send recipe” button
Sends the cooking parameters of the recipe selected in the “recipe selection box” (N).
“Delete recipe” button
Removes the recipe selected in the “recipe selection box” (N).
“More information” button
It opens a window with information about the equipment: the user linked to the equipment, the minutes of operation of the oven and the temperatures of the electronics of the equipment.
mychefcooking.com
PRODUCT MANUAL COOK UP | COOK PRO – DT.MP.CK.2102.2
39
T
“Add New Device” button Allows you to link a new unit. See section 7.1.3.
U
“Delete device” button
Allows you to remove a device from the list of linked devices.
V
“Logout” button
Log out and redirect the page to the authentication panel.
W
“Delete account” button Once all the ovens are deleted, delete the user account.
Table 11. Control panel description
7.2. Google home setup and voice assistant87.2.1. Synchronizing oven to Google HomeThe first step to be able to use the Google Home functionality and control our ovens using the Voice Assistant is to sign in with a Google account on our mobile device and download the Google Home and Google Assistant application.
Figure 30. Google applications requiredOnce the two applications are installed, we start Google Home and follow the next steps: 1. On the app’s Home screen, select Add “+” and then “Set up device”.
8 Mychef’s Intelligent Voice Control is currently only available in English, so you need to change the language of the mobile device you are using to English to enjoy the full functionality.
mychefcooking.com
PRODUCT MANUAL COOK UP | COOK PRO – DT.MP.CK.2102.2
40
Figure 31. Google Home application captures steps to be followed2. Select the option “Work with Google” and then search the list of suppliers for the “Mychef Control” service.
Figure 32. Google Home application captures steps to be followed3. Finally, the user will be redirected to the authentication server page to log in with the user and password created in section 7.1.1. It will wait for the authentication to be validated and then all the devices created in the control web application will be synchronized.
mychefcooking.com
PRODUCT MANUAL COOK UP | COOK PRO – DT.MP.CK.2102.2
41
It is possible that in some cases the server is busy or that a message appears informing that the synchronization could not be carried out, the message should be omitted if the linked ovens appear on the start screen. If they do not appear, repeat all the steps in this section.Whenever you add or remove an oven in the control web application, the Google Home startup screen will automatically update with the new devices, otherwise you need to unlink your account from the Mychef Control9 service and repeat the steps in this section to make the devices appear or disappear on the Google Home startup screen.
Figure 33. Authentication server screen and messages that appear while validating and synchronizing information
9 See section 7.3.3.
mychefcooking.com
PRODUCT MANUAL COOK UP | COOK PRO – DT.MP.CK.2102.2
42
Figure 34. Google Home screen where all the ovens linked to the user’s account will appear, along with all the smart devices that the user has associated with his Google account
mychefcooking.com
PRODUCT MANUAL COOK UP | COOK PRO – DT.MP.CK.2102.2
43
7.2.2. Voice commands for oven control10
ON/OFF:
– Turn on Mychef. – Turn off Mychef. – Turn on [all] ovens. START/STOP:
– Is Mychef on? – Is Mychef off? – Turn off [all] ovens.
– Start Mychef. – Stop Mychef. – Stop [all] ovens. TEMPERATURE CONTROL: (X = [30-300])
– Run Mychef. – Start [all] ovens.
– Set Mychef temperature to X.
– Set Mychef to X.
– What is Mychef temperature?
– What temperature is Mychef set to?
– Set [all] ovens temperature to X.
– What is ovens temperature?
HUMIDITY CONTROL: (X = [High, Medium, Low])
– Set Mychef mode to Humidity X.
– Set Mychef to Humidity X mode.
– What mode is Mychef set?
– Is Mychef humidity X mode set?
– Set [all] ovens mode to Humidity X.
TIME CONTROL: (X = [0-99 hours, 0-5940 minutes, 0-356400 seconds])
– Run Mychef for X. – Start Mychef for X. – Cancel Mychef timer. – Increase Mychef timer X. FAN CONTROL: (X = [High,Low])
– Set Mychef timer to X. – How many minutes are left on Mychef? – How many minutes are left on ovens?– Decrease Mychef timer X.
– Set Mychef fan speed to X.
– Set Mychef speed to X.
– What fan speed is Mychef set to?
– What is Mychef speed?
– Set ovens speed to X.
– What is ovens speed?
Table 12. Different voice commands compatible with the intelligent control
10 The word “Mychef” appears in these commands to refer to the oven in question, but this word can be replaced by the name you want to give the oven once it is added to the web control.
mychefcooking.com
PRODUCT MANUAL COOK UP | COOK PRO – DT.MP.CK.2102.2
44
From the Google Home application’s start screen, pressing the microphone icon, saying “OK Google” or “Hey Google”, will open the Google Assistant which will listen to the voice command the user says and if it is correctly understood as an oven control command, will perform the action requested or inform about the parameters asked.You can also do this directly from the Google Assistant application or through any device that supports the Google Assistant such as a Google Home speaker.
Figure 35. Different voice commands understood and executed by the Assistant7.2.3. Adding automated routinesIt is also possible to add routines to Google Home, so that different actions are executed with a single voice command. Below is an example where just by saying “Cook Pizza”, Google Home will execute all the necessary commands to turn on the oven, set the desired temperature, humidity and cooking time and finally start a bake with these parameters.1. Go to settings in Google Assistant and select the “Routines” icon.
mychefcooking.com
PRODUCT MANUAL COOK UP | COOK PRO – DT.MP.CK.2102.2
45
Figure 36. Google Assistant application capture2. Then manage routines and press the add icon (+).
Figure 37. Google Assistant Routines capture
mychefcooking.com
PRODUCT MANUAL COOK UP | COOK PRO – DT.MP.CK.2102.2
46
3. In adding commands, the desired voice command will be written to execute the routine, in this example it will be “Cook Pizza”.4. Finally, under “Add action”, all commands of section 7.2.2 that you want the oven to perform in this routine are added. For this example, they will be as follows11: – Turn Mychef on. – Set Mychef temperature to 260. – Set Mychef mode to Humidity Low. – Start Mychef for 17 minutes. – Start Mychef.Figure 38. Routine configuration in the Google Assistant application
11 The word “Mychef” appears in these commands to refer to the oven in question, but this word can be replaced by the name you want to give the oven once it is added to the web control.
mychefcooking.com
PRODUCT MANUAL COOK UP | COOK PRO – DT.MP.CK.2102.2
47
Figure 39. Executing the configured routine by voice command in the GoogleAssistant application
mychefcooking.com
PRODUCT MANUAL COOK UP | COOK PRO – DT.MP.CK.2102.2
48
7.3. Support functions7.3.1. Reset Wi-Fi settingsIt is possible to remove the Wi-Fi network settings as well as the user to which the oven is linked as follows:· Turn off the oven by pressing and holding the START/STOP button. · Once off, press and hold the fan icon on the front panel until you hear a “Click”. · See if the device’s Wi-Fi Access Point appears, if not, repeat these actions again.7.3.2. Show MAC addressYou can view the MAC address of your device once you have set up a Wi-Fi connection to your computer as follows:· Turn off the oven by pressing and holding the START/STOP button. · Once off, press and hold the temperature icon on the front panel until you hear a“Click”. · The central display will show the digits of the MAC address in pairs in an orderlyfashion.If the Wi-Fi connection to your computer has not yet been set up, the MAC address can be seen in the name of the Wi-Fi access point.127.3.3. Unlink the “Mychef Control” serviceTo unlink the Google account to the “Mychef Control” service, follow the steps in section 7.2.1 until the list of service providers appears, this screen will show that we are linked to the “Mychef Control” service with the number of devices synchronized. If you want to unlink the account, just select the linked account and choose “unlink”.
Figure 40. Last window concerning the steps to be followed to unlink the account from the service12 See section 7.1.2.
mychefcooking.com
PRODUCT MANUAL COOK UP | COOK PRO – DT.MP.CK.2102.2
49
7.3.4. Desktop application for intelligent control If the web control application is accessed through the “Google Chrome” browser, it is possible to download the page as an application, either on a mobile device or on a computer.· Computer: Go to the menu at the top right of Chrome , select “More tools” and “Create shortcut…”. In the pop-up window that will open, put the desired name for the application and select the box “Open as window” and “Create”. This creates a shortcut to our intelligent control that can be found in the home menu.Figure 41. Pop-up window for creating the shortcut· Mobile device: Similarly, on the mobile device, go to the menu at the top right of Chrome , select the option “Add to Home Screen” and add. This creates a shortcut to our intelligent control that can be found on the home screen of the mobile device13.
Figure 42. Pop-up window for adding the application to the home screen and application icon on a mobile device
13 In order to add the shortcut to the home screen, the Chrome application must have permissions to do this.
mychefcooking.com
PRODUCT MANUAL COOK UP | COOK PRO – DT.MP.CK.2102.2
50
7.4. Table of states
Status
Description
Online
The equipment is connected while waiting to start cooking or washing.
Offline
The computer is not connected or ready to receive and send data.
Cooking The equipment is connected and performing a cooking.
Preheating The equipment is connected and performing a preheating.
Adjust
The equipment is connected and has reached the heating temperature.
Washing The equipment is connected and performing a wash.
Error
The device shows an error on the central display.
Connecting… It is trying to connect with the oven.
Table 13. Different states that can be displayed on the control panel
7.5. RecipesThe remote control gives the possibility to enter an infinite number of recipes, and these will be compatible and visible to all the ovens that can cook them. To add a recipe, just fill in the different fields of the form that opens. The data to be entered are the name of the recipe, desired temperature and humidity, cooking time and fan speed.In the same way, if you want to edit a recipe, the same form will be opened with the data entered previously at the time it was created and it will be enough to change the data by the new parameters desired.
Figure 43. Recipe creation formIf a recipe is selected, the cooking parameter input fields are locked with the values of the recipe in question. To change the cooking values again, select Manual cooking.
mychefcooking.com
PRODUCT MANUAL COOK UP | COOK PRO – DT.MP.CK.2102.2
51
8. MAINTENANCE
8.1. Cleaning
It is the responsibility of the owner to carry out regular maintenance and cleaning. To maintain the warranty, it must be possible to check that maintenance has been carried out correctly and according to the instructions detailed in this manual.
One of the important parts in the maintenance of the equipment is its cleaning. Therefore, the equipment should be cleaned more or less frequently depending on the area of the equipment.
Below is a table showing the frequency with which the different parts of the equipment should be cleaned.
Part of the equipment
Frequency
Inside the chamber
Daily
Compartment behind suction plate
Daily
Door gasket
Daily
Equipment outer plates
Daily
Door water drain
Weekly
Interior-exterior door compartment
Weekly
Table 14. Cleaning frequencies for Mychef ovens
Before starting any cleaning program, any trays, grids, grates, probes or other accessories inside the chamber must be removed.
8.1.1. MyCareThe MyCare self-cleaning system removes any dirt automatically and without supervision in the Mychef Cook ovens equipped with this self-cleaning system. MyCare makes greater energy savings possible with lower detergent consumption and fewer toxic emissions. In the models Mychef Cook, there is only one washing cycle in which one CleanDuo tablet is used per compartment. In the following models there is only one hole for one washing tablet CleanDuo:Mychef Cook Pro 4 GN 1/1 Mychef Cook Pro 6 GN 1/1 In the following models there are two holes to put 2 washing tablets: Mychef Cook Pro 10 GN 1/1
mychefcooking.com
PRODUCT MANUAL COOK UP | COOK PRO – DT.MP.CK.2102.2
52
8.1.2. SuctionThe piece that separates the cooking chamber with the fan and the heating element can be removed to clean that area. In order to remove the guard, the guard screw (A) must be unscrewed and the guard piece (B) must be lifted.
A
B
B
Figure 44. Suction plate fixing screws for Cook Pro and Cook UpOnce the part has been removed, cleaning can be done either manually or automatically.Extreme care must be taken when cleaning this part of the oven. Leave the door ajar and wait until the chamber fan stops.When this process has been completed, the chamber fan suction part must be replaced in reverse.8.1.3. Door gasket Once the cleaning of the chamber has been completed, the washing process will continue with the seal that ensures the watertightness of the chamber. It is important that this part of the oven is clean and does not have any pieces of food embedded in it so that it can seal the chamber well and heat, water, or steam cannot escape when it is in operation. To clean this rubber seal, a cloth soaked in water and a little bit of dishwasher is enough. Then the whole area is rinsed out and dried well. The gasket should not be removed from its contour for cleaning, it should only be removed when it needs to be replaced.
mychefcooking.com
PRODUCT MANUAL COOK UP | COOK PRO – DT.MP.CK.2102.2
53
8.1.4. Outer housingTo clean the outer casing, use a cloth moistened with water and dishwashing soap or specific stainless-steel cleaner. Then rinse and dry. To clean the glass on the outside through the outer door, use glass cleaner and hand paper to avoid scratching the glass.8.1.5. Control panelTo clean the control panel, use a cloth dampened with water and dishwashing soap. Then rinse and dry. Never use agents with alcohols or solvents, as they may attack the metals or plastics in the control panel.8.1.6. Front water drainThis piece is the one that allows water drops that may fall from the condensation of steam from the interior door to go to the drain, so it is important to keep this water collector clean and unobstructed. Remove any bits of food that may have fallen out before cleaning. Then clean with a cloth wet with soap and water and finally rinse with plenty of water.8.1.7. Interior/exterior door compartmentTo clean this compartment, the outer door must be opened, and the inner door clips opened so that the door can be opened and the chamber between the outer and inner door can be accessed.
mychefcooking.com
PRODUCT MANUAL COOK UP | COOK PRO – DT.MP.CK.2102.2
54
Figure 45. Inner glass clampIt is advisable to clean the inside of the outer glass and the inside glass on the outside with glass cleaning fluid and hand paper. For the inside of the inner glass, if the dirt is not excessive, you can proceed in the same way as the other glass. If there is a lot of dirt, an automatic cleaning cycle can be done to remove this excess dirt. Once cleaning is complete, the inner door can be closed and secured with the staples.Cleaning the oven with a pressure washer is harmful to the equipment and could result in breakage and void the warranty of the equipment. Do not use the hand shower accessory on the door glass while it is hot, there is a danger of breakage due to thermal shock.For the stainless-steel housing use a cloth dampened in a mixture of water and detergent, or specific detergent for stainless steel.
mychefcooking.com
PRODUCT MANUAL COOK UP | COOK PRO – DT.MP.CK.2102.2
55
Never use cold water to wash the interior of the cooking chamber when it is above 70ºC. Thermal contrast is harmful to the equipment and would void the warranty of the equipment.
8.2. Preventive maintenanceMychef ovens are designed for intensive and long-lasting operation. For this to happen, in addition to regular cleaning tasks, preventive maintenance must be carried out. This preventive maintenance is specifically designed to prolong the life of your Mychef oven, minimize energy and water usage, and ensure excellent cooking quality without interruption.This maintenance program is segmented into four types of revisions, A, B, C and D, which should be performed approximately every year or 2.000 working hours, whichever comes first.These periodic reviews should be carried out every 2.000h of work or every year, whichever comes first.These periodic checks must be carried out by an authorized service technician.
The following table shows the operations to be performed on Mychef ovens at each of the revisions. The table is circular, and from 20.000h of use or 10 years would start counting again on the left of the table. That is to say, at 22.000h it would correspond to revision A of 2.000h.
Mychef maintenance program
2000 4000 6000 8000 10000 12000 14000 16000 18000 20000
Firmware upgrade
X
X
X
X
X
X
X
X
X
X
Water hardness test
X
X
X
X
X
X
X
X
X
X
Review A Cleaning of cooling fans Electronic cleaning
X
X
X
X
X
X
X
X
X
X
X
X
X
X
X
X
X
X
X
X
Cleaning drainage tray and siphon
X
X
X
X
X
X
X
X
X
X
Changing the gasket and adjusting the door
X
X
X
X
X
X
X
X
X
X
Pathogen-inactivated replacement (depending on model)
X
X
X
X
X
Review B Calibration of temperatures
X
X
X
X
X
Adjustment of internal screws
X
X
X
X
X
Change of chimney and drain pipes Review C Change of solenoid valve for steam generation
X
X
X
X
Change of resistance contactor (only models without TSC)
X
X
Change of motor
X
Review D Change of resistance and gasket
X
Cambio of internal gaskets
X
Table 15. Periodic maintenance table
mychefcooking.com
PRODUCT MANUAL COOK UP | COOK PRO – DT.MP.CK.2102.2
56
Regular maintenance ensures that your oven always works as designed.Periodic maintenance must be accredited for warranty validity purposes.Before any handling for maintenance or repair, the equipment must be disconnected from the power supply. If the power cable is damaged, it must be replaced by your service department or similarly qualified personnel in order to avoid risks.
mychefcooking.com
PRODUCT MANUAL COOK UP | COOK PRO – DT.MP.CK.2102.2
 report this ad
57
References
[xyz-ips snippet=”download-snippet”]