
MyOximeter Operation Guide
Download and Installation
This app runs in iOS 7.0 and later versions and Android 4.3 and later versions of mobile phone operating systems. You can download the app using any of the following methods:
- Scan the following QR to download the app and theninstall it:

- Download the app in the following URL: http://image.jumper-health.com/oxygen.html
- For iOS mobile phone users, go to the App Store and enter the key word “MyOximeter” to search for the app. Then, download and install the app.
- For Android mobile phone users, go to the Google Market and enter the key word “MyOximeter” to search for the app. Then, download and install the app.

Note: Before running the app, turn on the mobile data connection of the mobile phone or connect the mobile phone to a Wi-Fi network.
Users Management
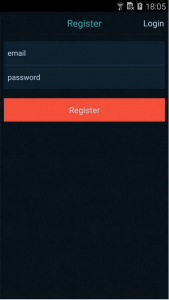
- RegistrationAfter the software is installed and started for the first time, access the user registration interface and enter the email and password for registration.
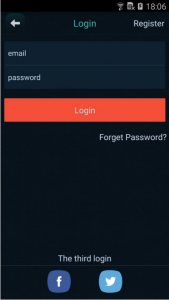
- Logina) Click Login to enter the following login interface, enter the registered email and password. Unregistered users can log in using a third-party platform account (for example, Facebook and Twitter).b) After a successful login, the home screen is displayed.
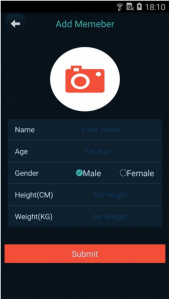
- Adding a Membera) On the home screen, click the icon , select the User Profile area, and click Add Member. The following is displayed on the screen.a) Select the user portrait (from the local gallery or by taking a new photo), enter the user’s name, age, gender, height, and weight information, and click Submit to create the family member.
- Modifying and Deleting Member InformationAfter a family member is created, go to the User Profile module, and click Edit on the top right. Select a member, and then you can edit or update the information about the member or delete the member.
 b) After a successful login, the home screen is displayed.
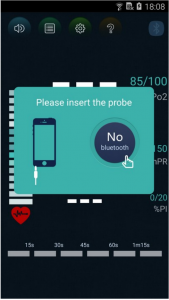
 a) Select the user portrait (from the local gallery or by taking a new photo), enter the user’s name, age, gender, height, and weight information, and click Submit to create the family member.
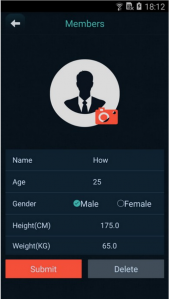
Connecting the Device—Finger Pulse Oximeter
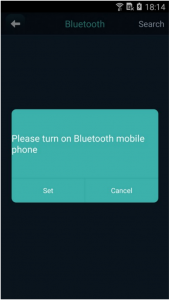
- Enabling Bluetoothb) On the home screen, click Bluetooth. On the displayed page, click Search on the top right. A dialog box is displayed to ask you whether to turn on the Bluetooth. Click Set to enable the Bluetooth.c) Alternatively, directly turn on the Bluetooth and then click Search on the top right to search for Bluetooth devices.
- Connecting BluetoothClick the found Bluetooth “My Oximeter”. Device information is obtained automatically and then paring and connection are performed automatically. After Bluetooth is connected, the window is redirected to the real-time detection window.Note: a) Before the device is found in the detection, keep the oximeter power-on, and place a finger into the oximeter for measurement.b) If no measurement is performed after the connection, the oximeter automatically powers off in 10s and disconnects Bluetooth.c) Only Bluetooth within 10m from the oximeter can be connected by the oximeter.d) During the Bluetooth connection, do not enable multiple Bluetooth devices.
 c) Alternatively, directly turn on the Bluetooth and then click Search on the top right to search for Bluetooth devices.
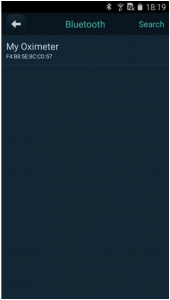
Real-Time Detection
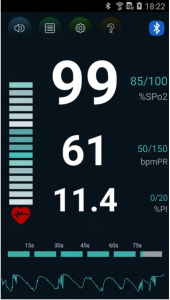
After Bluetooth is connected, the blood oxygen saturation (SpO2), pulse rate (PR), blood perfusion index (PI), and volume charts of the measurement schedule and blood oxygen saturation are displayed in real time on the screen. After the detection is complete, measurement results are automatically saved locally.
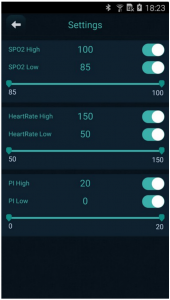
Setting Limit Reminding
- Setting Limit Reminding RangesOn the home screen, click the icon to enter the limit reminding range page. Press the adjusting point on the adjusting bar and move left or right to adjust the upper and lower limits. The settings are saved automatically when you return to the home screen. After the limit reminding ranges are set, the mobile phone will alert with sound when a detected actual value exceeds the upper or lower limit. In addition, the measured value also turns red.
- Setting Limit Reminding On/Off On the home screen, click the icon to enable or disable the limit reminding function.
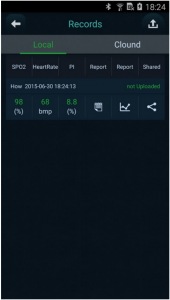
Querying a Record
- Querying a Local RecordOn the home screen, click the icon of the recording module to enter the record page. The following page is displayed:a) Viewing a Test ReportTo view a test report, click .b) Viewing ChartsTo view charts, click .c) Sharing a ReportTo share a report, click . You can share a report via a third-party platform or via an email.
- Viewing Records on the CloudOn the local page, click the icon indicating uploading on the top right to upload local records in batches to the Cloud. Then, you can view the records on the Cloud anytime and anywhere.
- Deleting RecordsTo delete a local record, press the record and slide to the left, and then click the delete icon to delete the record. To delete a record from the Cloud, press and hold the record for a while, and then a deletion dialog box will be displayed; then, click the delete icon to delete the record.
 a) Viewing a Test ReportTo view a test report, click
 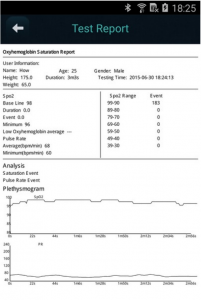 b) Viewing ChartsTo view charts, click
 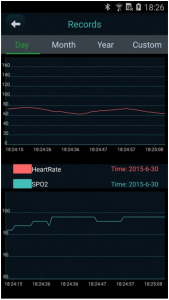 c) Sharing a ReportTo share a report, click
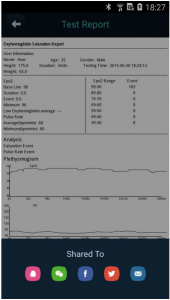
Help
- User GuideThe User Guide provides methods and operations of connecting this software to the oximeter.
- APP UpdateIt provides version detection and upgrade services for users.
- LanguageCurrently, Chinese and English are supported.
MyOximeter Operation Guide – MyOximeter Operation Guide –
[xyz-ips snippet=”download-snippet”]