
narpulsmart Narpult Smart Lock User Manual
for Narpult Smart Lock

Welcome to join family, please read this user manual before operating your smart lock, and keep it for further reference.
Powered by Narpult SmartCustomer Service:[email protected]
Warm Notice
◎ There are some difference for Left-side or Right-side door, please check your door direction and switch the toggle switch to L/R.

◎We highly recommend you to scan the QR code below to watch the installation guide video before operation and also you can search for Narpult Smart Lock to see it on youtube.com.
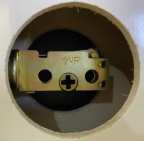
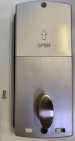
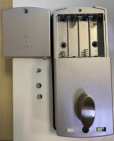
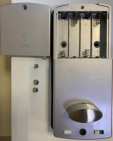
Product Structure

Installation
Step 1 Drill hole for your door

for Deadbolt

for Latch
Step 2 Install strikeStep 3 Adjust latch

2-3/8” (60mm)
2-3/4” (70mm)
Step 4 Install Latch
‘up’ is upward

Fix with pointed screws
Step 5 Install lock cylinder

Ready to install

Install completed
Step 6 Install screw pillar and cover the waterproof silicone
Ready to install

Install completed
Step 7 Install Keypad
Please stay the pin of cylinder Vertical and insert the keypad to the latch.

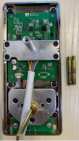
Step 8 Install mounting plate
Hold the side with waterproof silicone against your door, take the IC wire out, and screw the plate to your door.
Ready to install
Install completed
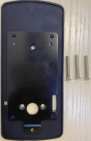
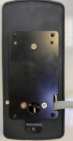
Step 9 Install inside back panel
◎Switch the toggle switch to L/R by your door direction

Switch to L for Left-side door

Switch to R for Right-side door
◎Connect the IC wire to inside back panel◎Adjust turn knob by your door direction and screw inside back panel to mounting plate(screw hole under the turn knob)
Vertical for Right-side door

Horizontal for Left-side door
◎Screw out the screws on the battery cover, and take battery cover out, screw inside back panel to mounting plate.
Right-side door
Left-side door
◎Install 4pcs AA batteries, screw back the battery coverRemark: After installation completed, please check if the keypad light on by touching the keypad, if not, please check the connection of IC wire or change new batteries.
Operation by APP via Bluetooth
Part 1 Add lock
◎Download and install TTLock from Google Play or APP Store.

Google Play

APP Store
◎Register account with phone number or e-mail and login

◎Add your lock on APPPlease open Bluetooth setting on your phone before connection, and stay your phone within 2 meters away from your lock.

Click ‘+’ in the center
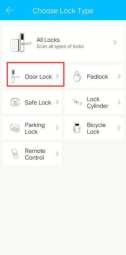
Select ‘Door Lock’

Touch keypad and click ‘Next’

Click ‘+’ with high-light device

Name your lock, and click ‘OK’
Add completed
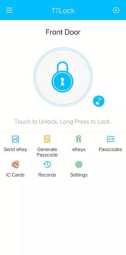
Part 2 Unlock/lock by APP via Bluetooth
◎ Unlock by touching the lock button, it will pop up ‘unlocked’
◎Lock by long-pressing the lock


button, it will pop up ‘locked’
Remarks: Please check if your door lock operate in correct direction, once it reverse, please switch the toggle switch to other side and re-install itPart 3 Auto-lock settingRemarks: Auto-lock is setting up only by the program, but couldn’t be used to determine if your door is locked. And please stay your phone close to your lock during setting process.

Click ‘Settings’

Click ‘Auto Lock’

Click ‘Read The Time’
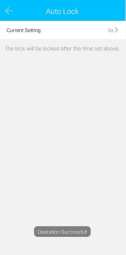
Click ‘Current Setting’

Select period you need to set

Or enter your time period
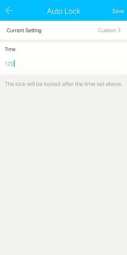
5-900S be your choice

Set up completed
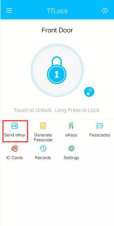
ekey is a function for you to authorize the rights to your family membersand guests to unlock/lock your door by the same APP. eKey can beauthorized to MAX. 20 smart phone users.
◎ Download TTLock app and register a new account on new smartphone of family or guests. ◎ Click ‘Send eKey’ on the APP screen with admin account(The firstaccount to add lock).

◎Select Time, Permanent, One-time, Recurring eKey by yourself, then input Recipient account and name it.
◎Select time period if necessary, then click ‘send’.
◎Refresh by pulling down on the APP screen with new smart phone APP, the smart lock will show up on the APP screen.
Remarks: Admin account can manage all guest accounts by clicking‘eKeys’ on APP screen.
Part 5 Lock Sound
The original setting for this smart lock is Lock Sound On, but you canclose it if you want.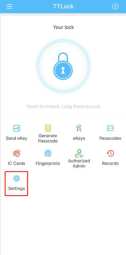
Click ‘Settings’
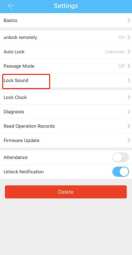
Click ‘Lock Sound’
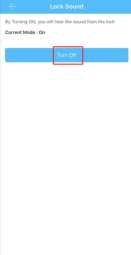
Click ‘Turn Off’
Remark: Please stay your phone close to your lock during setting process.
Operation by keypad
Part 1 Generate Passcode

Click ‘Generate Passcode’ on APP

Select Passcode type

Passcode generated
Part 2 unlock/lock by keypad◎Unlock by inputting Passcode, then press lock button◎Lock Only by long-pressing lock buttonRemark: For security, this smart lock supports Virtual Passcode(Add anydigit in front of or back of Passcode. e.g. Your Passcode is 12345678, you can unlock by 5612345678 or 1234567802.
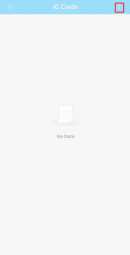
Operation by IC cards
IC Card can be used to unlock your door, but can not be used to lock your door.
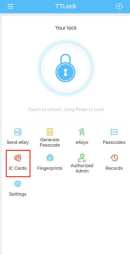
Click ‘IC Cards’ on APP
Click ‘ ‘ upper right corner

Click ‘Add IC Card’

Name it and select time period
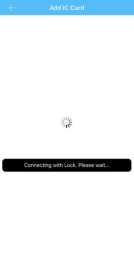
Waiting for connection
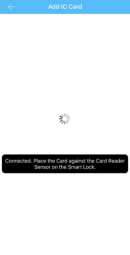
Connected
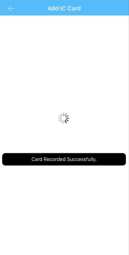
Place IC Card on the keypad, Add completed
Remark: Please stay your phone close to your lock during setting process.
Operation by mechanical keys
There are two compatible mechanical keys included in the package,
Please keep it easily for backup.
◎ Take the cover out by turning the key cover◎Insert the keys to unlock/lock your door 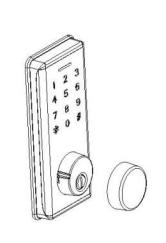
Operation by APP via wifi remotely
We provide Bluetooth wifi gateway(Sold separately) for this smart lock to reach for remote control via internet, you can search for Narpult smart wifi gateway to buy it on www.amazon.com
Remark: About operation for wifi gateway, please refer to separate instructions of wifigateway. But we have warm notice for you about unlock/lock remotely: 
◎Unlock by touching the little button◎Lock by long-pressing the same lock buttonwith Bluetooth local control
More functionPart 1 AlarmAnti-theft Alarm: Once this smart lock get four times wrong Passcodes, it will be locked for 5 minutes, nobody can get in even if you have correct Passcodes.
Low Voltage Alarm: Once the batteries close to be dead, this smart lock will sound a beep alarm, and if you forget to replace the batteries before to be dead, you can use USB backup power to power for it(At the bottom of keypad).
Part 2 Security LockThere one Security Switch under the knob, anybody can’t unlock your lock via Passcode except for Manager Passcode when you switch it to ON, at the same time you can’t lock it by the keypad.
Part 3 Passage Mode
During the preset time period, this smart lock will remain unlocked until it is manually locked once Passage Mode activated.
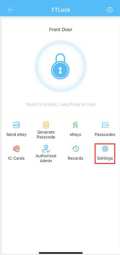
Click ‘Settings’

Click ‘Passage Mode’

Activate Passage Mode
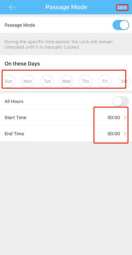
Select period and click ‘Save’
WarrantyYou will enjoy 100% satisfaction service with your smart lock. We provide 30days full refund and 60 days replacement with any product issue. E-mail to us with your order information, you will get more.
Powered by Narpult SmartCustomer Service:[email protected]
References
[xyz-ips snippet=”download-snippet”]