national ramp New Vertical Pickets
Thank you for purchasing from National Ramp! This quick installation guide will focus on the differences between a vertical picket handrail vs. dual rail handrail (Liberty/Breeze) install. It is a prerequisite to understand how to install dual rail handrails on the Liberty or Breeze system before proceeding with this guide. Please read through entire guide before installation.
Tools Required
- Tools required to install Liberty / Breeze system
- 9/16” open end wrench (will be used for inside corner configurations)
- 7/16” socket and/or wrench (used for vertical picket handrail through-bolts)
Vertical Picket – Legs
What’s different?
| Dual Rail Handrail (Liberty/Breeze) | New Vertical Picket Handrail |
| Legs are fixed sizes and once piece. Leg channel and foot plate are one piece. | Vertical picket legs can be cut and customized. Leg channel and foot plate are 2 separate components. Leg channel can be cut and installed into foot plate. The length is customizable due to potential interference with bottom rail of the vertical picket handrails. |
Instructions
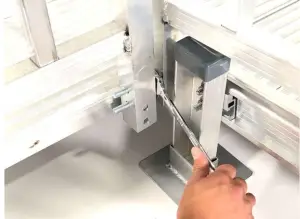
| 1. | Determine required leg sizes and cut leg channels to required lengths. Top of leg should extend 3” from walking surface (2-3” for platforms, 3-4” for ramps sections). | 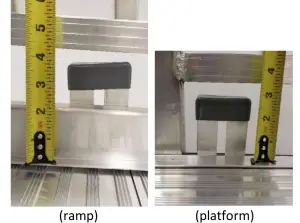 |
| 2. | Cut bottom of leg channel (opposite side of slot). Cut below red line. Do not cut through slot on leg channel. | 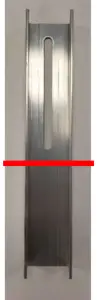 |
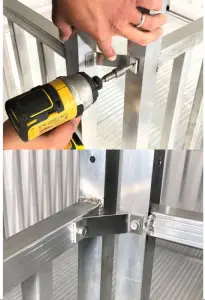
| 3. | Attach foot plate to bottom of leg channel using two 1/4”-14 x 1” drilling screws | 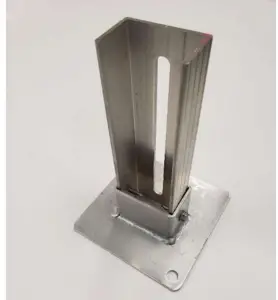 |
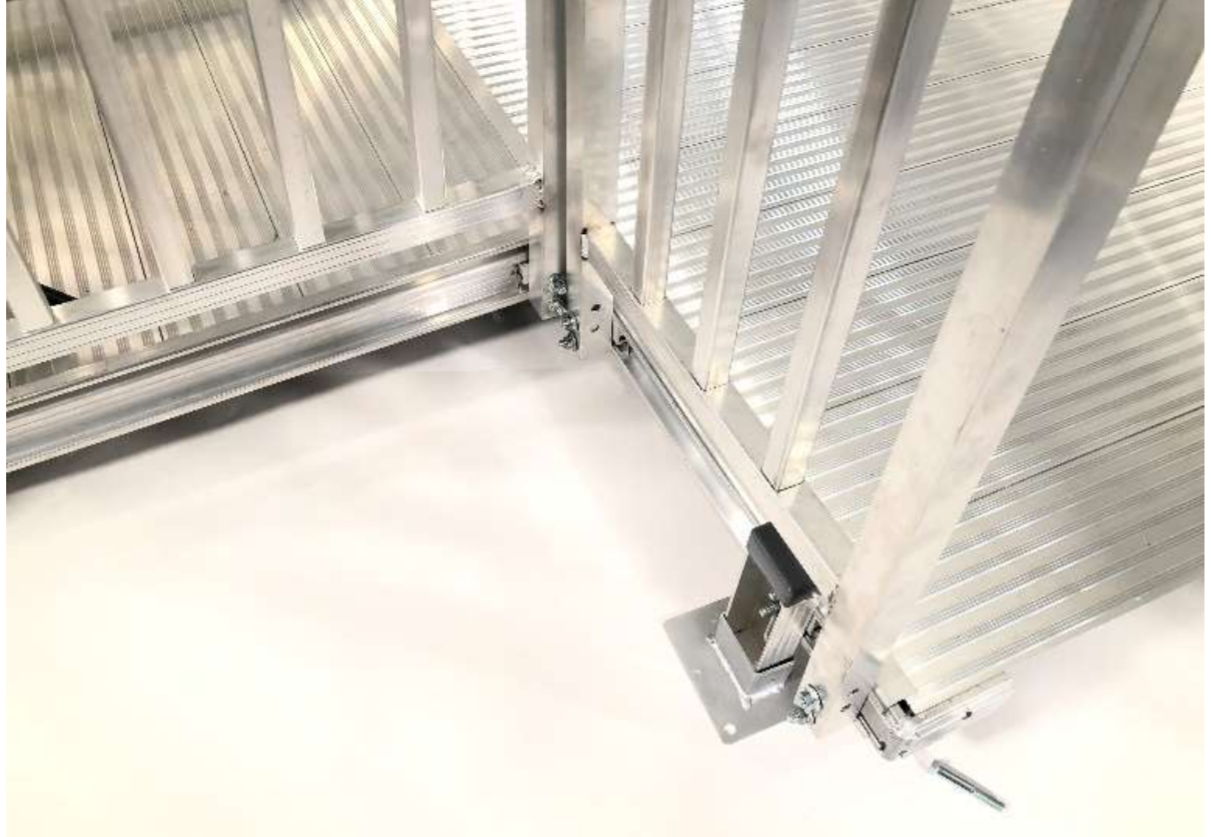
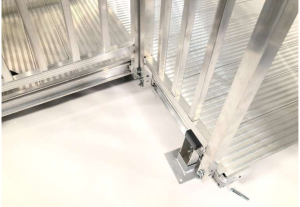
| 4. | Install leg to ramp/platform using 3” universal brackets, 3/8”-16 x 1.5” bolts and 3/8”-16 serrated flange nuts. Slide the universal bracket assembly into the ramp/platform channel and attach leg to universal bracket assembly using 3/8”-16 serrated flange nuts.Vertical picket legs are assembled in-between the handrail square posts (as oppose to installing outboard of the dual rail handrail square posts) | 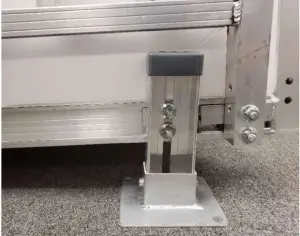 |
Vertical Picket Handrails
What’s different?
| Dual Rail Handrail (Liberty/Breeze) | New Vertical Picket Handrail |
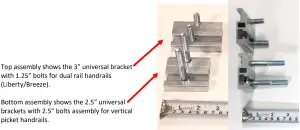
| Handrails uses 3” universal brackets with 3/8”-16 x 1.25” bolts | Handrail uses 2.5” universal brackets with 3/8”-16 x 2.5” bolts |
| Handrails are joined using plastic straight connectors and elbows. | Handrails are joined using:
|
Instructions
| 1. | The new vertical picket handrails are symmetrical and can be installed on either the left or right side of the ramp/platform.
Assemble vertical picket handrail to ramp/platform using 2.5” universal brackets, 3/8”-16 x 2.5” bolts and 3/8”-16 serrated flange nuts.
|
|
| 2. | Once the universal bracket assemblies for vertical picket handrail is assembled, slide the universal bracket assembly into the ramp/platform channel and attach the handrails to the universal bracket assembly using 3/8”-16 serrated flange nuts.
Tip: Start handrail installation from the top of the ramp and work your way down. Don’t fully tighten to allow for adjustment after all handrails have been installed. |
|
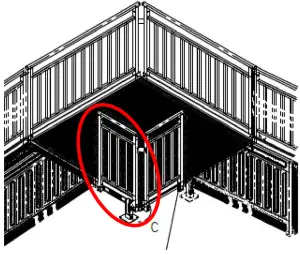
| 3a. | Inside corner installation:
These steps will go over how to install vertical picket handrails at an inside corner. The layout depicted will be a ramp into a platform into another ramp turning left off the platform. Install the first inside corner vertical picket handrail onto the platform that has the channel to accept universal brackets. |
  |
| 3b. | 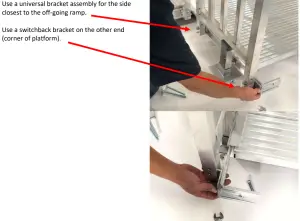
Tip: It may help to loosely assemble the vertical picket handrail to the switchback bracket, then slide entire assembly into the channel. |
|
| 3c. | Once the first inside corner vertical picket handrail is assembled to the platform channel, snug the serrated nuts but don’t fully tighten to allow for adjustment after all handrails have been installed.
We are ready to install the other inside vertical picket handrail to the tongue side of the platform. |
|
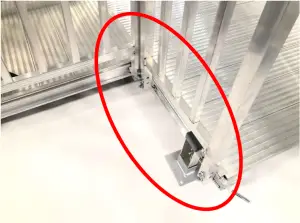
| 3d. | 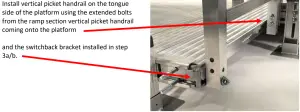
In the case of a switchback layout, install the vertical picket handrail onto the platforms using the extended bolts from the ramp section picket coming onto the platform and a universal bracket assembly in the channel of the other platform. |
|
| 3e. | 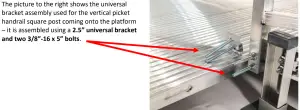
Tip: Keep the serrated nuts loose until the inside corner picket is mounted and positioned. |
|
| 3f. | Mount vertical picket handrail to extended bolts from step 3e. | 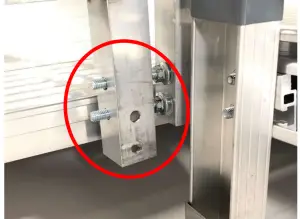 |
| 3g | Mount other side of vertical picket handrail to switchback bracket installed in steps 3a/b using one 3/8”-16 x 2.5” bolt on the bottom slot. | 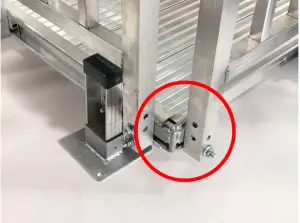 |
| 3h. | Once the vertical picket handrail is positioned, tighten the serrated nuts holding the on-coming ramp with a 9/16” open end wrench.
Install another set of serrated nuts to the 5” bolts to attach the vertical picket handrail. |
 |
| 4. | Once all hand rails have been installed, insert round plug caps to ends of all handrails. | 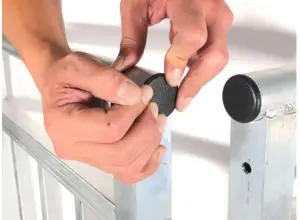 |
| 5a. | Fasten all handrails together using through- bolts for straight connections or corner support brackets for corner connections.
Connect straight connections using through bolts, washers and acorn nuts:
|
 |
| 5b. | Connect all corners using the corner support bracket.
Make sure the handrails are plumb. Line the corner support bracket up with the top rail and fasten using two 1/4”-14 x 1” drilling screws. |
 |
| 6. | 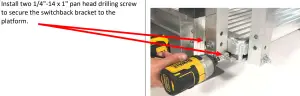 |
|
| 7. | Once all straight and corner picket connections have been made and switchback bracket is secured to platform, fully tighten all leg and handrail nuts.
Inspect entire installation by walking and jumping on each ramp section/platform to be sure it is secure. Run your hands along all the handrails double checking for any sharp edges. Review with the homeowner how to care & maintain the ramp. Installation complete! |
 report this ad
[xyz-ips snippet=”download-snippet”]