Nature POWER Solar Security Light
WARNING: Read carefully and understand all ASSEMBLY AND OPERATION INSTRUCTIONS before operating. Failure to follow the safety rules and other basic safety precautions may result in serious personal injury.
SAVE THESE INSTRUCTIONS
Important Safety Information
Thank you for choosing a Nature Power Product.Save the receipt and these instructions. It is important that you read the entire manual to become familiar with this product before you begin using it.This product is designed for certain applications only. the distributor cannot be responsible for issues arising from modification. We strongly recommend this product not be modified and/or used for any application other than that for which it was designed. If you have any question relative to a particular application, Do not use the product until you have first contacted the distributor to determine if it can or should be performed on the product.
Intended Use
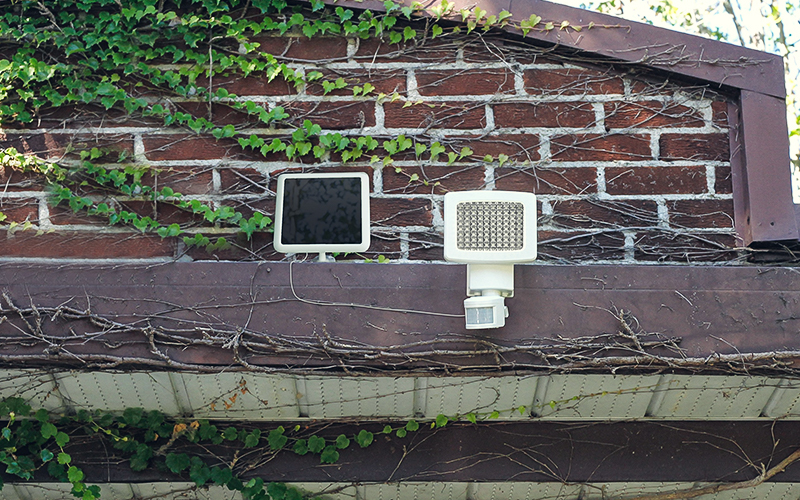
The 144-LED Solar-Powered Motion Security Light provides brilliant illumination using the power of the sun without using electricity. For convenience, this powerful light is equipped with motion activation to automatically trigger the light when motion is detected within a 40 foot range. You can select how long you want the light to remain on, from 8 to 2 mins. The included amorphous solar panel charges the rechargeable battery even in cloudy conditions and can be placed up to 10 feet from the light.
Technical Specifications
| Property | Specification |
| Lumen | 1500 |
| LEDs | 144 White LEDs (6500K) |
| Motion Distance and Range | 40 Feet and 120 Degrees |
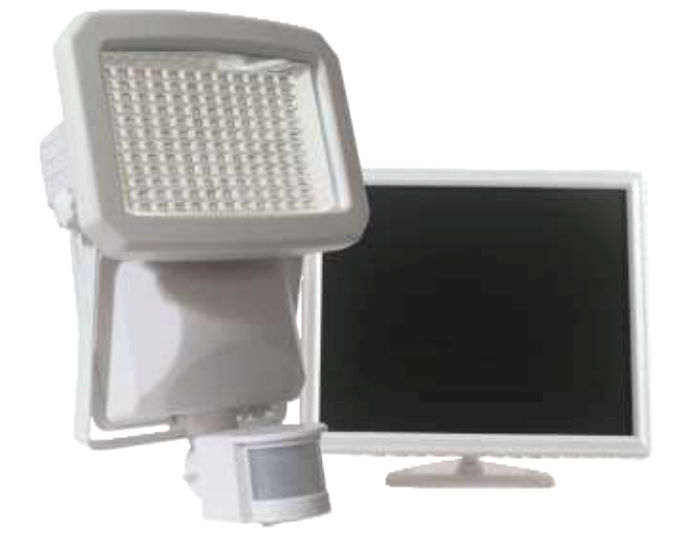
Parts List

| Reference | Part Description | Quantity |
| 1 | Lamp | 1 |
| 2 | Solar Panel | 1 |
| 3 | Screws and Anchors (pack) | 1 |
| 4 | Mounting Bracket | 1 |
| 5 | Manual | 1 |
Assembly Instructions
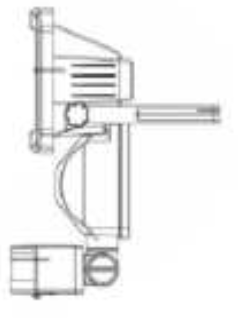
- Lamp Unit Installation
- Use the ‘U’ shaped mounting plate located to the rear of the lamp to mark where you want to install the lamp.
- Make sure it is clear of obstacles such as cables and electric lines.
- Secure lamp to the wall with the screws provided.
- Carefully route the wire from the solar panel to the lamp and plug it into the battery housing input.
- Adjust the motion sensor so that it faces the area where motion detection is desired. You can move it up and down by adjusting the screw on the neck of the motion detector
- Use the ‘U’ shaped mounting plate located to the rear of the lamp to mark where you want to install the lamp.
Note: The lamp unit should be mounted 6.5-9 feet (2-3 meters), from the ground to ensure motion detection is optimized.
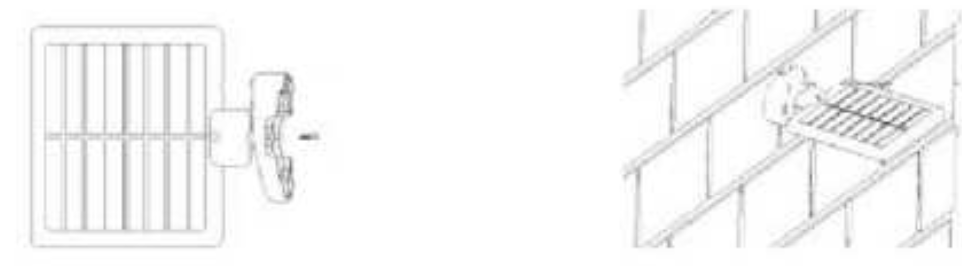
- Wall or deck mounting of solar panel
- Secure the bracket to the solar panel with the screw provided (shown below).
- Set the bracket on the surface and secure in place with larger screws provided.
- Adjust the angle of the solar panel to ensure it receives optimum sunlight
Note: The Solar Panel is equipped with a length of wire. Ensure that the wire will reach the desired position of the lamp before making the final installation.
Before Each Use
Solar lights require sunlight to function properly. Extended periods of cloudy weather will cause shorter runtimes. Shade on the solar panel is to be avoided. The solar panel may be cleaned with a clean damp cloth. Do not use soap, solvents, or abrasives. A regular visual inspection is recommended. Ensure the solar panel is free from debris and in a location where it will receive several hours of sunlight each day. Ensure the light is facing the desired direction and that there are no nearby alternate light sources that may interfere with the motion sensor.
Operating Instructions
- Before the Solar Motion Light can operate to its full capacity, allow the unit to charge in sunlight for 2 days with the solar panel wire connected to the light. Charging should be done with the unit in the “OFF” position.
- Located at the bottom of the Battery Housing there is a OFF/AUTO/ON switch:
- “AUTO” position, the light will turn on automatically when motion is detected.
- “ON” position, the light can be used as a standard light for constant illumination.
- “OFF” position, the light will remain off and will not detect any movement.
How to Use Control Dials
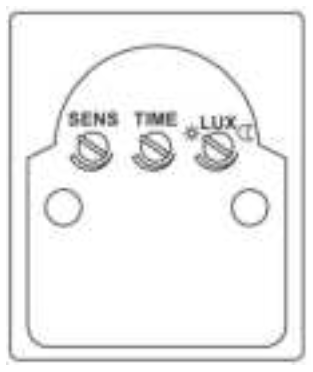
The Solar Motion Light has 3 dials which control the light’s duration, sensitivity to light, and sensitivity to motion.
LUX (Light Level)
The LUX dial adjusts the sensitivity to darkness. If set to the maximum level, the light will go on in daylight. If set to the minimum level, the sensor will only trigger the light to turn on at dusk or when it is dark out. This is the ideal position for general use. Please note that ambient light will affect the sensor.
Time
The time dial sets the duration the light will stay on when triggered. The duration is adjustable from 8 seconds to 2 minutes. Rotating the dial clockwise will increase the duration the light will stay on.
SENS (Sensitivity)
The SENS dial adjusts the sensitivity of motion detection:
- Minimum position – Low Range: large movement is required to trigger the light to turn on.
- Mid Position – Medium setting.
- Maximum position – Maximum range: the smaller movements will trigger the light to turn on.

Location of the Solar Light
Solar powered lights require sunlight to recharge the internal batteries. For best results, locate the Solar Panel in a position where it will receive direct sunlight, and is generally free from cover and shade.
Maintenance
Maintain the solar powered light by adopting a program of conscientious repair and maintenance in accordance with the following recommended procedures.
| Maintenance Interval | Maintenance Point |
| First Use | Allow the solar panel to charge the light for 2 sunny days.
Observe the solar panel once installed for one day. Ensure that it is not shaded at any time during daylight. Observe the light once installed during the evening. Ensure there is no alternate light source that will interfere with the light’s sensors. |
|
Seasonally |
Visually inspect the solar panel and light to ensure both are clear of debris and dirt.
Observe the solar panel during one sunny day to ensure that as the suns position has changed in the sky, the solar panel is still receiving optimal sunlight throughout the day. |
|
During the Winter |
Check the solar panel. Ice should not be allowed to form on the solar panel as the freezing can damage waterproof seals.
Adjust the angle of the solar panel to the sun’s lower position in the sky. This will maximize the amount of sunlight received and help allow any water or snow that accumulates on the panel to slide off. |
Troubleshooting
Use the table below to troubleshoot problems before contacting service personnel or your local dealer. If the problem continues after troubleshooting, call your local dealer for assistance.
| Failure | Possible Cause | Corrective Action |
| Batteries are not fully charged. | Ensure the solar panel is in a location where it will receive maximum sunlight during daytime hours.
Turn the light to the OFF position and allow the solar panel to charge the batteries for 2 sunny days |
|
| Light does not stay on as long as it did previously or it flashes. | ||
| Solar panel is not receiving enough sunlight and not able to recharge batteries. |
Clean the solar panel with a clean, damp cloth. |
|
|
It is winter and there is not as much sunlight as during summer, and the solar panel is not able to recharge the batteries. |
Ensure the solar panel is located in a place where it will receive the maximum amount of sunlight during the day. Remove any object that throws shade on the solar panel. Tilt the solar panel so that it is perpendicular to the sun. |
| Light does not turn on. | Batteries are not charged. | Ensure the solar panel is in a location where it will receive maximum sunlight during daytime hours.
Turn the light to the OFF position and allow the solar panel to charge the batteries for 2 sunny days. |
| Clean the solar panel with a clean, damp cloth. | ||
| Switch is in wrong position | Move the switch to the AUTO position. | |
| Rechargeable batteries are at the end of their life. | Replace the batteries with new rechargeable batteries of the same type and size.
Battery Replacement: 1. Batteries are located in the battery housing located at the back of the lamp. 2. Remove Screws from front of the battery housing to access batteries. 3. Replace batteries with rechargeable batteries of the same type and rating 4. Reassemble battery housing. |
|
| Sensor is malfunctioning. | Reset the Sensor:
1. Take the light into a dark room and then switch to the Auto. 2. Activate the motion sensor in the dark. 3. Once the light turns on, the sensors are reset. 4. Wait until the light turns off before returning the product to a lit room or area. |
Limited Warranty
Nature Power warrants our products to the original purchaser that this product is free from defects in materials and workmanship for the period of one year from date of purchase. In the case of product defect, contact Nature Power customer service to receive troubleshooting. If defective part or unit should be returned, a Return Authorization Number must be issued by Nature Power and the defective part or unit should be returned to the authorized location at the purchasers’ expense. A dated proof of purchase is required to receive warranty service. Once received at authorized location and defect proves to be the result of defective material and workmanship, the defective part or unit will be replaced at warrantors’ option and returned to the original purchaser at warrantors’ expense. No refunds will be granted by the warrantor, in the event of buyer’s remorse please contact your point of purchase within and in adherence to their return policy. Refunds are granted at the retailers’ discretions.

Please contact Nature Power Products to acquire more information:
1-800-588-0590
[email protected] www.naturepowerproducts.com
Made in China
References
[xyz-ips snippet=”download-snippet”]