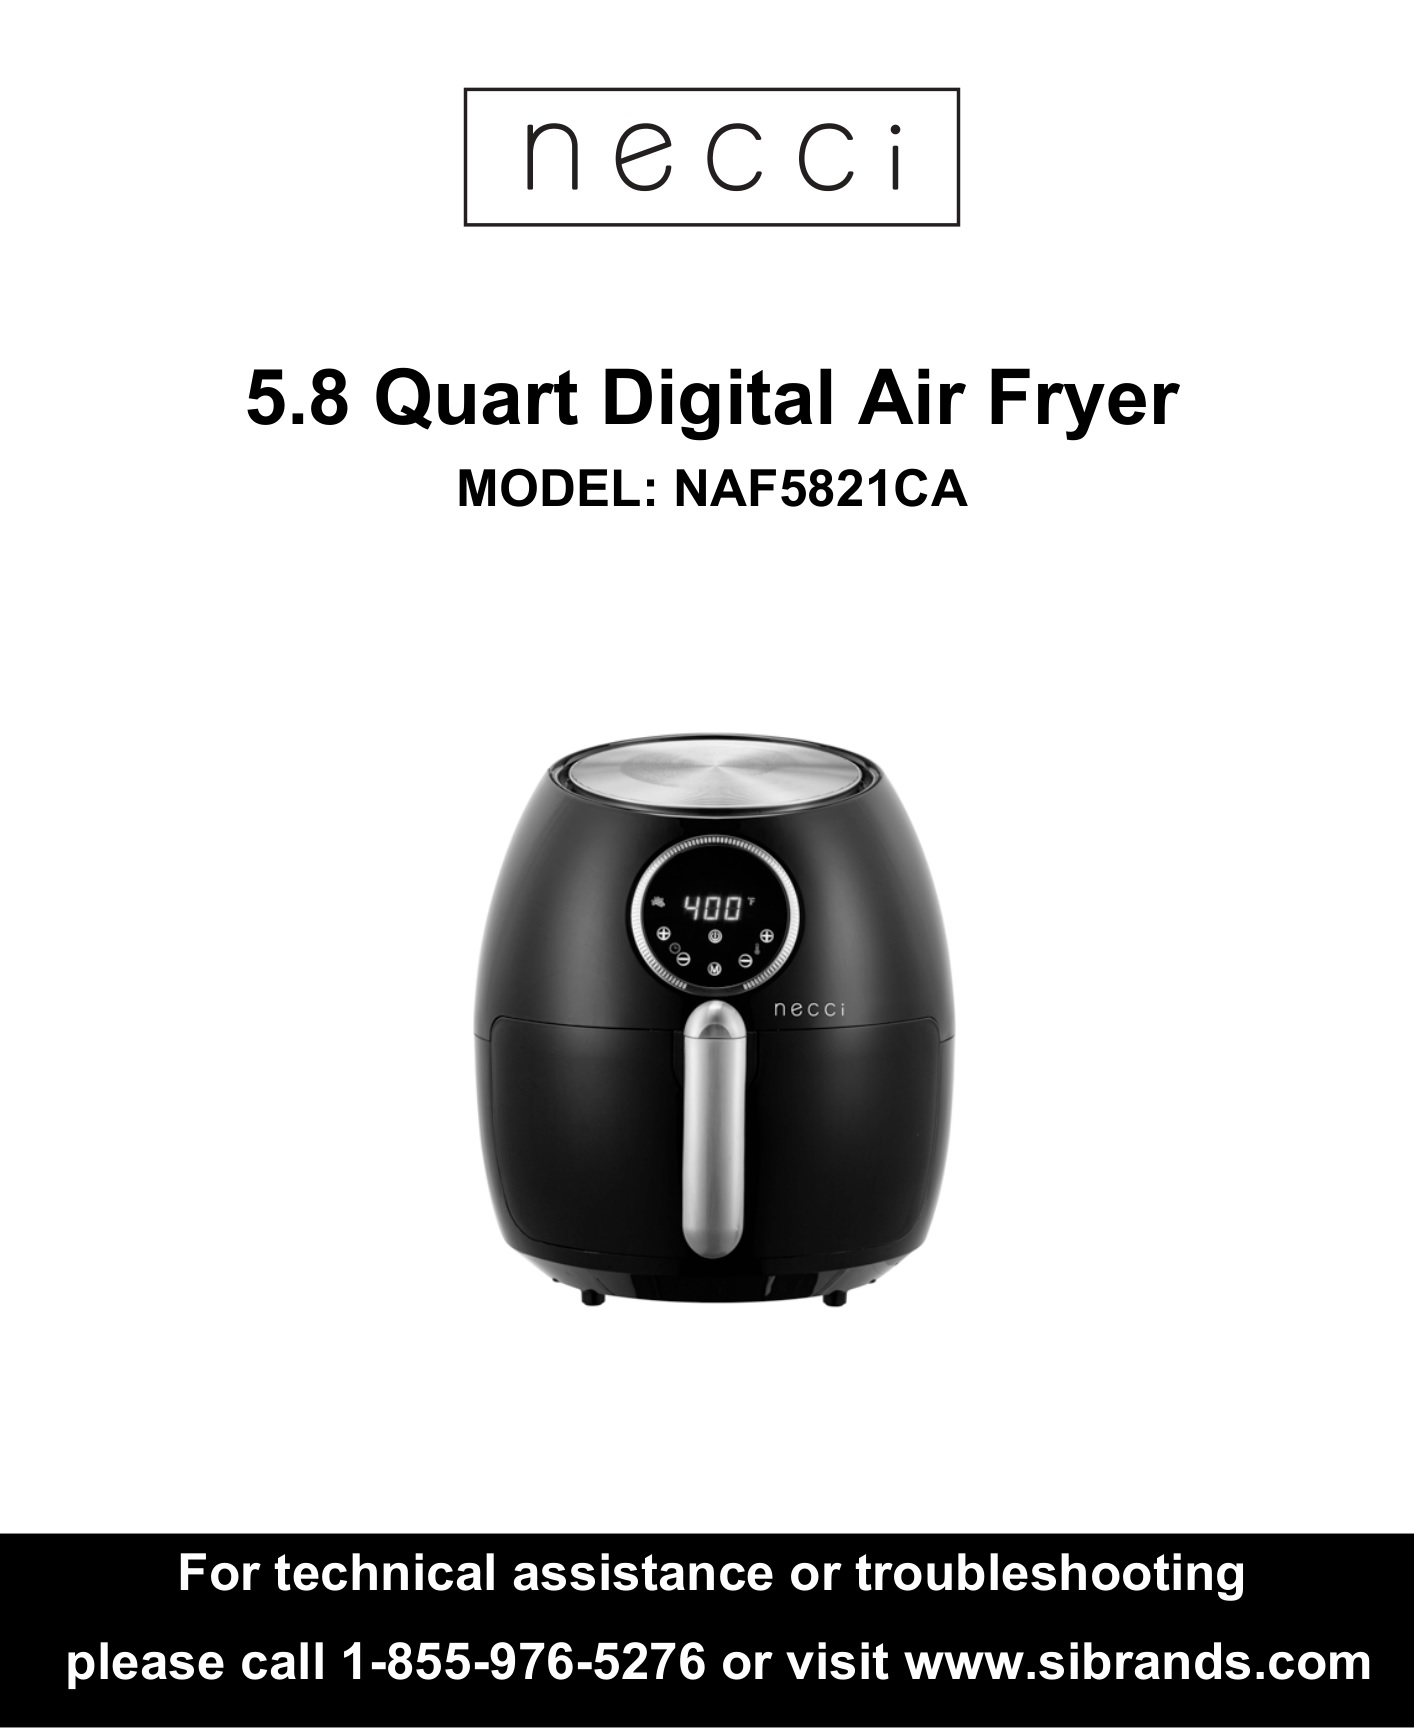
necci 5.8 Quart Digital Air Fryer NAF5821CA
User Manual
IMPORTANT
CAUTION
– Read all instructions.– Do not touch hot surfaces. Use handles or knobs.– To protect against electrical shock do not immerse cord, plugs or any part of the main body of the appliance in water or other liquid.– Close supervision is necessary when any appliance is used by or near children.– Unplug from outlet when not in use and before cleaning. Allow to cool before putting on or taking off parts.– Do not operate any appliance with a damaged cord or plug or after the appliance malfunctions or has been damaged in any manner. Return appliance to the nearest authorized service facility for examinatioin, repair, or adjustment.– The use of accessory attachments not recommended by the appliance manufacturer may cause injuries.– Do not use outdoors.– Do not led cord hang over the edge of a table or counter.– Do not touch hot surfaces.– Do not place on or near a hot gas or electric burner, or in a heated oven.– Extreme caution must be used when moving an appliance containing hot oil or other hot liquids.– Always attach plug to appliance first, then plug cord into the wall outlet. To disconnect, turn any control to “Off”, then remove plug from wall outlet.– Do not use appliance for other than intended use.– Save these instructions.– Polarization instruction: this appliance has a polarized plug (one blade is wider than the other). To reduce the risk of electric shock, this plug is intended to fit into a polarized outlet only one way. If the plug does not fit fully into the outlet, reverse the plug. If it still does not fit, contact a qualified electrician. Do not attempt to modify the plug in any way.
DANGER
– Never immerse the housing, which contains electrical components and the heating elements, in water nor rinse it under the tap.– Do not let any water or other liquid enter the appliance to prevent electric shock.– Always put the ingredients to be fried on the grill rack in the pan, to prevent it from coming into contact with the heating elements.– Do not cover the air vents while the appliance is operating.– Do not fill the pan with oil as this may cause a fire hazard.– Never touch the inside of the appliance while it is operating.– Always allow the appliance to cool down for at least 30 minutes before attempting to clean any of the parts.
WARNING
– Check if the voltage indicated on the appliance corresponds to the local power voltage before you connect the appliance.– Do not use the appliance if the plug, the power cord or the appliance itself is damaged.– If the power cord is damaged, you must have it replaced by Professionals, a service center authorized by the seller or similarly qualified persons in order to avoid a hazard.– This appliance should not be used by children under the age of 15, or by persons with reducedphysical, sensory or mental capabilities, or lack of experience and knowledge.– Children should be supervised to ensure that they do not play with the appliance.– Keep the appliance and its power cord out of the reach of children younger than 15 when theappliance is switched on or is cooling down.– Keep the power cord away from hot surfaces.– Do not plug in the appliance or operate the control panel with wet hands.– Always make sure that the plug is inserted into the wall socket properly.– This appliance should not be operated by means of an external timer or a separate remotecontrol system.– Do not place the appliance on or near combustible materials such as a tablecloth or curtain.– Do not place the appliance against a wall or against other appliances. Leave at least 4 inches of free space on the back and sides and 4 inches of free space above the appliance.– Do not place anything on top of the appliance.– Do not use the appliance for any other purpose than described in this manual.– Do not let the appliance operate unattended.– During hot air frying, hot steam is released through the air outlet openings. Keep your hands and face at a safe distance from the steam and from the air outlet openings. Also be careful of hot steam and air when you remove the pan from the appliance.– The accessible surfaces may become hot during use.– Immediately unplug the appliance if you see dark smoke coming out of the appliance. Wait for the smoke emission to stop before you remove the pan from the appliance.
CAUTION
– Place the appliance on a horizontal, even and stable surface.– This appliance is intended for normal household use only. It is not intended for use in environments such as staff kitchens of shops, offices, farms or other work environments. Nor is it intended to be used by clients in hotels, motels, bed and breakfasts and other commercial environments.– If the appliance is used improperly or for professional or semi-professional purposes or if it is not used according to the instructions in the user manual, the warranty becomes invalid and the manufacturer and seller refuse any liability for damage caused.– Always return the appliance to a service center authorized by sellers for examination or repair. Do not attempt to repair the appliance yourself, otherwise the warranty becomes invalid.– Always unplug the appliance after each use.– Let the appliance cool down for approx. 30 minutes before you handle or clean it.– Make sure the ingredients prepared in this appliance come out golden-yellow instead of dark or brown. Remove burnt remnants. Do not fry fresh potatoes at a temperature above 356°F (to minimize the production of acrylamide).
AUTOMATIC SHUT-OFF
This appliance is equipped with a timer. When the timer has counted down to 0, the appliance switches off automatically and enters standby mode. To turn the appliance off completely, simply unplug the power cord from the wall outlet.
- Note: if the Pan is removed from the main unit during use the air fryer will automatically stop the cooking process.
OVERHEATING PROTECTION
This air fryer is equipped with a safety mechanism designed to prevent overheating. If the temperature inside the air fryer gets too hot the unit will automatically shut down to allow the air fryer to cool. If this happens during use, immediately unplug the power cord from the wall outlet and let the air fryer cool down completely.
CONTROL PANEL OVERVIEW

BEFORE FIRST USE
- Remove all packaging material.
- Remove any stickers or tape from the appliance.
- Thoroughly clean the Frying Basket and the Pan with warm water, some mild soap and a non-abrasive sponge or cloth.
- Place the air fryer on a stable, horizontal and level surface. Make sure the surface is heat resistant.• Never use the air fryer on a non-heat resistant surface.
This is an air fryer that cooks using hot air. Do not fill the pan with oil or frying fat.
OPERATING INSTRUCTIONS
POWER
- Plug the power cord into a working power outlet. The Power/Start button (1) will blink a few times and then will remain solid indicating the air fryer is in standby mode.
- To turn the air fryer ON, press and hold the Power/Start button (1) for 3 seconds to turn the air fryer on and unlock the control panel.
- To turn the air fryer OFF, press and hold the Power/Start button (1) continuously until the lights on the control panel display turn OFF and only the Power/Start button is shown. The air fryer will now be in standby mode.
- NOTE: it is recommended to unplug the air fryer when not in use.
PREHEATING (OPTIONAL)
This air fryer can begin cooking food immediately once a cooking program has been started. However it will take the air fryer a few minutes to heat to the selected temperature of your cooking program.An optional step is to preheat the air fryer with no food inside the basket.
To preheat simply turn the air fryer ON, set your desired cooking temperature using the Decrease Temperature (4) or Increase Temperature (5) buttons, and set a cooking time of 3 minutes using the Decrease Cooking Time (6) or Increase Cooking Time (7) buttons. Once you have set the time and temperature press the Power/Start button (1). The air fryer will begin coming up to the correct temperature immediately. After the 3 minutes have completed, the air fryer will beep 5 times and will return to standby mode. The air fryer will now be preheated and you can begin cooking food using the methods described later in this manual.
NOTE: if you do not wish to preheat, it is recommended to add 3 minutes to the cooking time specified for your ingredients/recipe.
COOKING USING THE PRESET COOKING MODES
This air fryer includes seven preset cooking modes that can be used as guides for cooking various types of dishes. To cook food using one of these modes follow the instructions below.
- NOTE: keep in mind that these cooking modes are general suggestions. As ingredients vary in size, shape, brand, etc. we cannot guarantee the best setting for your ingredients.
- Gently pull the handle of the air fryer towards you to remove the pan from the body of the air fryer.
- Add the food you wish to cook to the frying basket. Do not overfill the frying basket.
- Gently slide the pan back into the air fryer.
- Turn the air fryer ON according to the instructions in the “POWER” section of this manual.
- Press the Cooking Mode button (2) repeatedly to cycle through the seven different cooking modes. The indicator light of the currently selected cooking mode will blink, and the preset Time and Temperature values will be displayed on the control panel.
- NOTE: Each cooking mode has a default cooking time and temperature.o If you need to change the Cooking Time use the Decrease Cooking Time (6) or Increase Cooking Time (7) buttons to make your desired adjustment.o If you need to adjust the Cooking Temperature use the Decrease Temperature (4) or Increase Temperature (5) buttons to make yourdesired adjustment.
6. To begin cooking press the Power/Start button (1). The air fryer will automatically begin the cooking process.
- The Fan Indicator Light (3) will turn on and off during the cooking process as the temperature is regulated inside the air fryer.
- The timer will begin counting down from your selected time setting.
- During the cooking process some excess oil from the ingredients will be collected on the bottom of the Pan and you may see some white smoke. This is normal.
7. Some ingredients require shaking halfway through the cooking time to help cook evenly (see section “Settings”). To shake the ingredients, gently pull the pan out of the appliance by the handle. The air fryer will automatically stop when the pan is removed. Gently shake the pan from side to side to reposition the ingredients. After shaking, slide the pan back into the air fryer. The air fryer will automatically resume cooking.
o Tip: If you set the timer to half of the desired preparation time, you will hear the timer beep when you need to shake the ingredients. However, this means that you will need to set the reset the cooking mode, time, and temperature for the remaining preparation time after shaking.
8. When the set cooking time has completed, the air fryer will beep 5 times and automatically turn off and enter standby mode.9. Using the handle gently pull the pan out of the air fryer and place the pan on a heat-resistant surface.o CAUTION: after hot air frying the pan and the ingredients are hot, and steam may escape from the pan when it is removed from the air fryer. Do not touch the metal parts of the pan or frying basket, and keep your face and other body parts at a safe distance when removing the pan from the air fryer.10.Check if the food is cooked to your desired level. If the food is not ready yet, simply re-insert the pan into the air fryer and follow steps 4-10 again to cook the food until it is fully cooked.11.Once the food is fully cooked, use a pair of tongs or other kitchen utensil to transfer the food from the pan to a serving dish.o NOTE: do not turn the pan upside down to remove the cooked food, as any excess oil that has collected on the bottom of the pan will pour out. After the first batch of food has completed cooking, the air fryer is instantly ready for preparing another batch of food as it is already heated. To cook another batch of food simply repeat the previous steps again.
PRESET COOKING MODES DEFAULT SETTINGS

COOKING WITH MANUAL SETTINGS
Once you are familiar with the air fryer, you may want to experiment with your own recipes. When you with to cook using manual settings you do not need to select a preset cooking mode. Simply choose the cooking time and temperature settings that work best for your dish.
- Gently pull the handle of the air fryer towards you to remove the pan from the body of the air fryer.
- Add the food you wish to cook to the frying basket. Do not overfill the frying basket.
- Gently slide the pan back into the air fryer.
- Turn the air fryer ON according to the instructions in the “POWER” section of this manual.
- Use the Decrease Cooking Time (6) or Increase Cooking Time (7) buttons to make your desired adjustment for the cooking time setting.o NOTE: remember to add 3 minutes to the cooking time if you do not wish to preheat the air fryer.
- Use the Decrease Temperature (4) or Increase Temperature (5) buttons to make your desired adjustment for the cooking temperature setting.
- To begin cooking press the Power/Start button (1). The air fryer will automatically begin the cooking process using your selected settings.o The Fan Indicator Light (3) will turn on and off during the cooking process as the temperature is regulated inside the air fryer.o The timer will begin counting down from your selected time setting.o During the cooking process some excess oil from the ingredients will be collected on the bottom of the Pan and you may see some white smoke. This is normal.
- Some ingredients require shaking halfway through the cooking time to help cook evenly (see section “Settings”). To shake the ingredients, gently pull the pan out of the appliance by the handle. The air fryer will automatically stop when the pan is removed. Gently shake the pan from side to side to reposition the ingredients. After shaking, slide the pan back into the air fryer. The air fryer will automatically resume cooking.o Tip: If you set the timer to half of the desired preparation time, you will hear the timer beep when you need to shake the ingredients. However, this means that you will need to set the reset the cooking mode, time, and temperature for the remaining preparation time after shaking.
- When the set cooking time has completed, the air fryer will beep 5 times and automatically turn off and enter standby mode.
- Using the handle gently pull the pan out of the air fryer and place the pan on a heat-resistant surface.o CAUTION: after hot air frying the pan and the ingredients are hot, and steam may escape from the pan when it is removed from the air fryer. Do not touch the metal parts of the pan or frying basket, and keep your face and other body parts at a safe distance when removing the pan from the air fryer.
- Check if the food is cooked to your desired level. If the food is not ready yet, simply re-insert the pan into the air fryer and follow steps 4-10 again to cook the food until it is fully cooked.
- Once the food is fully cooked, use a pair of tongs or other kitchen utensil to transfer the food from the pan to a serving dish.o NOTE: do not turn the pan upside down to remove the cooked food, as any excess oil that has collected on the bottom of the pan will pour out.After the first batch of food has completed cooking, the air fryer is instantly ready for preparing another batch of food as it is already heated. To cook another batch of food simply repeat the previous steps again.
SETTINGS
The table on the next page helps you to select the basic settings for some ingredients you may want to prepare. It will also indicate foods that cook better when they are shaken half way through the cooking process.Note: Keep in mind that these settings are suggestions. As ingredients differ in origin, size, shape, as well as brand, we cannot guarantee the best setting for your ingredients.
TIPS
– Smaller ingredients usually require a slightly shorter preparation time than larger ingredients.– A larger amount of ingredients only requires a slightly longer preparation time. A smaller amount of ingredients only requires a slightly shorter preparation time.– Shaking smaller ingredients halfway through the preparation time optimizes the end result and can help prevent unevenly fried ingredients.– Brush some cooking oil on fresh potatoes for a crispy result. Fry your ingredients in the air fryer within a few minutes after you have added the oil.– Do not prepare extremely greasy ingredients such as sausages in the air fryer.– Snacks that can be prepared in an oven can also be prepared in the air fryer.– The optimal amount for preparing crispy fries is about 16 ounces.– Use pre-made dough to prepare filled snacks quickly and easily. Pre-made dough also requires a shorter preparation time than homemade dough.– You can also use the air fryer to reheat ingredients. To reheat ingredients, set the temperature to 320°F for up to 10 minutes.

Note: If you do not preheat the air fryer before beginning the cooking process, Add 3 minutes to the preparation time for best results.
MAKING HOMEMADE FRIES
For the best results, we advise to use pre-baked (e.g. frozen) fries. If you want to make homemade fries, follow the steps below.
- Peel the potatoes and cut them into sticks.
- Soak the potato sticks in a bowl for at least 30 minutes, take them out and dry them with a paper towel.
- Pour ½ tablespoon of olive oil in a bowl, put the sticks on top and mix until the sticks are coated with oil.
- Remove the sticks from the bowl with your fingers or a kitchen utensil so that excess oil stays behind in the bowl. Put the sticks in the frying basket using your hands or a kitchen utensil.Note: Do not tilt the bowl to put all the sticks in the frying basket all at once, to prevent excess oil from ending up on the bottom of the pan.
- Fry the potato sticks according to the instructions in the table above.
CLEANING
Clean the Frying Basket and Pan after each use.The Frying Basket and Pan have a non-stick coating. Do not use metal kitchen utensils or abrasive cleaning materials to clean them, as this may damage the nonstick coating. Always clean these parts using hot water, some mild soap, and a nonabrasive sponge or cloth
Note: the Frying Basket & Pan are also dishwasher safe
Separating the Frying Basket & Pan
To thoroughly clean the appliance it is recommended to separate the Frying Basket and the Pan. The Frying Basket and Pan are equipped with a button guard. To separate the two pieces, first set the pan (with attached basket) on a level surface. Then simply slide the button guard to expose the button, then press the separation button and lift the Frying Basket out of the Pan.
Caution: Never press the separation button when food is in the Frying Basket.
Doing so can cause the basket and pan to separate and spill food, grease, oil, etc.
Cleaning the Air Fryer
- Remove the power plug from the wall socket and let the appliance cool down for at least 30 minutes.Note: Remove the pan to let the air fryer cool down more quickly.
- Wipe the outside of the appliance with a moist cloth.
- Separate the Frying Basket and Pan using the method described previously.
- Clean the Pan and Frying Basket using hot water, some mild soap and a nonabrasive sponge or cloth.Tip: If excess food is stuck to the Frying Basket or the bottom of the Pan, fill the Pan with hot water with some mild soap. Put the Frying Basket in the Pan and let the Pan and the Frying Basket soak for approximately 10 minutes.
- Clean the inside of the appliance with hot water and a non-abrasive sponge.
STORAGE
- Unplug the appliance and let it cool down.
- Make sure all parts are clean and dry.
- Place the appliance in a clean, dry place for storage until the next use.
TROUBLESHOOTING
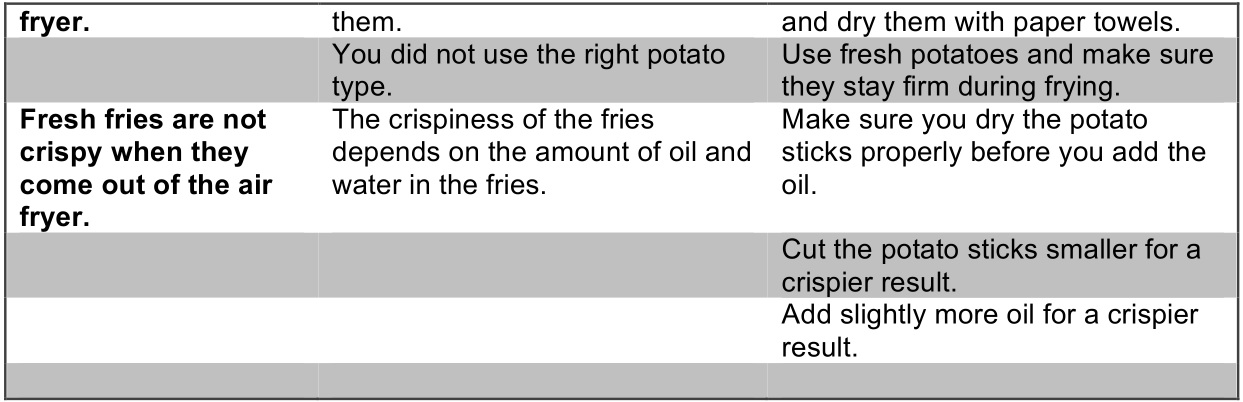
![]()
LIMITED ONE-YEAR WARRANTY
We warrant this product to be free from defects in material and workmanship under normal use for a oneyear period from the original date of purchase from an authorized NECCI dealer. We will repair or replace the unit free of charge should it become defective under this warranty, providing you, the originalpurchaser, submit proof of purchase (sales slip) along with the product and all accessories.Should you be missing any of the included accessories or other components (screws, pieces, etc.), please contact the Customer Support Center to secure a replacement. It is not necessary to bring the unit back to the store. When calling, please reference the parts list found in the Instruction Manual to help us accurately identify the missing parts and promptly provide replacements.During the one-year period from the original purchase date, we will service or exchange the product, at no charge. To obtain warranty service or replacement within the duration of the one-year warranty, please return the product and all accessories to the original place of purchase.For technical support, visit our website www.sibrands.com or call the NECCI Technical Support Center for technical assistance or troubleshooting at 1-855-976-5276, Monday to Saturday, 10:00AM to 7:00PM EST.There are no consumer serviceable parts contained in this product and any attempt by the owner to service or repair the unit will immediately void all warranty coverage.This warranty does not cover any product which has been subject to damage due to an act of nature, misuse, neglect, accident, abuse, outdoor use, commercial use, or modification of, or to, any part of the product. Damage to any external devices such as countertops, cabinets, and/or tables or other platformsare not covered nor is the cost incurred in shipping the unit for warranty repair. Under no circumstances shall NECCI be liable for any loss (direct, indirect, incidental, foreseen, unforeseen, special or consequential) or for any damage arising out of, or in connection with, the use of this product.
UNDER NO CIRCUMSTANCES WILL NECCI BE LIABLE FOR ANY INCIDENTAL OR CONSEQUENTIAL DAMAGES.
 report this ad
This warranty does not cover re-manufactured units, or product sold ‘As Is’.This warranty is valid only to the original purchaser of the Product in the United States and Canada and grants specific legal rights.
References
[xyz-ips snippet=”download-snippet”]