nedis Deep Fryer User Guide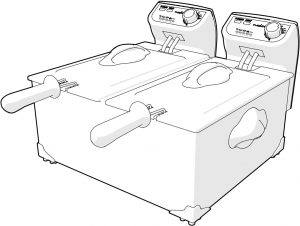
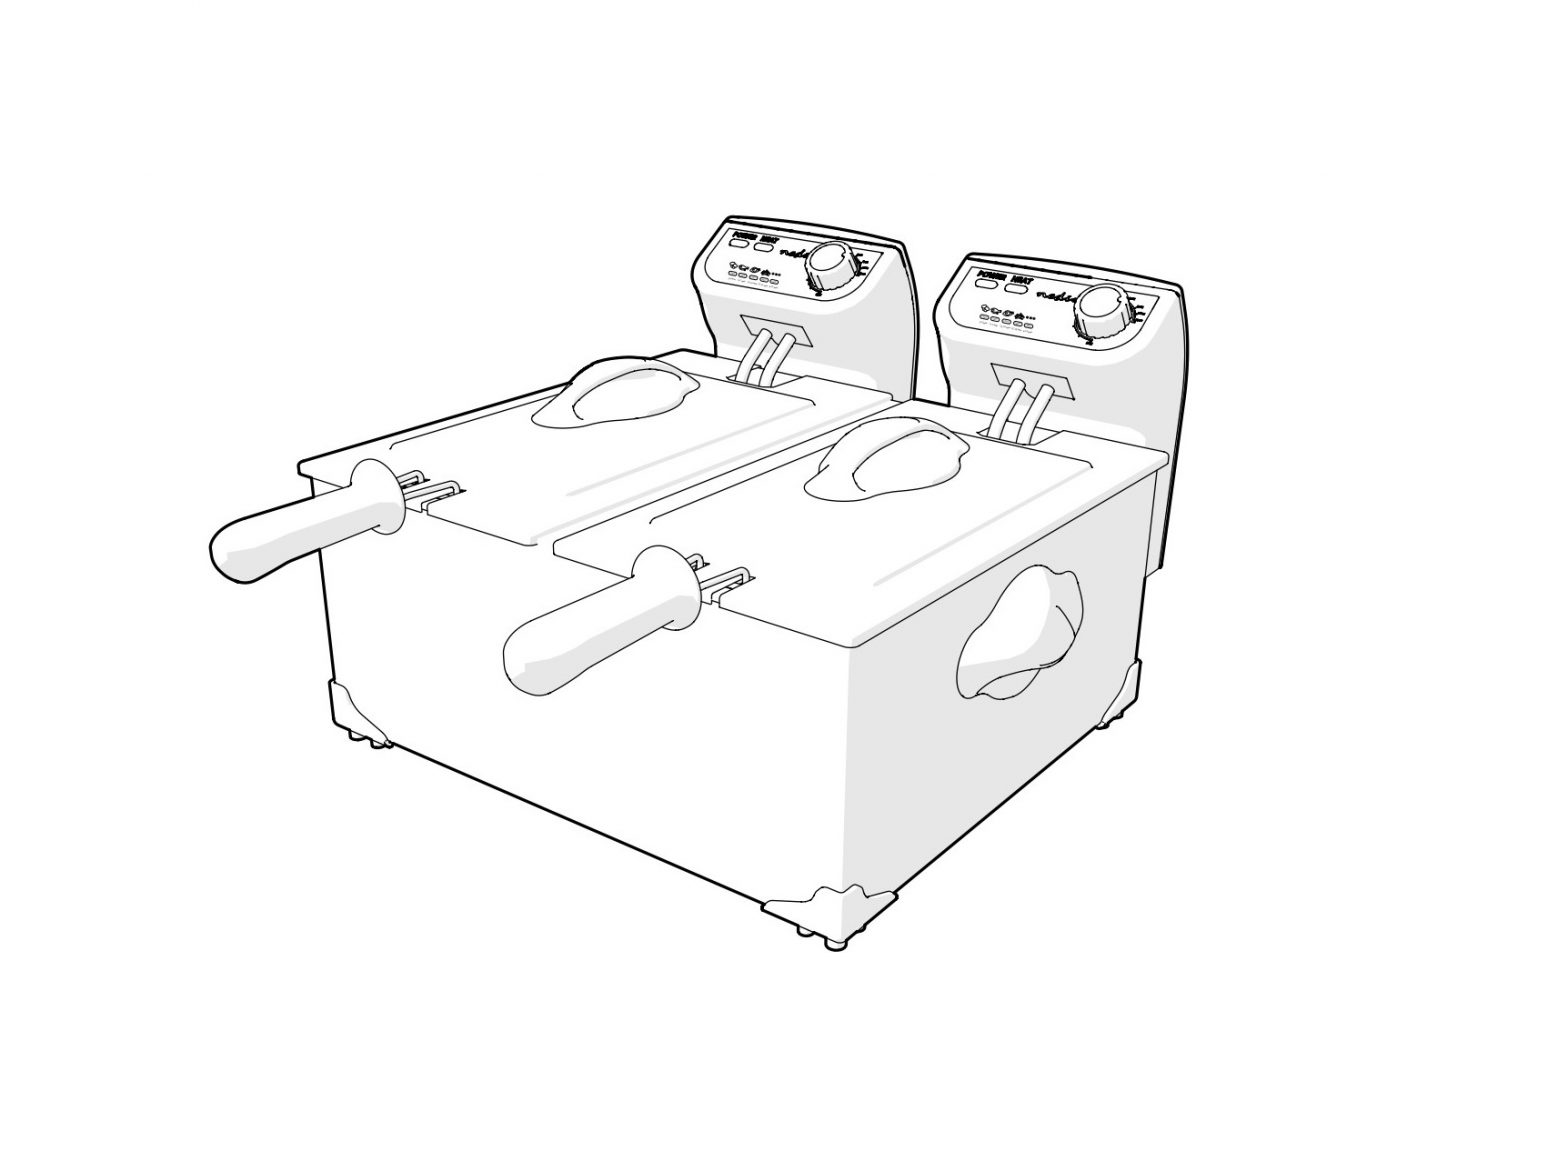
Deep Fryer
![]() For more information see the extended manual online: ned.is/kadf600fsr
For more information see the extended manual online: ned.is/kadf600fsr
Intended use
- The Nedis KADF600FSR is a double deep fryer with a 6.0 l capacity.
- The product is equipped with an overheating safeguard.
- This product is only intended for frying food.
- This product is not intended to be operated by means of an external timer or a separate remote control system.
- This product is intended for use in household environments for typical housekeeping functions that may also be used by non-expert users for typical housekeeping functions, such as: shops, offices other similar working environments, farm houses, by clients in hotels, motels and other residential type environments and/or in bed and breakfast type environments.
- The product is intended for indoor use only.
- The product is not intended for professional use.
- This product is not intended for use by persons (including children) with reduced physical, sensory or mental capabilities or lack of experience and knowledge, unless they have been given supervision or instruction concerning the use of the product by a person responsible for their safety.
- Any modification of the product may have consequences for safety, warranty and proper functioning.
Specifications
| Product |
Deep Fryer |
| Article number | KADF600FSR |
| Dimensions | (l x w x h) 52 x 41 x 24 cm |
| Weight | 1500 g |
| Power supply | 220 – 240 VAC / 50 Hz |
| Power consumption | 2 x 1800 W |
| Temperature range | 130 – 190 °C |
| Capacity | 6.0 L |
Main parts
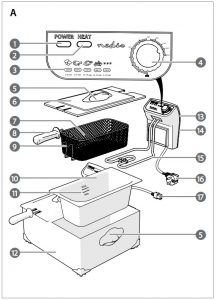
- Power indicator LED
- Heat indicator LED
- Advised frying temperatures
- Control dial
- Handles
- Lid
- Frying basket
- Basket handle
- Basket hook
- Inner pan
- Min – Max indicators
- Housing
- Power input
- Reset button
- Heating element
- Power cable
- Power connector
Safety instructions
![]() WARNING
WARNING
- Ensure you have fully read and understood the instructions in this document before you install or use the product. Keep this document for future reference.
- Only use the product as described in this document.
- Do not use the product if a part is damaged or defective. Replace a damaged or defective product immediately.
- Do not drop the product and avoid bumping.
- Unplug the product from the power source and other equipment if problems occur.
- Make sure that the power cable cannot become entangled and does not hang over the edge of a worktop.
- Avoid spillage on the power connector.
- Do not use an extension cable.
- Do not use a timer or a separate remote-control system that switches on the product automatically.
- Do not let the power cable touch hot surfaces.
- Plug into a grounded outlet only.
- Unplug the product when not in use and before cleaning.
- Do not unplug the product by pulling on the cable. Always grasp the plug and pull.
- Keep the product out of reach from children.
- Children should be supervised to ensure that they do not play with theproduct.
- Place the product on a stable and flat surface.
- Do not install the product in a cabinet.
- Ensure a minimum of 10 cm free space around the product to provide enough ventilation during frying.
- Do not leave the product unattended when switched on.
- Do not expose the product to water, rain, moisture or high humidity.
- Never immerse the product in water or place it in a dishwasher.
- Prevent water and/or ice from mixing with oil or fat, as this causes heavy spattering or violent bubbling of the oil or fat. To minimize spattering, remove all excess ice from frozen ingredients before you fry them and dry ingredients thoroughly before you fry them. Do not overfill the pan. After cleaning, dry all parts thoroughly before you put oil or fat in the fryer.
- Make sure the fryer is always filled with oil or fat to a level between the Min – Max indicators on the inside of the inner pan to prevent either overflowing or overheating.
- Never use the product without oil or fat, this will damage the product.
- Fry food golden-yellow instead of dark or brown and remove burnt remnants.Do not fry starchy foods, especially potato and cereal products, at a temperature above 175 °C (to minimize the production of acrylamide).
- Do not fry Asian rice cakes (or similar types of food) in this appliance. This might cause heavy spattering or violent bubbling of the oil or fat.
- Do not switch on the product before you have filled it with oil or fat, as this can damage the product.
- During frying hot steam may escape through the openings. Keep your hands and face at a safe distance. Also be careful of hot steam when you remove the lid.
- Make sure the product is switched off and the oil is cooled down, before moving the product.
- Only move the product in an upright position.
- Do not expose the product to direct sunlight, naked flames or heat.
- Keep distance from flammable objects.
- Do not touch the hot parts of the product directly.
- Do not use the product if the surface is cracked.
- This product may only be serviced by a qualified technician for maintenance to reduce the risk of electric shock.
Before first use
- Remove all packaging material, protective stickers and covers from the product.
- Clean the frying basket A7 and the inner pan A10 in warm soapy water, rinse it with warm water and wipe it dry.
Placing the handle
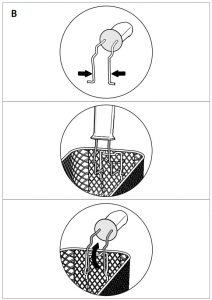 Image B
![]() Make sure that the basket handle A8 is placed correctly.
Make sure that the basket handle A8 is placed correctly.
- Fit the ends of A8 into the eyes of the frying basket A7.
- Move A8 downwards and press it until it locks into A7.
Installing the product
Follow the instructions.
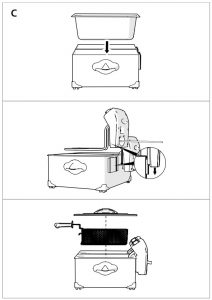 Image C
Using the product
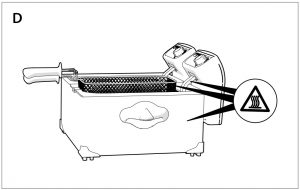 Image D
![]() Do not touch any hot surfaces.
Do not touch any hot surfaces.![]() Make sure that all parts are dry before you fill the fryer with oil or fat.
Make sure that all parts are dry before you fill the fryer with oil or fat.![]() This product is only suitable for use with oil or liquid fat, not for solid fat.
This product is only suitable for use with oil or liquid fat, not for solid fat.
- Fill A10 with oil between the Min – Max indicators A11.
 Only use oil that is suitable for frying. Never use the product without oil or fat, this will damage the product. Only use the product for frying food. Place the product on a stable, flat and heat resistant surface. Ensure a minimum of 10 cm free space around the product to provide enough ventilation during frying.
 - Place the lid A6 on A10.
- Plug the power connector A17 into the power input A13 (image E).
- Plug the power cable A16 into the power outlet.The power indicator LED A1 lights up.
- Check the food packaging for the required frying temperature and duration to get the best results.
- Set the control dial A4 to the correct temperature.The heat indicator LED A2 lights up.Do not place food in the product before it has reached the set temperature. A2 switches off when the oil has reached the set temperature.
- Remove A6 from A10.
- Lift A7 and hang it on the edge of A10.Use a maximum of 600 grams of chips for each pan, to prevent overflowing the pan. Use a maximum of 100 grams of frozen food (other than chips) for each pan, because the oil cools off rapidly.Remove all excess ice from frozen food and dry the food thoroughly before you place them in the product.
- Fill A7 with food.
- Slowly lower A7 into the oil to prevent the oil from heavy spattering.
- Place A6 on A10. A15 automatically switches on and off to maintain the set oil temperature during frying.Be careful when opening the lid, hot steam may escape.
- Regularly check if the food has not been fried too deep.
- When the food is ready, turn A4 to MIN.
- Remove A6 from A10.
- Lift A7 and hang it on the edge of A10 to let the oil drip off into A10.Be careful, the basket and food are hot.
- Remove the food with a food tong or by lifting A7 out of the product and emptying it into a bowl or onto a plate.
- Unplug A16 from the power outlet after use.
- Let the product cool down without A6 to prevent condensation.
- Remove any food residue from the oil with a skimmer to maintain the best quality of the oil.
Changing the oil
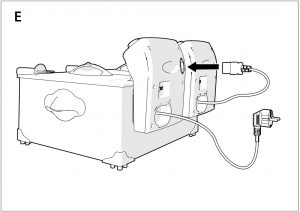 Image E
- Unplug A15 from the power outlet.Make sure oil or fat has cooled down, before removing the oil.
- Pour the oil in an empty oil container.Used oil is harmful to the environment. Follow the guidelines issued by the local authorities for disposing the oil.
- Clean the product after removing the oil. Follow the instructions in the next paragraph.
- Dry all parts thoroughly before you put oil or fat in the fryer.Always replace all oil, do not mix new and old oil.
- Change the oil after every 8 – 10 frying sessions or as soon as it becomes dark, or if the smell of the oil has changed.
- Change the oil if you recognize high concentration of water in the oil. You can recognize this by large bubbles, water droplets or water vapor.If you switch on the product with water mixed in the oil, it can spatter out with an explosion during frying.
Cleaning
![]() Avoid abrasives that can damage the surface.
Avoid abrasives that can damage the surface.![]() Only A7 A10 can be cleaned in water or dishwasher when removed from the product.
Only A7 A10 can be cleaned in water or dishwasher when removed from the product.
- Remove any food residue from the inside of A10 With a paper tissue.
- Clean A6 A7 A10 thoroughly in warm soapy water by using a brush.
- Rinse A6 A7 A10 in warm clean water and wipe it dry.
- Clean the outside of the product with a soft clean, damp cloth.

[xyz-ips snippet=”download-snippet”]