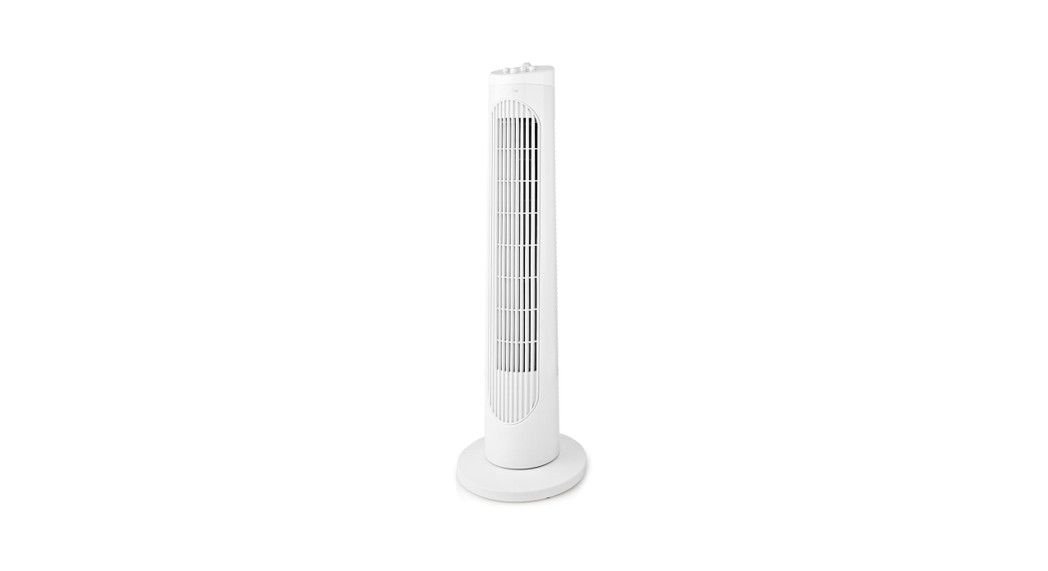
 Tower Fanwith oscillation functionFNTR12CWT40


Information requirements for comfort fans
| Description | Symbol | Value |
Unit |
| Maximum fan flow rate | F | 5.21 | m’/min |
| Fan power Input | P | 4150 | W |
| Service value | SV | 0.13 | (m3/mlnyW |
| Standby power consumption | Ps. | – | W |
| Off power consumption | Po, | 0 | W |
| Fan sound power level | I-ft | 61.75 | dB(A) |
| Maximum air velocity | C | 2.38 | m/s |
| Seasonalelectricity consumption | Q | 13.28 | Khiva |
| Measurement standard for service value | EN 60704-2-7:1998,
EN 60704-1: 2010H-A1 1: 2012 EN 50564: 2011 EN ISO 5801:2008 |


Quick start guide
Tower Fan


Specifications
|
Product |
Tower Fan |
| Article number | FNTR12CWT40 |
| Dimensions (l x w x h) | 24 x 24 x 76 cm |
| Weight | 2500g |
| Input voltage | 220-240V~, 50Hz |
| Power input | 50 W |
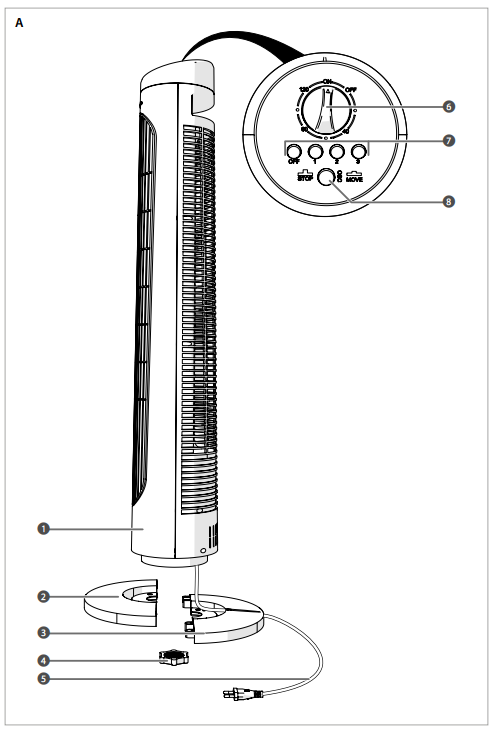
Main parts (image A)
- Fan unit
- Power cable
- Front base part
- Timer dial
- Rear base part
- a speed buttons
- Base fastening nut
- Oscillation button
Safety instructions
![]()
![]()
![]()
- Ensure you have fully read and understood the instructions in this document before you install or use the product. Keep the packaging and this document for future reference.
- Only use the product as described in this document.
- Do not use the product if a part is damaged or defective. Replace a damaged or defective product immediately.
- Do not expose the product to direct sunlight, naked flames or heat.
- Do not use the product where splashing of water might occur, e.g. bathroom, swimming pool or close to a washbowl.
- Do not expose the product to water or moisture.
- Do not drop the product and avoid bumping.
- Do not open the product.
- Do not use a damaged product.
- Do not insert a hand or other objects in the fan grill.
- Keep the product out of reach from children.
- Children of less than 3 years should be kept away unless continuously supervised.
- Children aged from 3 years and less than 8 years shall only switch on/off the product provided that it has been placed or installed in its intended normal operating position and they have been given supervision or instruction concerning the use of the product in a safe way and understand the hazards involved. Children aged from 3 years and less than 8 years shall not plug in, regulate and clean the product or perform user maintenance.
- This product can be used by children aged 8 years and above and persons with reduced physical, sensory or mental capabilities or lack of experience and knowledge if they have been given supervision or instruction concerning the use of the product in a Safeway and understand the hazards involved. Children shall not play with the product. Cleaning and user maintenance shall not be done by children without supervision.
- Do not cover the product.
- Do not splash water onto the product.
- Do not let water enter the product.
- Do not place the product on moving vehicles or somewhere easy to be tipped over.
- Do not move the product during operation.
- Do not let the power cable hang over the edge of a table or counter, or touch hot surfaces.
- Keep the product far away from loose products (e.g. curtains, plastic bags, paper) that can cover the air inlet easily.
- Unplug the power cable when the product is not in use for a long time.
- When using an extension cord, use one which is as short as possible and fully extended.
- Do not use the product using an on/off timer or other equipment which can automatically switch the device on.
- Do not locate the product immediately below a power outlet.
- Unplug the product from the power source and other equipment if problems occur.
- Do not unplug the product by pulling on the cable. Always grasp the plug and pull.
- Do not use the product in rooms where flammable liquids or gases are used or stored.
- This product may only be serviced by a qualified technician for maintenance to reduce the risk of electric shock.
Installing the product (image B)
- Turn the fan unit A1 upside down.
- Remove the base fastening nut A4 from A1.
- Assemble A3 to A2.
- Place the base parts A2A3 to A1.
- Guide the four pins of A1 through the holes of A2A3.
- Replace A4 to fasten A2A3.
- Guide the power cable A5 through the cable recess of A3.
- Turn the product back upright.
- Place the product on a flat surface close to a power outlet.
Using the product
1. Connect the power cable A5 to a power outlet.
| imer dial A6 | Rotate the timer dial to set the timer |
| Speed button A7 | Press one of the buttons to select thefan speed. “0” = Off / “1” = Low / “2” = Mid/ “3” = High |
| Oscillation button A8 | Press to activate the oscillation.Press again to stop oscillation. |
Nedis BVDe Tweeling 28, 5215 MC ’s-HertogenboschThe Netherlands
References
[xyz-ips snippet=”download-snippet”]

