Netatmo Smart Smoke Alarm NSD01
User guide available in more languages at the following address: https://smokealarm.netatmo.com
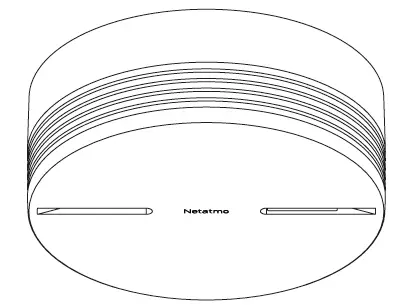
Pack contents
- A. One Smart Smoke Alarm with built-in 10-year battery
- B. One mount
- C. Two screws and two anchors
- D. One user guide
Product overview
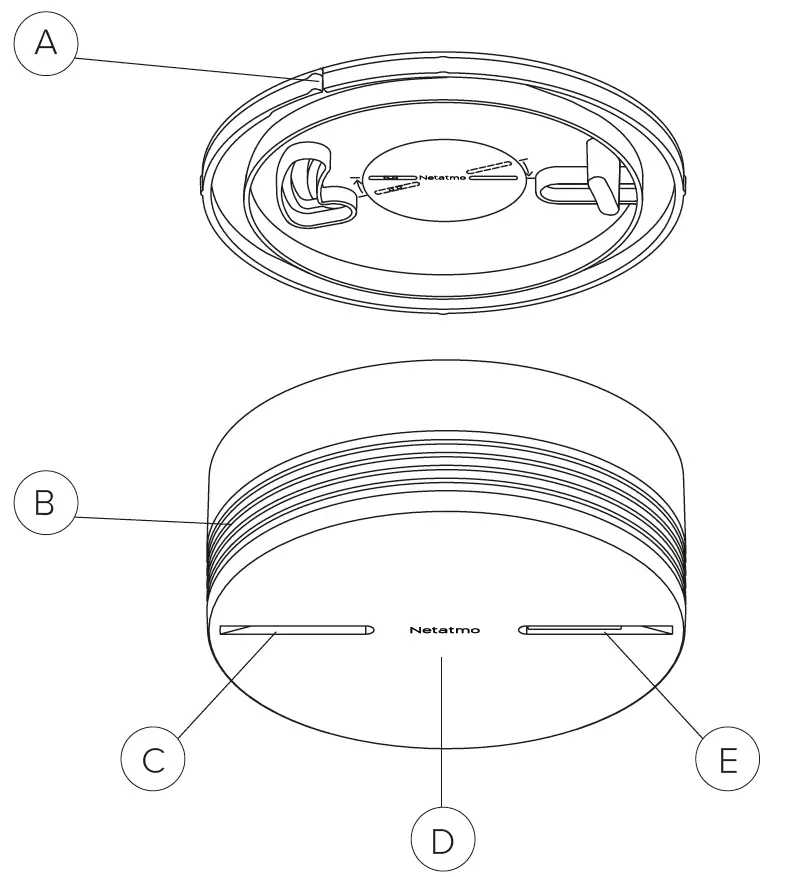
- A. Slot (for safe removal)
- B. Smoke detection vents
- C. Red and blue LEDs
- D. Deactivation button – front
- E. Alarm
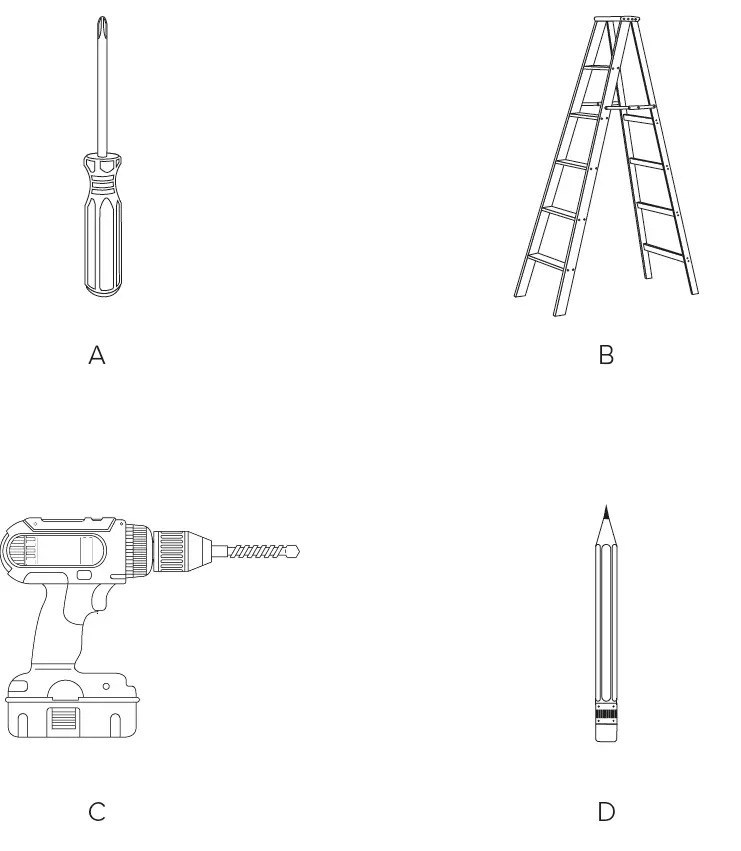
Required tools (not included)
- A. One phillips screwdriver
- B. One step ladder (only required if you install the Smart Smoke Alarm on a high ceiling)
- C. One drill – Ø5 mm or Ø0.2 in
- D. One pencil
Location advice
Location
Install several Smart Smoke Alarms in your home to fully protect it. Installing one Smart Smoke Alarm in every bedroom, children’s room and hallway is highly recommended. For maximum protection, you should also install Smart Smoke Alarms in the living room, attic and basement.
Location advice
Caution: avoid false triggersTo avoid triggering the alarm unnecessarily, do not install the Smart Smoke Alarm:
- near an electronic ballast, a low voltage transformer, power-saving bulbs, fluorescent tubes (minimum distance 50 cm or 19.69 in)
- near air vents
- in an excessively dusty room
- less than 6 m or 236.22 in from a fireplace or wood-burning stove
- in a room where cooking fumes or steam may trigger the alarm
- in a room where there may be condensation or damp
PositionPick a spot on the ceiling on which you would like to install the Smart Smoke Alarm. Be sure to respect the minimum distances shown on diagram A. With the exception of Germany,if the Smart Smoke Alarm cannot be fixed on the ceiling, it may be fixed to the wall. If the Smart Smoke Alarm is installed on a cathedral ceiling, be sure to respect the minimum distances shown on diagram B.In Germany, fixing the Smart Smoke Alarm to the wall isn’t compliant with the DIN 14676.
Check Wi-Fi receptionCheck your smartphone to make sure you have Wi-Fi reception where you have chosen to install the Smart Smoke Alarm. If you do not, try to move your Wi-Fi router closer.The Smart Smoke Alarm will detect smoke and will sound even if the Wi-Fi isn’t configured. However, you will need Wi-Fi to receive smartphone alerts from your Smart Smoke Alarm when you are away. Wi-Fi will be configured later in the app.
Installation
Securing the mount
- A. Following the previous location recommendations, place the mount in the relevant position, then mark the two fixing holes with a pencil.
- B. Drill the two holes.
- C. Insert one anchor in each of the two holes. Then insert and tighten the two screws, leaving a 2 mm or 0.08 in gap below the heads.
- D. Align the holes of the mount with the screws on the ceiling.
- E. Slide the mount to the right.
- F. Turn the mount counterclockwise to the marked line.
- G. Finish tightening the two screws in order to secure the mount.
Powering on
- H. Install the Smart Smoke Alarm on the mount by aligning the marks on it with the Smart Smoke Alarm.
- I. Turn the Smart Smoke Alarm clockwise in order to lock the assembly.Once the assembly is locked, the red and the blue LEDs will light up alternatively. After several seconds, the red LED will flash every 10 seconds to indicate that the Smart Smoke Alarm is working correctly.
Download the App and follow the instructionsTo set up and control your Smart Smoke Alarm from your smartphone or tablet, please download the app.
Successful installation
Your Smart Smoke Alarm has been installed successfully. Enjoy a safer home!
Product use and maintenance
Manual testing and silencing

Testing the Smart Smoke AlarmPress the front of the Smart Smoke Alarm until it beeps twice. Then release it to trigger the alarm.Press the front again to turn off the alarm. The manual test should be carried out once a year.
Turning off the alarmPressing the front of the Smart Smoke Alarm will deactivate the alarm for 15 minutes, during which time the alarm will not sound even if it detects smoke. The red LED will blink every 2 seconds. Deactivating the Smart Smoke Alarm from the Netatmo Security App is not supported by the applicable EN14606 standard. Deactivating the Smart Smoke Alarm should be done in the line of sight of the Smart Smoke Alarm.
Product removal
Removing the Smart Smoke AlarmThe Smart Smoke Alarm should be replaced every 10 years. The replacement date is shown on the back of the product. To remove the Smart Smoke Alarm, turn the device anti-clockwise.
Fault indicators
| Indicator | Issue | Solution |
| 2 rapid beeps every 60 sec |
Battery low |
Replace by a new Smart Smoke Alarm |
| 2 red LED flashes every 5 sec | ||
| 8 rapid beeps every 60 sec |
Smoke sensor dirty |
Vacuum the Smart Smoke Alarm’s vents |
| 8 red LED flashes every 8 sec |
It is essential to carry out regular detector maintenance. Dust in the detection vents must be vacuumed at least once a year or every time you receive a dust detection notification.If the Smart Smoke Alarm continues to report about dust clogging problems even after vacuuming the vents, replace it by a new one as soon as possible.If the Smart Smoke Alarm emits low-battery beeps, you have the possibility to postpone them by 8h during 7 days maximum by pressing the front of the Smart Smoke Alarm.
Technical specification
TYPE OF SMOKE ALARMOptical smoke alarm
AVERAGE COVERAGE50 m2
USEIndoor
POWER SUPPLYTwo non-replaceable 3 V lithium batteries with a 10-year lifespan
ALARMUpon detection: 85 dB at 3 m or 118.11 inManual test: up to 75 dB at 1 m or 39.37 in
OPERATING TEMPERATURE-10°C to 65°C or 14°F to 149°F
STORAGE TEMPERATURE-20°C to 45°C or -4°F to 113°F
DEGREE OF PROTECTIONIP30
SIZEDiameter: 115 mm or 4.52 inHeight: 44 mm or 1.73 in
WEIGHT255 g or 0.55 lb
FREE APP, LIFETIME SUPPORTNo subscription fee. App available on the App Store and on Google Play. Accessible from multiple devices
WIRELESS SPECIFICATIONS802.11 b/g/n compatible (2.4GHz ±10MHz). Supported security: Open/WEP/WPA/ WPA2- personal (TKIP and AES)Bluetooth Low Energy (2.4GHz ±0.5MHz)
Disposing of waste electrical and electronic devices at the end of their service life (Applicable in European Union countries and other European countries with a waste collection system). This symbol on products or product packaging indicatesthat the product must not be thrown out with normal household waste. It must be taken to an appropriate collection point for recycling waste electrical and electronic equipment. By disposing of such products in the appropriate manner,you are helping to prevent any harmful effects they may have on the environment and human health. For further information about recycling this product, you should consult your local authorities, waste collection centre or the shop where you bought the product.
SAFETY WARNINGS
This device must be installed in accordance with the latest standards and is for indoor use only. Do not attempt to repair the device yourself. Please contact customer service in the event of problems. Do not attempt to access the Smart Smoke Alarm’s internal parts, other than those described in this user guide. Doing so will void the product warranty and Netatmo shall not be liable for any problems. Touching the Smart Smoke Alarm’s internal parts and/or electronic components can damage the product. The Smart Smoke Alarm is designed in such a way that these parts and components do not need to be accessed for operation or maintenance purposes. Do not paint the Smart Smoke Alarm. Please remove the Smart Smoke Alarm before decorating or making any other home improvements.The radius of 50 cm or 0.02 in around the Smart Smoke Alarm must be free of obstacles. Please note that Netatmo cannot guarantee the latency of smartphone or tablet alerts if smoke is detected by the Smart Smoke Alarm. Life span for typical use. The battery’s life span may vary based on the use of the Smart Smoke Alarm. For further information, please go to: https://netatmo.com/usage/nsd
Do not place the lithium battery of the detector near a heat source or in direct sunlight.To prevent accidents, the detector must be securely attached to the mounting surface in accordance with installation instructions.
HOMEKITControlling this HomeKit-enabled accessory automatically and away from home requires an Apple TV with tvOS 10.x or later or an iPad with iOS 10.x or later set up as a home hub.Google Play and the Google Play logo are trademarks of Google Inc.
LEGAL NOTICEUse of the Works with Apple HomeKit logo means that an electronic accessory has been designed to connect specifically to iPod touch, iPhone, or iPad, respectively, and has been certified by the developer to meet Apple performance standards. Apple is not responsible for the operation of this device or its compliance with safety and regulatory standards.
report this adApple and the Apple logo are trademarks of Apple Inc., registered in the U.S. and other countries. App Store is a service mark of Apple Inc., registered in the U.S. and other countries.
References
[xyz-ips snippet=”download-snippet”]