
NETGEAR® GS324v2 Installation Guide
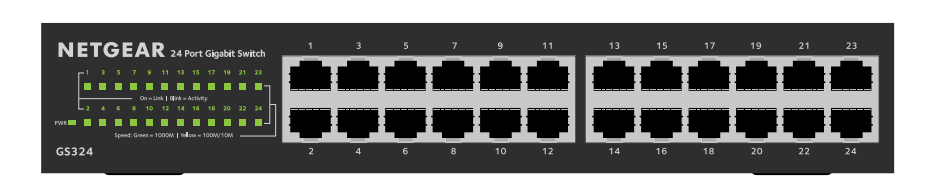
24-Port Gigabit Ethernet Unmanaged Switch
GS324v2
Package contents
- Switch model GS324v2
- Detachable power cord (varies by region)
- Wall-mount kit screws
- Rack-mount kit
- Four rubber footpads
- Installation guide
Note: We recommend that you use Category 5e (Cat 5e) cable or higher for Gigabit Ethernet connections.
1. Register with the NETGEAR Insight app
- Search for NETGEAR Insight and download the latest app.

- Set up a NETGEAR account if you do not have one.
- Tap the menu in the upper-left corner.
- Tap REGISTER ANY NETGEAR DEVICE.
- Use the camera on your mobile device to scan the serial number bar code, or enter the serial number located on the bottom of the switch.
- Tap GO.The switch is registered and added to your account. You can now view the switch in the NETGEAR Insight app.

Note: Because this is an unmanaged switch, you cannot configure or manage it in NETGEAR Insight.
2. Connect the switch
Sample connections
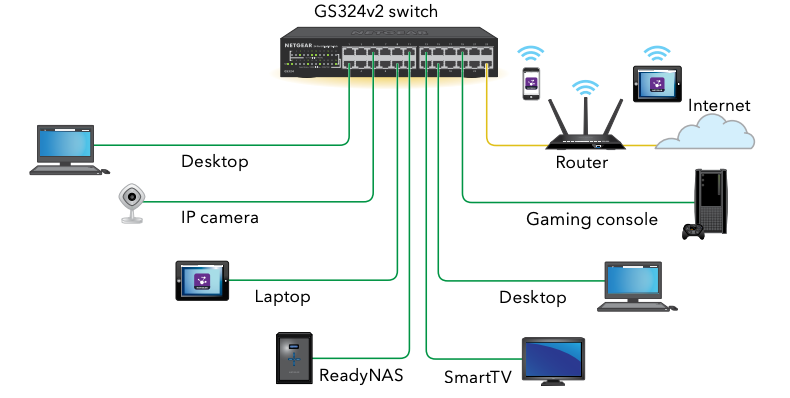
This switch is designed for indoor use only. If you want to connect it to a device located outdoors, the outdoor device must be properly grounded and surge protected, and you must install an Ethernet surge protector inline between the switch and the outdoor device. Failure to do so can damage the switch.
Before connecting this switch to outdoor cables or devices, see https://kb.netgear.com/000057103 for safety and warning information.
3. Check the LEDs
When you connect the power adapter to the switch and plug it into an electrical outlet, the LEDs indicate the status.

Specifications

Mount the switch in a rack
We recommend that you use the brackets and screws that came with the switch.
- Attach the supplied mounting brackets to the sides of the switch.
- Insert the supplied small screws through each bracket and into the bracket mounting holes in the switch.
- Tighten the screws with a No. 1 Phillips screwdriver to secure each bracket.
- Align the mounting holes in the brackets with the holes in each rack, and insert the provided two pan-head screws (you can choose from two types of two pan-head screws) with nylon washers through each bracket and into the rack.
- Tighten the screws with a No. 2 Phillips screwdriver to secure mounting brackets to the rack.
Mount the switch on a wall
We recommend that you use the wall-mount screws that came with the switch.
- Locate the two mounting holes on the bottom panel of the switch.
- Mark and drill two mounting holes in the wall where you want to mount the switch. The two mounting holes must be 7.01 in. (178 mm) apart, center-to-center.
- Insert the supplied anchors into the wall and tighten the screws with a No. 2 Phillips screwdriver. Leave about 0.125 in. (4 mm) of each screw protruding from the wall so that you can insert the screws into the holes on the bottom panel.
Note: GS324v2 screws are 6.3 mm in diameter, 27 mm in length.
Support and Community
Visit netgear.com/support to get your questions answered and access the latest downloads.
You can also check out our NETGEAR Community for helpful advice at community.netgear.com.
Regulatory and Legal
(If this product is sold in Canada, you can access this document in Canadian French at https://www.netgear.com/support/download/.)
For regulatory compliance information including the EU Declaration of Conformity, visit https://www.netgear.com/about/regulatory/.
See the regulatory compliance document before connecting the power supply.
For NETGEAR’s Privacy Policy, visit https://www.netgear.com/about/privacy-policy.
By using this device, you are agreeing to NETGEAR’s Terms and Conditions at https://www.netgear.com/about/terms-and-conditions. If you do not agree, return the device to your place of purchase within your return period.
© NETGEAR, Inc., NETGEAR and the NETGEAR Logo are trademarks of NETGEAR, Inc. Any non-NETGEAR trademarks are used for reference purposes only.
NETGEAR, Inc.350 East Plumeria DriveSan Jose, CA 95134, USA
NETGEAR INTERNATIONAL LTDFloor 1, Building 3,University Technology CentreCurraheen Road, Cork,T12EF21, Ireland
References
[xyz-ips snippet=”download-snippet”]