![]() Quick Start – Orbi Pro WiFi 6
Quick Start – Orbi Pro WiFi 6
![]()

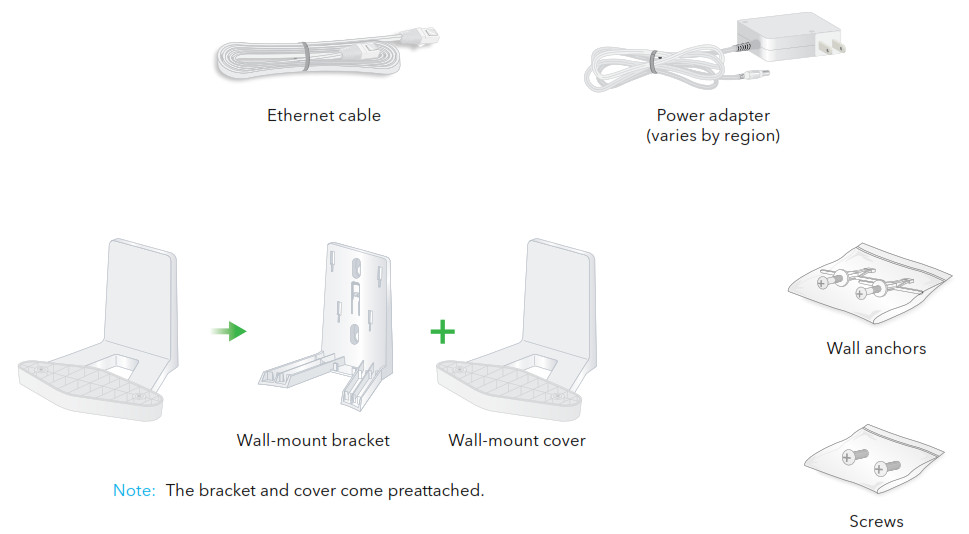
Package contents
Hardware overview
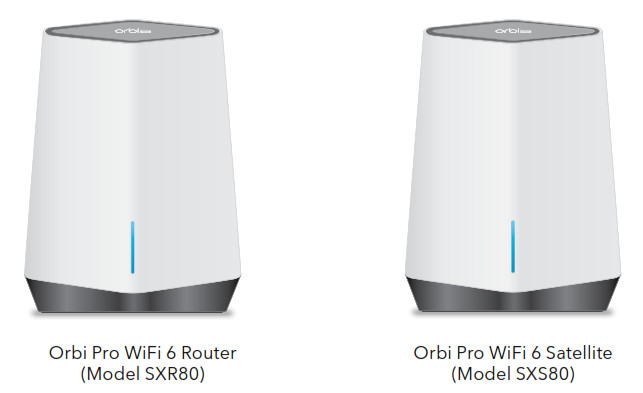
Orbi Pro WiFi 6 Router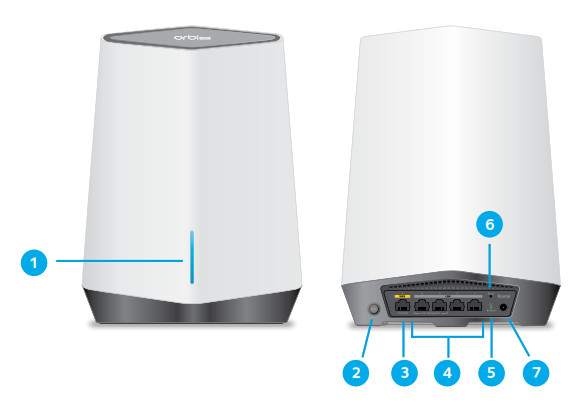
- Bar LED
- Sync button (also used for WPS connection) WAN port that supports 1 Gigabit and 2.5
- Gigabit Ethernet. Use this port for your WAN (Internet) connection.
- LAN Ethernet ports 1-4. Ports 3 and 4 support link aggregation.
- Power LED
- Reset button
- DC power connector
Orbi Pro WiFi 6 Satellite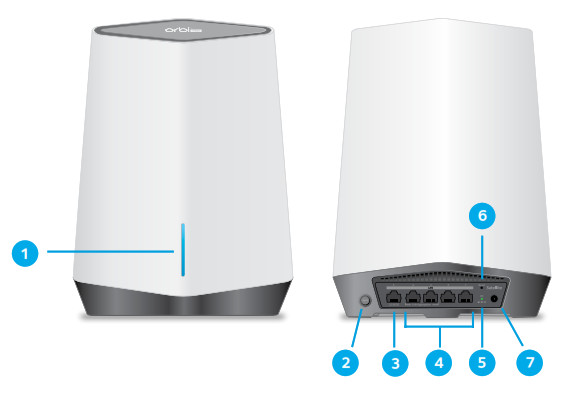
- Bar LED
- Sync button (also used for WPS connection) LAN port that supports 1 Gigabit and 2.5 Gigabit
- Ethernet. Use the port for a high-speed LAN connection.
- LAN Ethernet ports 14. Ports 3 and 4 support link aggregation.
- Power LED
- Reset button
- DC power connector
Prepare the wall mount
IMPORTANT: You can install the wall mount vertically on a wall only. Do not install the wall mount horizontally or on the ceiling.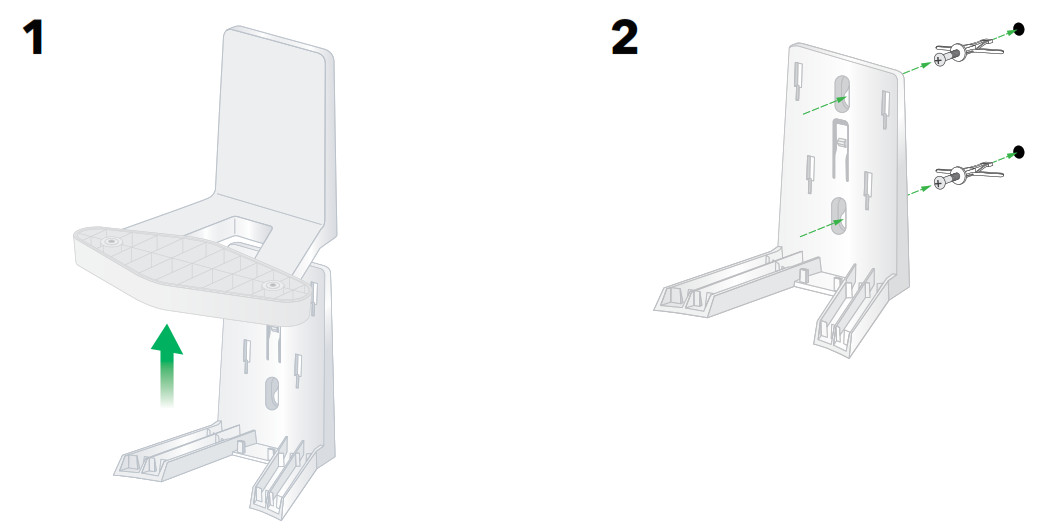
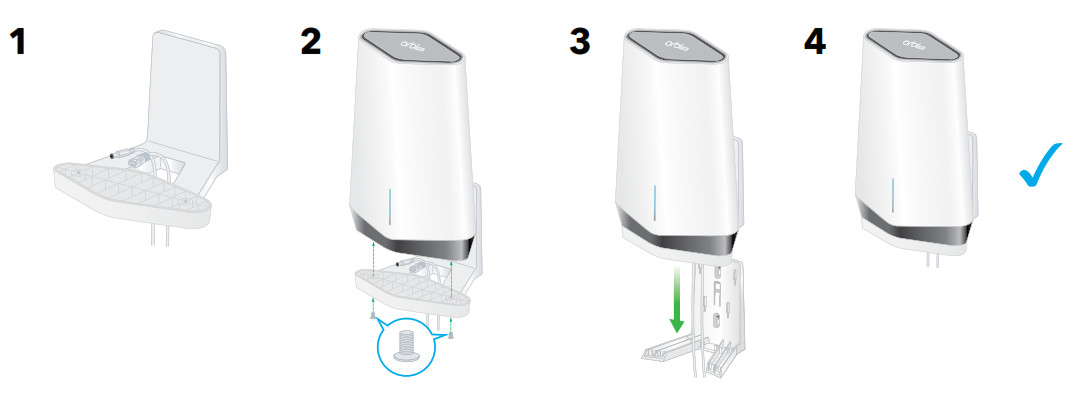
Wall-mount the Orbi Pro WiFi 6
Set up your Orbi Pro WiFi 6
To set up your Orbi Pro WiFi 6, you can use the NETGEAR Insight app or a web browser.
If you want to extend your WiFi coverage, you can purchase the Orbi Pro WiFi 6 satellite (model SXS80) separately. The Orbi Pro WiFi 6 router (model SXR80) supports up to six satellites.
NETGEAR Insight app setupFor remote management, you can use the NETGEAR Insight app to set up your Orbi Pro router. If you have an Orbi Pro satellite, you can also use the app to sync your satellite with your router. For more information about the app, visit https://www.netgear.com/insight/. 1. Download the NETGEAR Insight app from the Apple App Store® or Google Play™ store.
 2. Launch the NETGEAR Insight app on your mobile device and follow the prompts.
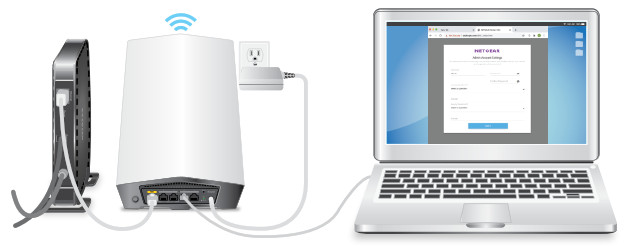
Web browser setup
- Unplug your modem, remove and then reinsert the backup battery if it uses one, and plug the modem back in.
- Use an Ethernet cable to connect your modem to the 2.5G/1G WAN port on your Orbi Pro WiFi 6 router.Note: If you want to connect your router to an existing gateway, we recommend that you turn off your existing gateway’s WiFi.
- Connect your router to a power source. The Power LED on the back of the router lights green.
- Wait for the router’s bar LED to light white.
- (Optional) If you have an Orbi Pro WiFi 6 satellite, do the following:a. Place the satellite in a central location for the best WiFi coverage.b. Connect the satellite to a power source. The Power LED on the back of the satellite lights green.
- Connect your computer or mobile device to the router or satellite (optional) with an Ethernet or WiFi connection:• Ethernet. Use an Ethernet cable to connect your computer to the router or satellite (optional).• WiFi. Use the preassigned WiFi network name (SSID) and password on the label of the router or satellite (optional) to connect to the Orbi WiFi network.
- Launch a web browser and type orbilogin.com in the address field.
- If a login window opens, enter the user name and password. The user name is admin and the default password is password.
- Follow the onscreen instructions. The router’s bar LED turns off after the setup is complete.
Orbi Pro WiFi 6 Satellite sync information
If you set up an Orbi Pro WiFi 6 satellite, the satellite’s bar LED lights white while the satellite attempts to sync with the Orbi Pro WiFi 6 router. After the satellite’s bar LED lights white, it lights one of the following colors for about three minutes and then turns off:![]() BlueThe connection between the router and satellite is good.
BlueThe connection between the router and satellite is good.![]() AmberThe connection between the router and satellite is fair. Consider moving the satellite closer to the router.
AmberThe connection between the router and satellite is fair. Consider moving the satellite closer to the router.![]() MagentaThe satellite was unable to connect to the router. Move the satellite closer to the router.Note: If the bar LED still lights magenta after about one minute, press the Sync button on the back of the router and on the back of the satellite. When the satellite syncs with the router, the satellite’s bar LED lights white then lights blue to indicate a good connection, and then turns off.
MagentaThe satellite was unable to connect to the router. Move the satellite closer to the router.Note: If the bar LED still lights magenta after about one minute, press the Sync button on the back of the router and on the back of the satellite. When the satellite syncs with the router, the satellite’s bar LED lights white then lights blue to indicate a good connection, and then turns off.
Support and Community
Visit netgear.com/support to get your questions answered and access the latest downloads. You can also check out our NETGEAR Community for helpful advice at community.netgear.com.
Regulatory and Legal
Si ce produit est vendu au Canada, vous pouvez accéder à ce document en français canadien à https://www.netgear.com/support/download/. (If this product is sold in Canada, you can access this document in Canadian French at https://www.netgear.com/support/download/.) For regulatory compliance information including the EU Declaration of Conformity, visit https://www.netgear.com/about/regulatory/. See the regulatory compliance document before connecting the power supply. For NETGEAR’s Privacy Policy, visit https://www.netgear.com/about/privacy-policy. By using this device, you are agreeing to NETGEAR’s Terms and Conditions at https://www.netgear.com/about/terms-and-conditions. If you do not agree, return the device to your place of purchase within your return period.
NETGEAR, Inc.350 East Plumeria DriveSan Jose, CA 95134, USAJanuary 2021
NETGEAR INTERNATIONAL LTDFloor 1, Building 3University Technology CentreCurraheen Road, Cork,T12EF21, Ireland
References
[xyz-ips snippet=”download-snippet”]